| Book |
Page |
Context |
 |
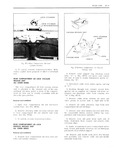 |
111 11 II I I I Q111g1 1 111 3yI 1351 33 1 I11 M we 5 11 I I1 1 111 ...
IJ1Lmm W I 111 1 I g1 I111g1 ...
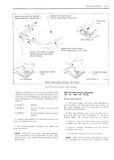
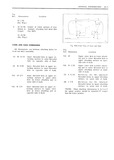
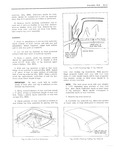
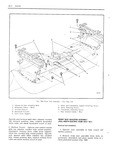
VACUUM HOSE A W 1 1111 VIEW B INI Fig 2F1I Rem C0111p 1 1111 111 Lid 1011 Cylindcr F1 mi11 1 Fig 2FI2 R 1 C mp 1 1men1 |
 |
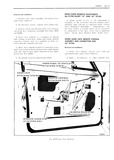 |
i111 1 F E 1l T 1 11111 1 1i11 t 1 11 11111111 111111 e1w 111 1 11e 11e 11 11 A S11 111 1111r 111111 ni 1 111 111 111 1111us1111e111 ...
11J1 111 The v 1 1t11 1t1 11 1 11 j 1 111 11 111111 1 11 1w 11 2 O11 1w 1 1i11 11 11 51311ws 1 s 1111 1ve 11111l pSL11 ...
1jus1i11q 511111 111 1 111lT 1s r 1 111 11111 r1 1I1 1 l Fl 4 111T D 111111 Ve 111i1 11 1r A 1 ml11j1 A l1jLlSt111t 11 IS O11 21 1 1 11111vr |
 |
 |
111 Q 1 11 11 1 114 J 1 aw N A uunmr nuiir naw F 7 1jj j P 11 21 11111 1 11 11 11A1 Dm I m N 1 UP 11 Aavcnww ...
111 111 1111111 1Eu 1 5 5 21 A1A 1 nnsan w1N 011 w 11c11 ...
111 J 1 1 111 37 11 111 17 OWN A1 nan r 1 11 r DOWN Qi1 i 4il URM wmnnw 1 01nn 11 1 g C 5532JJh |
 |
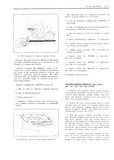 |
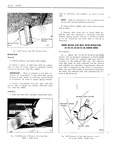
HEAR QUARTFR E1 iZ The 1llHt l 1Cl1S 111 11 are required 111 remove and install 1 quarter Vll 11 1 11re 1s 10110ws 1 Two 12 Adhesive C 1ulk111g Kits ...
11l1 1 1 l1Sf h1J11j11YpE 2 N 1 47 11j T J 1 rew0rked 11s described 111 prwcedxirei Y1 2 1 M T i 1 1Vi4 f 1 Tw0 2 pieces 1 11 w00d ...
CuH1ng Ou1Adhesive Cc111I1 1e 1W1nd0w 1 Spacer 1P111 t N11 4459 129 0r c1 p 11v11ls 111 20 x x 1 011lati Because the cured ld t d 1Ll1 adheres tn both glass and body |
 |
 |
111 11 1 t Mr 5 5 1 F1 4 V l fr frrr ...
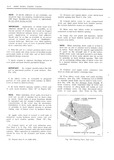
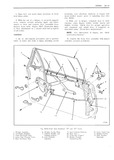
1z1111 nw v1111d11W A11Em1 11 ss 4a 118000 series new wives 1 Rear 00111 2 tower 11111 111 111111 2 11111 111 two 7 11111 to 1O w1 111 11 Window Asssunbiy Upper Outer Filler ...
Sash Channel Bolts Ctnnnnel Spacers 2 101191 1 111 4 LDWG1 1111 c1111 111G 11 101191 11111 11111111 En 11111 11 11m 111 11 111 11nEn A11g 111111 y Lower 0111sr mug 110111 Crim Rnllsr c 11111111 |
 |
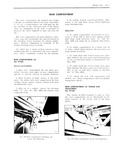 |
REAR END 21 7 REAR COMPARTMENT The re 1r z 1 1111p111 tment l11iI Cl1lI 111 S two IIJIYILIH 4 I 1 1 install reverse 1 1 1111 1v 1l pr1 11 e1 I111 ...
1lcI 1i pe1 1 for the hinge i1tt 11 l1i11g bolts 1111 N1 1t1 I1 s 111 the st 1ti1 11 11 y part 111 the hinges 11111111 l1 1 i rji lSIIllk ...
1111p 1rt111e11t 1111 lrml employs 11 side wqird 1 111 fr1i1111 side t1 1 side 111111 t1j 11p IlIllU l1 1i1s 11 11 t11111 s11 1p b1 11t n1e1 h t11ismtI1 tt hasp1 1 v1sl1i |
 |
 |
111r1ldi11 s are 1 l l1 VP L 1111111 F a111e111a1111e1 1s 1 11519 2 1 T 111 1 flat 9 f lTT 1 k T 1 4 i 1 l F MT T bkvliulxt ...
blade tained by bolt and clip assexziblies as sl1 M11 in Figure 2E16 T0 1 e11111ve 111 0 r ed as lnllnws 4 Repeat step I1Ll I1l P1 3 at each clip l1 1catir111 ...
body 11 Re111 1ve year 1 mmf llE 1l llllllllQ 111111 l 11isl1i1 1 111 l di11u and side sk 1ig111 1 1 111 1 111 411 111r1l li112 5 Ti Stall |
 |
 |
Ciireiully detach cemented edge oi 11e 1dli11i11p around entire perimeter Finishing Live und gQLiI l1lSIl IIIOIIYIIIIQS assist 111 11111111 11 the itemiiuilig 111 piaee The side 1 O1m11 6 Smuris ...
11101di11t s me smmri to me pmailweiti N l 1 MMI N 2 IMM wires iwm lwles 111 side fkmgg by Cups that Arg located inside the mC 1dh tgS root inner rails and supportinq ...
VI1tHI setcuring DU nUt d ImngE IIIUIIIIIIW by H listing wire View G Fig 1G1 111d1G2l 111 1re Lgsblve mmmEIm move headlining LiSS Il II lY 51 0111 body CAUTION Clean hands 111 1 t00ls |
 |
 |
I3l1 13 k TO1 which RETRACTOR is t0 be remevetl and 1lu belt to 1 0ll11p1 111 Q Q 1 DRUM t1 2lCEOf 1 2e l v RETRACTOR gl g yx 1 111 ...
stiff wire such as a paper belt acljiisted mr i11divid11 1l 1 eq11ire111ents when the clip 111 slot in rmller drum t0 niaintain spring sent belt is fastened by the driver 01 passenger t1 11s1011r ...
tract to the 11001 pun trttrgtnr is reinstzxllecl Ill the event that spring tension is 10st 111 11111 011 retrtictor can be turned 8 rev0l11ti011s by hand to regain spring te11si0n 3 Using a fl11t |
 |
 |
similar tool to initiate a holc xi wan the ma of ri helper p s1m mum cover 111 1 et 1 1 1 1115 S11 1 1 1 be spaced ...
possible in back window opening This will 7 Apply cement to exposed attaching Surface of T11 1 111 D1 V 11t111g Cllttimf edge of fabric cover due root panel and back window pinchweld flange ...
missed 11311111 1 1 111 r W W11911 11 1V 1111115 F11 installed IMPORTANT No cement should contact the felt pad or uncovered portion of paint surface Sec 11 P Siti |
 |
 |
diniensiens are between attaching holes for Fi frnnt end skirt assembly Ref Dimensinn L1 cat1011 1 46 111 18 Inner threaded hole in upper at H5 47 ppper ...
trwhing qurhce tn Outer thrmd d ing pad to Outer threaded h0le 111 Que gu U Loqit jside OI 151 upper attaching surface 011 eppn 7 U site side Of dash ...
iIlIl f1 I Il SI 1 1 3 18 3 4 thleiiegehils 1L g 1ju threaded heles 111 upper attaching |
 |
 |
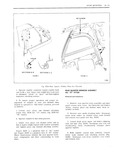
ITl1iY ZS HFUL1 i S dm fm F gQf 1 f 19 5 11011101 1 01 101115 0110015 111 1111 11 11 p1 1 11101 1 1101 11111 11 HHSJLAS Yvnl ...
P01101 1 111 2 v 01111101 01 15500111 1 7 Outside 11011011 0 01101 10 0001 1001 111 12011101 0 c 0111101 110111 up 110001 100 0011110 Guskcts 11 G1 cs R1111 |
 |
 |
111 1 RERR we EEEEEEE e EE EEEEE i 1 1 1 E W r 1 ZWR 7 rrrr r 1 1 F 1 11 11111 1 1 FOAM 111 111 |
 |
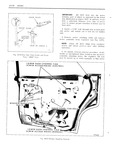 |
111 56 DOORS IMPORTANT DO NOT drill into thc 1l l tUl E PL TE l1ClLlS1I I part of which is iiiclicuted by the dfitted i GUM A li11e lul1St1 L1t Cl i11 Figure IDT7 ...
Re111r1vL1 z111 1t011 1tt 1 111i11g bnlts and 1 11111ve 1 V BRACKET 1 1 111 1t 1r 1sse111bly f1 1111 l L lllI1ll1 ...
111 1 5 1 1 1 1 NOTE Clean 11111 steel ehips fl O1l1 regn1nt111 VIXEV IN CIRCLE C se tL11 and 1111i t11r 11 11111111 gmr utter drilling 1 0pe1 1ti1111 5 T11 insmll |
 |
 |
step 8 wl inst 1llati n pnieedure is pericimiiied 15 Rei11 ve screw securing es ut l1e 111 clip at li eavh end nt Vll l Ul l nI lini nn rear linw Re1nr ...
CURTAIN snrlave with nuter layer nl material oxpnsetl BELOW UPPER EDGE OF REAR 3 Using a penvil 111 11 1 tmp 111 1te1 ial t lTl l1 k TRIM STICK shiynld be apprI imatelv |
 |
 |
bmcf I S Sm Y Fig I RH Dimenqmu Location M 13 1 16 Forward gage hole 111 dash front brace to 11 32 gage hole in floor G B4 7 8 Front suspension lower ...
lgule N 7B 25 32 Forward gage hole 111 dash front 4A3 to gage IIOIQ 1 A1l V I flange bln Fe tOUVu EhO1 il www H m 1 E of rear spri11g fro11t support ...
spring front support on opposite Cross bmC side of body i Q 27 15132 11 32 hole 111 floor pill J 83 5 18 Front suspension upper control Cross brace tO gage hole |
 |
 |
lower edge sl1 uld vxiexid l l C XlIl1111E 1Y 1 2 cri 1 tune 11 111 111 sui 11 c 1111 9111 V 11111 h 1UW1 Wt 1 HMB Ni tum Sm k ends ...
l1111Y 101 each trim stir bnlt zipper Lxpe ut upper edge 111 vinyl F1 21 11 4 8 I r k nylr n webbinu tw rear trim stink Fit 15 Reiiwye biacrk FLl1 |
 |
 |
various components rcinovineg it from the hinges or by renioving the 7 2 V l A 2 111 ...
111 l 1 s 1 1 yy 7 V 1 1 1 1 1 4111 it 1 1 1 v E pri l1 12 aw 1 l1 u D W 1 111 |
 |
 |
DOORS Y 3 11 SO 1 7 1 111 1 1 Q 111 ...
111 7 17 44 116 1D56 12661 0661 1161 6W61 6 68069 s1 16 1 W 11111611 1 11166111 16 5 0661 1611 11 w 11111611 11666161 61 2 V111 111I 1 1 Assemb1y 6 e111i 1 1 R6g11 |
 |
 |
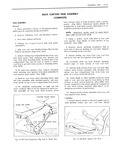
BACK CURTAIN TRIM ASSEMBLY 10 Detach top material flaps from side roof frynt rail Fig 111 l Place protective covers on all exposed panels whlch may be Cmlmcted e 1 1 11 Raise ...
attach emove ron roo rai ron ill r ir V I 1t F 114 weatherstrips Fig 111 mg J S IL 17 At each rear quarter area remove attaching 9 Detach top material from front ...
roof rail bolts securing rear quarter trim stick assembly Fig 111 to rear quarter inner panel |
 |
 |
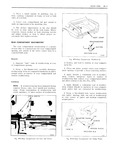
climpler 1 reiir rI 0t bow Us 1 3 7 7 7 IA V 7 UPPER A 111 tl DEHLI llltillx 1 I nte1line I 1 I vAI ANcE 1 1311 bow rin tgipe ...
Iiqu 1rter excess by trimmiiig webbing just tIin w ti I i rif i snr flip seams 111 irl s nn deck senin slmnlti hn in rolled edge ni rear r1 Ir f hriw center |
 |
 |
alan s i re line riepinrted ljislid of mmlkmg Hmttwml 3 8 huh by 3 yr wwe 111 View A01 F1 U1 2E22 aii base r vxiipletely around eriue ivf glass lz Wipe surface ...
ulntli 13 Assemble nnzzle tn tube nf adhesive and in 15 CUI U11i1 11113 11 ZZ1 111 J 45 1t 1 iZ 111111 SEM mlm mt 3 Smmmyd puuikmg mln as shrwwn in View |
 |
 |
Lower 1 a1 compartment iid just i IIOU 1h to 1 make an i1np1 essi0n 111 the modeling riay i V Q Yw rx V V 1 1 3 The Striker 1n1p1 ess1011s 111 |
 |
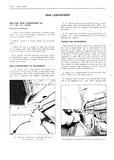 |
torque rod is ioetneti inthe most i em tmi ti pttgitii 111 bqdel mH m hm the effort required to open the lid is the least and the amount of effort required to close ...
111 l 1 1 21 Fig 1F4 Rem Compurtntent Lid Hinge and Torqoe Rod Adiostment Styles Fig 4F5 Re r Compartment Lid Torque Rod Adjustments |
 |
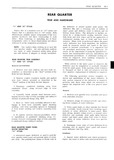 |
j111pO1 Y TZ that 1 GHP qUL1Tt l window All side imdbick i1 ld0 S 111 personnel JE 1 fiJl H1D gf sarvicne uperutxms are nre nmde of solid tempered safety plate glass aware ...
pinchweld finishing strip re Sealey and mum panel Along b h gjdgg 5 HS c n19nl ffn 111 d Ov91 l3pping 9dg Of t1 i1 assembly g ag c sides Of water d f1e ct01 |
 |
 |
DOORS TO MANIFOLD FRONT OF BODY CHECK VALVE 0lOR DD IDINYIFICIIION Ren UUCUUU XTLLEW STORAGE 111 111 11111 1 GREEN TANK ORANGE A FRONT SHROUD DASH PANEL |
 |
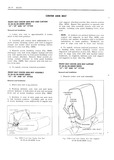 |
operation on opposite side 37 39 AND 67 STYI ES of arm rest then carefully remove 11 111 rest as sembly including trim panel finishing cover from Removal and Instulluticn seat T LOWE ...
Inches NOTE If washers tire present between 11 111 rest h t eifulid W 1 S1 support and supports on sent Fig lH50 note |
 |
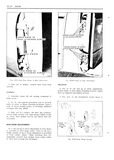 |
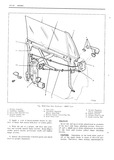
111 A3 A A N i wjyxj urr eRH1NGE TO DOOR c UPPER H NGE TO A NG SCREWS B BODY ATTACHING SCREWS ...
niie nr in adiustment 1i i ASeii1i1A1ge1 hinge rareas S As 111 A11ti squeak precaution and t0 prevent A e entrj ef water at hinge attaching locations apply ei A1 A iiwat 0f heavy bodied |
 |
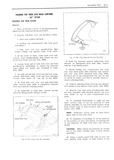 |
9Y3111 1 iS disengaged from bow then remove weatherstrip sufficiently to detach top material I tLi 111 l 11 0111 listing pocket flaps which are nailed and cemented to rails Fil ZIQS 4 9 Detach |
 |
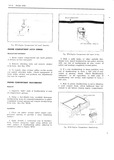 |
weatherstrip is being installed trim 3 T 111 1 1 1 111211 1111 21 1 1 1 S 11 1 1 end of Waiiimii ip to form 11 me joint at mn aud install attaching |
 |
 |
Detach back curtain from rear roof bow then 4 At H h 1 9l1 I 111 Y F i 1h T9 m0V ittachmg remove back curtain assembly with attached trim bolts |
 |
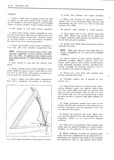 |
curtain assembly by retacking curtain to rear or 6 Tacks securing back curtain assembly to trim l 111 1u 1 li i trim Sticks 35 1 lui1 d sticks should be placed close to each |
 |
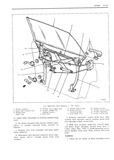 |
c0000 11 0 Rod 12 111 110 1 Regulufor 110001 Stop 0 1100 Lock 9 11 101 11 01 em 12 1 1 19 1001 1 0 101 OT center pillar depending1 nre1110vulmetl1c1dbein5 c Remove |
 |
 |
111 so l 11111111 so F rrrr Q or rr 3 rrrr |
 |
 |
ective COVG1 1112 5 W9 1w md 4 Cugyully ygise irom edge oi g1 111 HY Shfii fenders V Y grille lurwnrd and remove grille |
 |
 |
rrrrr rllii sl ii 111 E Vi vyr iii A ii i if 1 6 Fii i a 1 1 Q i 5 7 3 i l iQ lil i jrsf |
 |
 |
back window are as follows r cine A OF TOOL FLAT ow GLASS 11 Two A 111 Siv Caulkiue Kits Part |
 |
 |
however will operate tail gate window down only e I I g L On 111 styles i switch located at the left tail gate A lock prevents the operation Of the electrically |
 |
 |
place by 6 V il hens 1 t 5 are i l 1i 1 d to be 111 Wi d retainers formed to the contour of the roof panel I 1Z V Secutmg |
 |
 |
SSSS tr V V osii V VVVVS I 111 so Iii 12 f IIIII |
 |
 |
111 20 SEATS rtool remove shoulder screws securing 4 Disconnect drive cable from actuator ii age to vertical gearnut Fig 1H24 assembly Remove jackscrew down stop from jack 5 Remove screws securing horizontal actuator sciew |
 |
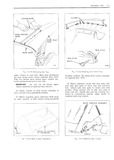 |
lLllll assembly hrls been dmwn f1 um Cllltllll ma eu 1 1 I as required Fm 111 7 Folcl any exvess back curtain upper valance mu terial rearward and tack t0 rear bow IMPORTANT |
 |
 |
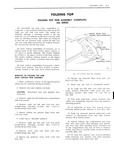
FOLDING TOP A T 1 1 111 |
 |
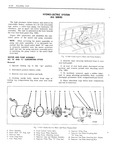 |
111 19 jj E o cbt zi po Q r rv i R Ae 1 1723 Fig l l 6l Hyclro Leciric Motor and Pump Disussernbled A Motor Assembly F Fluid Control Valve Balls |
 |
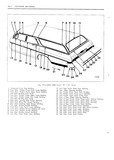 |
RRrR ii1 1g t 1 1 v r I 0 II RRRR 1 11 111 Rrrr rrrr Vrrr V F ee rrrr F l 1 R r eo X I wliwgl |
 |
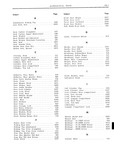 |
Folding Top Adjustments 1124 Moldings 45 46 48000 Series 11 30 Folding Top Trim Complete 111 Moldings 68000 Series 11 38 Folding Top Trim Less Curtain 1111 Four Way Bucket Seat lH16 Four Way Electric |
 |
 |
step 0 use ata 111 Li El lH1 from leak area with water then dry area Sm k Oy Oth g1 Isuimbig gl vy i Im1 L1 tw hr w 1 k with air li0se |
 |
 |
very hot water Wet the stain well by applying hut water t0 the spot with n cle 111 cloth scrape all excess pulp if present off the fabric SHOE POLISH AND DRESSINGS with it dull |
 |
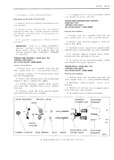 |
STYLES EXCEPT l3000 SERIES Rgmplvtg l Ij iste31 ln suit i r vttL 111 lixmaty lynut Removal and Installation ziucl iw Jr rittiivliiug limits |
 |
 |
Down Unit Rear Compartment 1F12 Top Lift Cylinder 1136 pun nanaie Door 1D3 Top Trim Complete Fvldiiig 111 Top Trim Less Curtain Folding 1111 Trim Cleaning 1Al R Trim Door V 1D5 Trim Rear Quarter |
 |
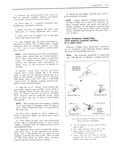 |
mommy msmn Adhesive eaulked glass installation waterleaks miie of gpmg can be corrected in the following rnanner 111 removing and reinstalling the glass NOTE V11Cll material in first tube dispensed quickly insert second tube |
 |
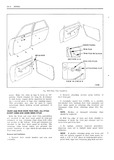 |
retaining clips along sides are pressed into 5 To i St U 1 V 1 S 1 111 JVH1 D1 0 d 1 plastie retainers or cups which fit into slots |
 |
 |
p1tIZ C Il1r In ngf to ind Side Of SEM Cushiml frame Fig 2H31 serts 111 Fig 2H3l show relationship ol linkage then rcmr ve linkage assembly from seat bushings wd HttB |


