Jeep Parts Wiki | Ford Parts Wiki
Home | Search | Browse
|
Body Service Manual August 1964 |
|
Prev

 Next
Next
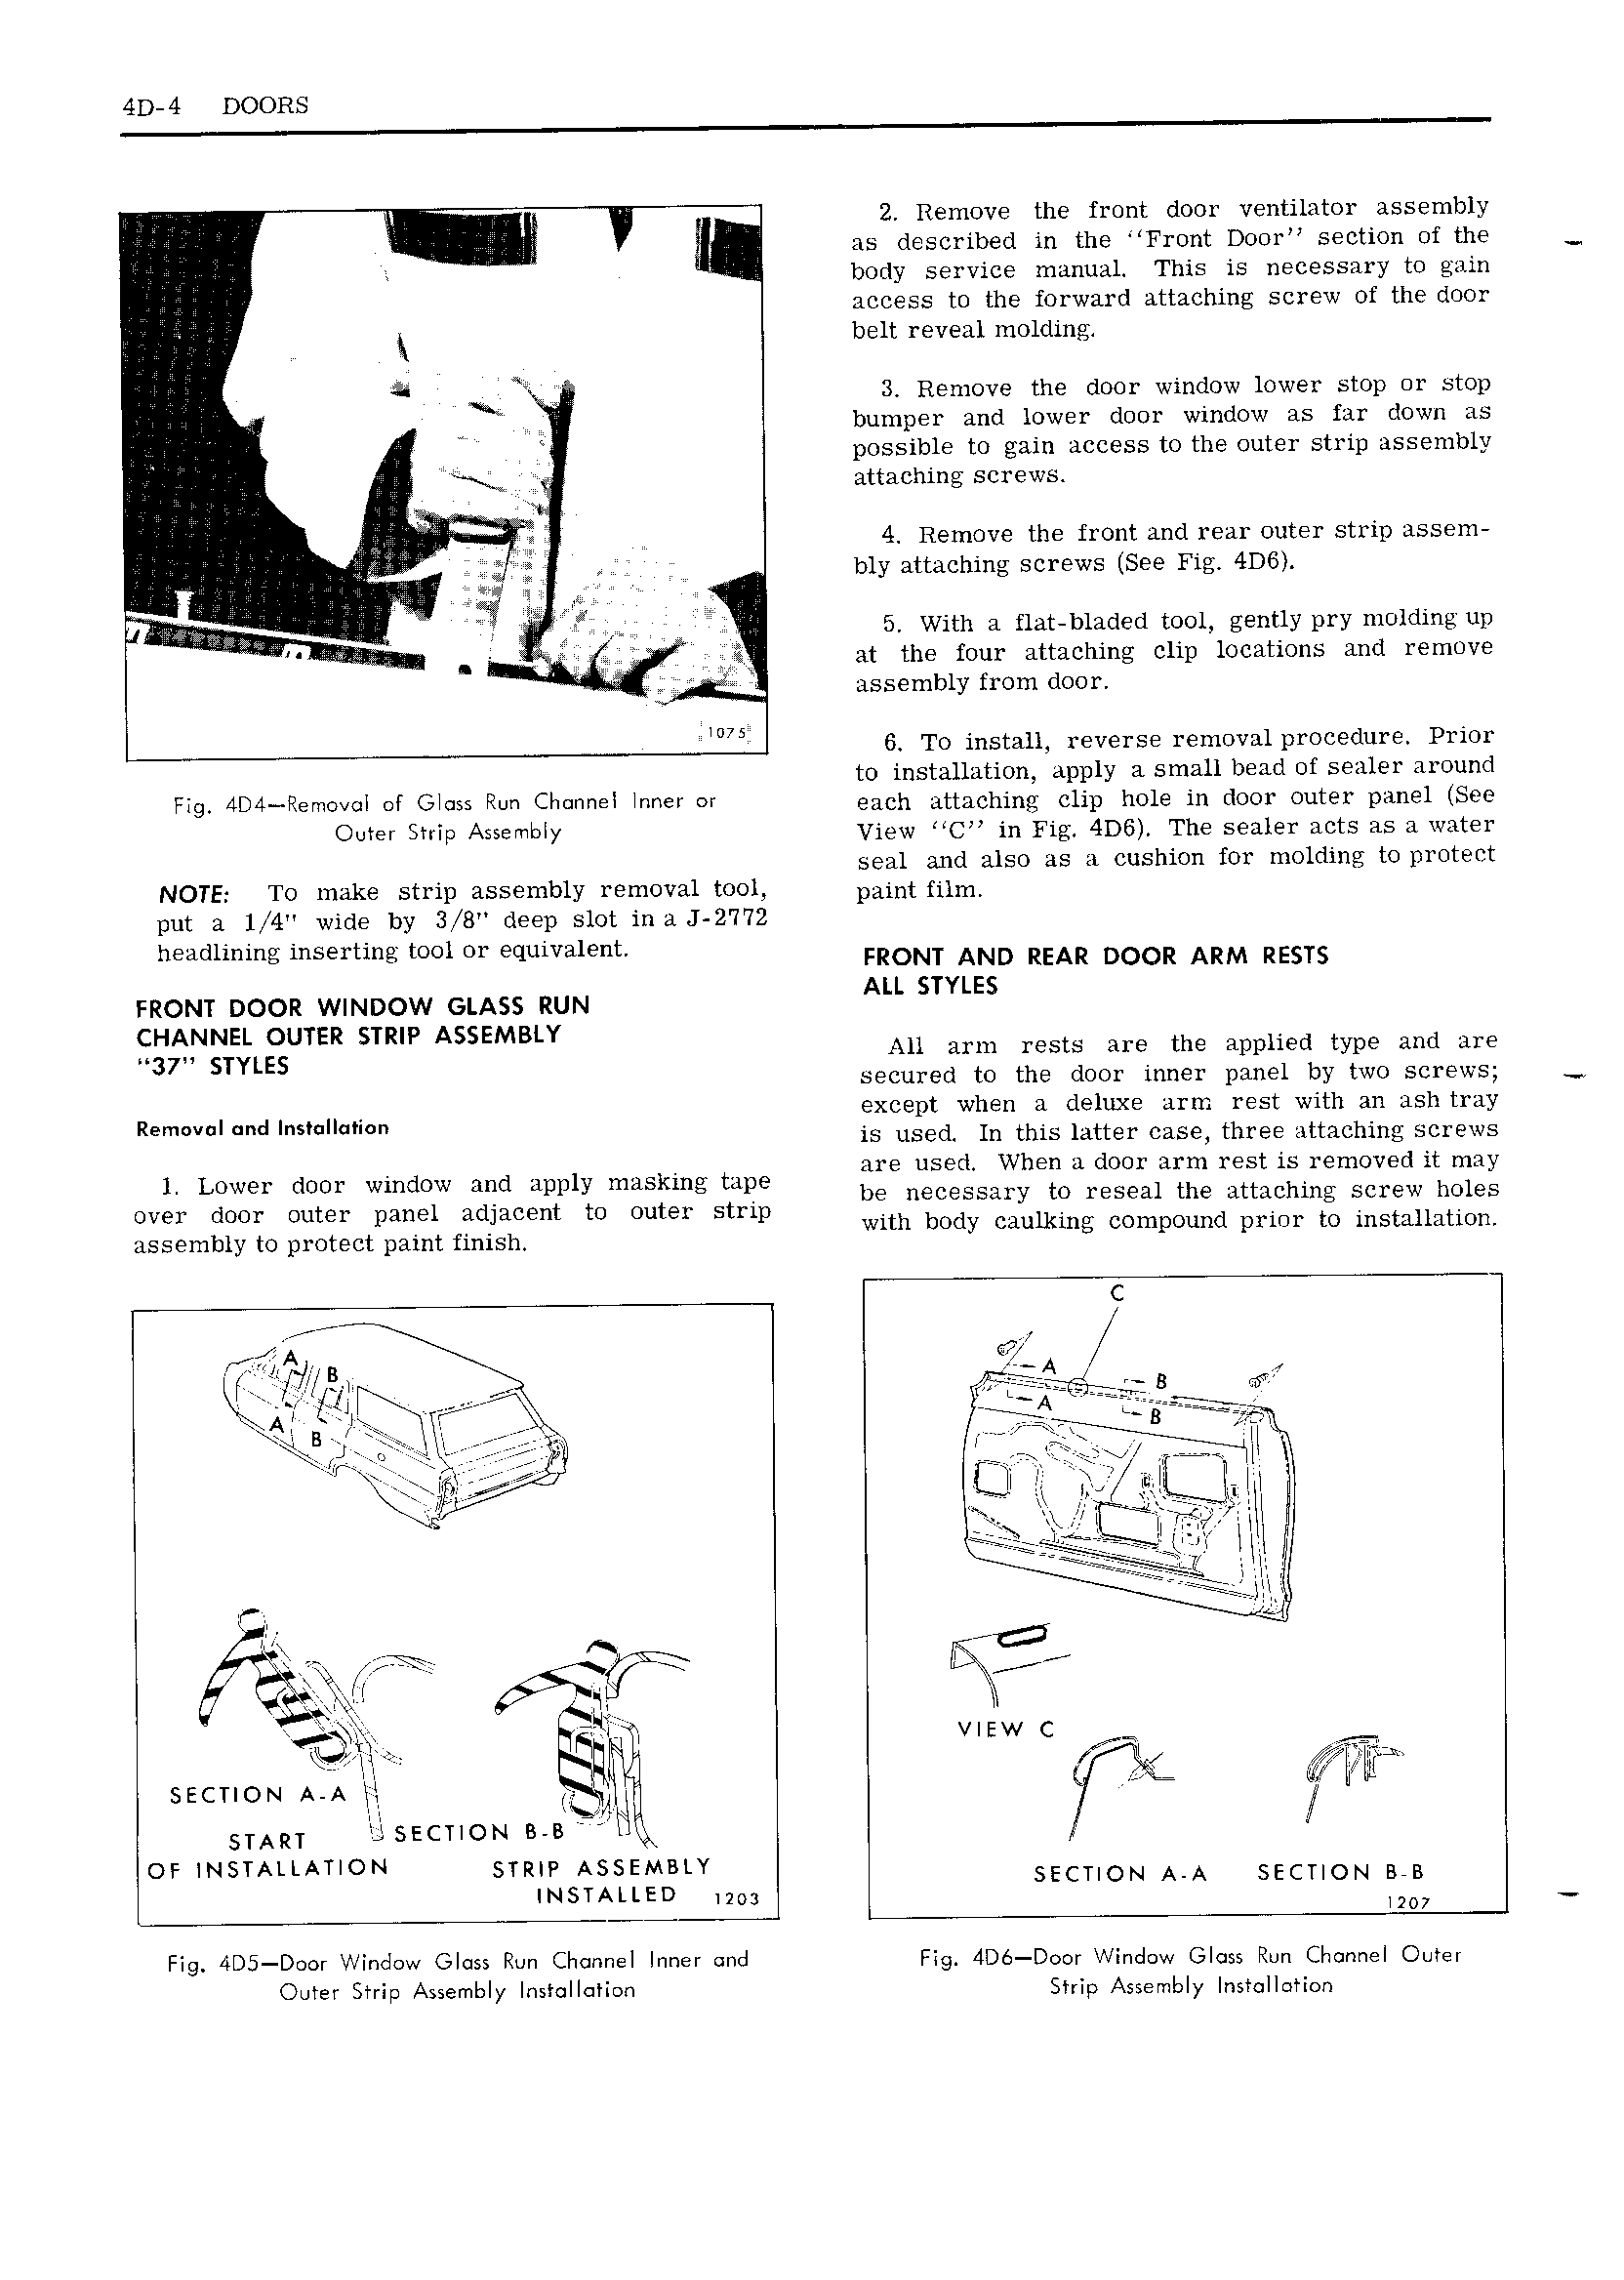
4D 4 DOORS I 2 Remove the front door ventilator assembly I l as described in the Front Door section of the I body service manual This is necessary to gain access to the forward attaching screw of the door I belt reveal molding R 3 Remove the door window lower stop or stop bumper and lower door window as far down as V possible to gain access to the outer strip assembly attaching screws gk A 4 Remove the front and rear outer strip assem Q bly attaching screws See Fig 4D6 I wat l V LL I A T 5 With a flat bladed tool gently pry molding up lemue I at the four attaching clip locations and remove assembly from door IDM 6 T0 install reverse removal procedure Prior to installation apply a small bead of sealer around l l9 lD l lleI V l l Gl S RW ClI el l e ef each attaching clip hole in door outer panel See Ovlel SMP Assembly View C in Fig 4D6 The sealer acts as a water seal and also as a cushion for molding to protect NOTE To make strip assembly removal tool Paint fihu put a 1 4 wide by 3 B deep slot in a J 2 I 72 headlining inserting tool or equivalent FRONT AND REAR DOOR ARM RESTS A YL FRONT DOOR WINDOW GLASS RUN LL ST ES CHANNEL OUTER STRIP ASSEMBLY 37 STYLES All arm rests are the applied type and are secured to the door inner panel by two screws R I dl H r except when a deluxe arm rest with an ash tray Em v ns mn is used In this latter case three attaching screws 1 Lower dm Window md 1 Jl mllskmg tue are used When a door arm rest is removed it may pl y R l be necessary to reseal the attaching screw holes Owl dom Outer panel Mllacant to Outer stmp with body caulkin comaound yrinr to stallaton assembly to protect paint finish t L l m 1 C p f bt gw r 5 F my yy rr e I I1 Ae sx g i s A r I III plat q r B in I III I I Iww l I E if CII I I I I I E Q II 7 II It I I VIEW C l r 4 F II Z fr m II I I I e II SECTION A A It t Q II I AIII I START LI SECTION B B l4l y Il OF lNSlMLATlON STR ASSEMBLY SECTION A A SECTION as INSTALLED 1203 74 I207 Fig 4D5 Door Window Glass Run Channel Inner and Fig 4D6 Door Window Glass Run Channel Outer Outer Strip Assembly Installation Strip Assembly Installation

 Next
Next