Jeep Parts Wiki | Ford Parts Wiki
Home | Search | Browse
|
Body Service Manual August 1964 |
|
Prev

 Next
Next
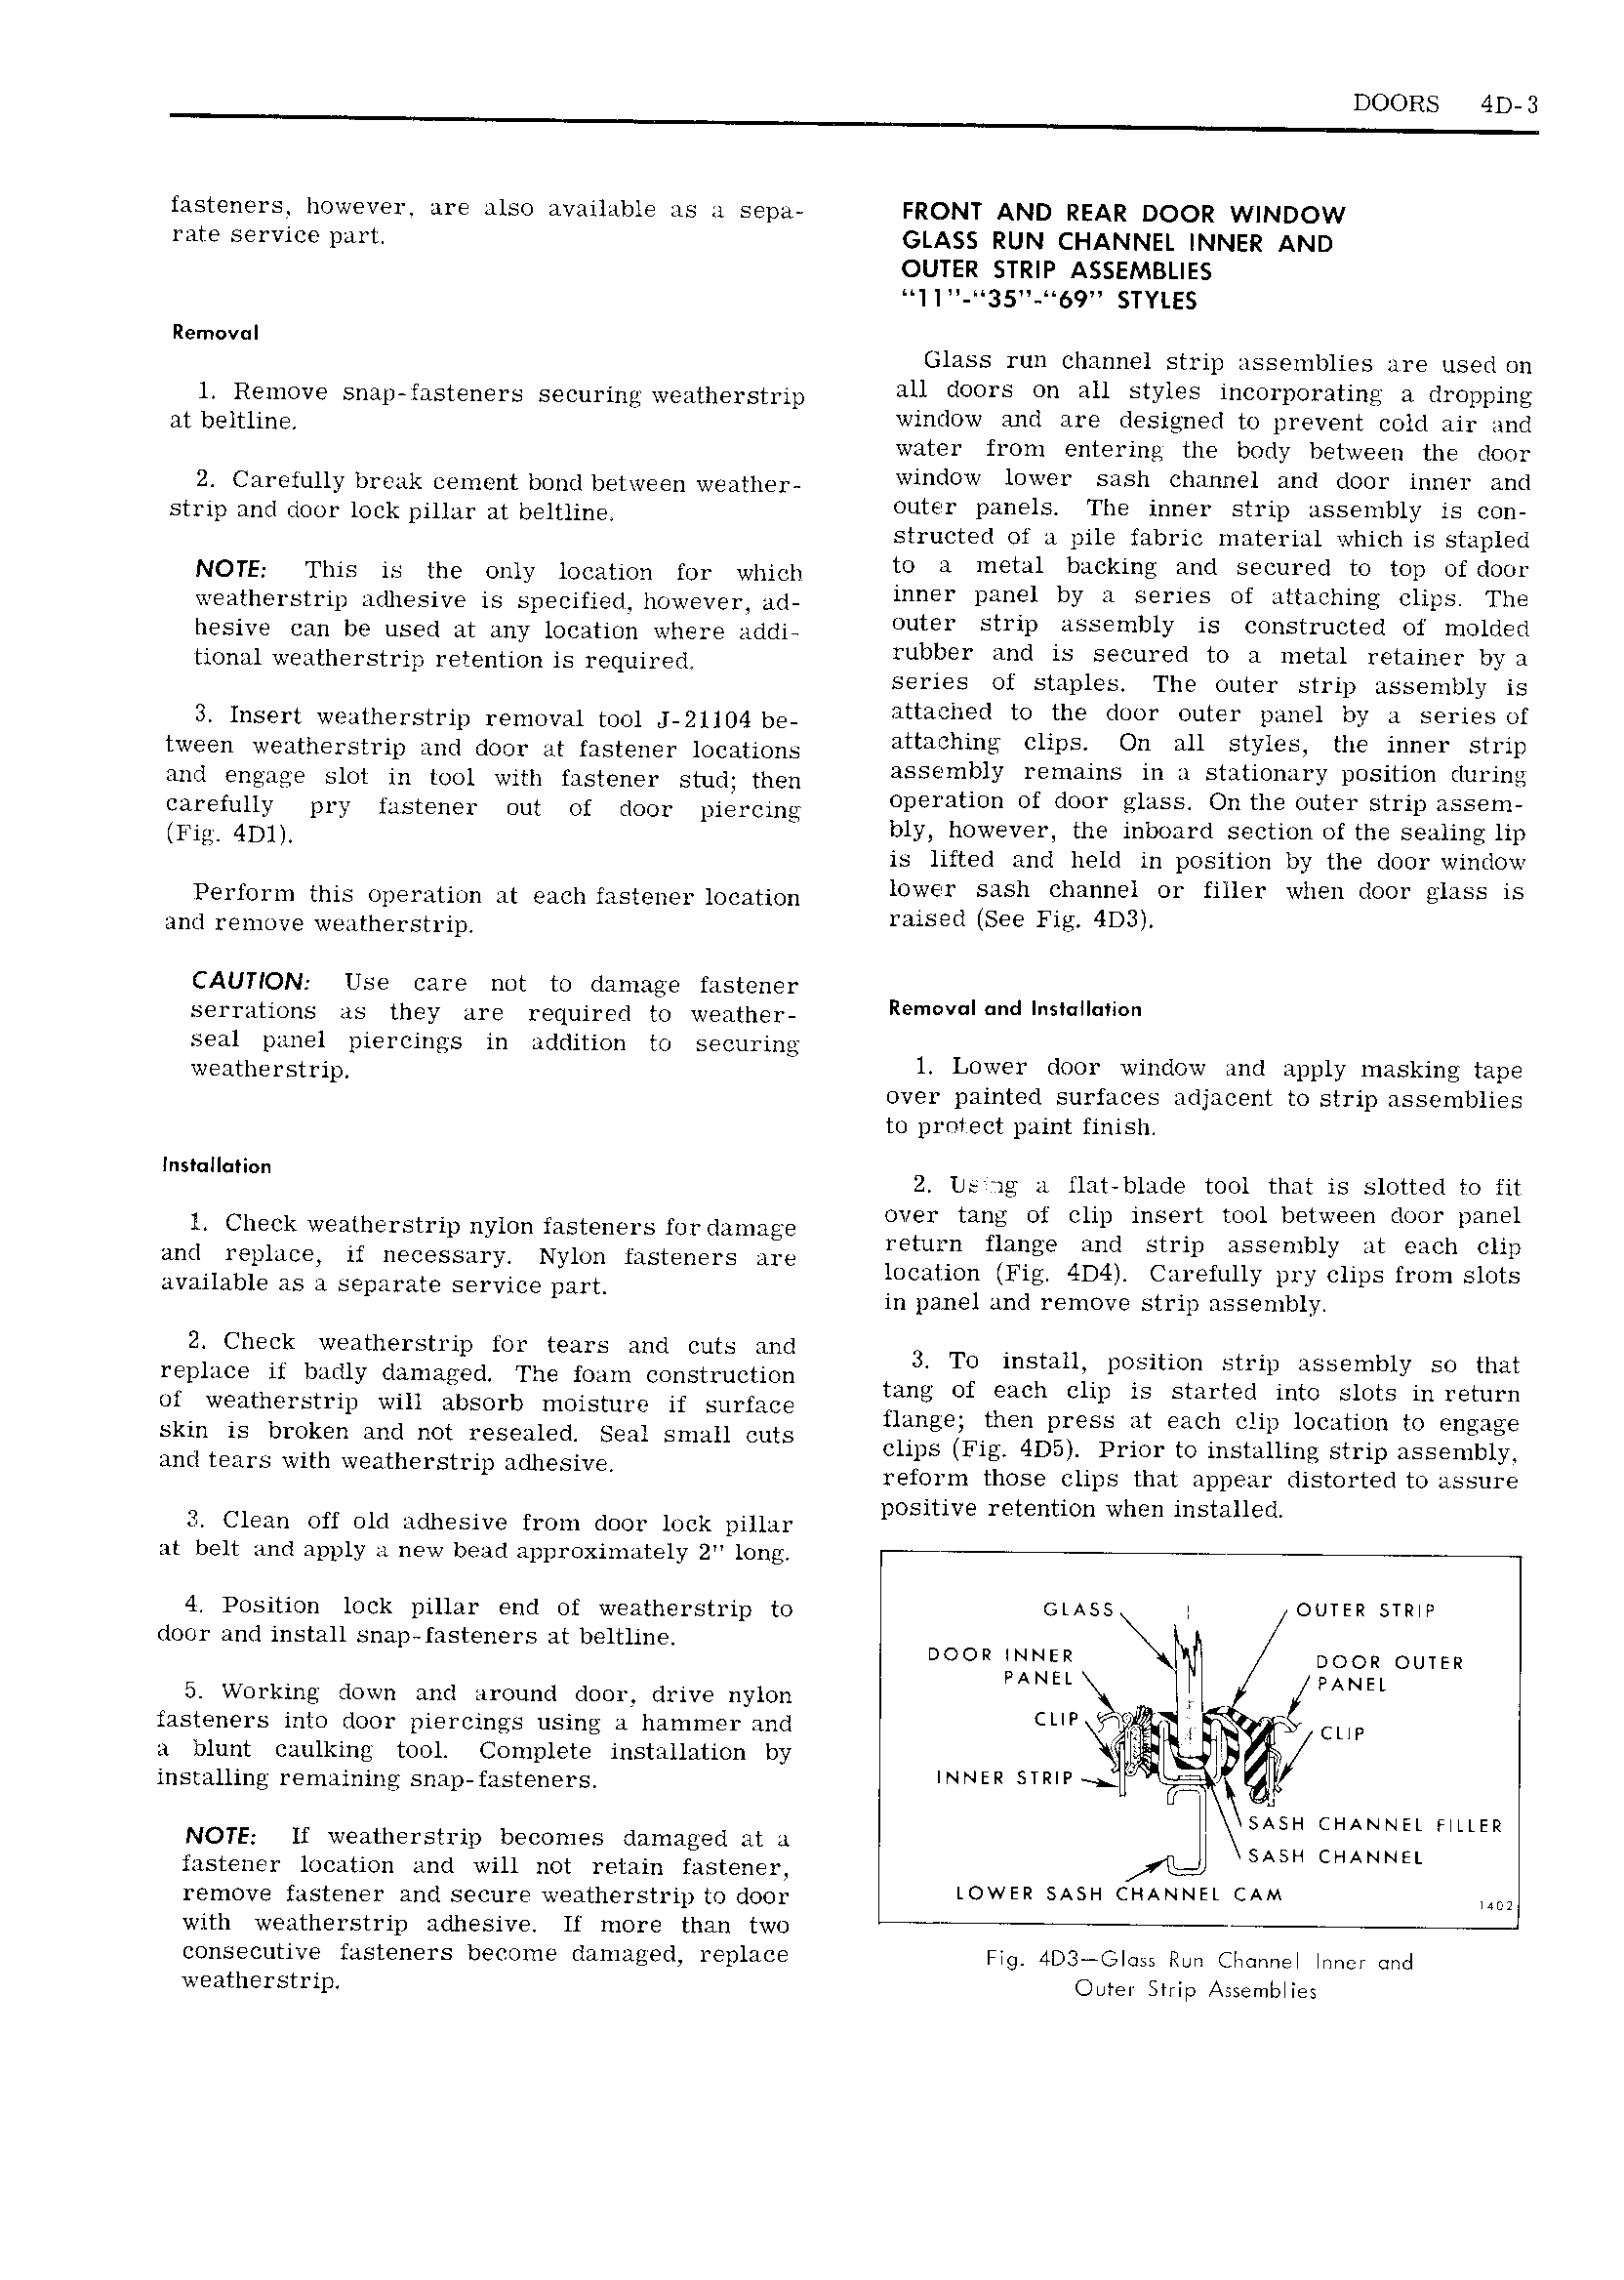
DOORS 4D 3 fasteners however are also available as 1 sepa FRONT AND REAR DOOR WINDOW rate service part GLASS RUN CHANNEL INNER AND OUTER STRIP ASSEMBLIES l I 35 69 STYLES Removal Glass run channel strip assemblies are used on 1 Remove snap fasteners securing weatherstrip R ROOYS O RLL SLYLQS cO POL RLL g R ELL OPPLLL at bemmg window and are designed to prevent cold air and water from entering the body between the door 2 Cmwfullybr ilk celmmtbgndbetwg u Wenthel window lower sash channel and door inner and Strip and 1001 lockpiuiu at belthng outer panels The inner strip assembly is con structed of a pile fabric material which stapled NOTE This is the Om loczmcm for which to a metal backing and secured to top of door veatlierst1 ip adhesive is specified however ad Lung PLLUEL by EL SQYLES Of ilLL3Thl CUPS The hesive can be USM at my lcmtmn Wh m Addi outer strip assembly is constructed of molded tional weatherstrip retention is required llubllgr wld L5 Secured to H metal retainer by 3 series ot staples The outer strip assembly is Sr IDSQN Wmth l St1 ip l 9mOv 1mO1 KL21104 bE attached to the door outer panel by 1 series of tween weatherstrip and door at fastener locations attaching Cllpsj OQ HLL Styles the fllner Stlvlp and Engagg Slot in mol with hstcngl Stud then assembly remains in u stationary position during Carefuliy pm fustguer Out Of dom Pi rcmg operation of door glass On the outer strip assem Fig 4DU bly however the inboard section of the sealing lip is lifted and held in position by the door window Perform this operation at each fastener location lolvml Sash Ehmmel ml mk when dom Elms IS and remove weatherstrip rinsed See Fm 4D3l CAUTION Use care not to damage fastener serrations as they are required to weather R d seal panel piercings in addition to securing k 1th FSU ipL 1 Lower door window and apply masking tape over painted surfaces adjacent to strip assemblies to protect paint finish lnslullullml 2 Us ig a flat blade tool that is slotted to fit l Check weatherstrip nylon fasteners fordamage Over tang Ul Cllll ln ellt lu bemeell doll MEI V return flange and strip assembly at each clip am llsplll ei ll llgicesslllyj Nl L lllslgllels llllll location Fig 4D4 Carefully pry clips from slots llvllllable as ll Sepllllllle S llvlce Dart in panel and remove strip assembly rggiugglegl 3 To install position strip assembly so that of weitherstrip will absorb moisture if surface tang Of Each Chll ls stalled mw Slots ul ll lum I Q flange then press at each clip location to engage skin is broken and not resealed seal small cuts Cups Fig AIDS P1 im tOmSmmng Strip assembly lull lglllls wltll Welltllgllstlllp lldllesll E reform those clips that appear distorted to assure positive retention when installed Clean off old adhesive from door lock pillar at belt and apply i new bead approximately 2 long 4 Position lock pillar end of weatherstrip to GLASS I OUTER STRIP door and install snap fasteners at beltline DOOR INNER DOOR OUTER PANEL PANEL 5 Working down and around door drive nylon l fasteners into door piercings using a hammer and CL RTL Ex Clip a blunt caulking tool Complete installation by installing remaining snap fasteners NNER SLRLE l J NOTE If weatlierstrip becomes damaged at 1 vb 2 HLLER fastener location and will not retain fastener ll remove fastener and secure weatherstrip to door LOWER 5 CHANNEL CAM im with weatherstrip adhesive lf more than two consecutive fasteners become damaged replace Fig 4D3 GI s5 Ron Channel Inner ond weatherstrip Outer Strip Assemblies

 Next
Next