Jeep Parts Wiki | Ford Parts Wiki
Home | Search | Browse | Marketplace | Messages | FAQ | Guest
|
Body Service Manual August 1964 |
|
Prev

 Next
Next
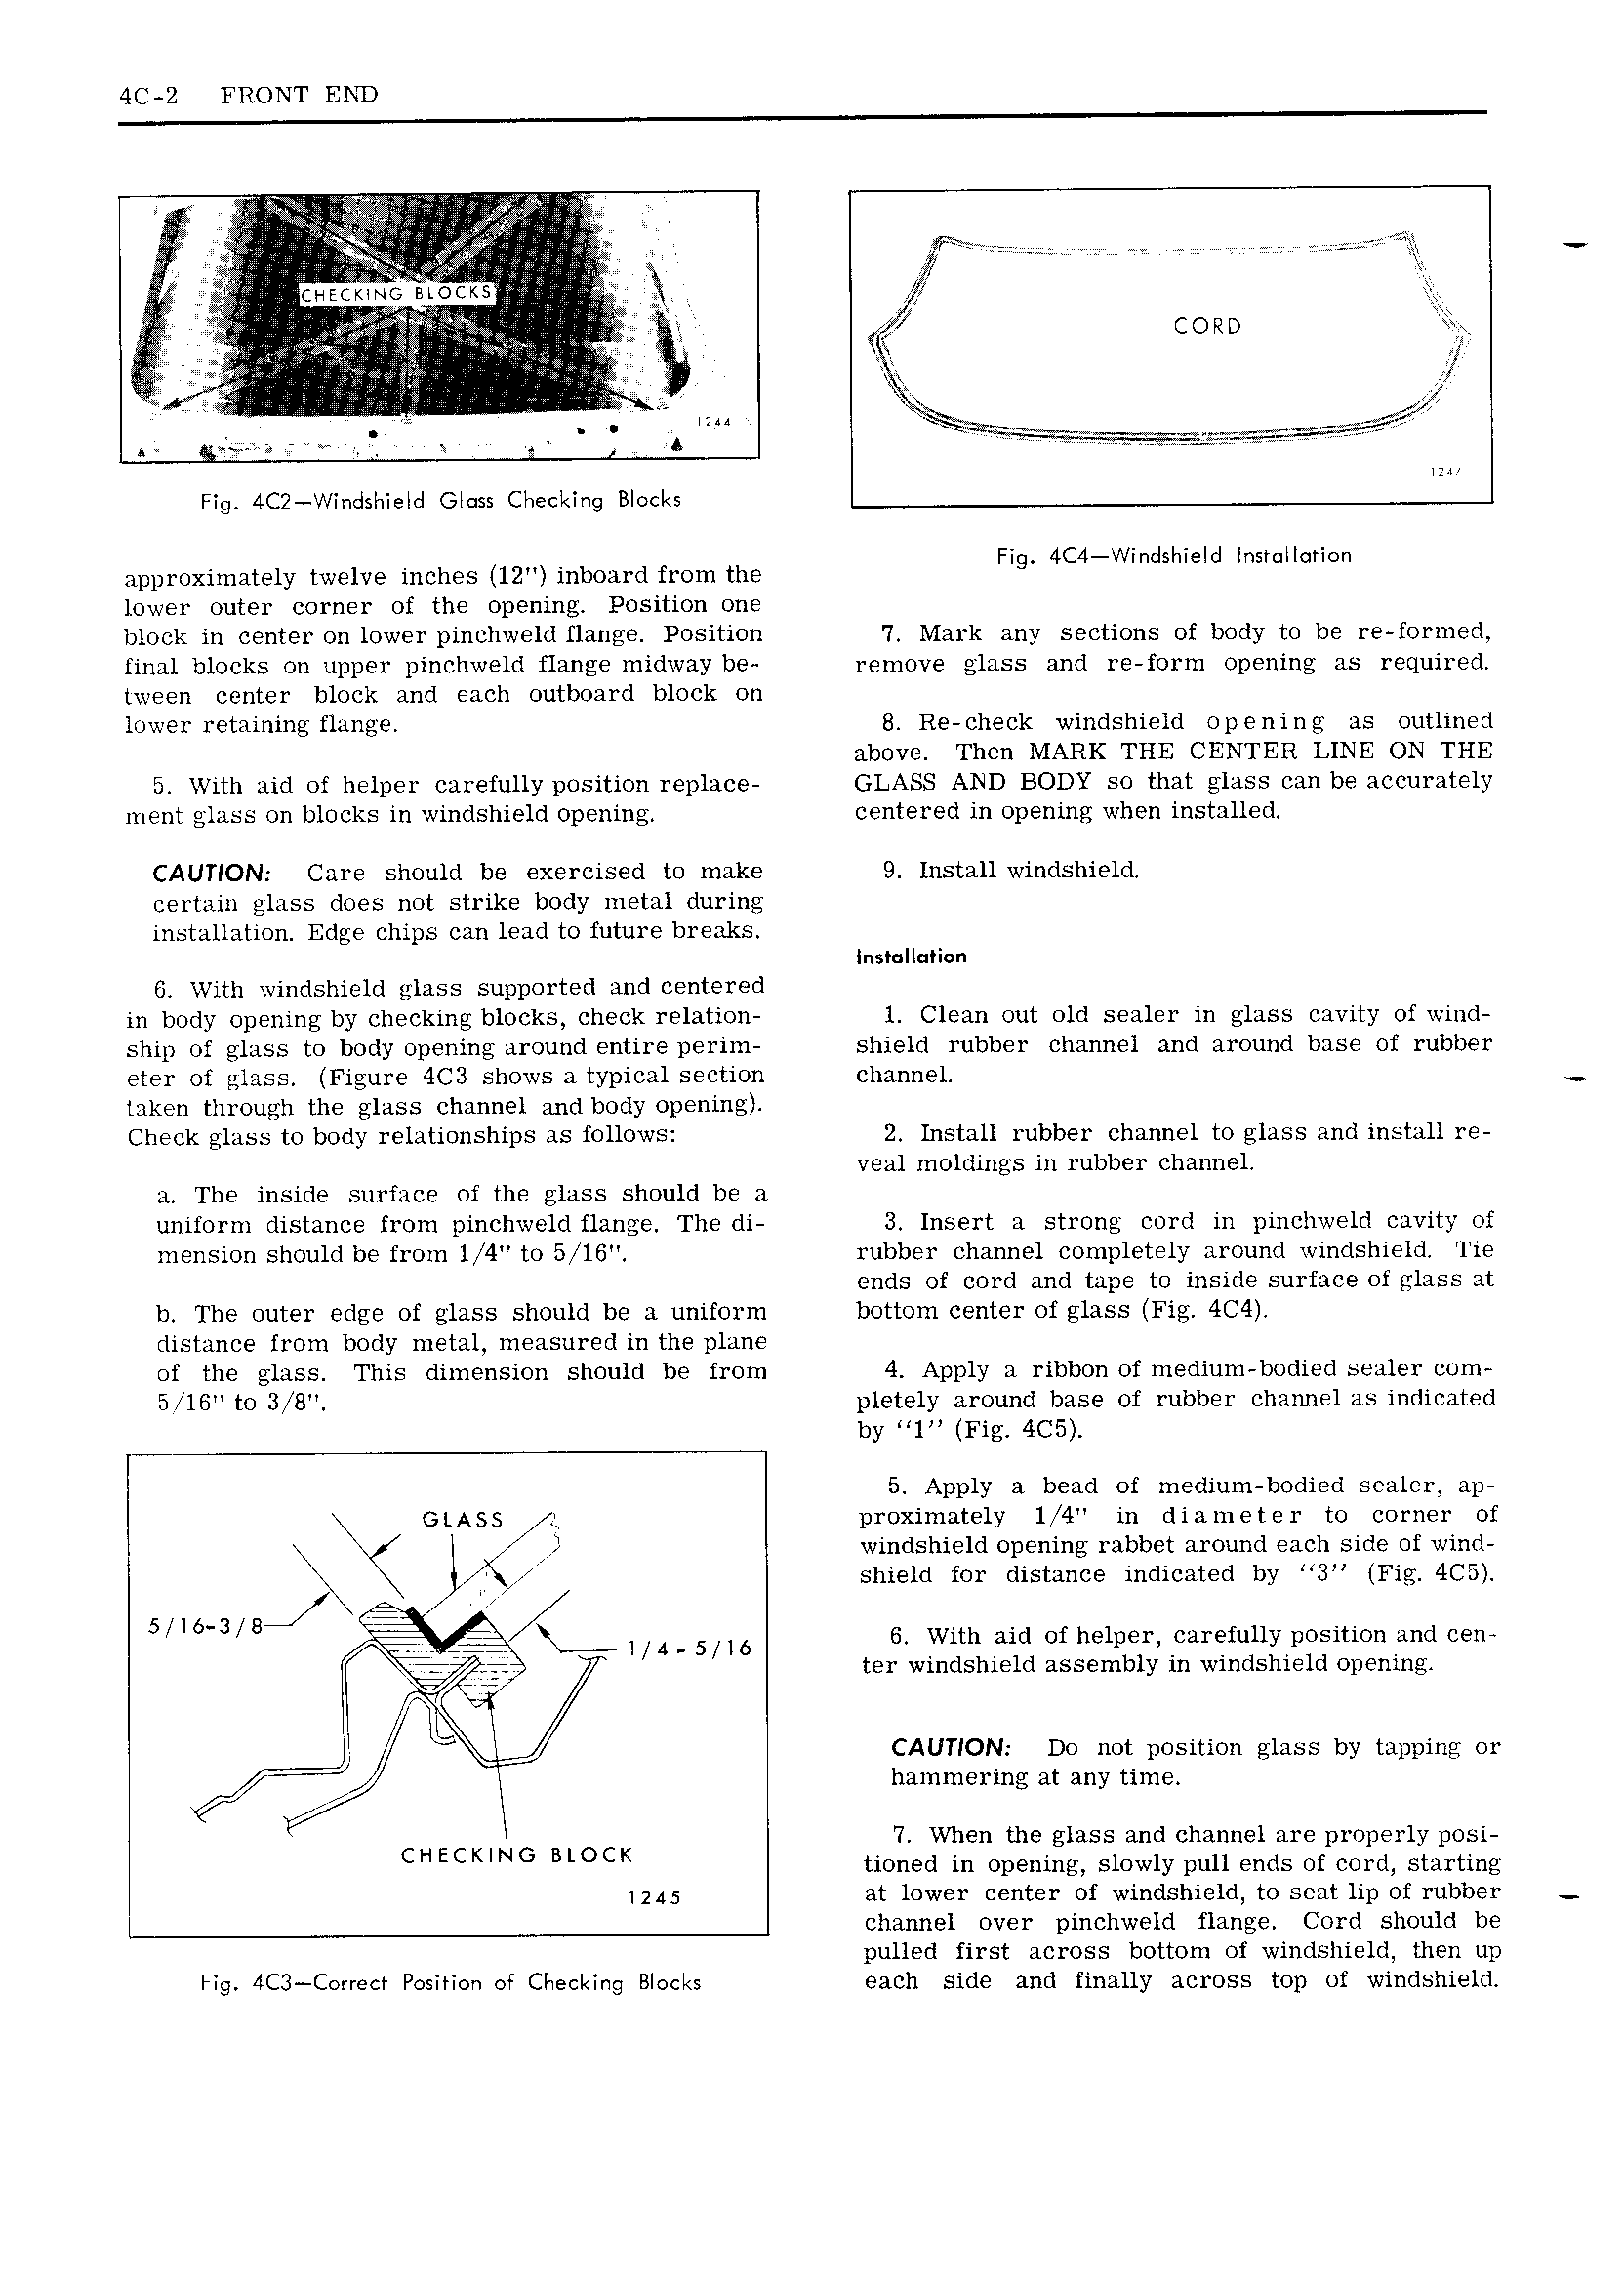
4C 2 FRONT END it 5 iJ u at V n if y r g i ciiacmtc atoms i ip 1 we I 1 p g u g N l ii ii f l ae 7 i 4 T o V4 AVV M y seee l 2 V V V A f Fig 4C2 Windshieid Gloss Checking Blocks approximately twelve inches I2 inboard from the FIS 4C4 WmdShl d Insmllchcn lower outer corner of the opening Position one block in center on lower pinchweld flange Position 7 Mark any sections of body to be re formed final blocks on upper pinchweld flange midway be remove glass and re form opening as required tween center block and each outboard block on lower retaining flange 8 Re check windshield opening as outlined above Then MARK THE CENTER LINE ON THE 5 With aid of helper carefully position replace GLASS AND BODY so that glass can be accurately ment glass on blocks in windshield opening centered in opening when installed CAUTION Care should be exercised to make 9 Install windshield certain glass does not strike body metal during installation Edge chips can lead to future breaks t s t i n G With windshield glass supported and centered in body opening by checking blocks check relation 1 Clean out old sealer in glass cavity of wind ship of glass to body opening around entire perim shield rubber channel and around base of rubber eter of glass Figure 4C3 shows a typical section channel taken through the glass channel and body opening Check glass to body relationships as follows 2 Install rubber channel to glass and install re veal moldings in rubber channel a The inside surface of the glass should be a uniform distance from pinchweld flange The di 3 Insert a strong cord in pinchweld cavity of mension should be from 1 4 to 5 l6 rubber channel completely around windshield Tie ends of cord and tape to inside surface of glass at b The outer edge of glass should be a uniform bottom center of glass Fig 4C4 distance from body metal measured in the plane of the glass This dimension should be from 4 Apply a ribbon of medium bodied sealer com 5 16 to 3 VB pletely around base of rubber channel as indicated by 1 Fig 4C5 5 Apply a bead of medium bodied sealer ap x GLASS ty proximately 1 4 in diameter to corner of I windshield Opening rabbet around each side of wind shield for distance indicated by 3 Fig 4C5 5 fits 2 a vlvll J 6 With aid of helper carefully position and cen l A 5 I6 tE v ir 3 1 windshield assembly in windshield opening ii Jl CAUTION D0 not position glass by tapping or i hammering at any time 7 When the glass and channel are properly posi CHECKING BLOCK tioned in opening slowly pull ends of cord starting 1 45 at lower center of windshield to seat lip of rubber channel over pinchweld flange Cord should be pulled first across bottom of windshield then up Fig 4C3 C rreer Position of Checking Blocks each side and finally across top of windshield

 Next
Next