Jeep Parts Wiki | Ford Parts Wiki
Home | Search | Browse | Marketplace | Messages | FAQ | Guest
|
Body Service Manual August 1964 |
|
Prev

 Next
Next
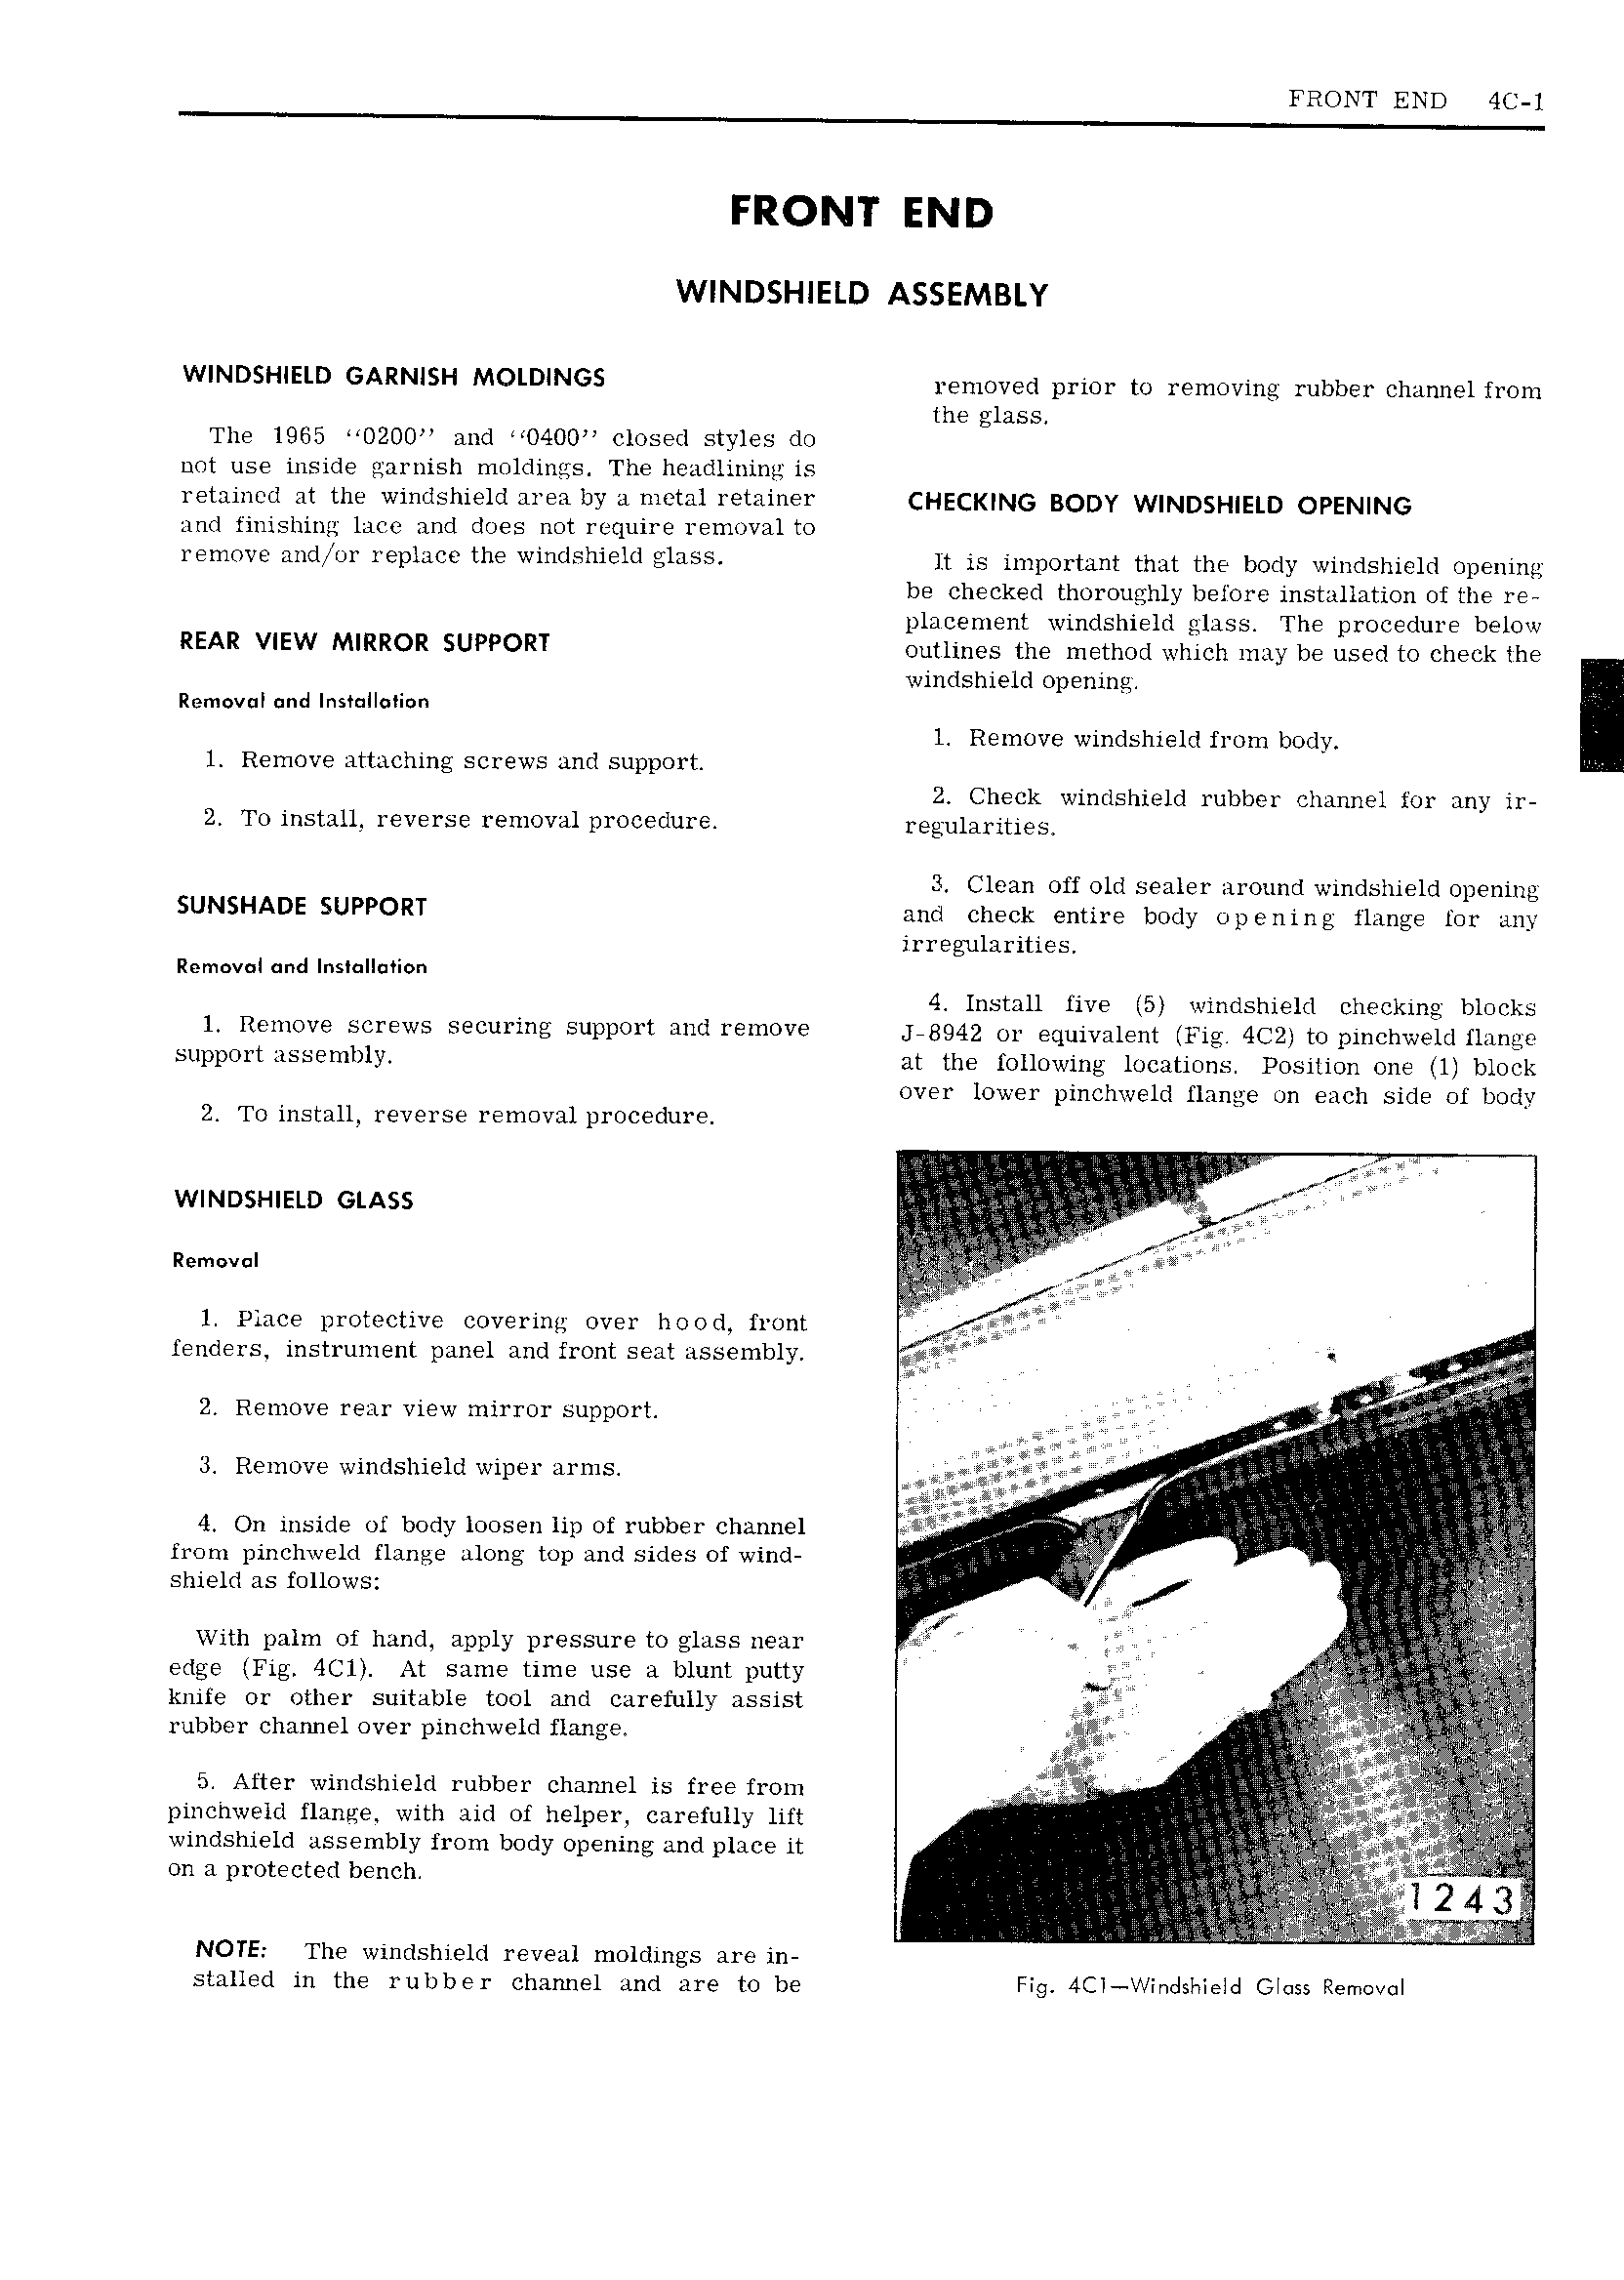
FRONT END 4C 1 FRONT END WINDSHIELD ASSEMBLY WINDSHIELD GARNISH MOI DINGS removed prior to removing rubber channel from the glass The 1965 O200 and O400 closed styles do not use inside garnish moldings The headlining is retained at the windshield area by a metal retainer CHEC N BQDY w ND5H E QpEN NG and finishing lace and does not require removal to remove andN or replace the windshield lt is important that the body windshield opening be checked thoroughly bef ore installation of the re placement windshield glass The procedure below REAR VIEW MIRROR SUPPORT outlines the method which may be used to check the windshield opening 4 Removal and lns i n l Remove windshield from body I 1 Remove attaching screws and support 2 Check windshield rubber channel for any ir 2 To install reverse removal procedure regularities 3 Clean off old sealer around windshield opening UN I IADE SUPPORT and check entire body op ening flange for any irregularities Removal und s i n 4 Install five 5 windshield checking blocks L R mOV SCTEWS CuI i g SUPPOYI mid i m0V J 8942 or equivalent Fig 4o2 to pinchweld flange Sllpptiwt i1SS nblY at the following locations Position one 1 block over lower pinchweld flange on each side of body 2 To install reverse removal procedure t t LIL 5 WINDSHIELD GLASS II H rr rzemewn j 1 Place protective covering over hood front V fenders instrument panel and front seat assembly 2 Remove rear view mirror support i Ei t r l z 4l 3 Remove windshield wiper arms 1 a5 I z i f 4 On inside of body loosen lip of rubber channel j k i p i from pinchweld flange along top and sides Of wind j V V pg shield as follows FQ L E i E a 1t 1 y With palm of hand apply pressure to glass near I A xv i edge Fig 4C 1 At same time use a blunt putty W knife or other suitable tool and carefully assist rubber channel over pinchweld flange V 2 Z 5 After windshield rubber channel is free from r i pinchweld flange with aid of helper carefully lift V Y kl windshield assembly from body opening and place it T 1 Y wi t tu y i l I on a protected bench 2f I S 4 3 NOTE The windshield reveal moldings are in stalled in the rubber chamiel and are to be Fig 4Cl indshield Glass Removal

 Next
Next