Jeep Parts Wiki | Ford Parts Wiki
Home | Search | Browse | Marketplace | Messages | FAQ | Guest
|
Body Service Manual August 1964 |
|
Prev

 Next
Next
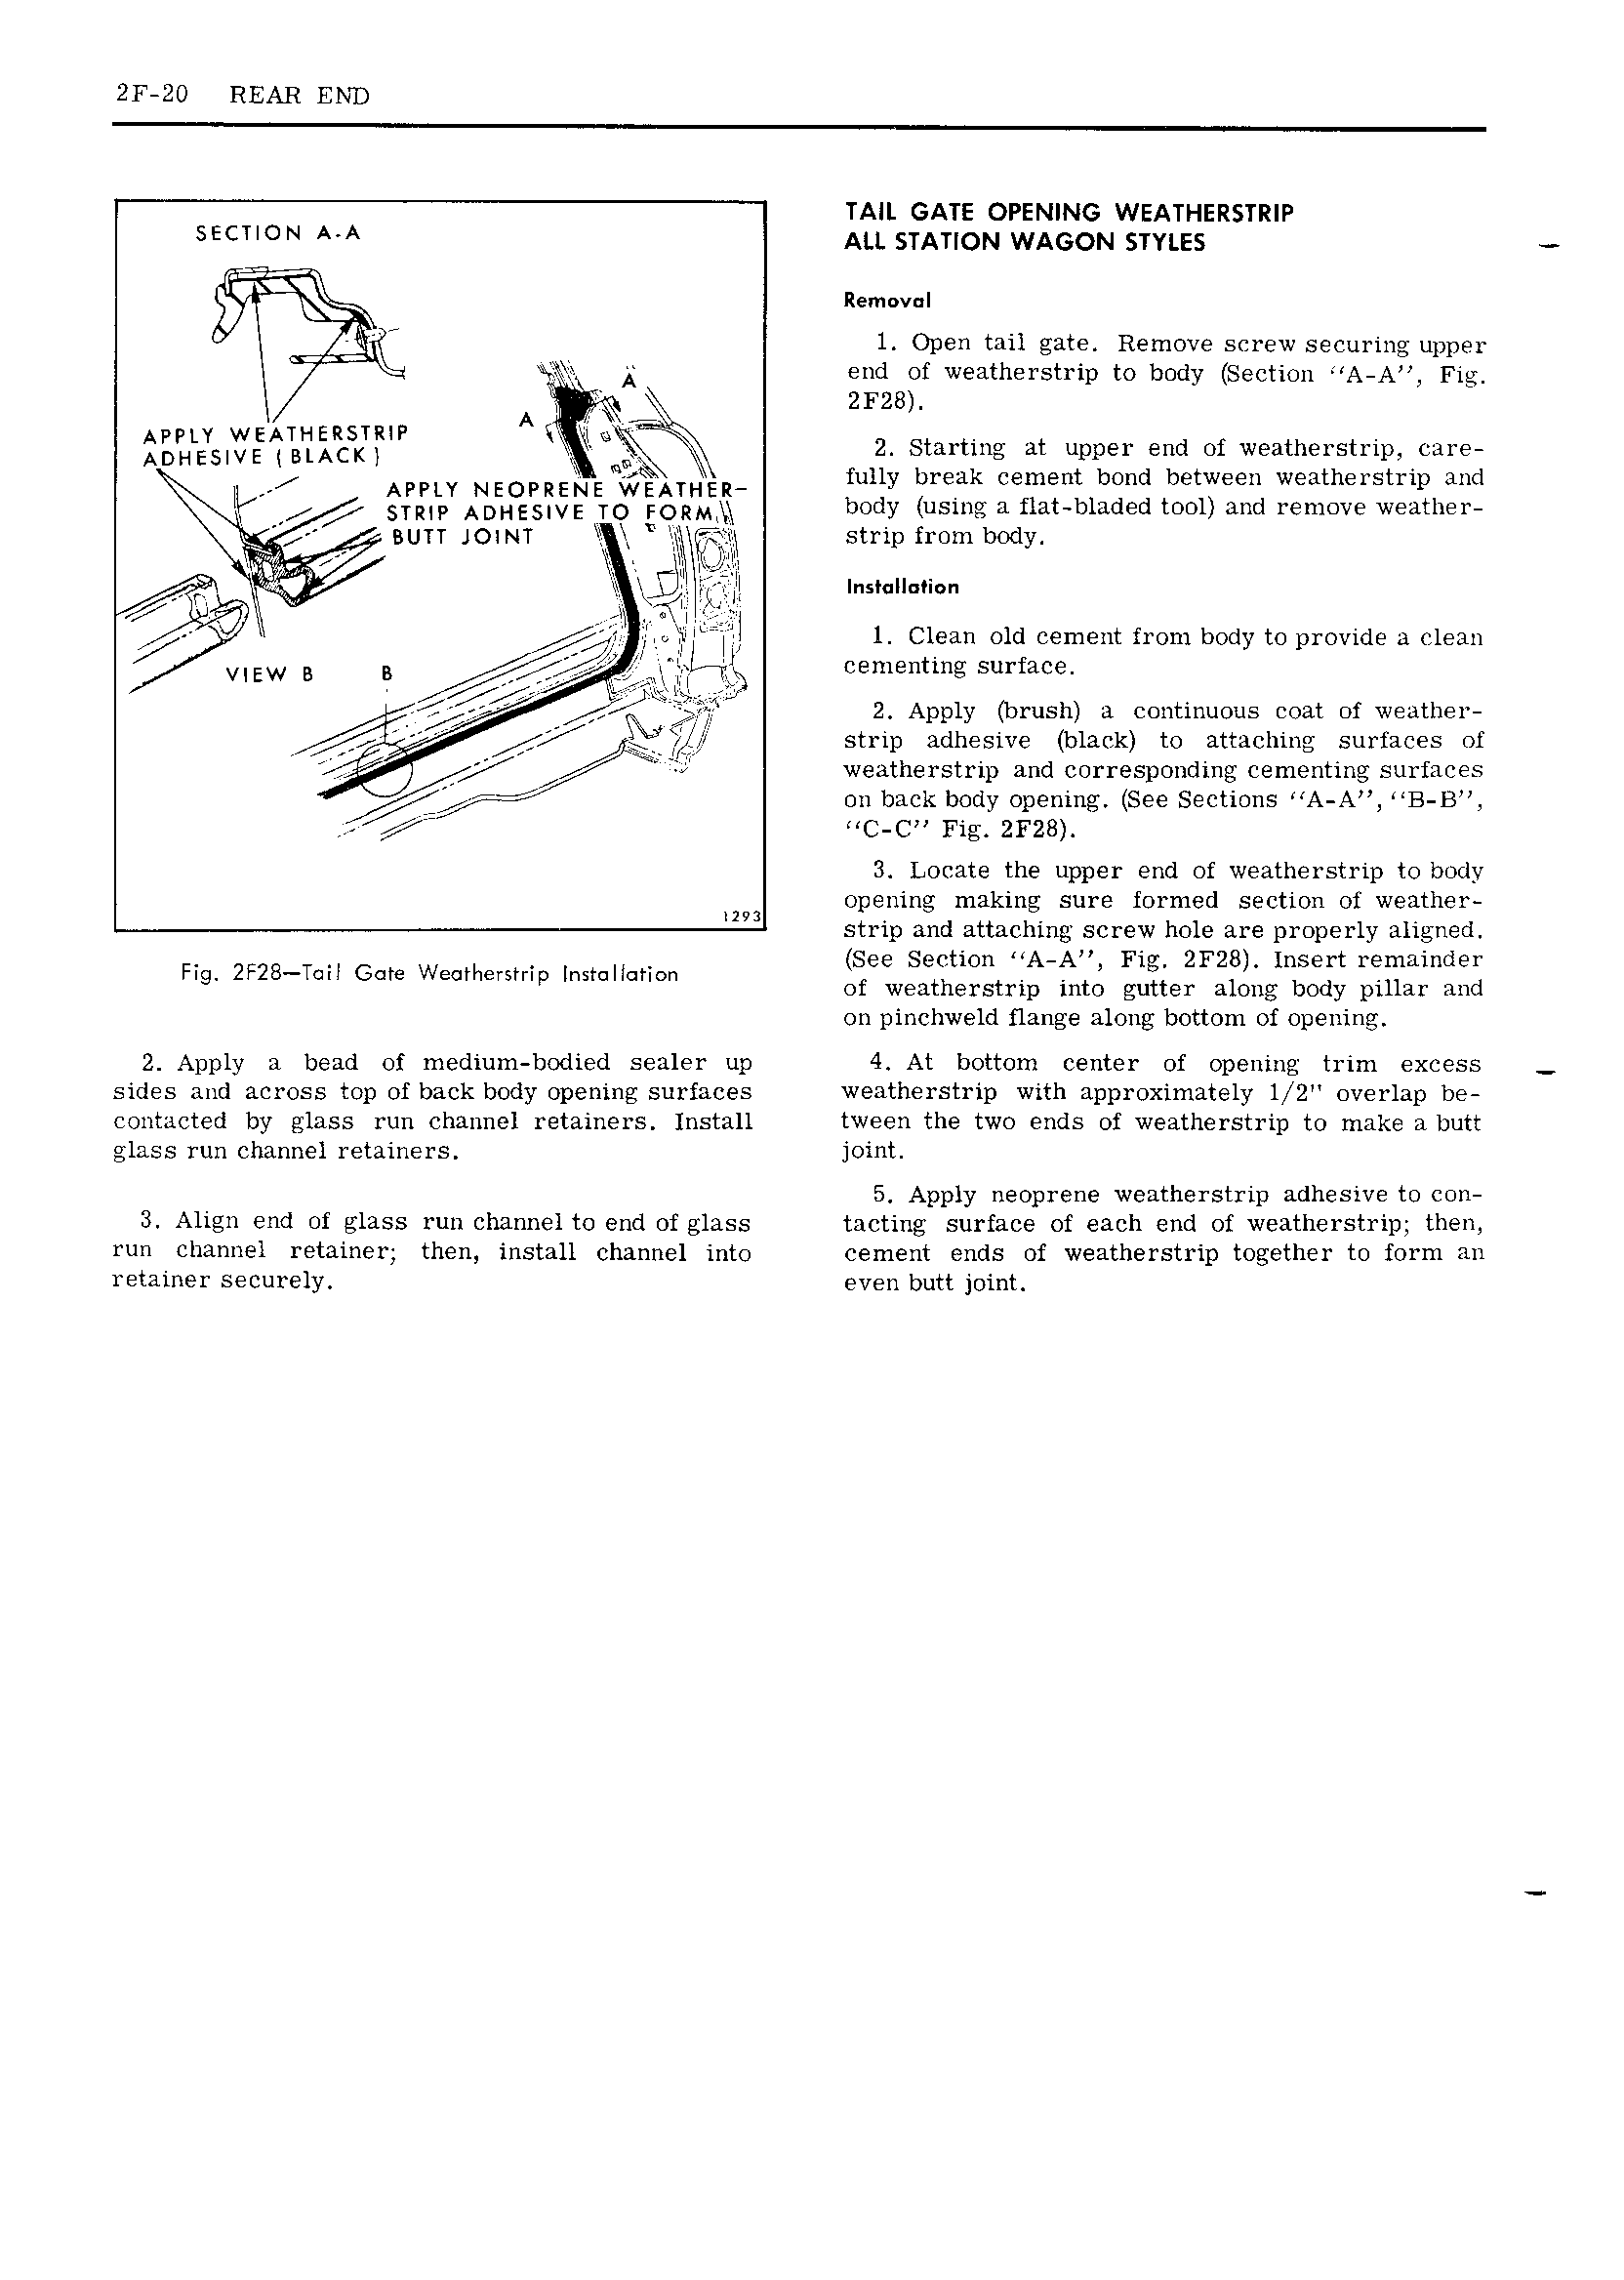
2F 20 REAR END TAIL GATE OPENING WEATHERSTRIP ECl N Au STATION wAcc N swiss Removal l Open tail gate Remove screw securing upper P y A gnc gof weatherstrip to body Section A A Fig LY WEATHERSTRIP Aki F 2 IESIVE BLACK V u 2 Staffing Ht upper end of weatherstrip care u APPLY NEOPRELE W TQER fully break cement bond between weatherstrip and X STRIP ADHESWE TO FORM body using a flat bladed tool and remove weather BUTT JOINT i strip from bocly 4 I I i 1t e ra t wLi i Y yvw M ii LH InsI II f n M r I mi I E jp nl l Clean old cement from body to provide a clean view B ii cenienting surface e ir J 2 A 1 1 1 0 t 1 u i I VT ip rusi a coninuous coa o xxea iei A l I LV ZY strip adhesive black to attaching surfaces of L1 7 weatherstrip and corresponding cementing surfaces j on back body opening See Sections A A B B 7 p C C Fig ZF28 3 Locate the upper end of weatherstrip to body ma opening making sure formed section of weather strip and attaching screw hole are properly aligned See Section A A Fig 2 F28 Insert remainder F 2F28 T I W Ig cl Gare emhersmp lnsmuuhon of weatherstrip into gutter along body pillar and on pinchweld flange along bottom of opening 2 Apply a bead of medium bodied sealer up 4 At bottom center of opening trim excess sides and across top of back body opening surfaces weatherstrip with approximately l 2 overlap be contacted by glass run channel retainers Install tween the two ends of weatherstrip to make a butt glass run channel retainers joint 5 Apply neoprene weatherstrip adhesive to con 3 Align end cf glass run channel to end of glass tacting surface of each end of weatherstrip then run channel retainer then install channel into cement ends of weatherstrip together to form an retainer securely even butt joint

 Next
Next