Jeep Parts Wiki | Ford Parts Wiki
Home | Search | Browse
|
Body Service Manual August 1964 |
|
Prev

 Next
Next
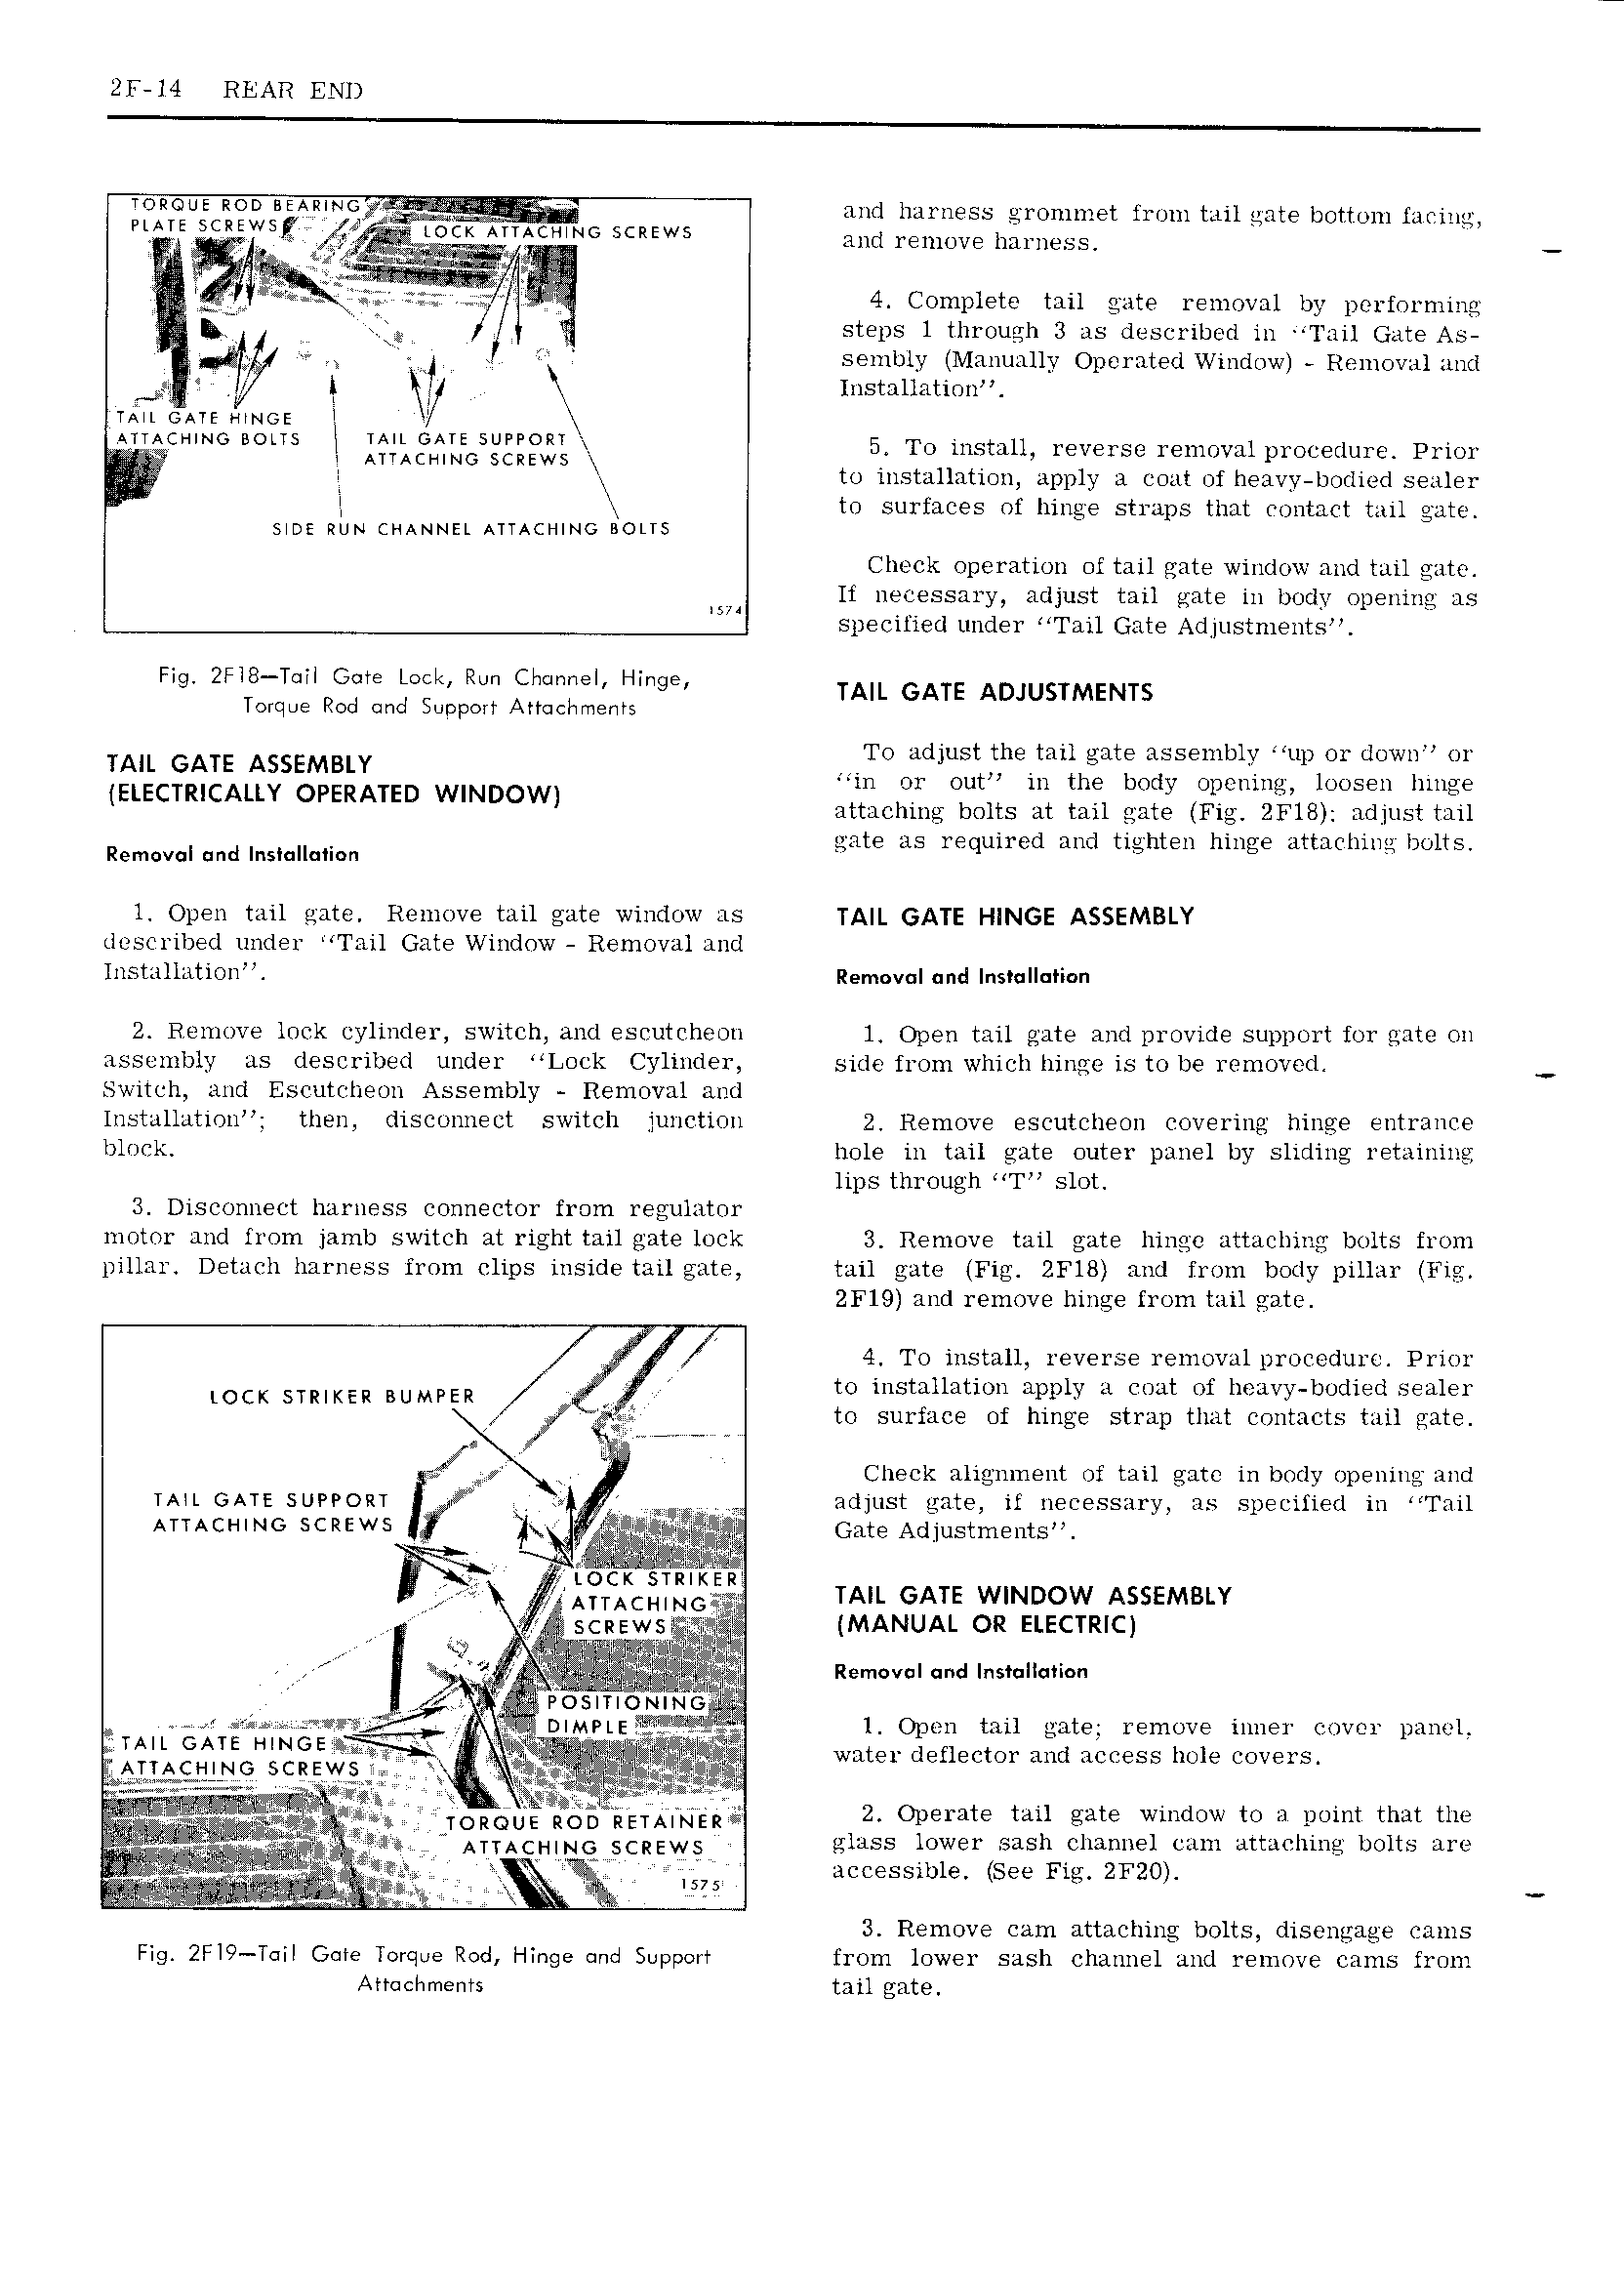
2F l4 REAR END tonous Ron nsA G T e t c and harness wcrommet from tail ate bottom f iciu F 5 t 2 2 2 z 1T r l News and remove images f IQ W 4 Complete tail gate removal by performing jj I steps l through 3 as described in l ail Gate As t I l sembly Manually Operated Window Removal and I No t Installation mn one Ponca I l l j C NG BOUS l L gI ILEG5g L KI 5A To install reverse removal procedure Prior I TI to installation apply a coat of heavy bodied sealer Y I lt to surfaces of hinge straps that contact tail gate sms Run cmnwzt uuctttmc nous Check operation of tail gate window and tail gate In lt necessary adjust tail gate in body opening J specified LlllCl l Tail Gate Adjustnients Fig 2Fl8 T il Gate Locl Run Channel Hinge TAIL GATE ADJUSTMENTS Torque Rod cmd Suppatt Attachments zi ttl tz lg t is llt l i WINDOW lll O ot JL 1t wi1iUtl e1 vtlyS l thiigl1pltjostefslIlnnge attaching bolts at tail gate Fig 2Fl8 adjust tail gate as required and tighten hinge attaching bolts Removal nd Installumm Y l Open tail gate Remove tail gate window as TA GATE HINGE ASSEMBLY described under Tail Gate Window Removal and lnstallationl Removal and Installation 2 Remove lock cylinder switch and escutcheon l Open tail gate and provide support for gate on assembly as described under Lock Cylinder side from which hinge to be removed Switch and Escutcheon Assembly Removal and lnstallation then disconnect switch junction 2 Remove escutcheon covering hinge entrance block hole in tail gate outer panel by sliding retaining lips through T slot 3 Disconnect harness connector from regulator motor and from jamb switch at right tail gate lock 3 Remove tail gate hinge attaching bolts from pill ar Detach harness from clips inside tail gate tail gate Fig 2Fl8 and from body pillar Fig 2Fl9 and remove hinge from tail gate j 4 To install reverse removal procedurc Prior LOCK STRIKER BUMPER l www to installation apply a coat of heavy bodied sealer to surface of hinge strap that contacts tail gate at r Check alignment of tail gate in body opening and TAlL GATE SUPPORT t adjust gate if necessary as specified in Tail ATT CH NG SCREWS I lx f l I t U tl f wl Gate Adjustments Mt W t t rw iL 1 t t t it B L K s K ATE w ow s Etvtstv AttAcHtt ac lAlL G lND A S Q T scnewst I I II MANUAL OR ELECTRIC tt tt tg I jsitI I I Is I Removal and Installation f fg Postttonttiii frtit t j QlMPLE l l Open tail gate remove inner cover panel II TAIL GATE LHNGE t f l tt l water deflector and access hole covers ATT4 t tj NG sckzws II tI I yy trite t W r MII Q TORQUE ROD RETAINER Z Opeiate tail gate window to a point that thc gte g tg ATTACHING SCREWS glass lower sash channel cam attaching bolts are Hit t vjj S Fay gpvgj v 4 I IM mj V III I575 accessiy e ee ig T2 t t t l t 3 Remove cam attaching bolts disengage cams Fig 2Fl9 Tail Gate Torque Rod Hinge and Support from lower sash channel and remove cams from Attachments tail gate

 Next
Next