Jeep Parts Wiki | Ford Parts Wiki
Home | Search | Browse
|
Body Service Manual August 1964 |
|
Prev

 Next
Next
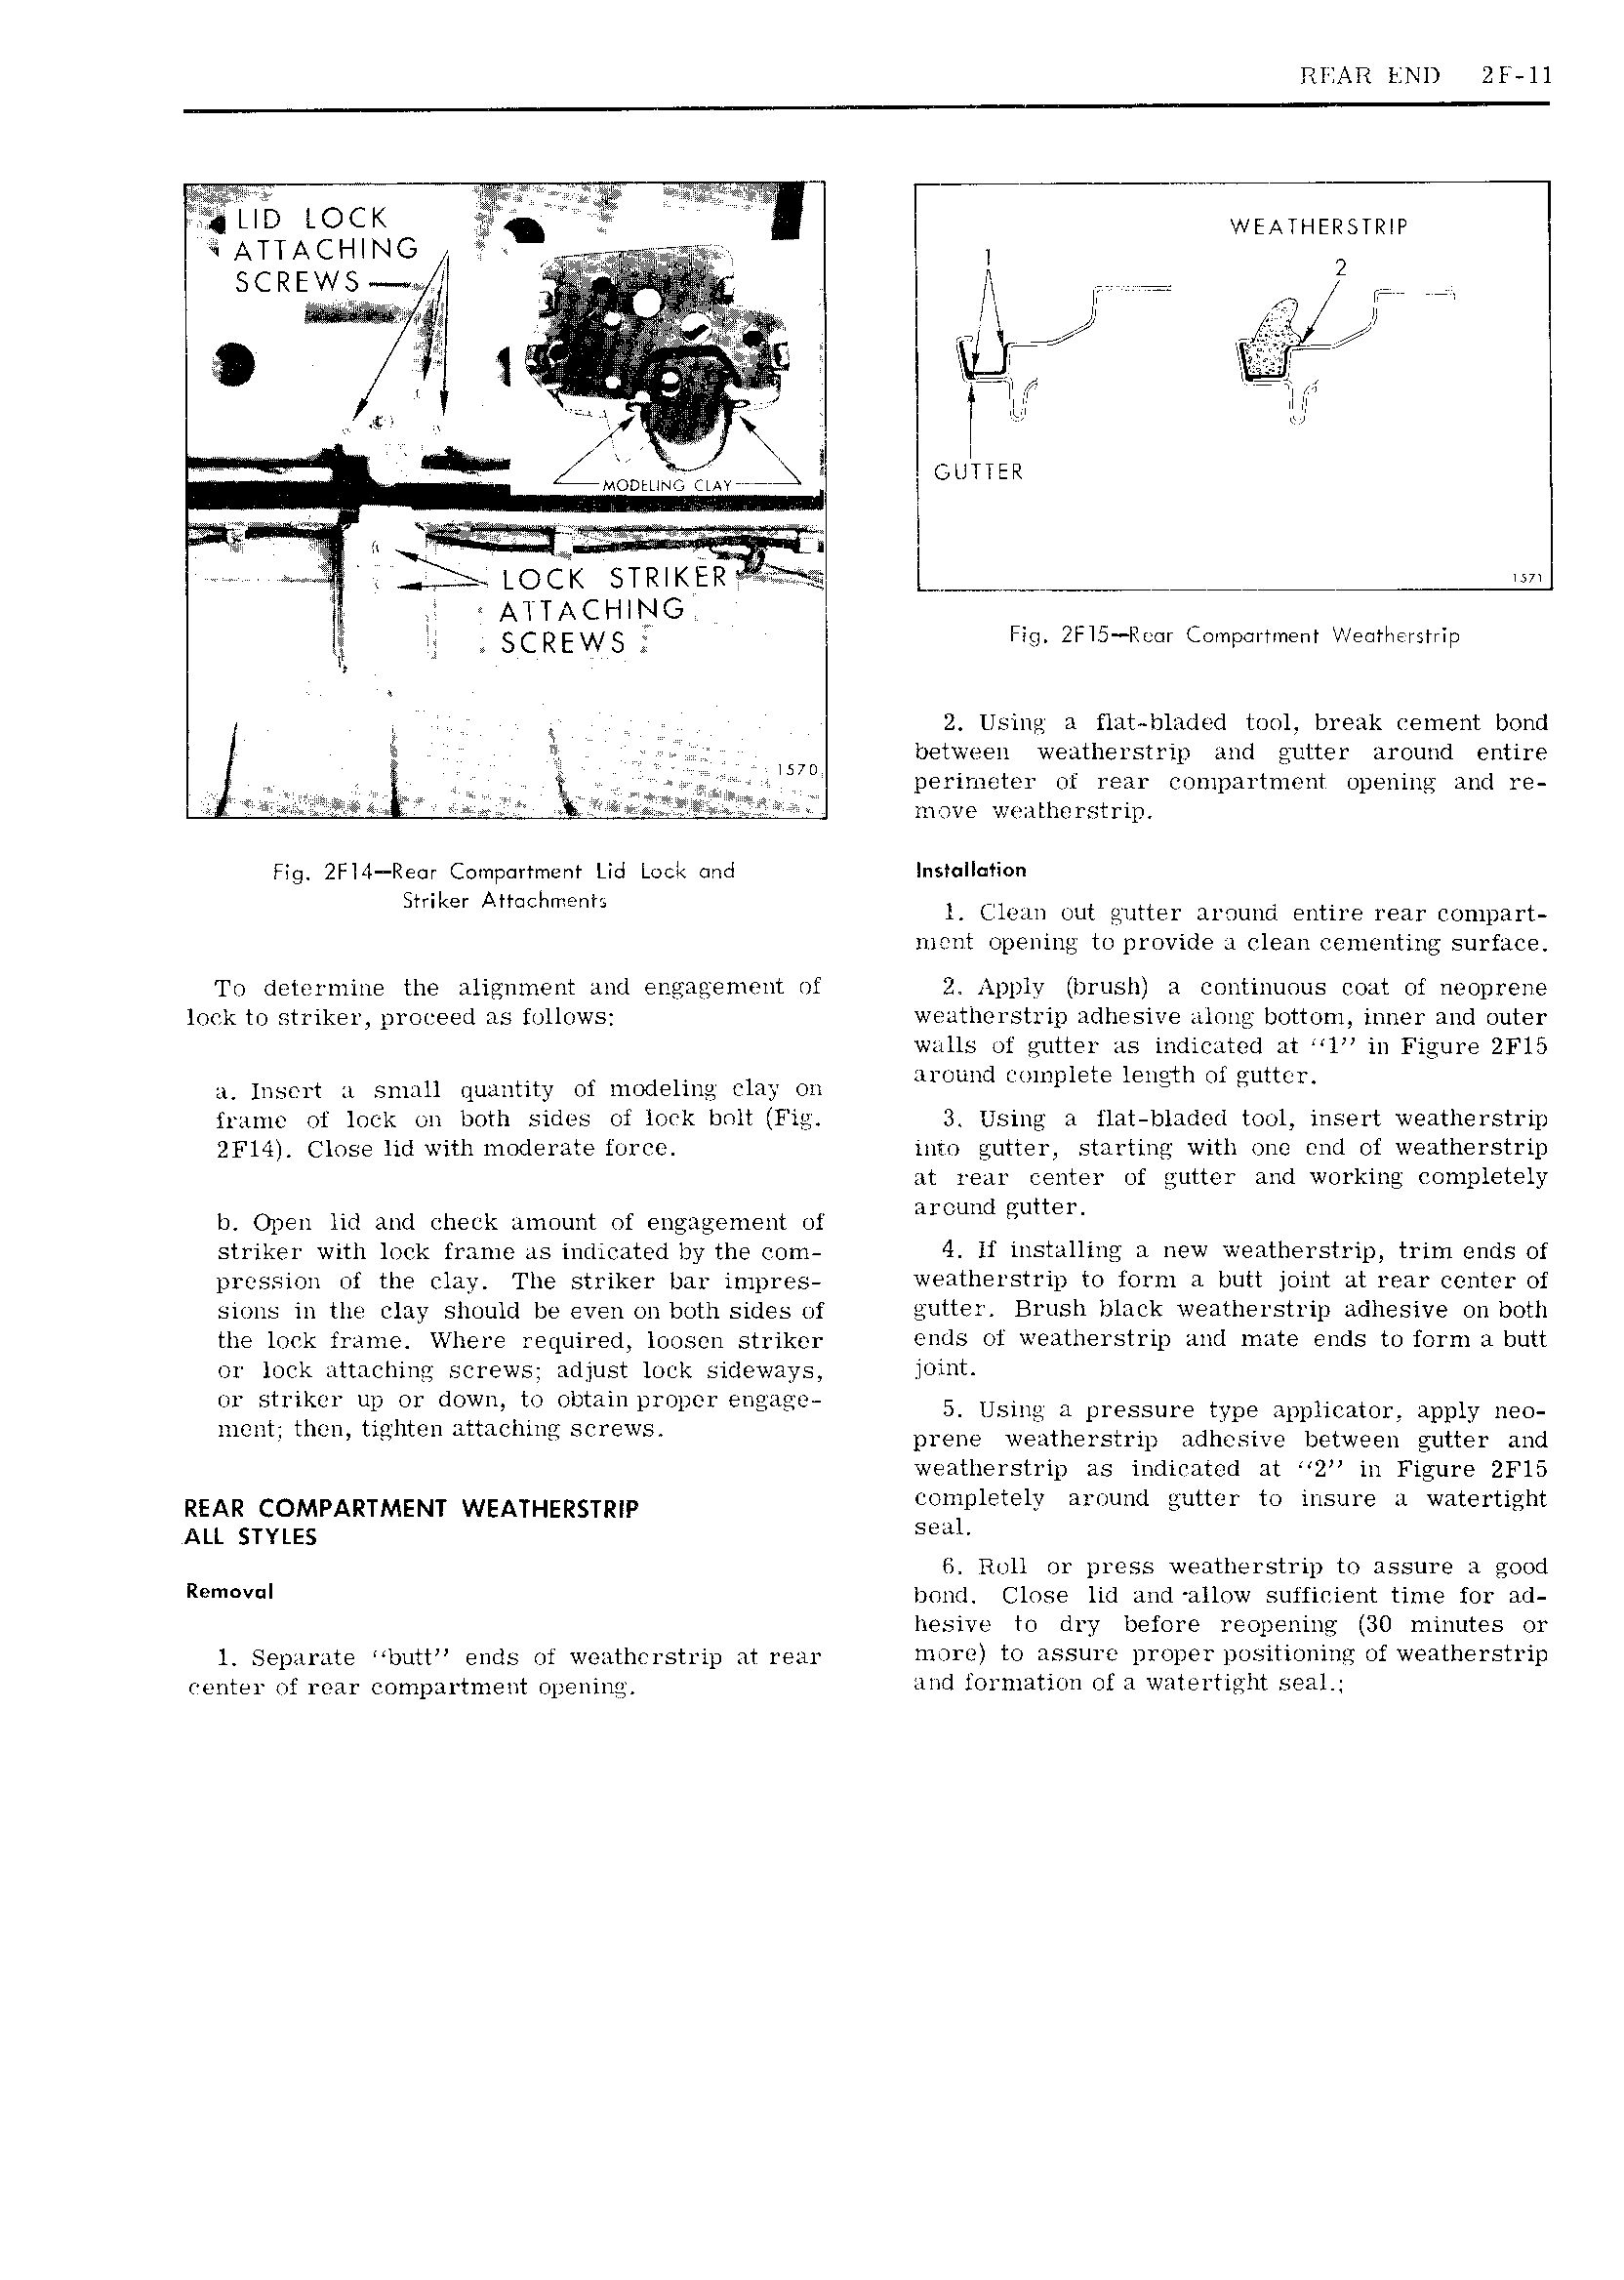
REAR END 2F ll QUD tOCK wvemnewsrranp ATTACHING r V s YiF r r t I 2 i W i r t j V il CREN J ELT I i it at i ire I 2 7 i U i 3 J l i tl P v elibai s I 1 i s J i ig i My ti 4 ll ia a l I l M0i u4 s t r r i Jt ER 4 l i 1 i A LOCK STRIKE i s t iw t A YTACHING i 4 SCREVVS Fiq 2Fl5 Re r Cmnpartment Wemttweratrip ii 2 Using u flat hlnded tool break eement bnnd between weutherstrip and gutter around entire it 5 U perimeter nt rem nnpnrtm nt opening and re i i is move wmitliorstrip Fig 2Fl4 Rear Compartment Lid Lock and Installation Striker Attachment 4 1 l tlean out guttei aruune entrre rear compart ment opening to provide 1 clean eementing surface To determine the alignment and EllQf3D E 1 l F l t of Apply brush 3 continuous rout ot neoprene lock to striker proreed ns follows weutherstrip adhesive along bottom inner and outer wzills of gutter as indieuted ut l in Figure 2F15 n Insert xi small quuntity of modeling clay on Awuml Kmluplem length Oi guttm r um of lock on beth sides of 1 k belt Fig Using in ilat blnded tool insert weutherstrip 2Fl4 Close lid with moderate force inm gutter starting with one end of weatherstrip nt rear center of gutter and working completely Y fit h Open lid and check amount ot engagement of xuum Lu H striker with loek trmne dSil l tlPL1tE llJyifhE com 4 li installing a new wentherstrip trim ends 0f pression of the clay The striker bur impres wedtherstrip to form 1 butt joint at rear center of sions in the Clay should be even on both sides of gutter Brush black weutherstrip adhesive on both the lock frame Where required loosen striker ends ot weatherstrip and mute ends to form s hutt or lock tittnehinsx screws adjust lock sideways joint or sterikur upvlor down itvorohtn 111proper engage 5 Using A p1 QSSm time 3Pph mO1 apply u O m m Hm mg mm AHM Img U w prene weutherstrip ndhesive between gutter and wentherstrip as indieated at 2 in Figure 2Fl5 REAR COMPARTMENT WEATHERSTRIP completely around gutter to insure il watertight ALL STYLES SH1 6 3 Roll or press weatherstrip to assure A good R m V bond Close lid 1nd 1llow sufficient time for nd hesive to dry before reopening 30 minutes or l Sepnrate butt ends of wezitherstrip at rear iiioria to assure proper positionini of weatherstrip renter of rear compartment opening Mid Y 1 1l Ti J ef H li Y 1 YitYhi SGH 2

 Next
Next