Jeep Parts Wiki | Ford Parts Wiki
Home | Search | Browse
|
Body Service Manual August 1964 |
|
Prev
 Next
Next
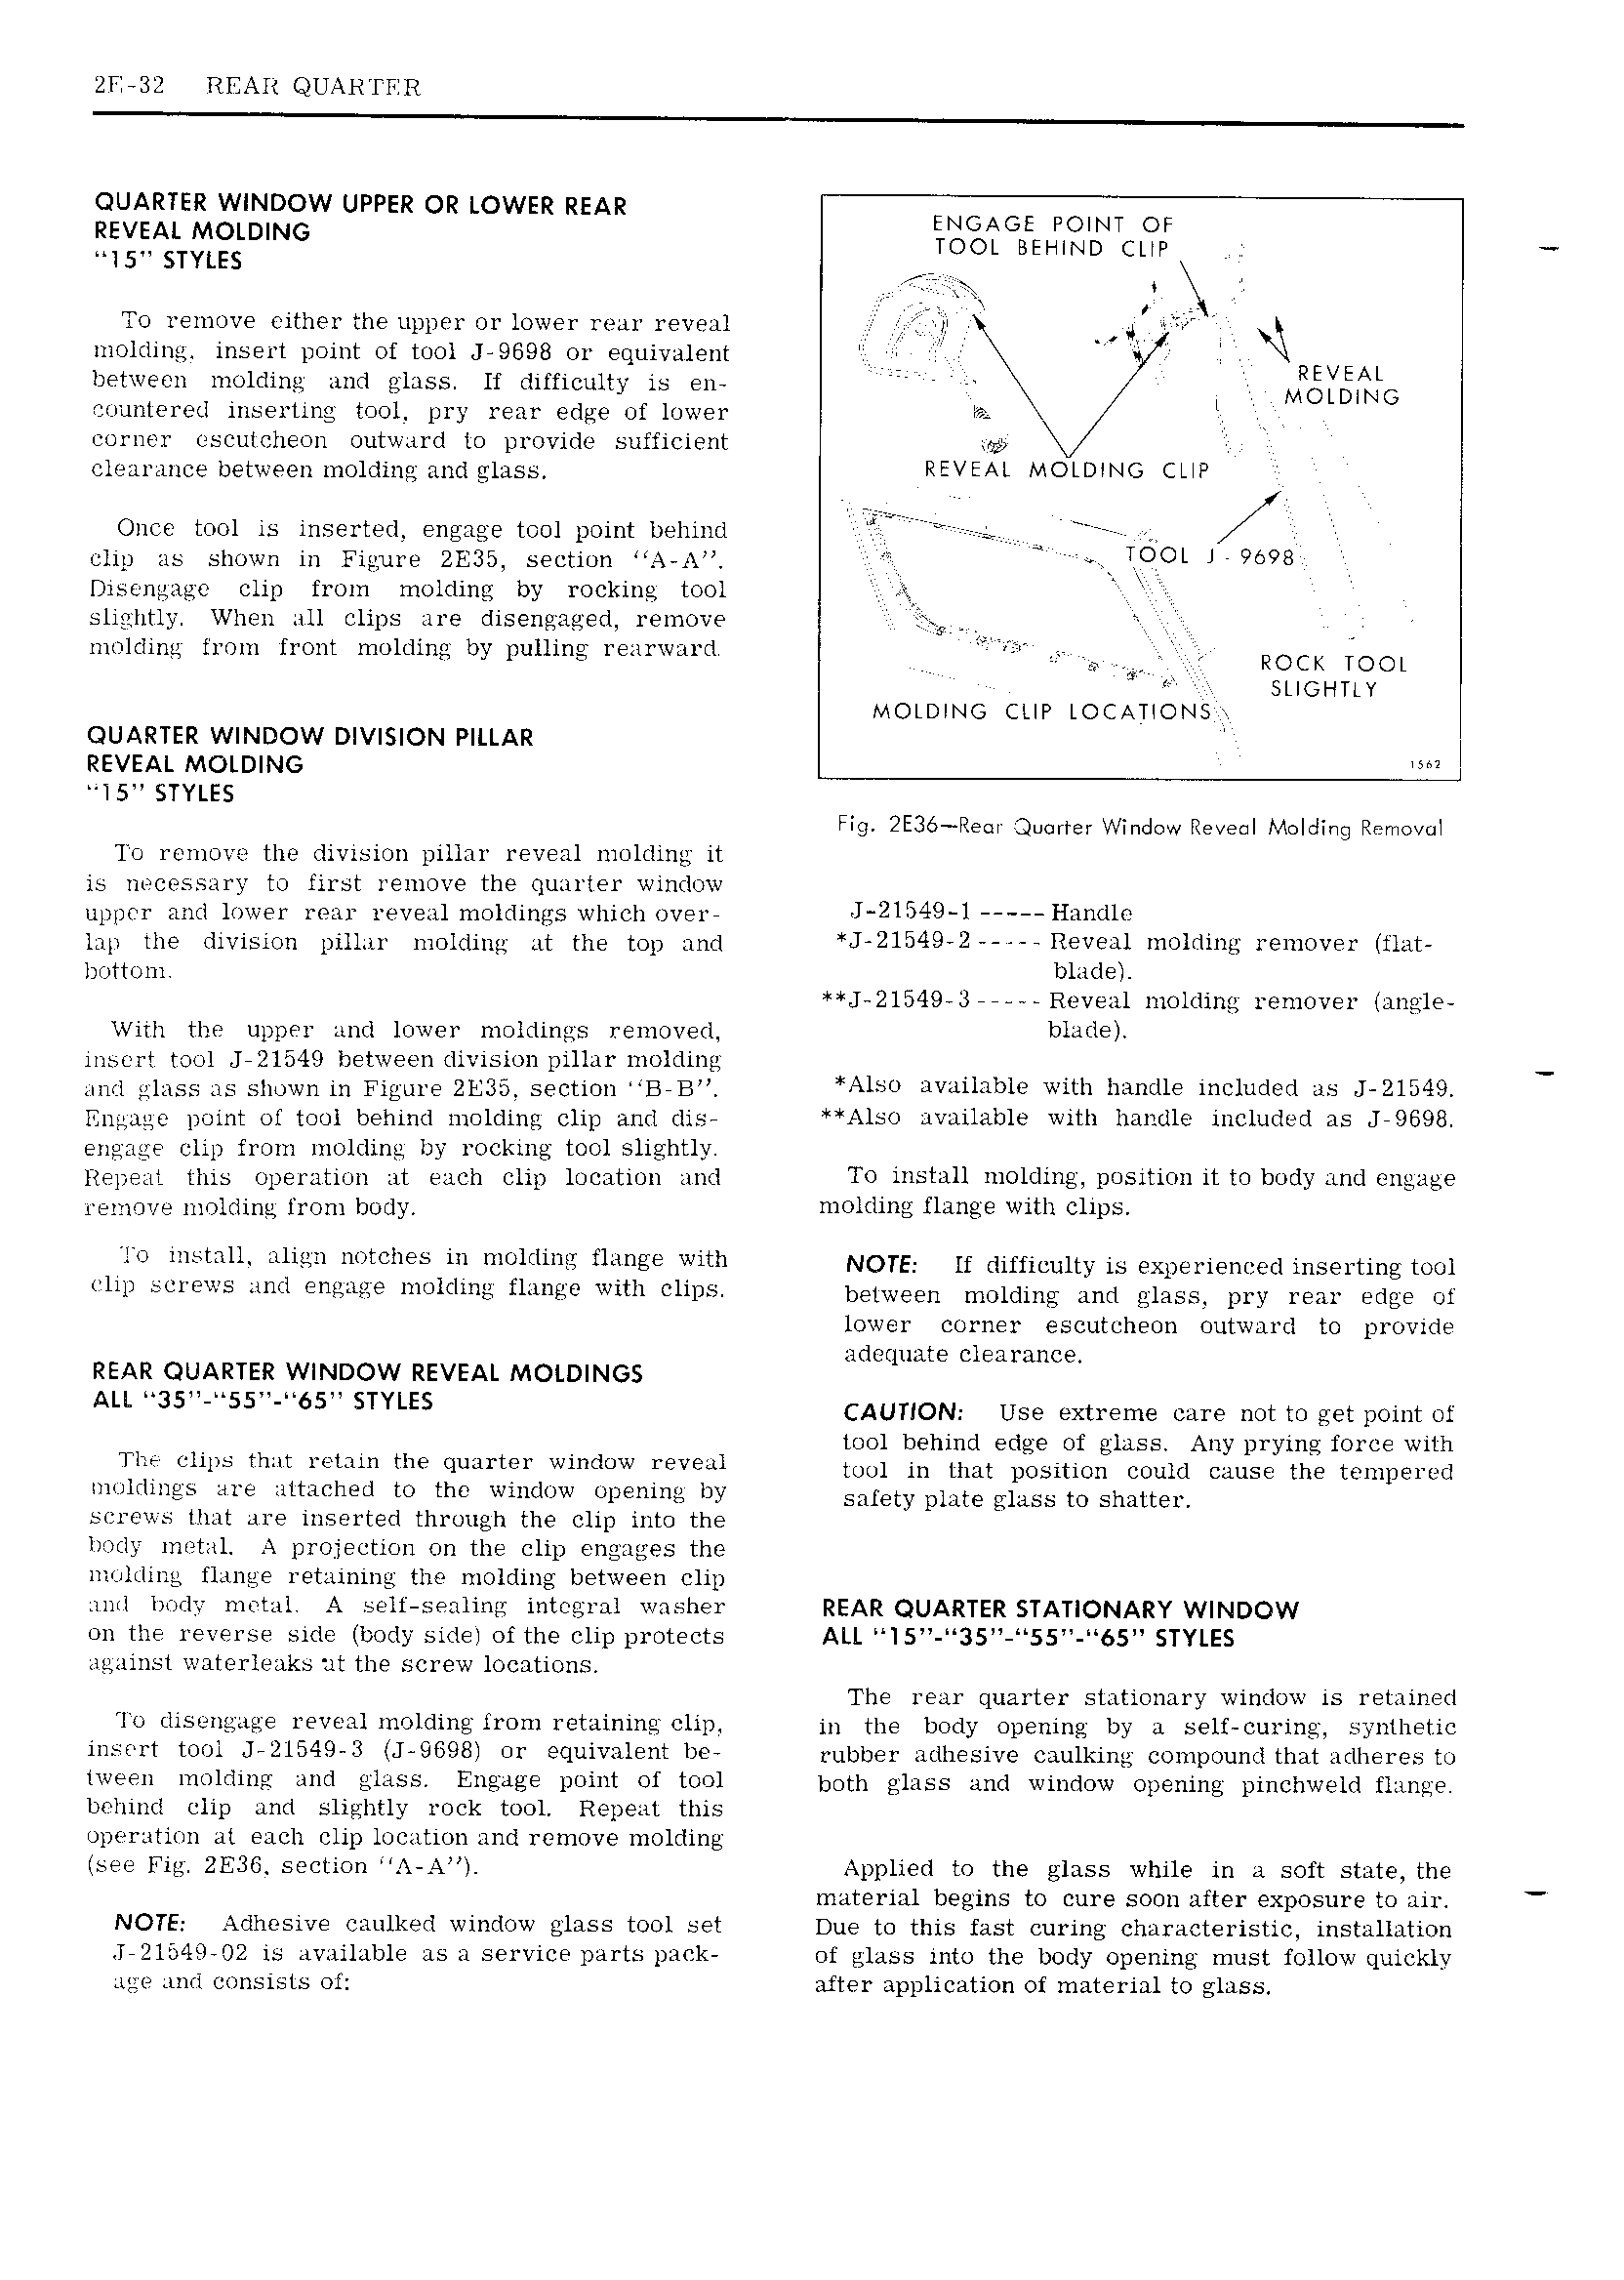
ZFFBE REAR QU R l RR QUARTER WINDOW UPPER E OR LOW R REAR ENGAGE POINT OF REVEAL MOLDING TOOL BEHIND CLTP l5 STYLES t To remove either the upper or lower rear reveal hir I Q molding insert point of tool J 9698 or equivalent L REVEAL between molding and glass lf difficulty is E 1l r MOLDING countered inserting tool pry rear edge ot lower li corner escutcheon outward to provide sufficient no V clearance between molding and glass REVEAL MOLDING CLIP Once tool is inserted engage tool point behind VV rrrrr e J VVVVV clip as shown in Figure ZE35 section A A TOOL 9698 Disengage clip from molding by rocking tool slightly When all clips are disengaged remove 5 4 molding from front molding by pulling rearward V f L T ROCK TOOL SLIGHTLV MOLDING CLIP LOCATIONS QUARTER WINDOW DIVISION PILLAR T REVEAL MOLDING I 5 STYLES Fig 2E36 Re r Quarter Window Ret e Molding Removal To remove the division pillar reveal molding it is necessary to first remove the quarter window upper and lower rear reveal moldings which overe J 2l549 l Handle lap the division pillar molding at the top and J 2l549 2 Reveal molding remover flat bott ni blade I 21549 3 Reveal molding remover angle With the upper and lower moldings removed blade insert tool J 2l5 19 between division pillar molding m i glass JS Shown m Figmn gE35 Sgntjqn 3oB Also available with handle included as J 21549 Engage point of tool behind molding Clip and dis Also available with handle included as 9698 engage clip from molding by rocking tool slightly Repeat tlus operation at each clip location and To install molding position it to body and engage remove molding from body molding flange with clips To install align notches in molding flange with NOTE if difficulty is sxpgyielmed inserting mo vlip screws and engage molding flange with clips between molding And g1BSS pry way Eggs Og lower corner escutcheon outward to provide adequate clearance REAR QUARTER WINDOW REVEAL MOLDINGS ALL U35 I u55 65u STYLES CAUTION Use extreme care not to get point of tool behind edge of glass Any prying force with The clips that retain the quarter window reveal wl in that position Could CAUSE the t mp 1 g d moldings are attached to the window opening by Safewpmte glass O Shmtem st i e s that are inserted through the clip into the Imilj metal A projection on the clip engages the molding flange retaining the molding between clip and liotiljs metal A self sealing integral washer REAR QUARTER STATIONARY WINDOW on the reverse side body sidew ofthe clip protects ALL I5 35 55 65 STYLES against waterleaks tit the screw locations The rear quarter stationary window is retained To disengage reveal molding from retaining clip in the body opening by a self curing synthetic i l t t 30l J l l549 3 J 9698l UF 9quiVHl l1t b rubber adhesive caulking compound that adheres to lW 1 1 Yl111E Mid glass Ellsdg Dvillt of H10 both glass and window opening pinchweld flange I F lund clip and slightly rock tool Repeat this operation at each clip location and remove molding see Fig ZE36 section A A Applied to the glass while in a soft state the material begins to cure soon after exposure to air NOTE Adhesive caulked window glass tool set Due to this fast curing characteristic installation T 2lE l9 O2 is available as a service parts pack of glass into the body opening must follow quickly age and consists oi Hier application of material to glass