Jeep Parts Wiki | Ford Parts Wiki
Home | Search | Browse | Marketplace | Messages | FAQ | Guest
|
Body Service Manual August 1964 |
|
Prev

 Next
Next
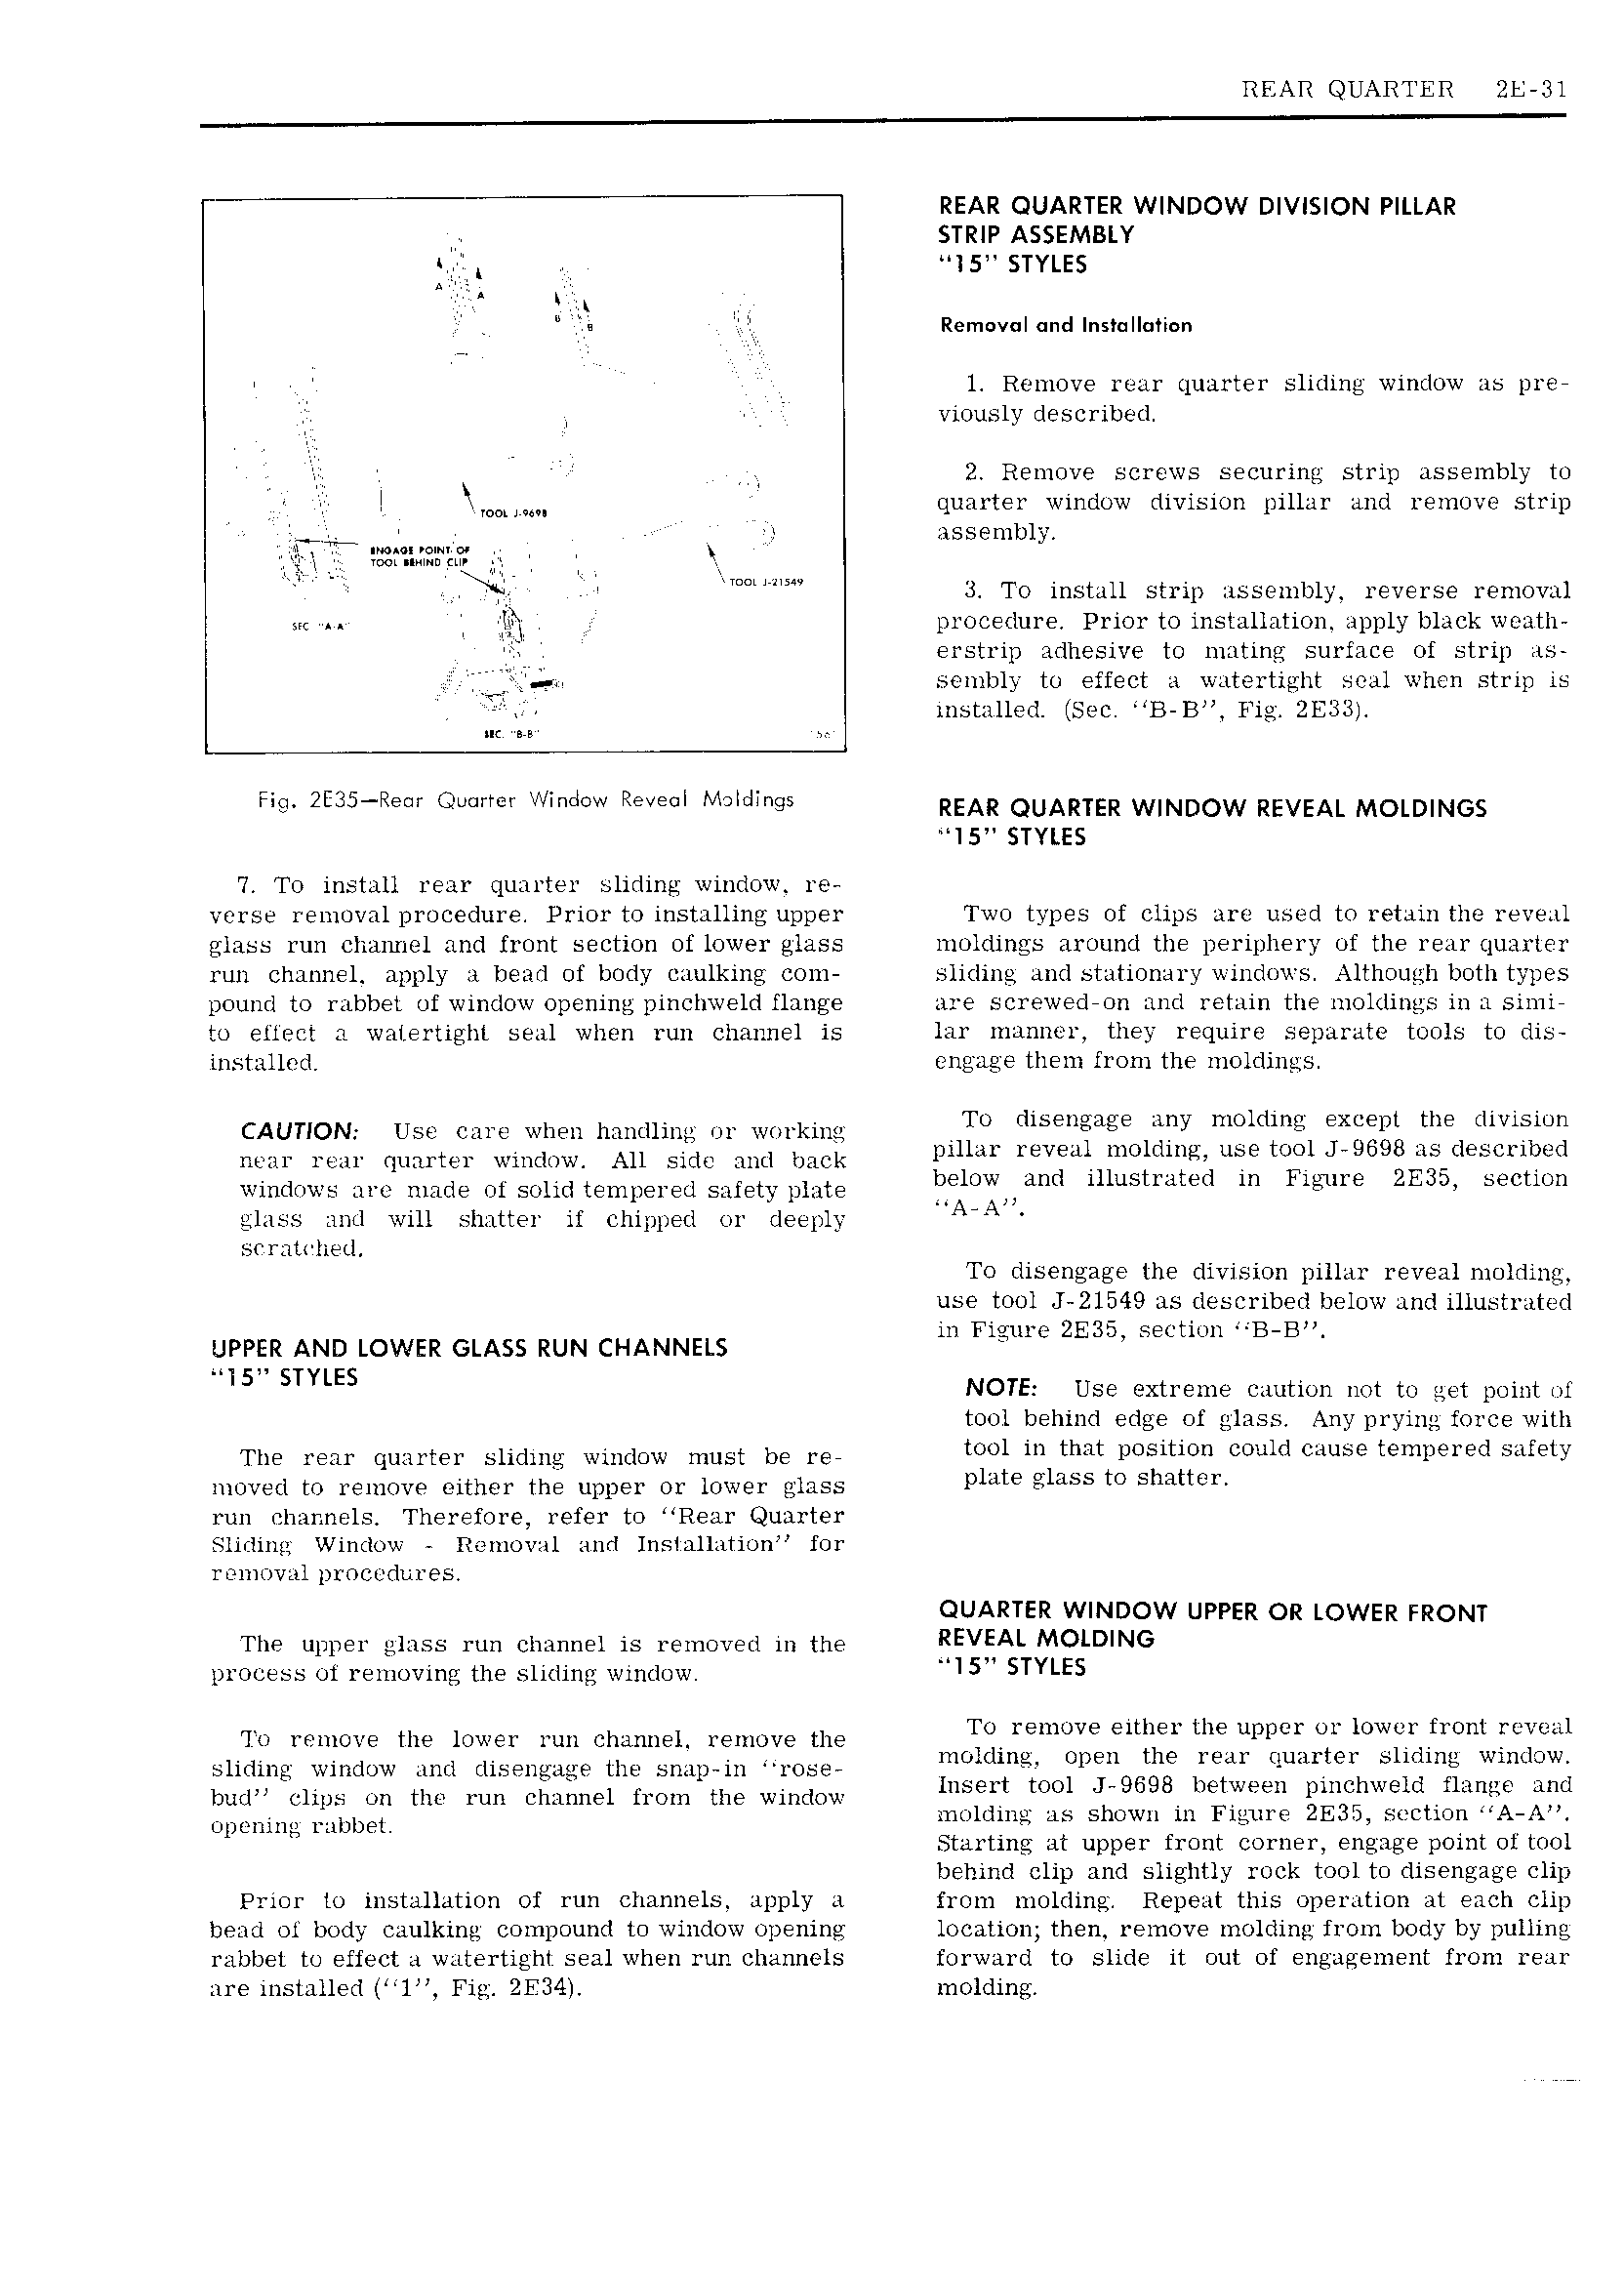
REAR QUARTER ZE 31 REAR QUARTER WINDOW DIVISION PILLAR STRIP ASSEMBLY nj A l 5 STYLES Rem v I and Ins1 II Ii 1 Remove rear quarter sliding window as pre y I viously described i I 4 2 Remove screws securing strip assembly to I y I mmm quarter window division pillar and remove strip i assembly Mt m y y t 3 T0 install strip assembly reverse removal we i procedures Prior to installation apply black weath erstrip adhesive to mating surface of strip Vl n sembly to effect a watertight seal when strip is T I installed Sec B B Fig Fin 2E35 Re r Quarter Window Reveal Iv JIcIIngs REAR QUARTER WINDOW REVEAL MOLDINGS l5 STYLES 7 To install rear quarter sliding window re verse removal procedure Prior to installing upper Two types of clips are used to retain the reveal glass run channel and front section of lower glass moldings around the periphery of the rear quarter run channel apply il bead of body caulking com sliding and stationary windows Although both types pound to rabbet of window opening pinchweld flange are screwed on and retain the moldings in a simi to effect a watertight seal when run channel is lar manner they require separate tools to dis installed engage them from the moldings CAUTION Use care when handling or working VTU diseugage SIW moldmg X j1 the CIIVITIUH iiii quarter nt so me tak ve e G 1J 9B S S windows are made of solid tempered safety plate I 1 j I Illustrated In hgure 2E3D SECUUH glass and will shatter if chipped or deeply AEA s rat hed To disengage the division pillar reveal molding use tool J 21549 as described below and illustrated in Figure ZE35 section B B UPPER AND LOWER GLASS RUN CHANNELS DISH STYLES NOTE Use extreme caution not to get point ol tool behind edge of glass Any prying force with The Nm quiwtel Shdmg wmduw must be FEV tool in that position could cause tempered safety moved to remove either the upper or lower glass plate glass tO SIMIIQD run channels Therefore refer to Rear Quarter Sliding Window Removal and Installation for removal procedures QUARTER WINDOW UPPER OR LOWER FRONT The upper glass run channel is removed in the REVEAL MOI DING process oi removing the sliding window MI SH STYLES 0 YQMOVE the IOWH mm Channel remove th To remove either the upper or lower front reveal V V V V molding open the rear quarter sliding window sliding window and disengage the bI i lp lll iose V VV V V V V bum dim Un tho um Clmmwl h Om the Window insert tool J 9698 between pinchweld flange and I raw 7 U Opcmmj mbbetl molding as shown pin Figure 2E3 i settion ATA Starting at upper front corner engage point ot tool behind clip and slightly rock tool to disengage clip Prior to installation of run channels apply a from molding Repeat this operation at each clip bead oi body caulking compound to window opening location then remove molding from body by pulling rabbet to effect a watertight seal when run channels forward to slide it out of engagement from rear are installed 1 Fig 2E34 molding

 Next
Next