Jeep Parts Wiki | Ford Parts Wiki
Home | Search | Browse | Marketplace | Messages | FAQ | Guest
|
Body Service Manual August 1964 |
|
Prev

 Next
Next
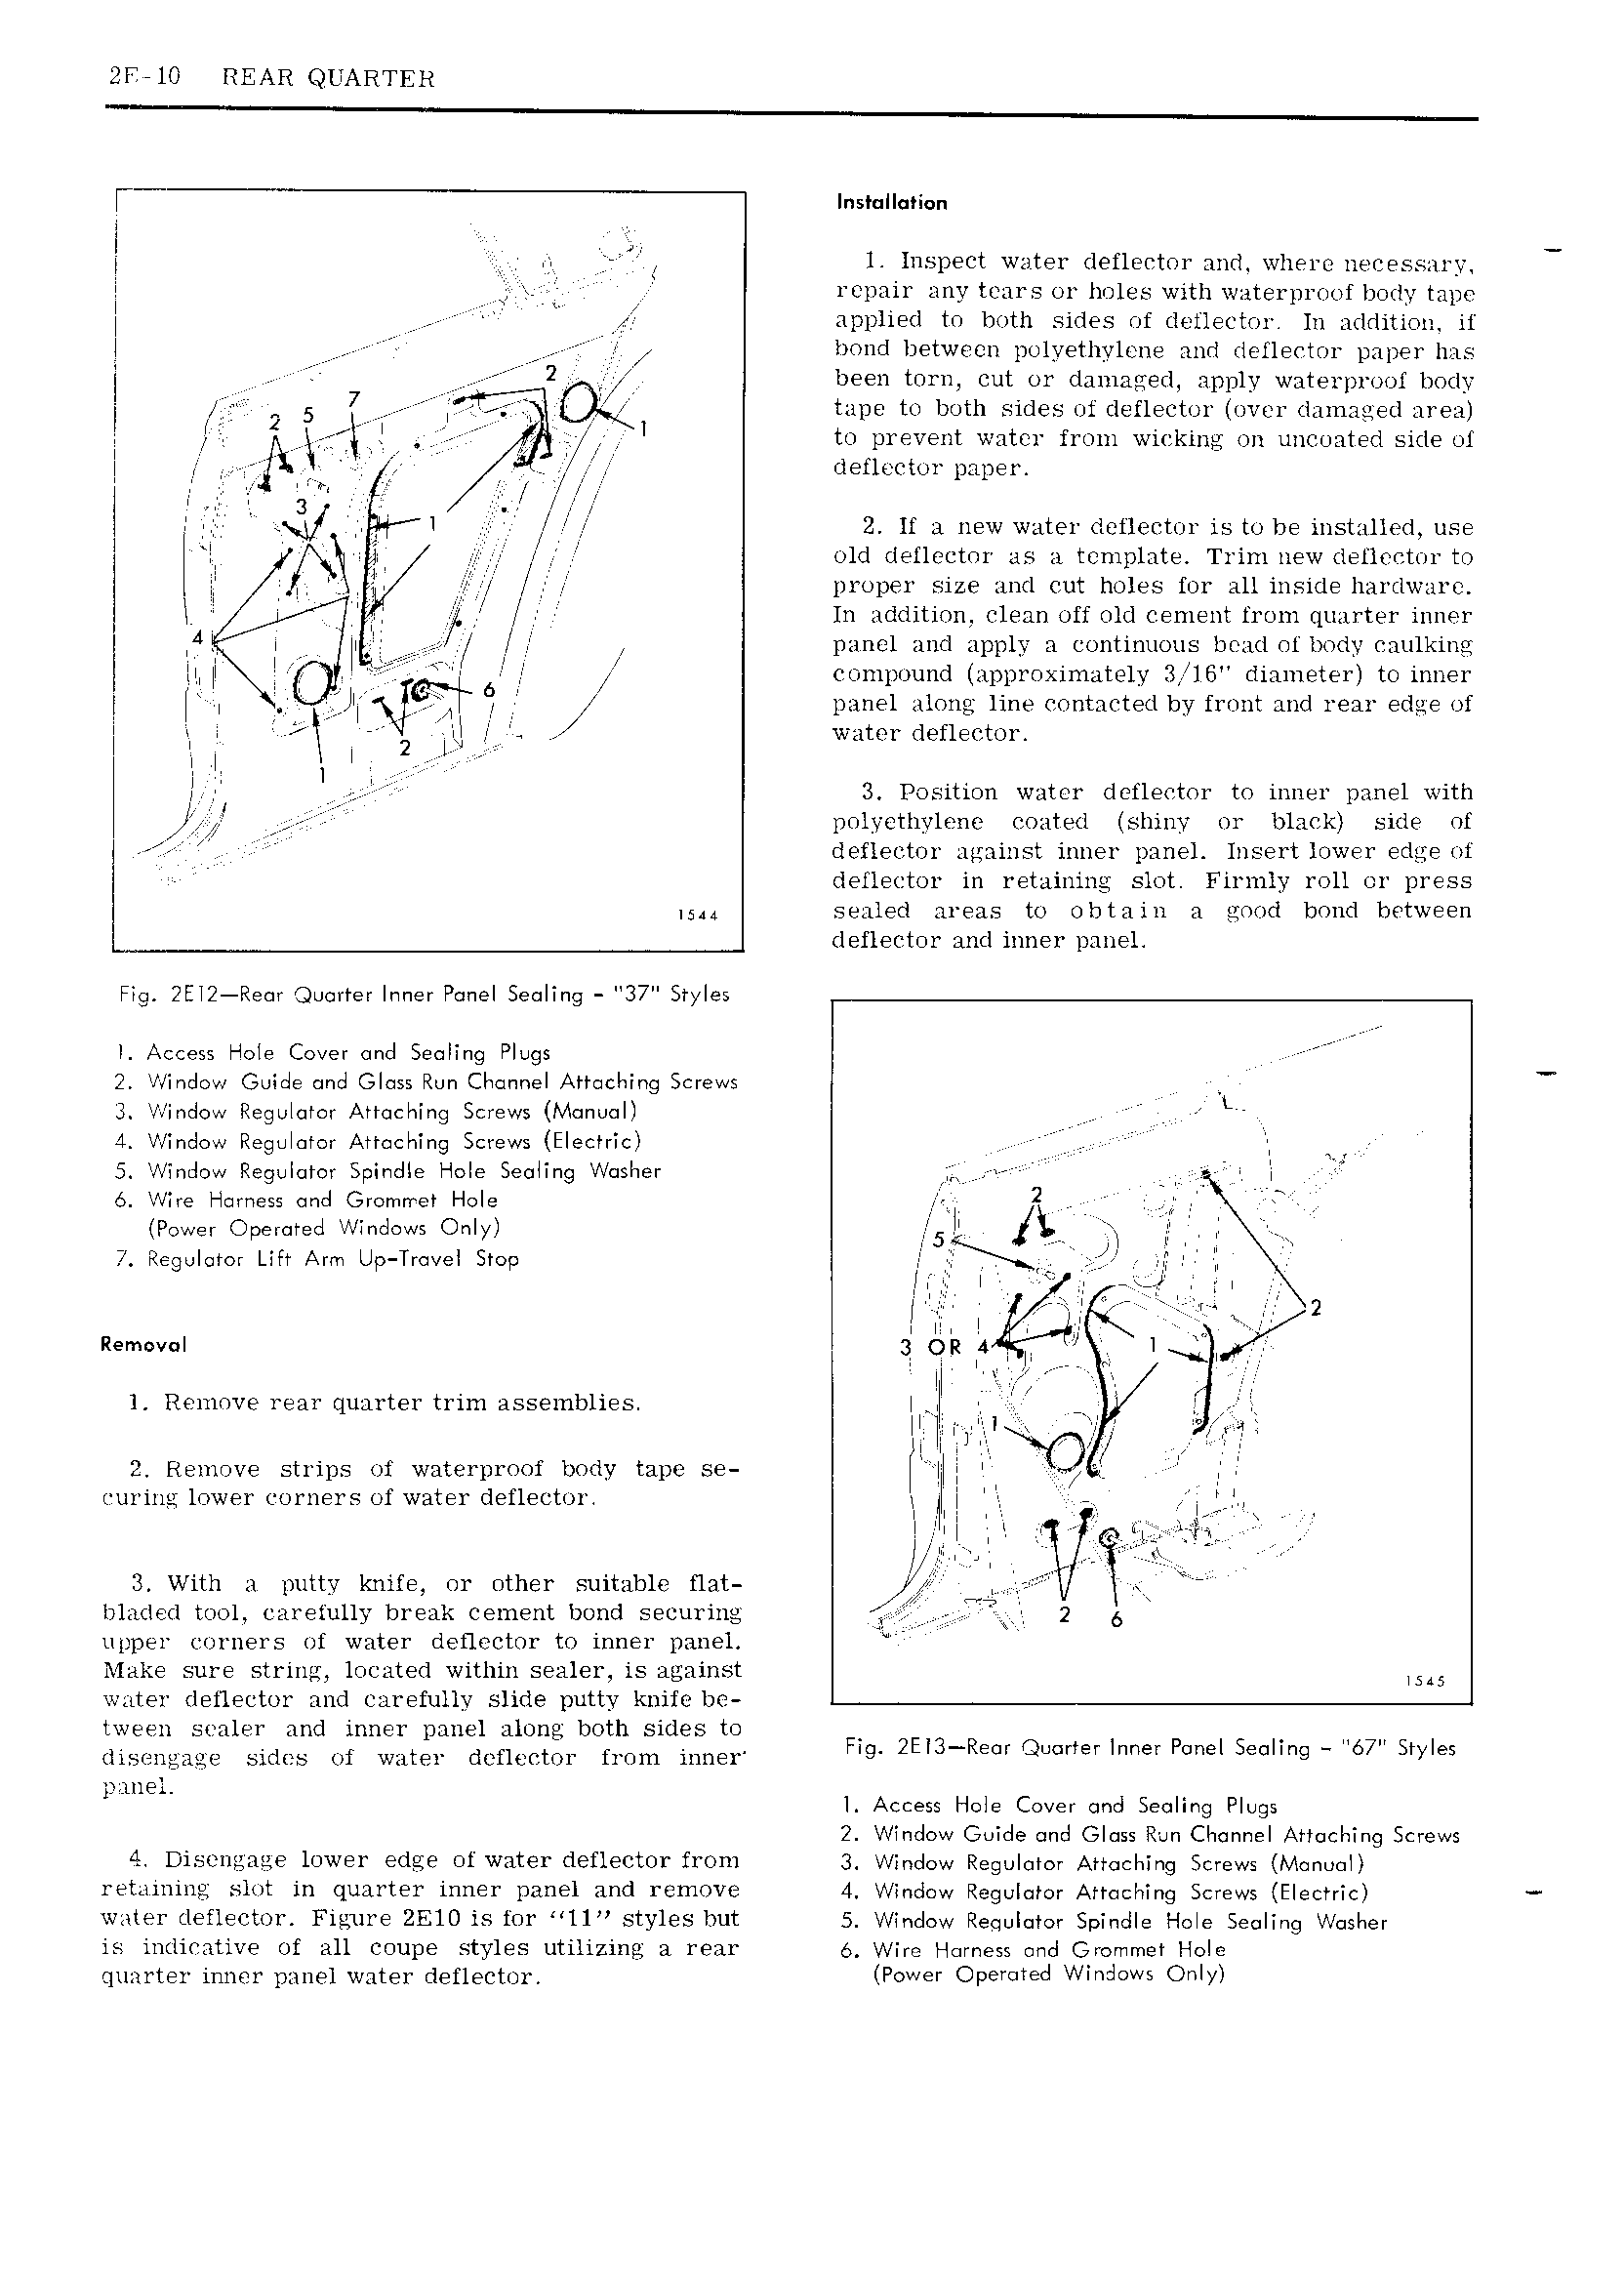
2F lO REAR QUARTER V tnstettenen I II II I l Inspect water deflector and where necessary I II I repair any tears or holes with waterpror f borly tape I applied to both sides of deflector In addition if I bond between polyethylene and rlellector paper has I 7 V I 2 been torn eut or damaged apply waterproof body I III 2 5 II I I II O I tape to both sides of deflector over damaged area I I I I to pretyent water from wicking on uncoated side ol I I I r I I def ec or paper I I 5IjI I II II I I 2 lf a new water deflector is to be installed use I I II I I III I I old defleetor as a template Trim new defleetor to I I III I I III II proper size and c utI holes for all inside liardware I I4 II II In addition clean oft old cement from quarter inner I I I II I I II I panel and apply a continuous bead ol body eaulkine I II Il I lII I 6 I I I Compound approximately 3IIlt3 diameter to inner I I I I llI II II I i panel along line contacted by front and rear edge of I II II I I 2 III I L water detleotor I I I I 3 Position water deflector to inner panel with I I polyethylene coated shiny or black side of I deflector against inner panel Insert lower edge nl dellector in retaining slot Firnily roll or press isii sealed areas to obtain a amid bond between deflector and inner panel Fig EEI2 Rear Quarter Inner Panel Sealing 37 Styles I Access I tale Cover and Sealing Plugs 2 Winclaw Guide and Glass Run Channel Attaching Screws I 3 Ir I indoI r Regulator Attaching Screws Manual Ln 4 Windewr Regulatar Attaching Screws Electric I 5 Window Regulator Spindle I tale Sealing Washer II I I I 6 Wire I Iarness and Grcmrret Hale 2 I Power Operated Windows Only II IZ I 7 Regulator Litr Arrn Up Travel Stop II I Ir I i Remaval l I II IIIIIIIJI t I l Remove rear quarter trim assemblies lI II II II I Ii I I II II III 2 Remove strips of waterproof body tape se II II I I II curing lower corners of water deflector I I I 7 II I I IIIQI II 6 iIe TIE I With a putty knife or other suitable flat Ia blacled tool carefully break cement bond securing QI IIT 2 6 upper corners of water deflector to inner panel I Make sure string located within sealer is against ISM water tletlector and carefully slide putty knife be tween sealer and inner panel along both sides to tlisengaae sides of water defleetor from inner F g 2EI3 R r QUGIISII Inner POIIEI Sealing II6 II Slyles piinel l Access Hole Cover and Sealing Plugs 2 Window Guide and Glass Run Channel Attaching Screws 4 Disengase lower edge of water deflector from 3 Window Regulator Attaching Screws Manual retaxnins slot in quarter inner panel and remove 4 Window Regulator Atraching Screws Electric water deflector Figure 2ElO is for l1 styles but 5 Window Requlatcr Spindle Hale Sealing Washer is indicative of all coupe styles utilizing a rear e Wire Harness and Grarnmet Hole quarter inner panel water defleetor POV BF OP l d Wllldcm O llYI

 Next
Next