Jeep Parts Wiki | Ford Parts Wiki
Home | Search | Browse
|
Body Service Manual August 1964 |
|
Prev

 Next
Next
4226000
4226000
4226000
4226000
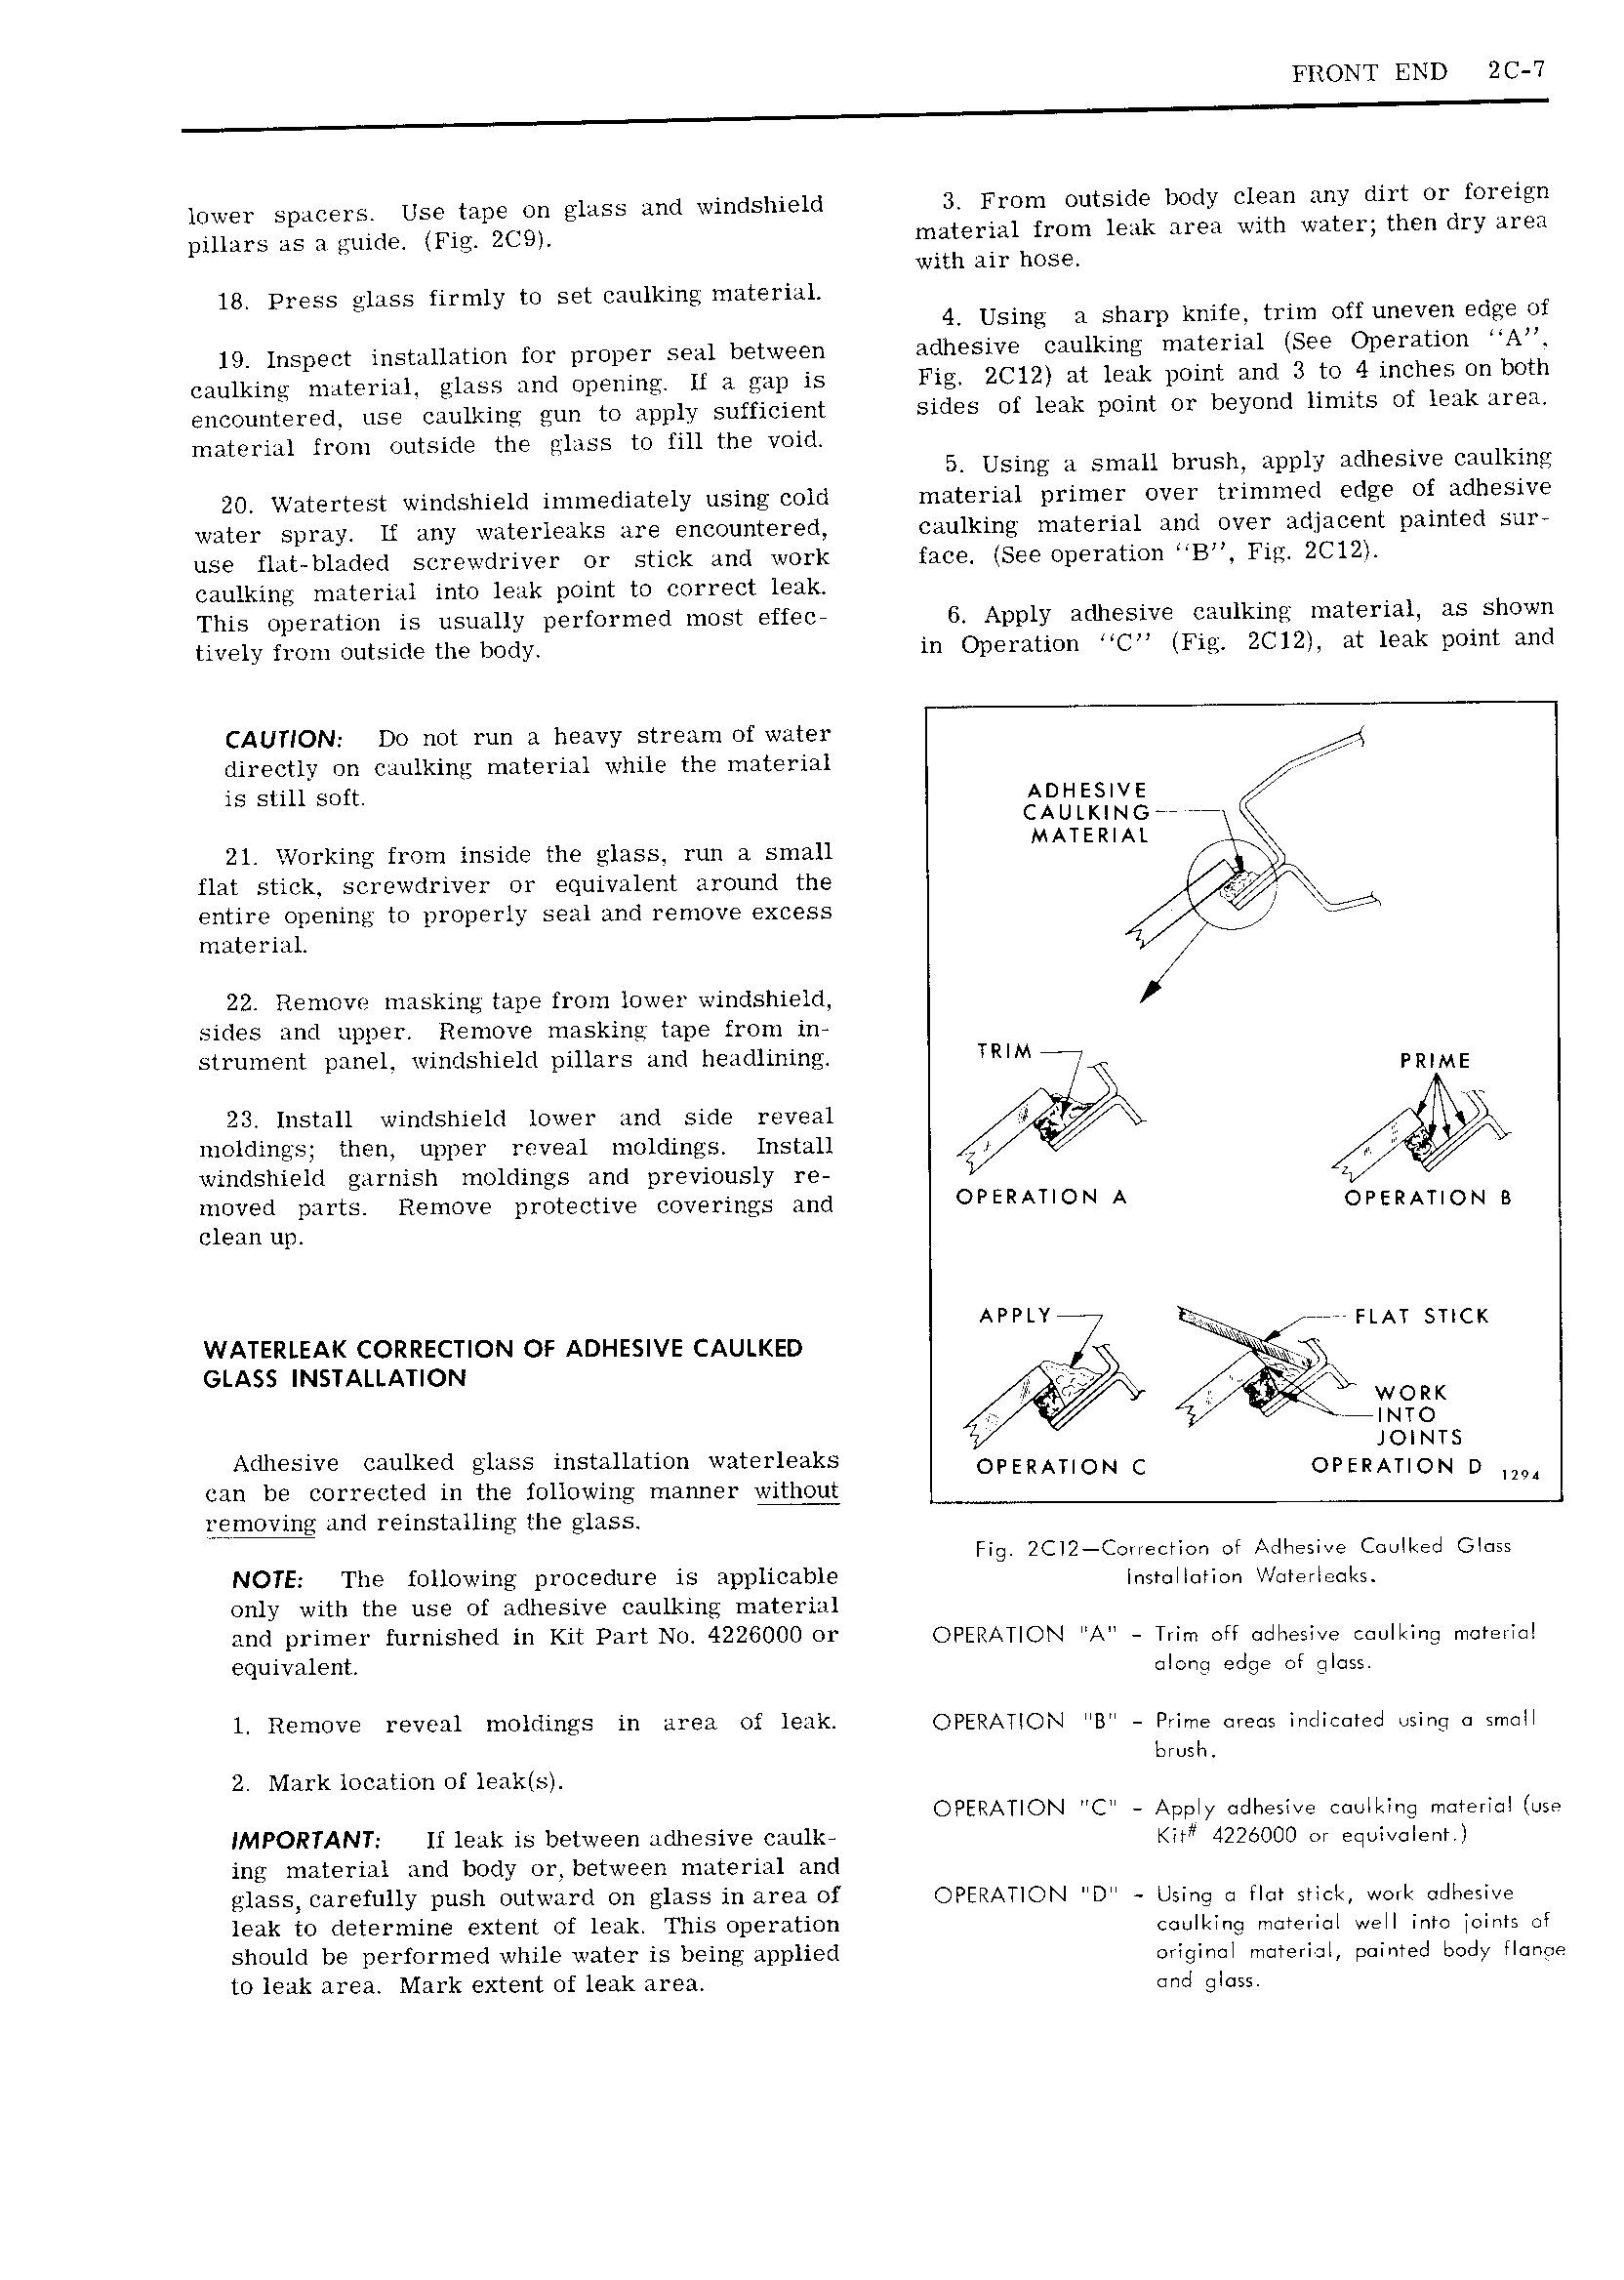
FRONT END ZC 7 lower spacers Use tape on glass and windshield 3 From outside body clean any dirt or foreign pillars as a guide Fig 2C9I material from leak area with water then dry area with air hose 18 Press glass firmly to set eaulking material 7 4 Using a sharp knife trim off uneven edge of 19 Inspect installation for proper seal between adhesive caulking material See Operation A caulking material glass and opening If a gap is Fig 2C12 at leak point and 3 to 4 inches on both encountered use caulking gun to apply sufficient sides of leak point or beyond limits of leak area material from outside the glass to fill the void 5 Using a small brush apply adhesive caulking 20 Watertest windshield immediately using cold material primer over trimmed edge of adhesive water spray if any waterleaks are encountered caulking material and over adjacent painted sur use flat bladed screwdriver or stick and work face See operation B Fig 2C12 l caulking material into leak point to correct leak This operation is usually performed most effec 6 Apply adhesive caulking material as shown tively from outside the body in Operation C Fig 2C12 at leak point and CAUTION Do not run a heavy stream of water directly on caulking material while the material lf is still soft ADHESIVE CAULK NG r W7 21 Working from inside the glass run a small MATERIAL flat stick screwdriver or equivalent around the K Q l entire opening to properly seal and remove excess material 2 22 Remove masking tape from lower windshield sides and upper Remove masking tape from in strument panel windshield pillars and headlining TRIM iq PMME 23 Install windshield lower and side reveal g V moldings then upper reveal moldings Install 54 I 4 7 windshield garnish moldings and previously re V L J moved parts Remove protective coverings and OPERATION A OPERATION B clean up APPLY PLAY sncx WATERLEAK CORRECTION OF ADHESIVE CAULKED Z GLASS INSTALLATION 1 i j WORK l ir NTO Adhesive caulked glass installation waterleaks JOINT5 OPERATION C OPERATION D can be corrected in the following manner without removing and reinstalling the glass Fig 2Cl2 Collection pt Atlliesive Cmilked Glass NOTE The following procedure is applicable I BIOIIGIIOH ll e I tS only with the use of adhesive caulking material and primer furnished in Kit Part No 4226000 or OPERATION A Tiim off odliesive cnoltinq mnreilnl equivalent alpnq edge ot glass 1 Remove reveal moldings in area of leak OPERATION B Prime meas lricIIr Ier I using sm II bmah 2 Mark location of leaklsl OPERATION C Apply adheslve coollning material use IMPORTANT If leak is between adhesive caulk I it 4226000 or eqoivalenrl ing material and body or between material and glass carefully push outward on glass in area of OPERATION D Using flpr stlclt walk citllwesive leak to determine extent of leak This operation equllzlng mmeiial Well inte palm of should be performed while water is being applied oilgiml material painted body flame to leak area Mark extent of leak area and glass

 Next
Next