Jeep Parts Wiki | Ford Parts Wiki
Home | Search | Browse
|
Body Service Manual August 1964 |
|
Prev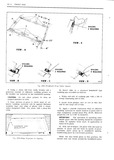
 Next
Next
4404196
4404196
4421823
4421823
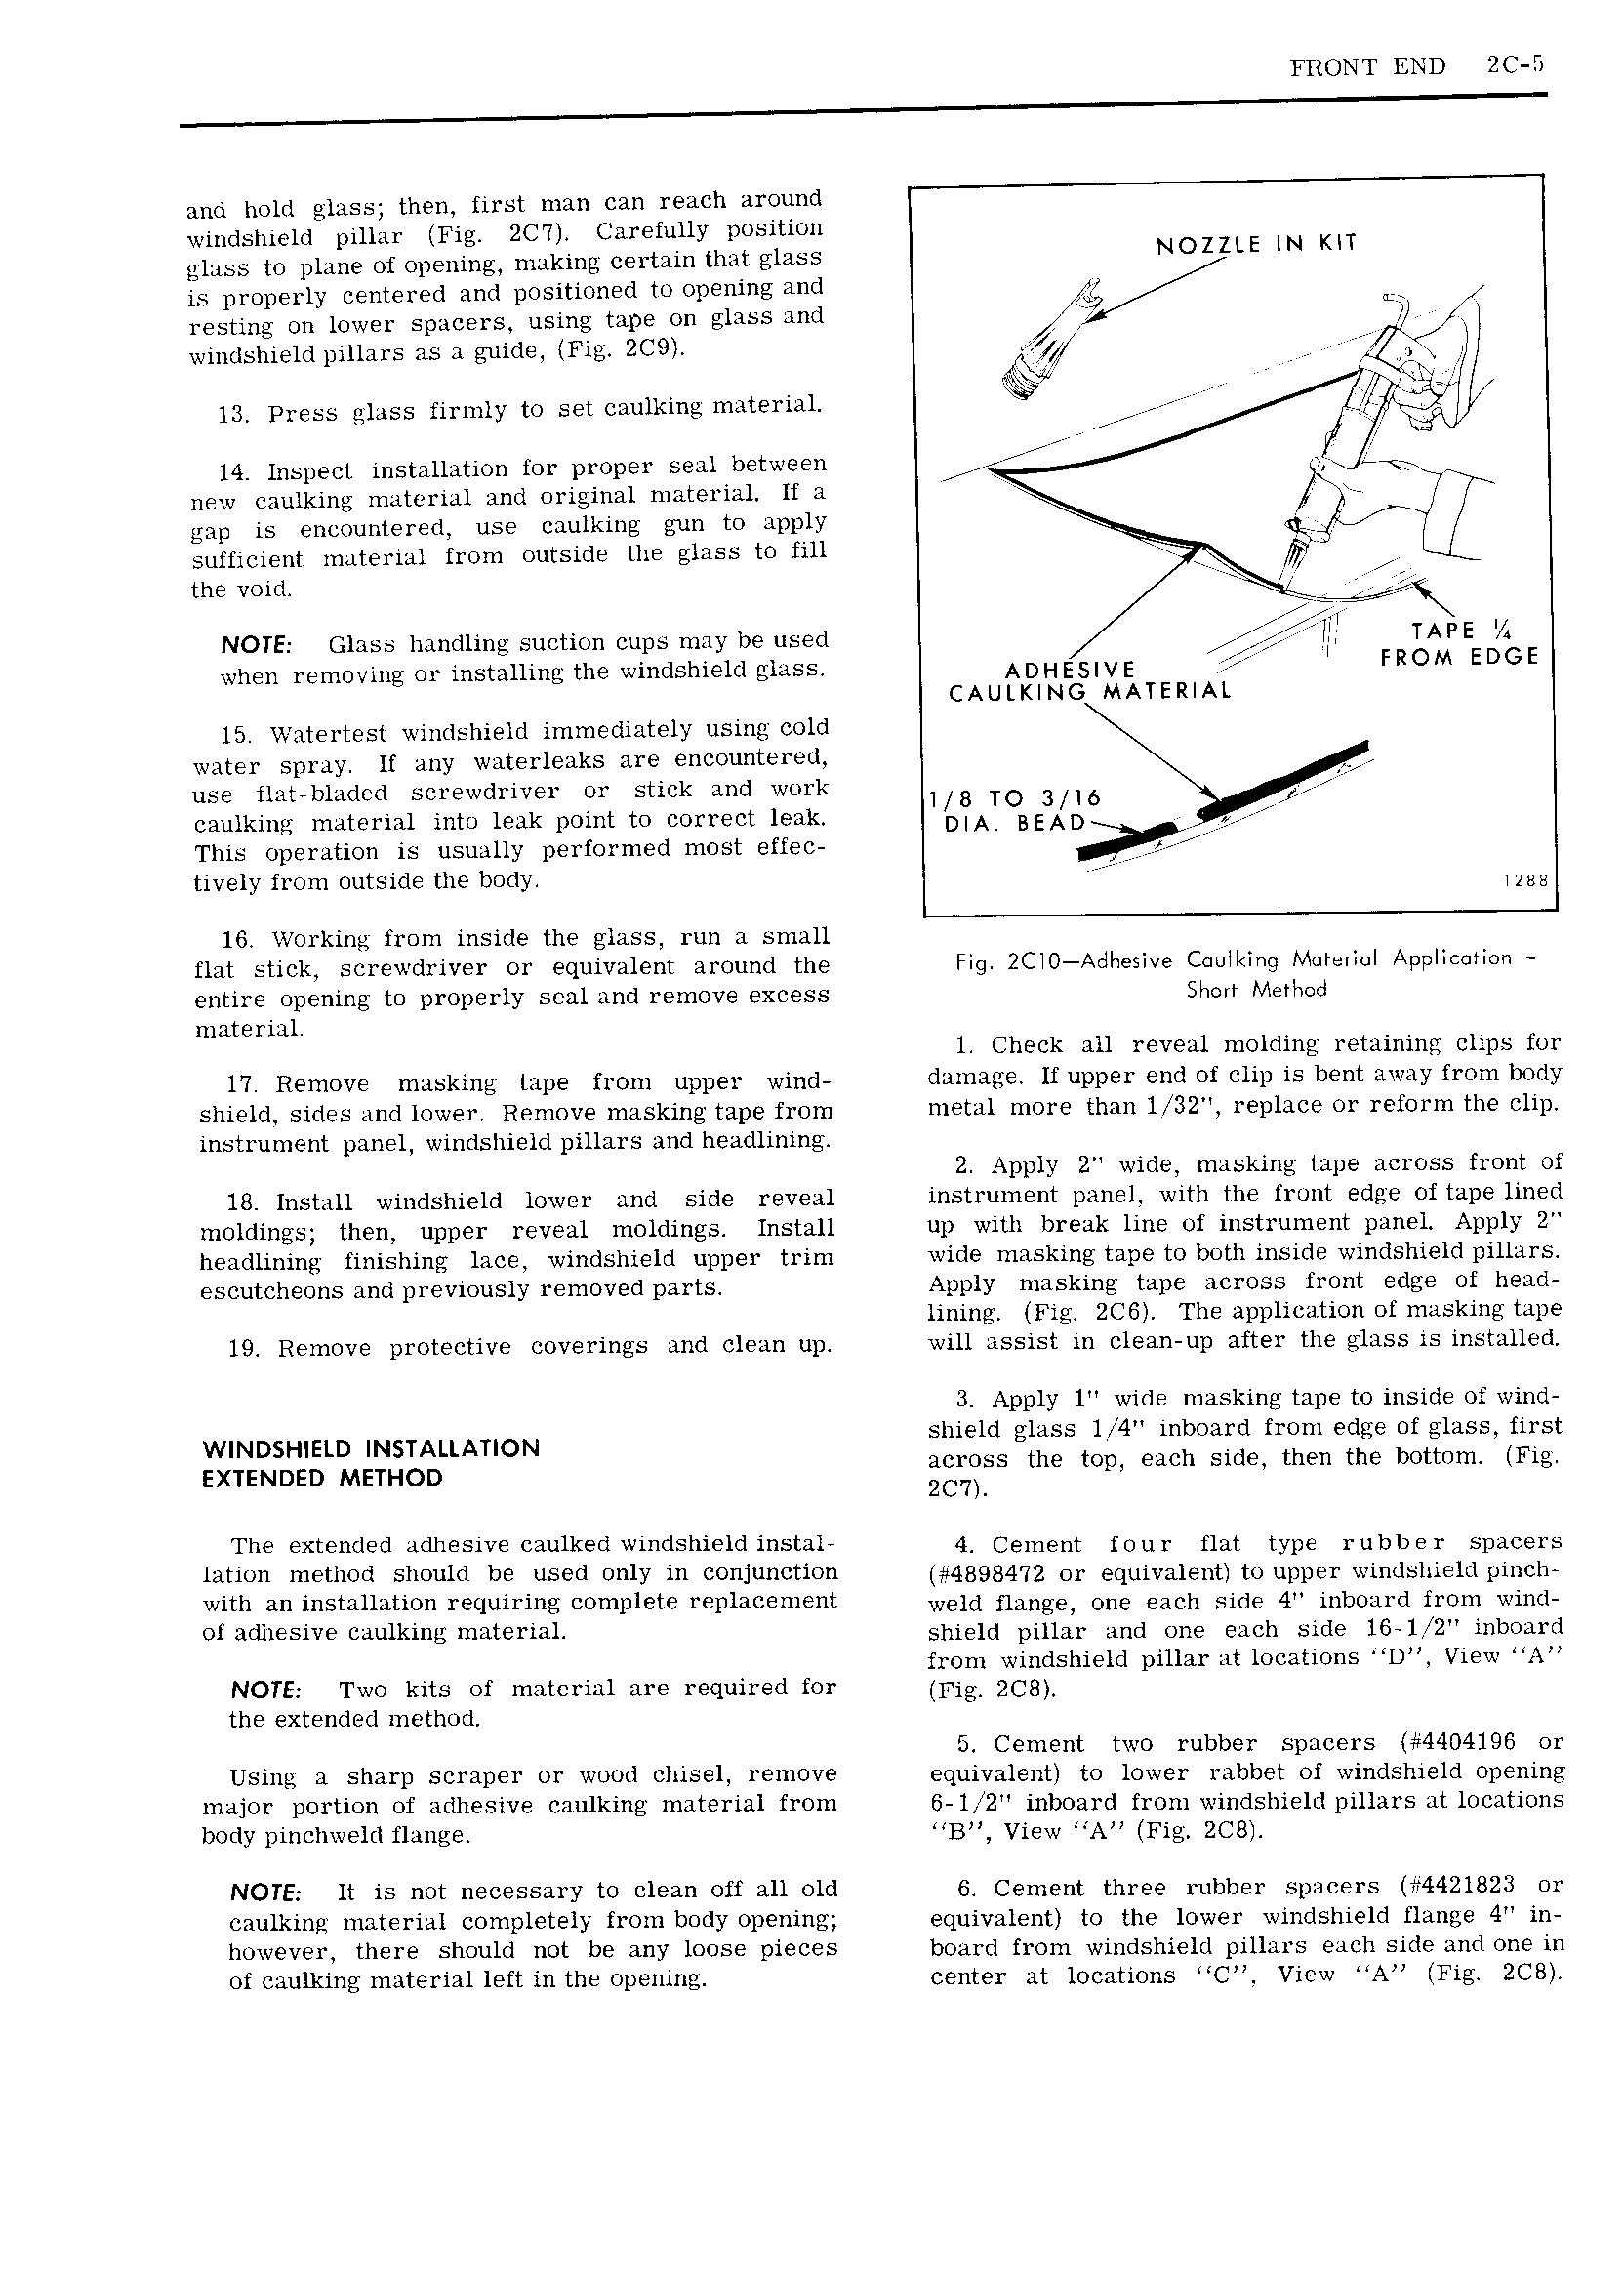
FRONT END ZC 5 and hold glass then first man can reach around windshield pillar Fig 2C Carefully position glass to plane of opening making certain that glass NOZZLE IN KH is properly centered and positioned to opening and V resting on lower spacers using tape on glass and VT Q A windshield pillars as a guide Fig 2C9 WZ ay 13 Press glass firmly to set caulking material 7 E V 14 Inspect installation for proper SSM b fW 11 r rVrr K V new caulking material and original material lf a IK T gap is encountered use caulking gun to apply f 1 sufficient material from outside the glass to fill W LL the void NOTE Glass handling suction cups may be used TAPE 54 when removing or installing the windshield glass AD E5 vE FROM EDGE CAULKING MATERIAL 15 Watertest windshield immediately using cold water spray If any waterleaks are encountered USE flat bladed screwdriver stick and work I 8 TO 3 I6 A caulking material into leak point to correct leak D A BEAD X 0 This operation is usually performed most effec tively from outside the body V nm 16 Working from inside the glass run a small flat stick screwdriver or equivalent around the Fig 2ClO tdlwesive Caulking Mereiiul Application entire opening to properly seal and remove excess Shen Merhed material 1 Check all reveal molding retaining clips for 17 Remove masking tape from upper wind damage If upper end of clip is bent away from body shield sides and lower Remove masking tape from metal more than 1 32 replace or reform the clip instrument panel windshield pillars and headlining 2 Apply Z wide masking tape across front of 18 Install windshield lower and side reveal instrument panel with the front edge of tape lined moldings then upper reveal moldings Install up with break line of instrument panel Apply headlining finishing lace windshield upper trim wide masking tape to both inside windshield pillars escutcheons and previously removed parts Apply masking tape across front edge of head lining Fig 2C6 The application of masking tape 19 Remove protective coverings and clean up will assist in clean up after the glass is installed 3 Apply 1 wide masking tape to inside of wind WINDSHIELD INSTALLATION shield glass l 4 inboard from edge of glass first EXTENDED METHOD ggmss the top each side then the bottom Fig The extended adhesive caulked windshield instal 4 Cement nun may type I nbbnr Spacers lation method should be used only in conjunction 43934 72 or equivalent to upper windshield pinch with an installation requiring complete replacement Weld fjnngey One each sing 4 inbO u d ppm wind OK Siv Ciiulkmt mm 1 m1 shield pillar and one each side 16 1 2 inboard from windshield pillar at locations D View A NOTE Two kits of material are required for Fig 2C3 the extended method 5 Cement two rubber spacers 4404196 or Using a sharp scraper or wood chisel remove equivalent to lower rabbet of windshield opening major portion of adhesive caulking material from 6 1 2 inboard from windshield pillars at locations body pinchweld flange B View A Fig 2C8 NOTE lt is not necessary to clean off all old 6 Cement three rubber spacers 4421823 or caulking material completely from body opening equivalent to the lower windshield flange 4 in however there should not be any loose pieces board from windshield pillars each side and one in of caulking material left in the opening center at locations C View A Fig ZC8