Jeep Parts Wiki | Ford Parts Wiki
Home | Search | Browse
|
Body Service Manual August 1964 |
|
Prev
 Next
Next
4404196
4404196
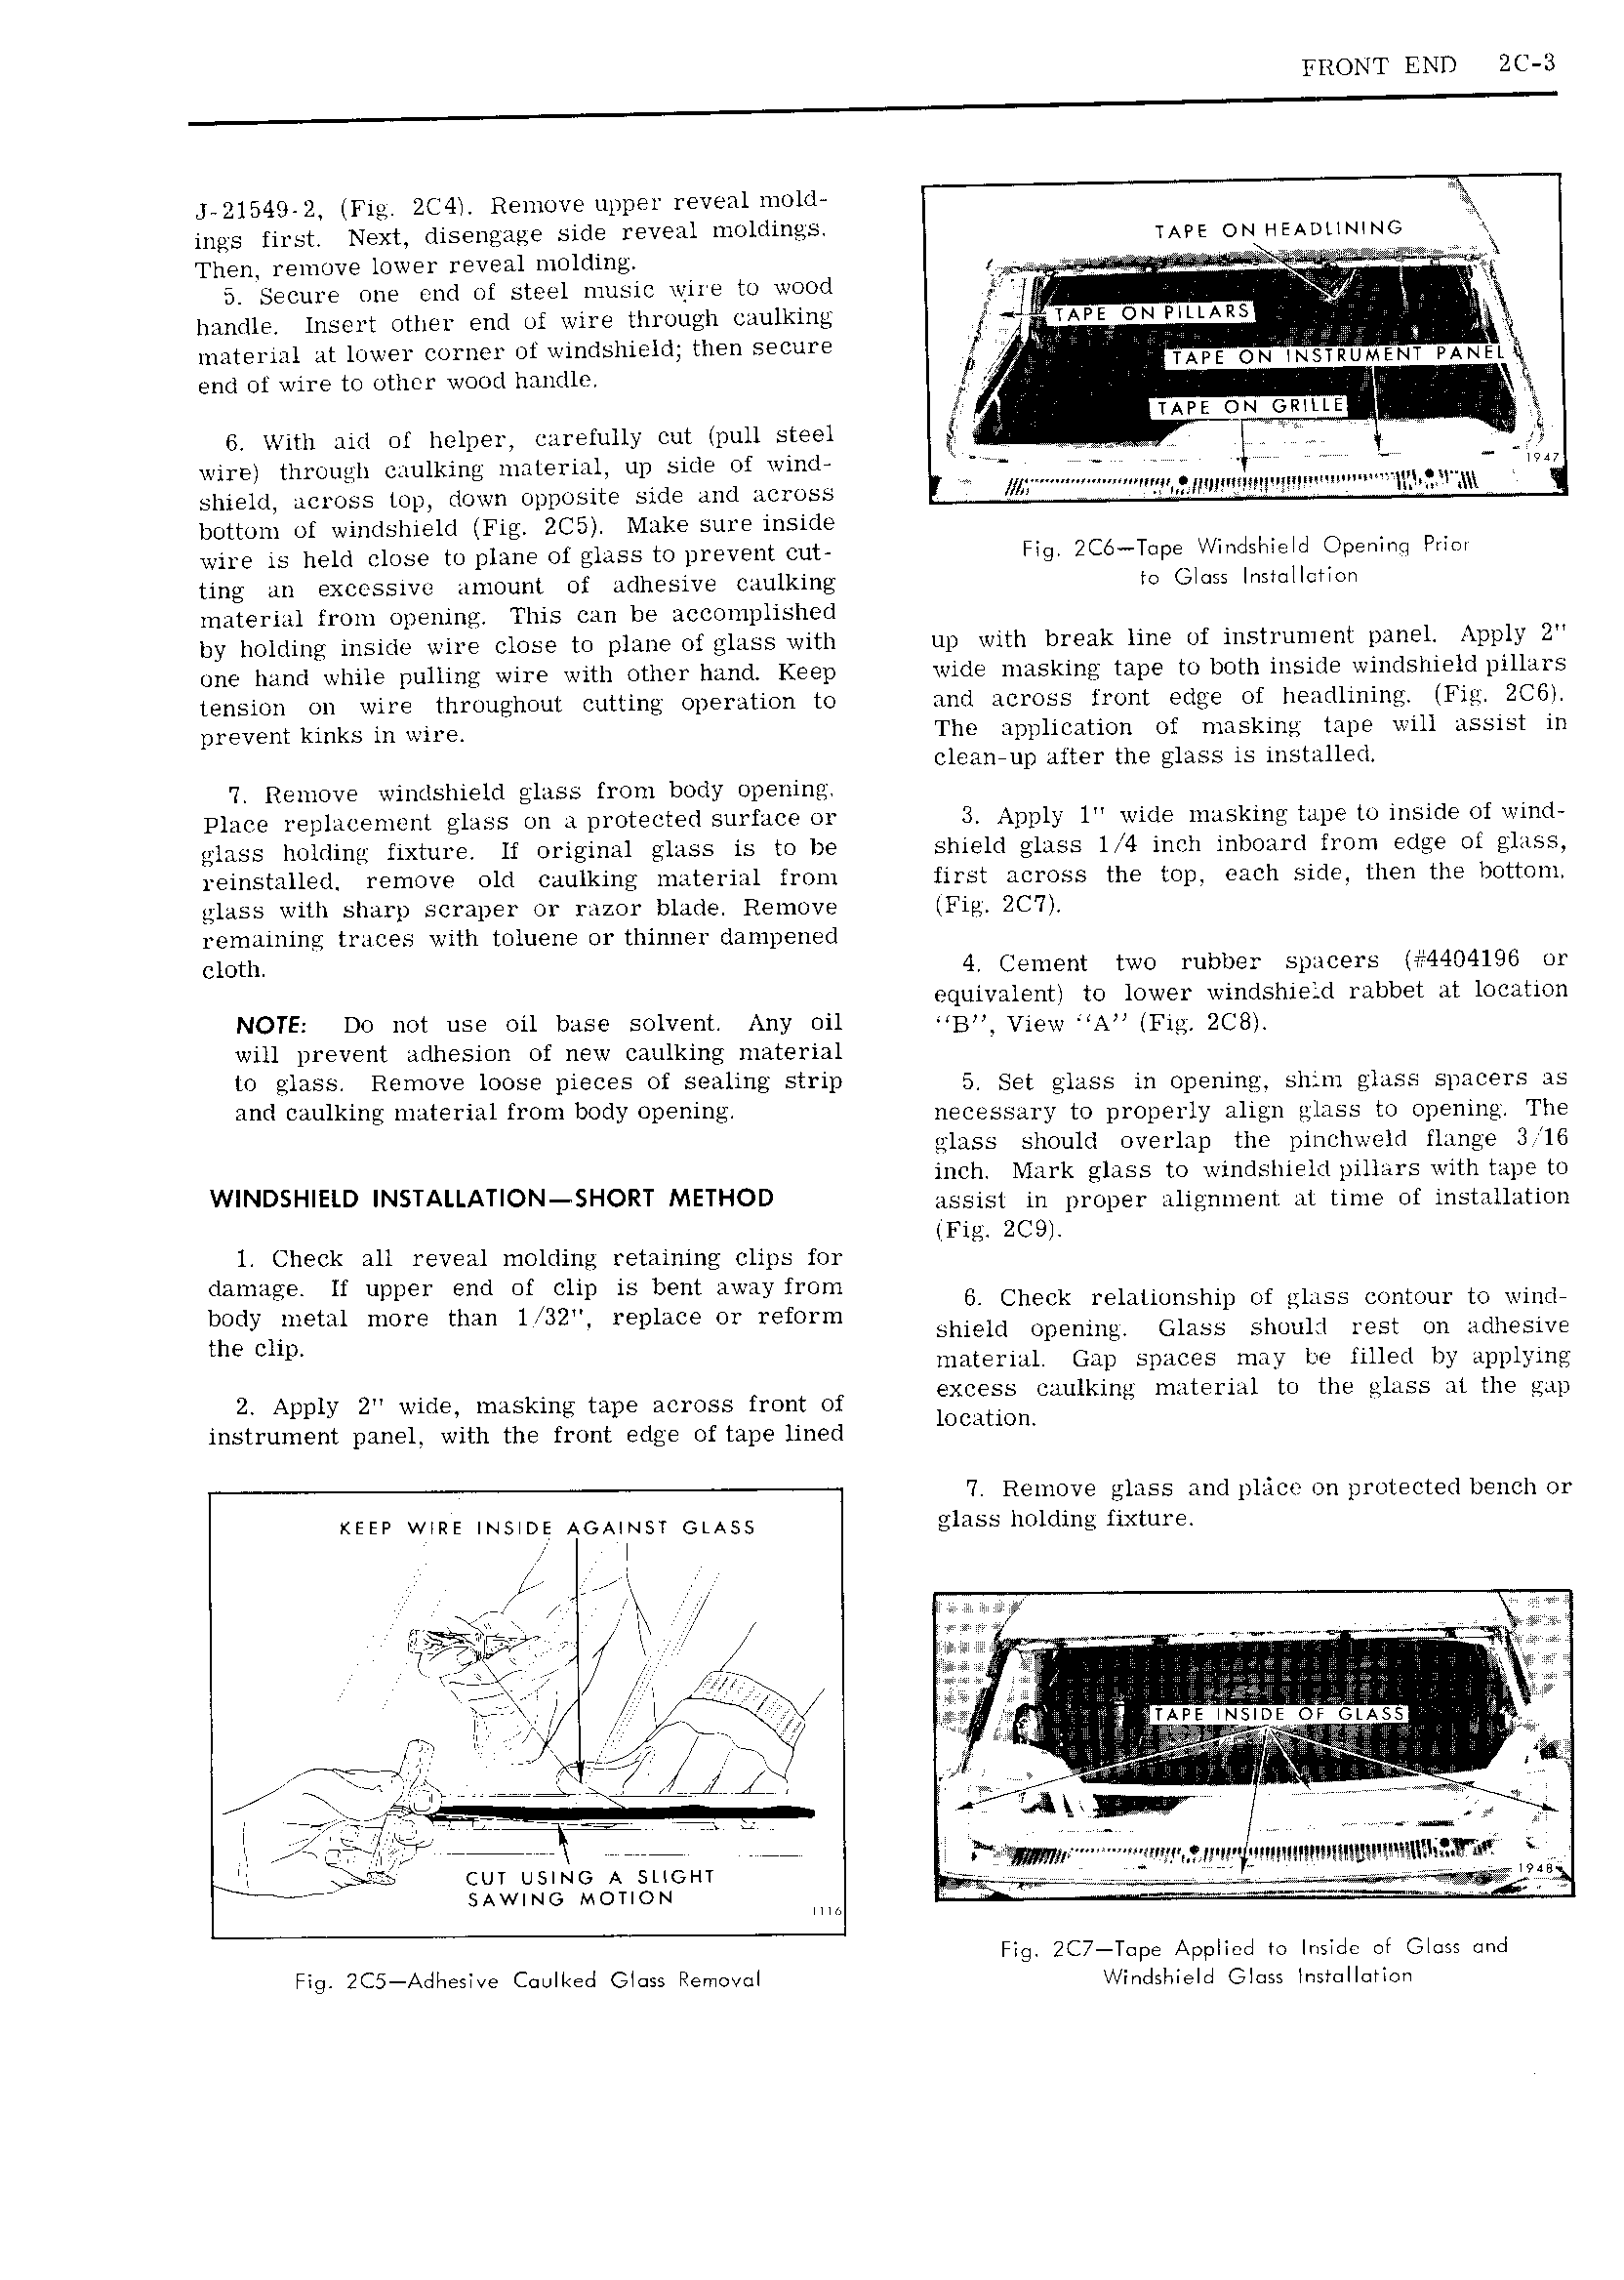
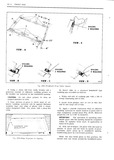
FRONT END 2C 3 J 21549 2 Fig 2C4 y Remove upper reveal mold ings first Next disengage side reveal moldings TAPE ON HEADUN NG Then remove lower reveal molding Gu i a gL u a a l L ao 5 Secure one end of steel music wire to wood 1 K Qs handle insert other end of wire through caulking 4 A E ON FILLARS 1 umtamgn at tower corner ot wiiidslil hilg tl S C 1 TAPE ON lnguunem PANELQ end ot wire to other wood handle i q 6 With aid of helper carefully cut lpull steel v E wirel through caulking material up side of wind i Um shield across top down opposite side and across W 4 l l l l llY bottom of windshield Fig ZC5 Make sure inside wire is held close to plane of glass to prevent out Fig 2C Tepe yl indslwisld Openinq Prim ting an excessive amount of adhesive caulking to Gloss Installation material from opening This can be accomplished by holding inside wire close to plane of glass with up with break line of instrument panel Apply 2 one hand while pulling wire with other hand Keep wide masking tape to both inside windshield pillars tension on wire throughout cutting operation to and across front edge of headlining Fig 2C6l prevent kinks inwire The application of masking tape will assist in clean up after the glass is installed 7 Remove windshield glass from body opening Place replacement glass on a protected surface or 3 Apply 1 wide masking tape to inside of wind glass holding fixture lf original glass is to be shield glass l 4 inch inboard from edge ol glass reinstalled remove old caulking material from first across the top each side then the bottom glass with sharp scraper or razor blade Remove Fig 2C 7l remaining traces with toluene or thinner dampened cloth 4 Cement two rubber spacers 4404196 or equivalent to lower windshield rabbet at location NOTE Do not use oil base solvent Any oil B vj w AM F1g 2C3 will prevent adhesion of new caulking material W 9135S RQIUOVP NOSE 6065 of Sfialiilg 11 5 Set glass in opening shgm glass spacers as l 1ki amterizllfr b y 0D i necessary to properly align glass to opening The glass should overlap the pinchweld flange 13 16 inch Mark glass to windshield pillars with tape to W ND H ElD NSTAI LAT ON SHORT METHOD assist in proper alignment at time of installation lFig 2C9l 1 Check all reveal molding retaining clips for Ar Eglgf gil if Check relationship of glass contour to wind the CHP shield opening Glass should rest on adhesive material Gap spaces may be filled by applying 2 Apply 2 widgy miskmg mpc HCYOSS mom Of encess caulking material to the glass at the gap instrument panel with the front edge of tape lined IUCMIOIL 7 Remove glass and place on protected bench or KEEP wlRE mslos Aoamsr crass glassh 1 l1 s Xt l c A xl V V fx V gt if l L Q3 T j QPF 1 7 r lr TAEE lV S l3A Y A V W L J 7 It of E 2 a g ai Ah H 37 M z r i Mi 6 o o l 33xtt E V o ll is if o gg3N G gqgxa or of r i l l l r rd Q SAWING MOTION WV V T Q ZQ ZIIE i ZZJ Q T i 7 Fig 2C7 T pe Applied to Inside ot Glagg und Fig 2C5 Adhe5lve Cqolked Glens Pemswl Windshield Glass lnsmllarlan