Jeep Parts Wiki | Ford Parts Wiki
Home | Search | Browse
|
Body Service Manual August 1964 |
|
Prev

 Next
Next
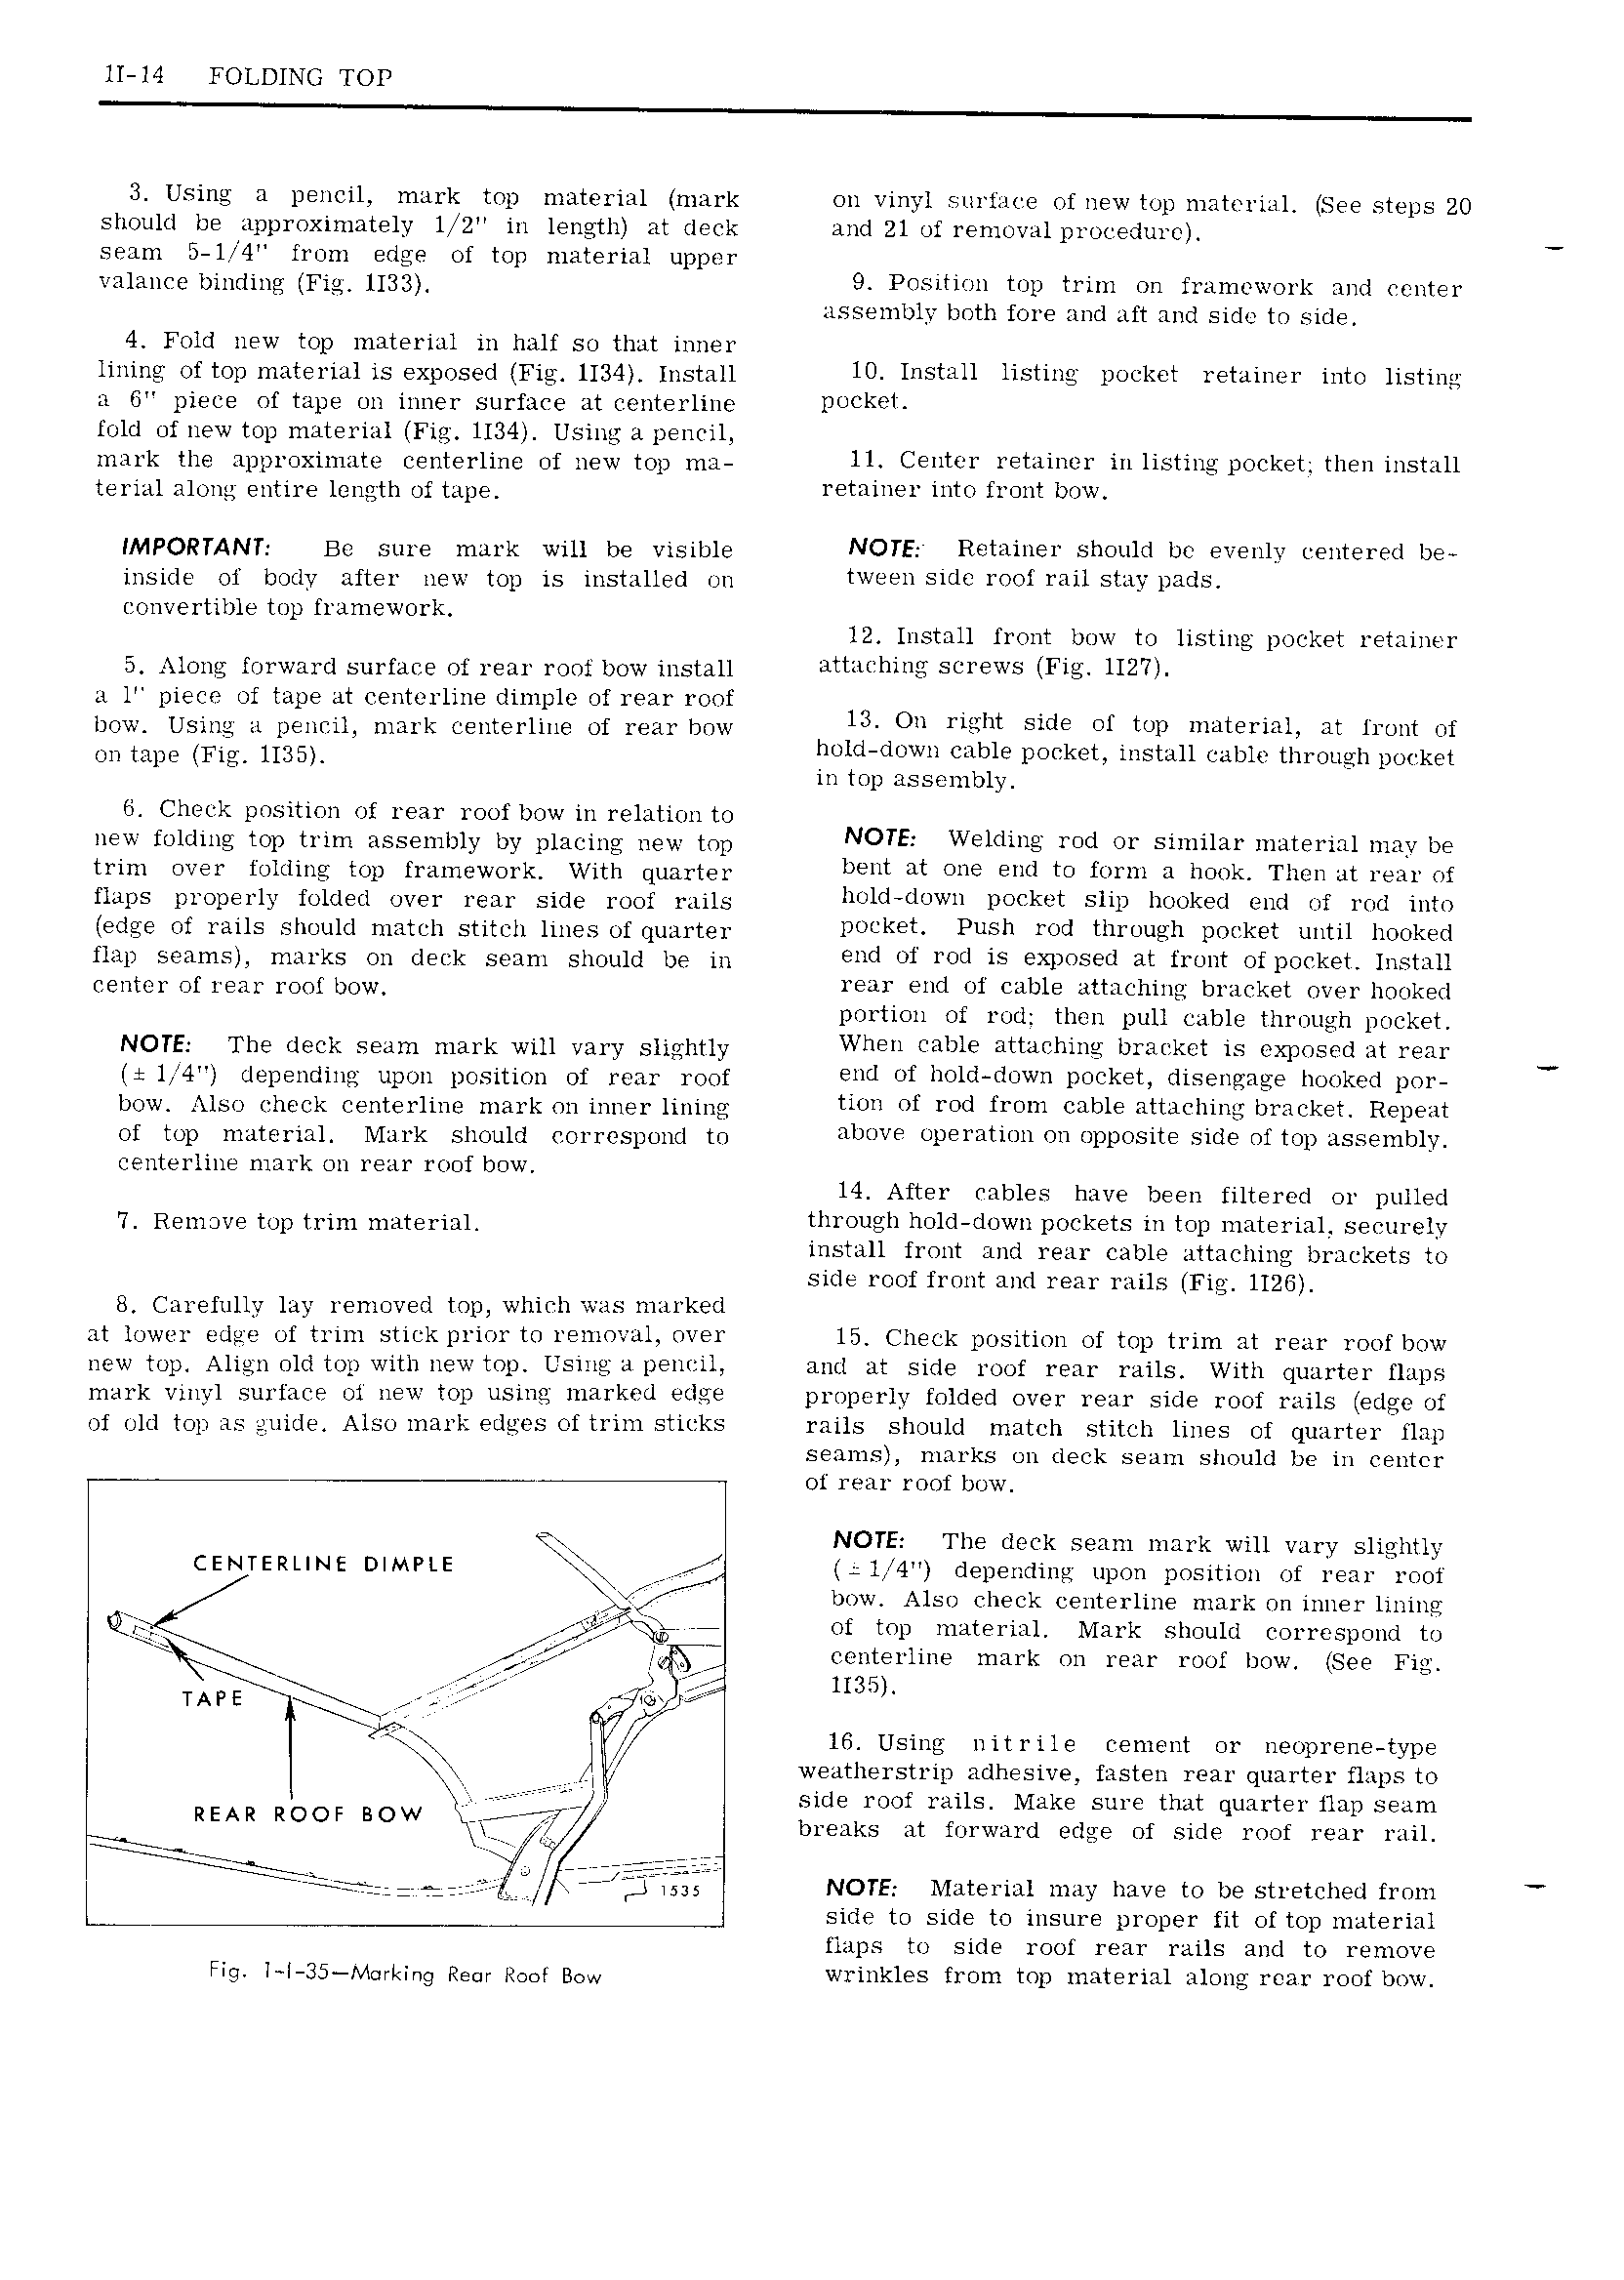
ll 14 FOLDING TOP 3 Using a pencil mark top material mark on vinyl surface of new top material See steps 20 should be approximately 1 2 in length at deck and 21 of removal procedure seam 5 I 4 from edge of top material upper valance binding Fig H3g 9 Position top trim on framework and ccnter assembly both fore and aft and side to side 4 Fold new top material in half so that inner lining of top material is exposed 1134 Install 10 INSYRH USUN l 0 k l I t l 1 into USUHQ a G piece of tape on inner surface at centerline l U kt l fold of new top material Fig 1134 Using a pencil mark the approximate centerline of new top ma U C 1t 1 retainer in listing pocket then install terial along entire length of tape ml Y Um YUM b IMPORTANT Be sure mark will be visible NOTE Retainer should be evenly centered be inside of body after new top is installed on tween side roof rail stay pads convertible top framework 12 Install front bow to listing pocket retainer 5 Along forward surface of rear roof bow install attaching screws Fig 1127 a l piece of tape at centerline dimple of rear roof bow Using a pencil mark centerline of rear bow 1 Ou Met Side 01 mp t 1 at YUM of UU mp Fig H35 lw1 i i0w1i cable pocket install cable through pocket in top assembly 6 Check position of rear roof bow in relation to new folding top trim assembly by placing new top NOTE Welding Fed OY Si i1 r teri 1 NNY DE trim 0 1 folding mp fmm wO1 k with quartm bent at one end to form a hook Then at rear of flaps properly folded over rear side roof rails h J1 l l0 V11 p0 kct slip hooked end of rod into edge of rails should niatcli stitch lines of quarter P kE t Push l d thlmugh PO k t until h Y k d flap seams marks on deck searn should be in end of rod is exposed at front of pocket Install C n O1 Of1 m 1 00 bOw rear end of cable attaching bracket over hooked portion of rod then pull cable through pocket NOTE The deck seam mark will vary slightly WUPH Z abl attaching bracket is exposed at reply v l 4 depending upon position of rear roof end of hold down pocket disengage hooked por bow Also check centerline mark on inner lining tion of rod from cable attaching bracket Repeat of top material Mark should correspond tn above operation on opposite side of top assembly centerline mark on rear roof bow 14 After cables have been filtered or pulled 7 Remove top trim material through hold down pockets in top material securely install front and rear cable attaching brackets to side roof front and rear rails Fig 1126 8 Carefully lay removed top which was marked at lowcr edge of trim stick prior to removal over 15 Check position of top trim at rear roof bow new top Align old top with new top Using a pencil and at side roof rear rails With quarter flaps mark vinyl surface of new top using marked edge properly folded over rear side roof rails edge of of old top as guide Also mark edges of trim sticks rails should match stitch lines of quarter flap seams marks on deck seam should be in centcr of rear roof bow is NOTE The deck seam mark will vary slightly CENTERLINE DIMPLE J 1 1 4 depending upon position of rear roof L k 4 bow Also check centerline mark on inner lining Q r of top material Mark should correspond to ifi centerline mark on rear roof bow See Fig il i 3 jj 1135 TAP E Fig p iff 16 Using nitrile cement or neoprene type weatherstrip adhesive fasten rear quarter flaps to er iilr 1 side roof rails Make sure that quarter ilap seam REAR ROOF BOW breaks at forward edge of side roof rear rail c ii a r rg 3 tm NOTE Material may have to be stretched from side to side to insure proper fit of top material flaps to side roof rear rails and to remove Fig I 35 M L ng REU HOO BOW wrinkles from top material along rear roof bow

 Next
Next