Jeep Parts Wiki | Ford Parts Wiki
Home | Search | Browse
|
Body Service Manual August 1964 |
|
Prev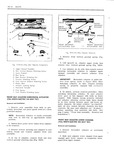
 Next
Next
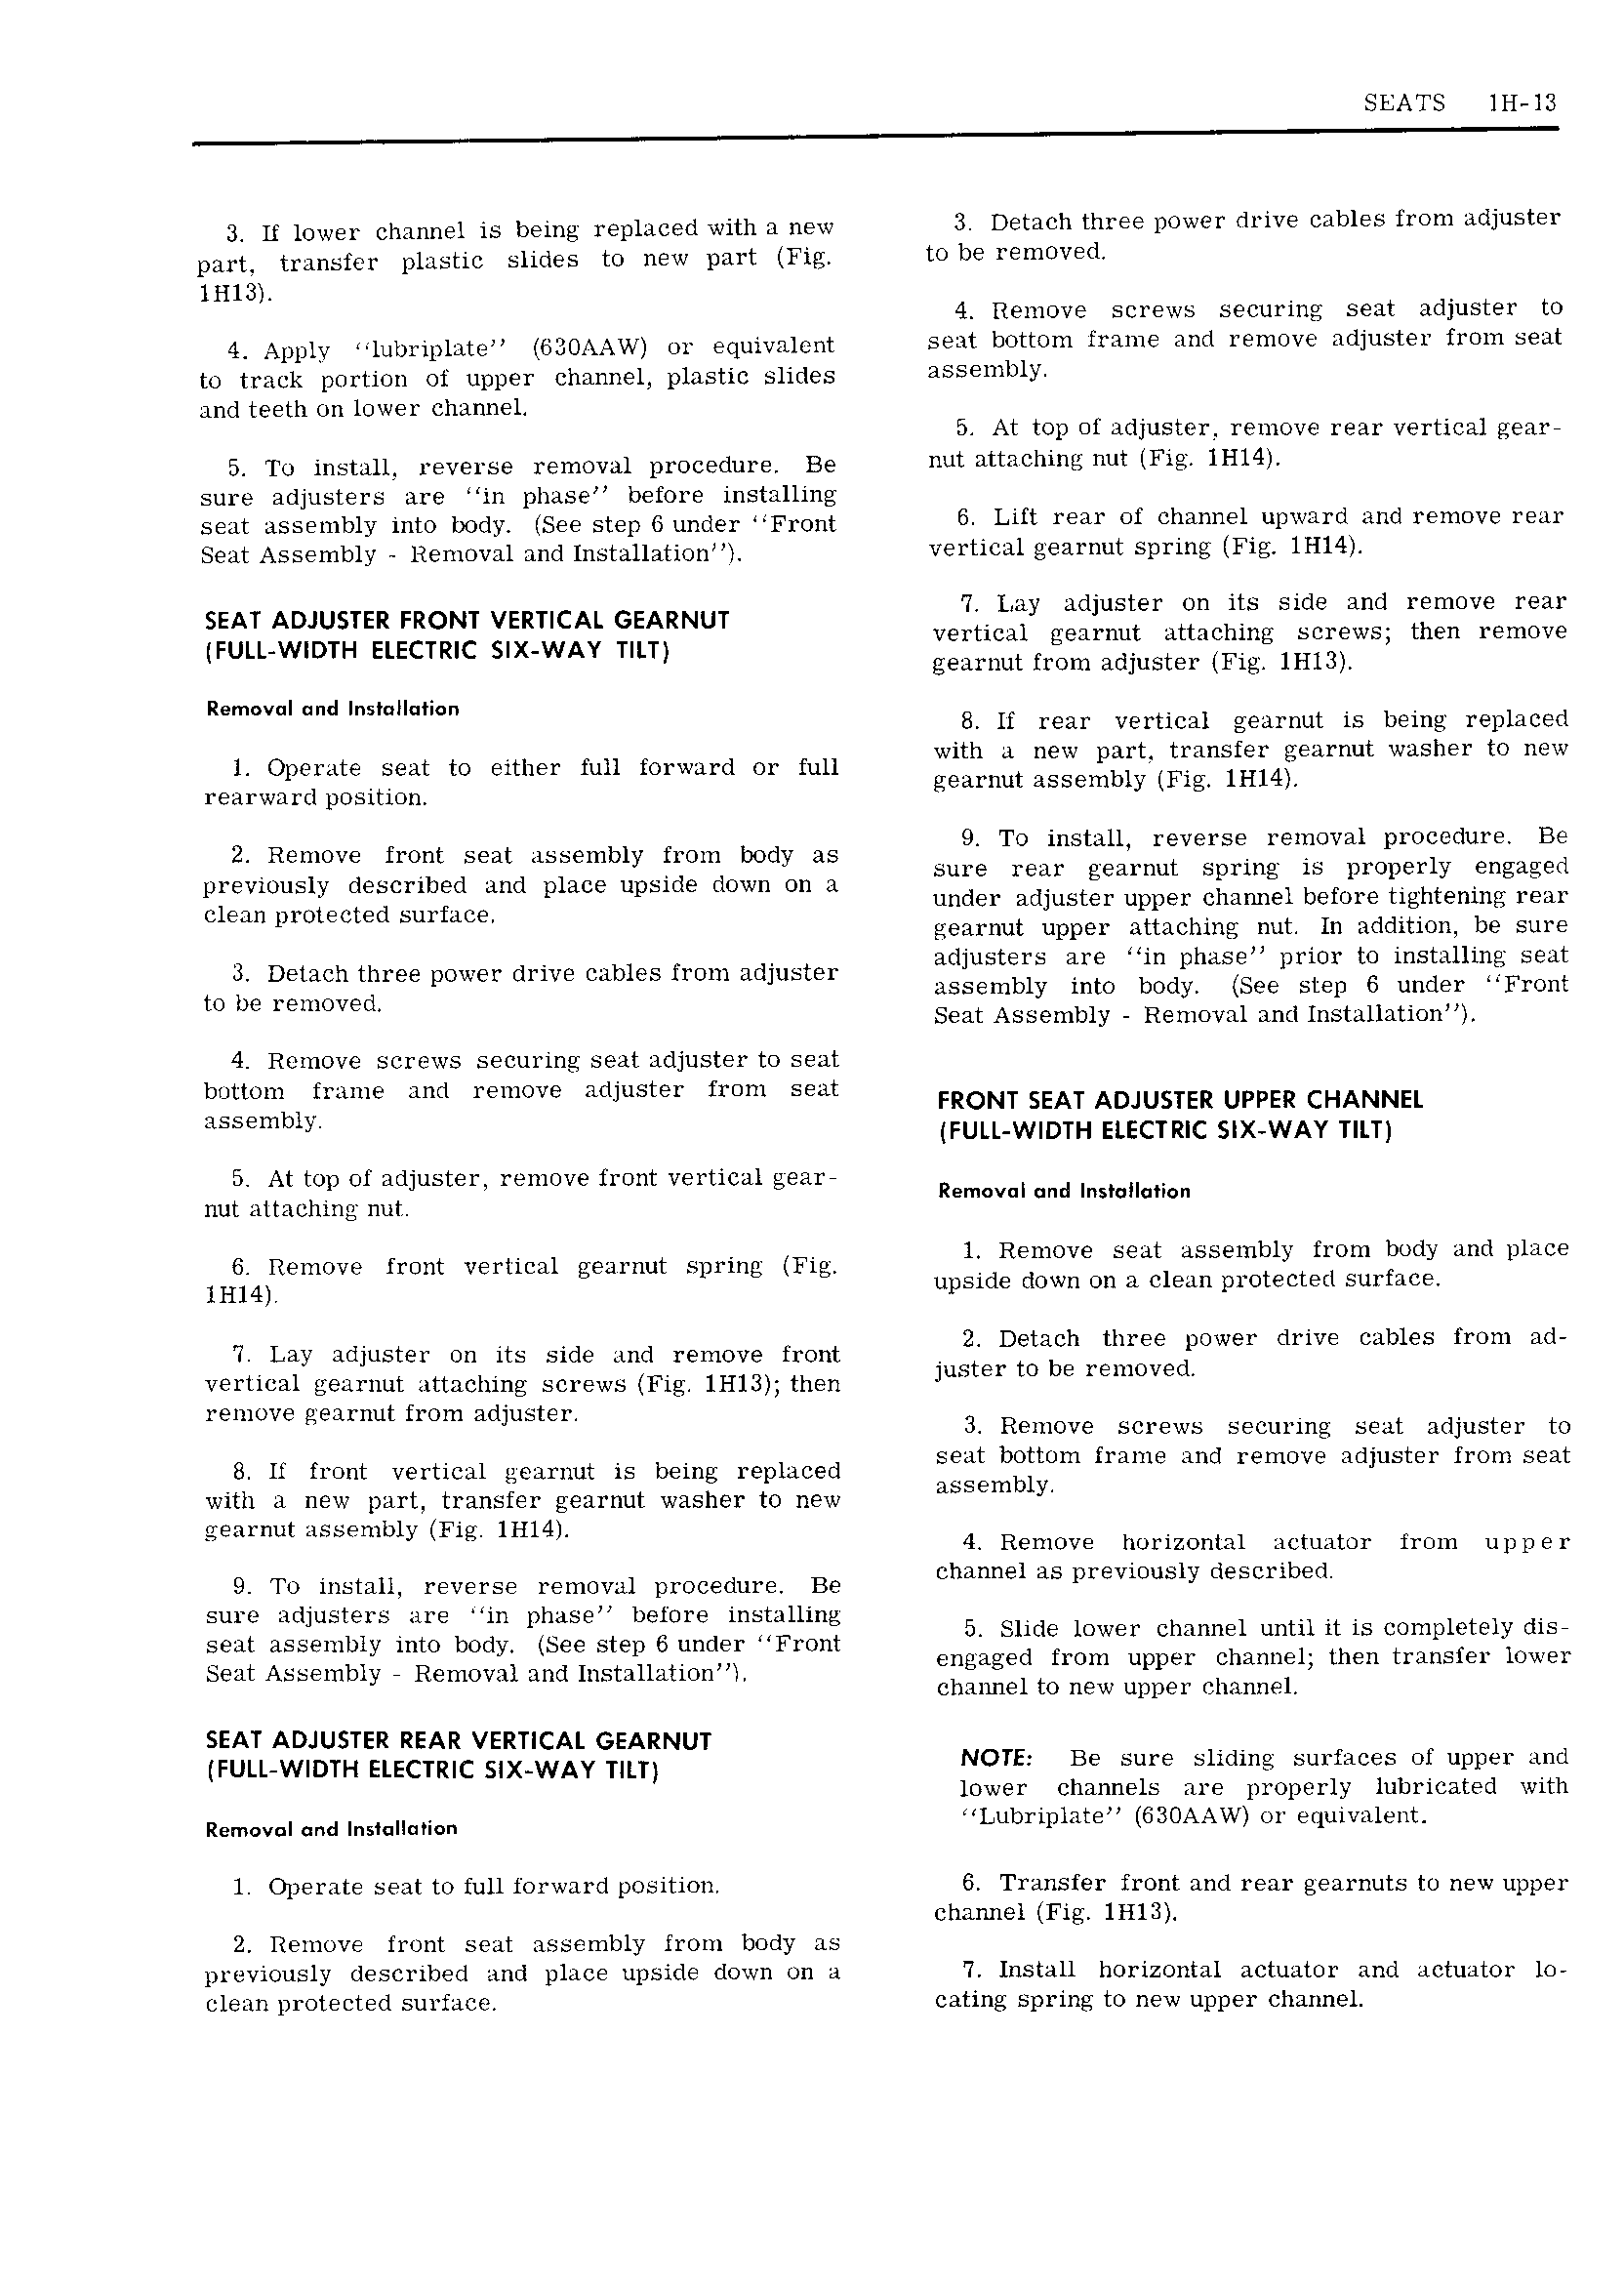
SEATS IH l3 3 lf lower channel is being replaced with a new 3 D tHGh th1 DOWGF Fll iV CHDIBS fl 0 1 1idjl15 part transfer plastic slides to new part Fig to be removed lHl3 4 Remove screws securing seat adjuster to 4 Appjy jum jp1 tt GZOAAW or eqmvapym seat bottom frame and remove adjuster from seat to track portion of upper channel plastic slides S mb1Y and teeth on lower channel 5 At top of adjuster remove rear vertical gear 5 To install reverse removal procedure Be Hut tt Chi Ut lFie NH4 sure adjusters are in phase before installing Sent assembly mm body See step 6 under Fl O t 6 Lift rear ol chaimelupward and remove rear Seat Assembly Removal and Installation VGFUGGJ tL iF t l Y1 S F15 IH14 gggggjgggtggggyg gem g5 V Zt i 2 i3i iEa Z i2 i 2I Vf i iZ gearnut from adjuster Fig lHl3 R I d II emovu an IMM umm 8 lt rear vertical gearnut is being replaced i L no 1 tr l Operate seat to either full forward or full gggjnttt g 6I T T nif 4 lmu Vmshel to nw rearward position t 9 t z 2 Remove front seat assembly from body as TO mbt u levels lexlwml pmccdule sure rear gearnut spring is properly engaged previously described and place upside down on a 4 j V Clem protected Surface under adjuster upper channel before tightening IEJI gearnut upper attaching nut In addition be sure 3 Detach three power drive cables from adjuster adjusters are dm phasgn prior to msmumg seat rr bly into body See step 6 under Front to bc removed lbbem Seat Assembly Removal and Installation 4 Remove screws securing seat adjuster to seat l ljbtOl l lll LUll and remove adjuster from seat FRONT SEAT ADJUSTER UPPER CHANNEL t FULL WIDTH Etecrmc SIX WAY TILT 5 At top of adjuster remove front vertical gear nut ilmclmw mn Removal und InsI II 1 o 6 Remove front vertical gearnut spring Fig tj TRE mtV r 1 r SS 1 1li1Ytf TOf and Place lHl4 upsice own on a c ean pro ec et sur a e l Lay adjuster on its side and remove front Dfgfh ghr e FOWGY drive Cables from ad vertical gearnut attaching screws Fig 1Hl3 then lub Gr 9 I muveo remove gearnut from adjuster 3 Remove screws securing seat adjuster to 8 lf front vertical gearnut is being replaced iiglggitum fume and remuvg adjuster from Seat with a new part transfer gearnut washer to new J y ggamut Hsspmbly Fig 1H14 4 Remove horizontal actuator from upper 9 To install reverse removal procedure Be Channel B SpY vwuS y descmbed l t 4 lf t i lu5 ell ug 1It Pllibg Name mi lllmg 5 Slide lower channel until it is completely disr seat assembly into body See step under Front 41 d from UD V cT Um 1 men tru er www Seat Assembly Removal and Installation l eng H E1 l lb channel to new upper channel SEAT ADJUSTER REAR VERTICAL GEARNUT FULIFWIDTH ELECTRIC S X WAY I ILT NOTE Be sure sliding surfaces of upper and lower channels are properly lubricated with Removal and lnsmuufiun Lubriplate GBOAAW or equivalent l Operate seat to full forward position 6 Transfer front and rear gearnuts to new upper channel Fig 1Hl3 2 Remove front seat assembly from body as ircviously described and ilace uiside down on a 7 Install horizontal actuator and actuator lc l l l clean protected surface cating spring to new upper channel