Jeep Parts Wiki | Ford Parts Wiki
Home | Search | Browse
|
Body Service Manual August 1964 |
|
Prev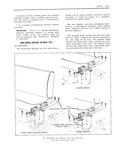
 Next
Next
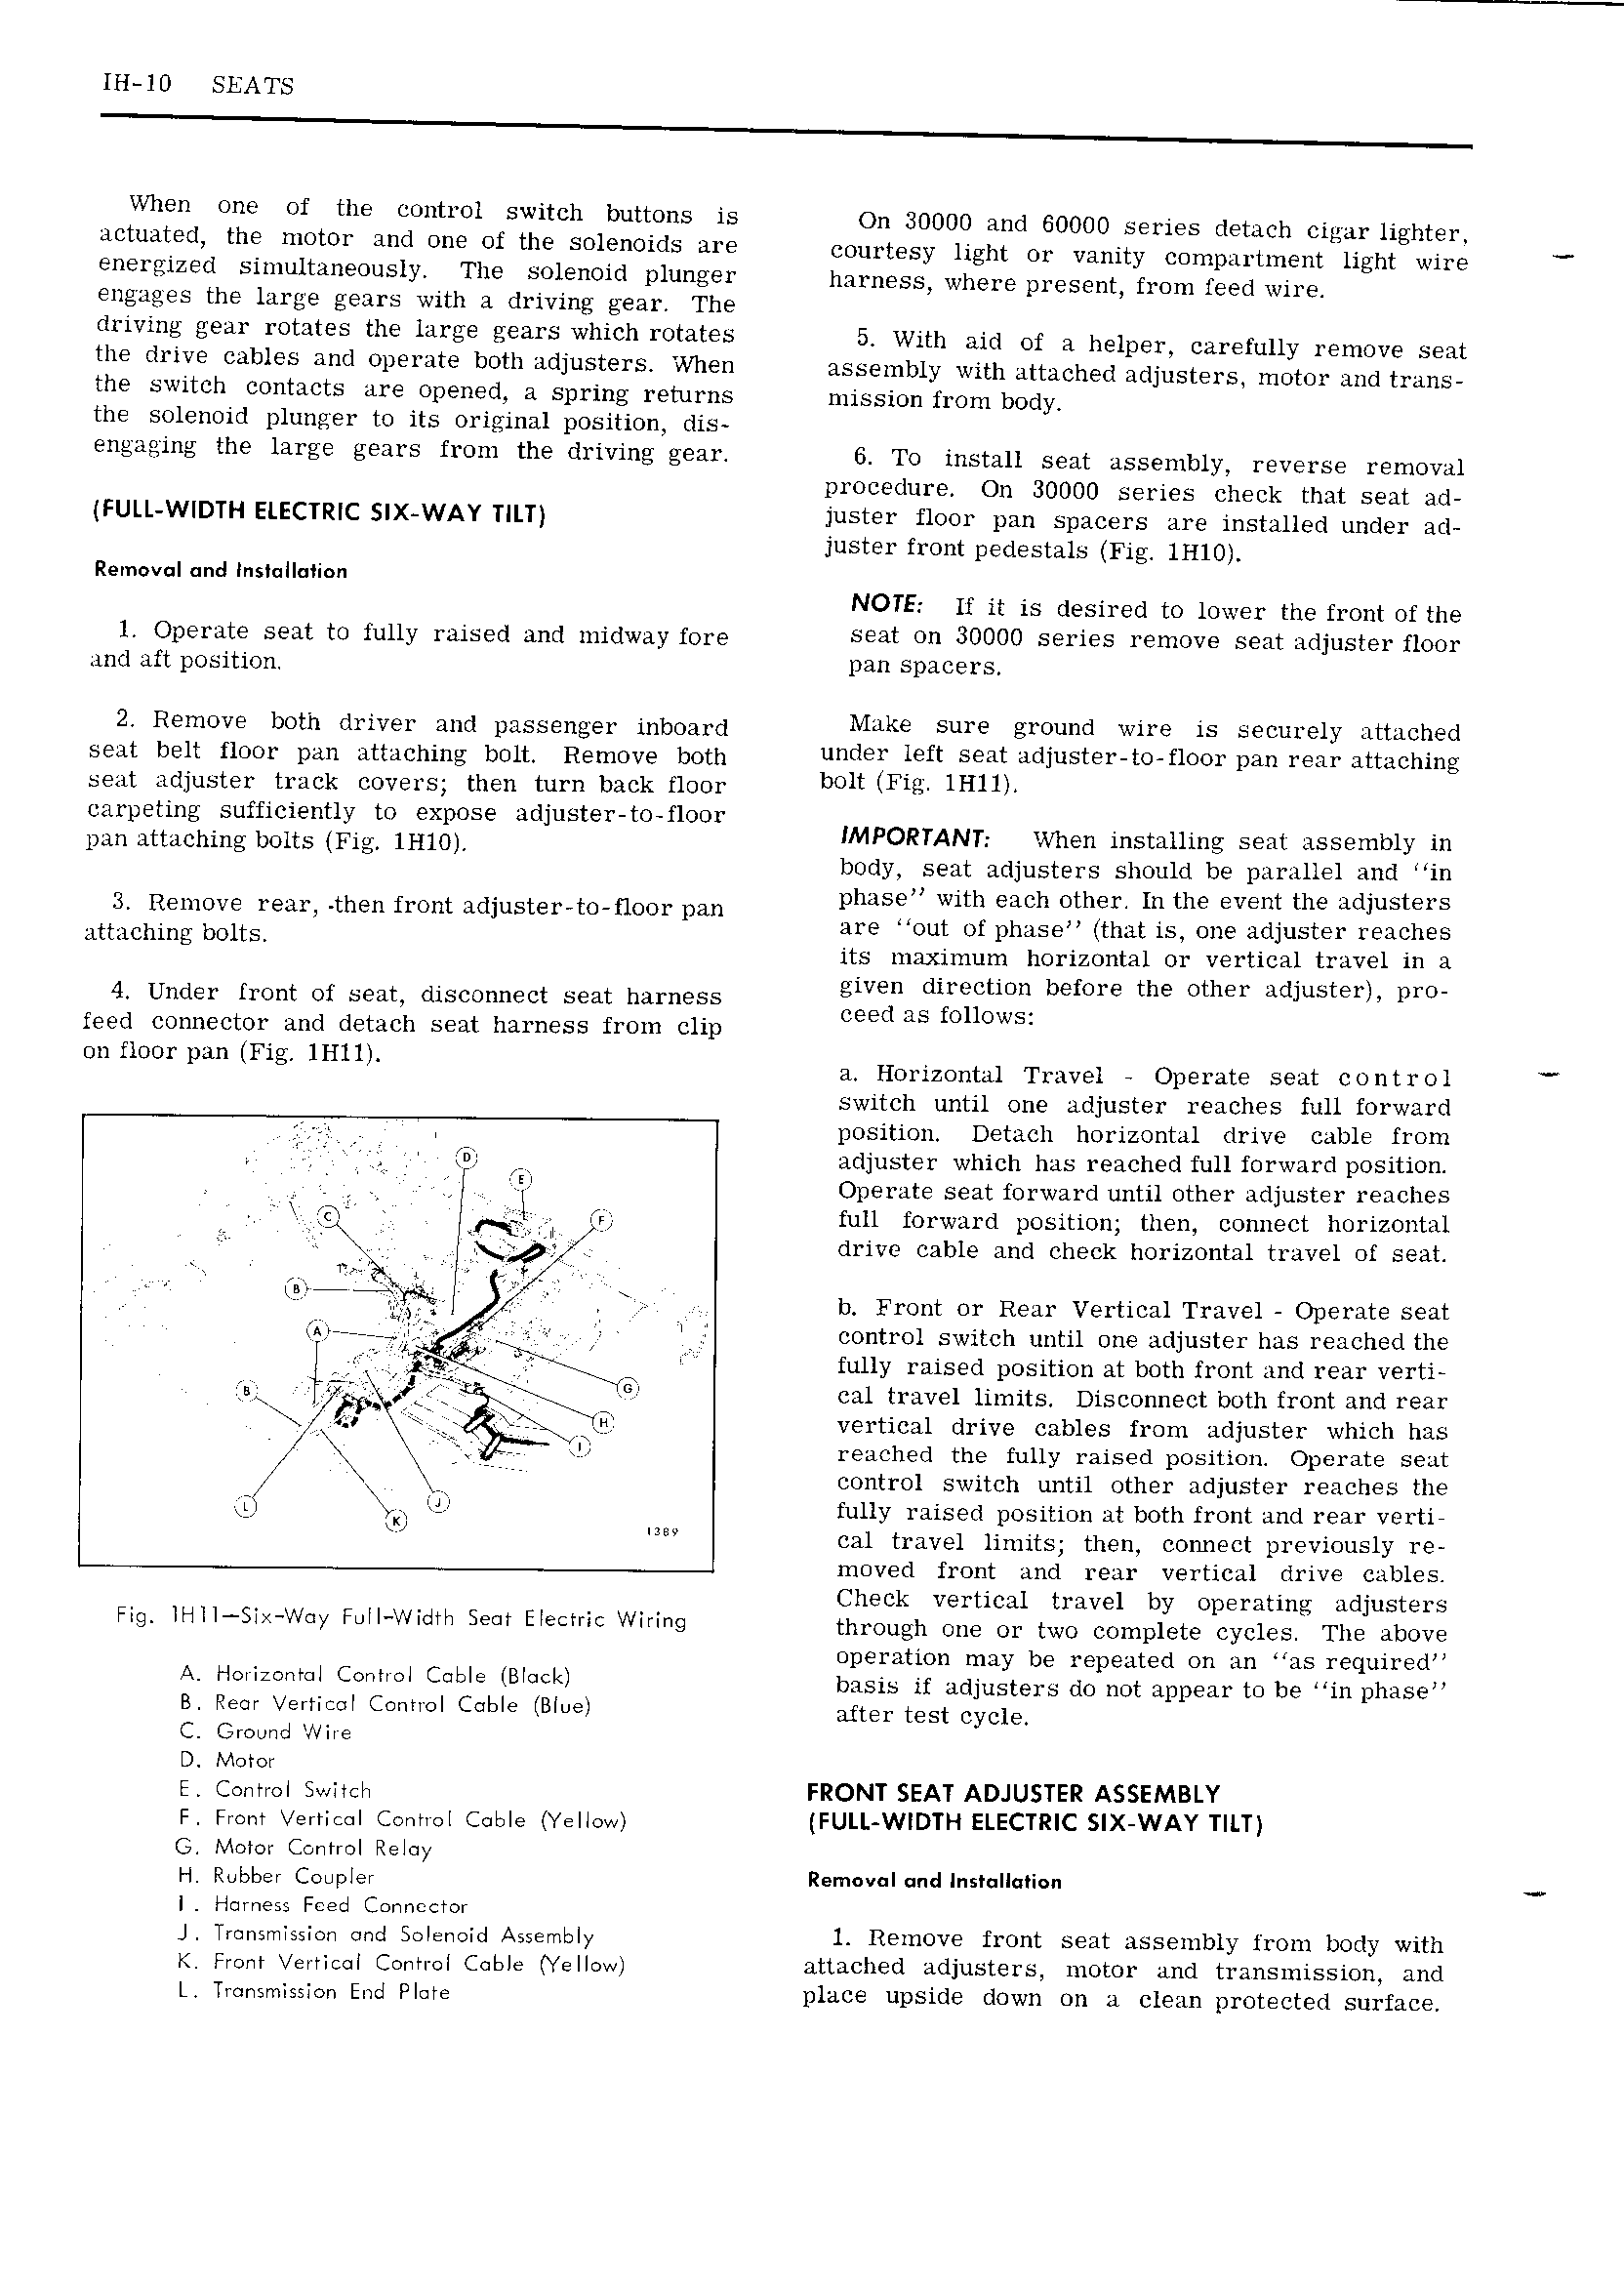
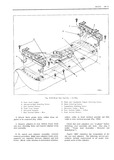
lH l0 SEATS When one of the control switch buttons is On 30000 and 60000 series detach cigar lighter actuated the motor and one of the solenoids are courtesy light or vanity compartment light wire energized simultaneously The solenoid plunger harness where present from feed wire engages the large gears with a driving gear The driving gear rotates the large gears which rotates 5 With aid of a helper carefully remove seat the drive cables and operate both adjusters When assembly with attached adjusters motor and trans the switch contacts are opened a spring returns mission from body the solenoid plunger to its original position dis engaging the large gears from the driving gear 6 To install seat assembly reverse removal procedure On 30000 series check that seat ad FULL W DTH ELECTRIC X WAY T LT juster floor pan spacers are installed under ad juster front pedestals Fig lH10 Removol und InsI lI Iion NOTE If it is desired to lower the front of the 1 Opnmto Seat tn muy ygjsgd and njjdwgy Om seat on 30000 series remove seat adjuster floor and aft position P311 SDRGETS 2 Ramove both driv l and passenger mboard Make sure ground wire is securely attached Seat belt HOO pim attaching bO1t Remove both under left seat adjuster to floor pan rear attaching seat adjuster track covers then turn back floor bglt Fit lH11l carpeting sufficiently to expose adjuster to floor IMPORTANT when insmumv SEM lssgmmy in pm m h1 gb R F1 HUG body seat adjusters should be parallel and in Remove rear then front adjuster to floor pan gg 2sthg j1th Sth Vjg i uljgigi ztttacliirie bolts jts mximum horizontal oi vertical travel iii A 4 Under mnt Of SQQL discmmect seat harness given direction before the other adjuster pro ceed as follows feed connector and detach seat harness from clip Ouf1OOrp m Fig IHHL a Horizontal Travel Operate seat control switch until one adjuster reaches full forward position Detach horizontal drive cable from I tB adjuster which has reached full forward position V f v g l Operate seat forward until other adjuster reaches Q5 Lt full forward position then connect horizontal X drive cable and check horizontal travel of seat L 1 V A b Front or Rear Vertical Travel Operate scat A rc 5 r I i control switch until one adjuster has reached the jg fjig fijl i fully raised position at both front and rear vertr rr i cal travel limits Disconnect both front and rear qa City vertical drive cables from adjuster which has ll reached the fully raised position Operate seat control switch until other adjuster reaches the ii tk fully raised position at both front and rear verti cal travel limits then connect previously re moved front and rear vertical drive cables Check vertical travel by operating adjusters Pls lHll l W Y F ll Wldlll Sem Eleclllc Wl 9 through one or two complete cycles The above operation may be repeated on an as required A l l ll l l C l l l l C bls lBl l l basis if adjusters do not appear to be in phase B Rent ei ticol Control Cable Blue after test cycle C Ground Wits D Motor F Conttol Swltcli FRONT SEAT ADJUSTER ASSEMBLY F Front Vetticol Ccntiol Cohle Yellow FULL WIDTH ELECTRIC SIX WAY TILT G Motor Control Reloy H Robber Cotiplet Removal ond lnst ll i n I Home ss Fced Connector J Ttonsniission cmd Solenoid Assembly 1 Remove front seat assembly from body with K Front Vertical Conti ol Coble Yellow attached adjusters motor and transmission and L Transmission End Plote place upside down on a clean protected surface