Jeep Parts Wiki | Ford Parts Wiki
Home | Search | Browse
|
Body Service Manual August 1964 |
|
Prev

 Next
Next
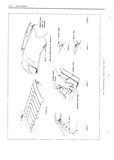
HEADLINING IG I 1 J 0i i 31l5 iind ui i h i 3 l7P i attaching l 10i S 5 Install all previously removedhardware and View B Fig 1GB Install sunshade Supp01 ts remove protective coverings NOTE Forward edge of front section and rear i V I ward edge of rear section are also secured in NOTE When installing side roofgrail moldings place by windshield or back window garnish make certain edge of headlining section is moldings covered by side roof rail moldings HEADLINING ON STATION WAGON STYLES DESCRIPTION IMPORTANT Note in which holes ends ol list ing wires are installed in side roof inner rails The headlining assembly is formed to the contour Listing wires should be placed in same holes of the roof panel by concealed listing wires Botti when replacing headlining ends of the listing wires are located in holes in the T At NQ 3 iisting Wim bnnd Clnwn nib Snnnning bldg wm m 1 listing wire to bow View E Fig IG4 remove rite iieiiaiining is secnieti at the winaaiiieiti open remaining listing wires and r ve neediinine Lie ing and rear quarter areas by tacks or staples mb1Yh Om bOdY VIEWS B gi F Fi 1G4 The headimmgl is Secured 8 lf replacing headlining remove listing wires to the side roof rails by a pronged retainer View C iinin niycksis Oi liss lllnlng Fig IG4 The headlining is secured at the back V body Opening insinl rstiiinni by cement Vin F IMPORTANT Listing wires removed from old Fig lG4 Nuliilwi 3 listing Wire is also nlinclisn io headlining must be installed in corresponding the moi bow by metal tabs View 1 rig 164 lmksis Of new h B m 2i CAUTION Clean hands and tools are essential l I when working with headlining material I If previously removed install listing wires into corresponding pockets of new headlining as Removula sembly V 2 Apply approved trim cement to headlining at l mage pmtechve Cowling Owl bed Cubhlcmb taching surfaces at windshield and back body and backs openings 2 Prior to removing headlining remove follow mu nm dWm and trim dssembiies 3 Lift entire headlining assembly into body and D i install listing wires into holes in side roof rails A Windshieldgarmshmgldmgs NOTE Each listing wire should rest against B Rear view mii roi Support roof panel deadener after installation C Suiislnids siinnniis NOTE Listing wires may be adjusted up or f down by placing them in appropriate holes in side D Dome lump roof inner rails E com hooks 4 At No 3 listing wire install listing wire F Rear quarter window garnish moldings pocket over metal tabs center headlining and bend tib f i E F lG4I Gy Back body Opening moldings up 1 s to secuie listing wire View lg i i i I 5 Working forward from No 3 listing wire H Centex plum flmbhmi moldmgb O1 phtes stretch and secure headlining to windshield opening 3 Carefully remove tacks or staples securing view B Fig 1G4 headlining at windshield and rear quarters 6 At back body opening stretch and secure head 4 Detach cemented material at back body lining View F Fig lG4l i g 2 Using headlining inserting toni J 2 7721 or 5 Using lisndlininn inserting mol J 277g Oi suitable wide bladed tool install headlining under equivalent wide bladed to ol carefully disengage PFOHESBG i min i 310nE beth Sid reef mils tVi W C headlining from pronged retainer on side roof rails Fi 1G4 View C Fig 1G4l 8 Stretch and secure headlining at rear quarter Gi Working from from to rear Of body disengage areas working out all wrinkles and draws headlining listing wires from side roof rails 9 Permanently secure headlining and replace gathering or folding headlining with listing wires on all previously removed inside hardware and trim outside to keep headlining clean assemblies

 Next
Next