Jeep Parts Wiki | Ford Parts Wiki
Home | Search | Browse
|
Body Service Manual August 1964 |
|
Prev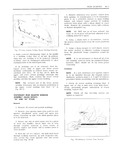
 Next
Next
4459429
4459429
4871330
4871330
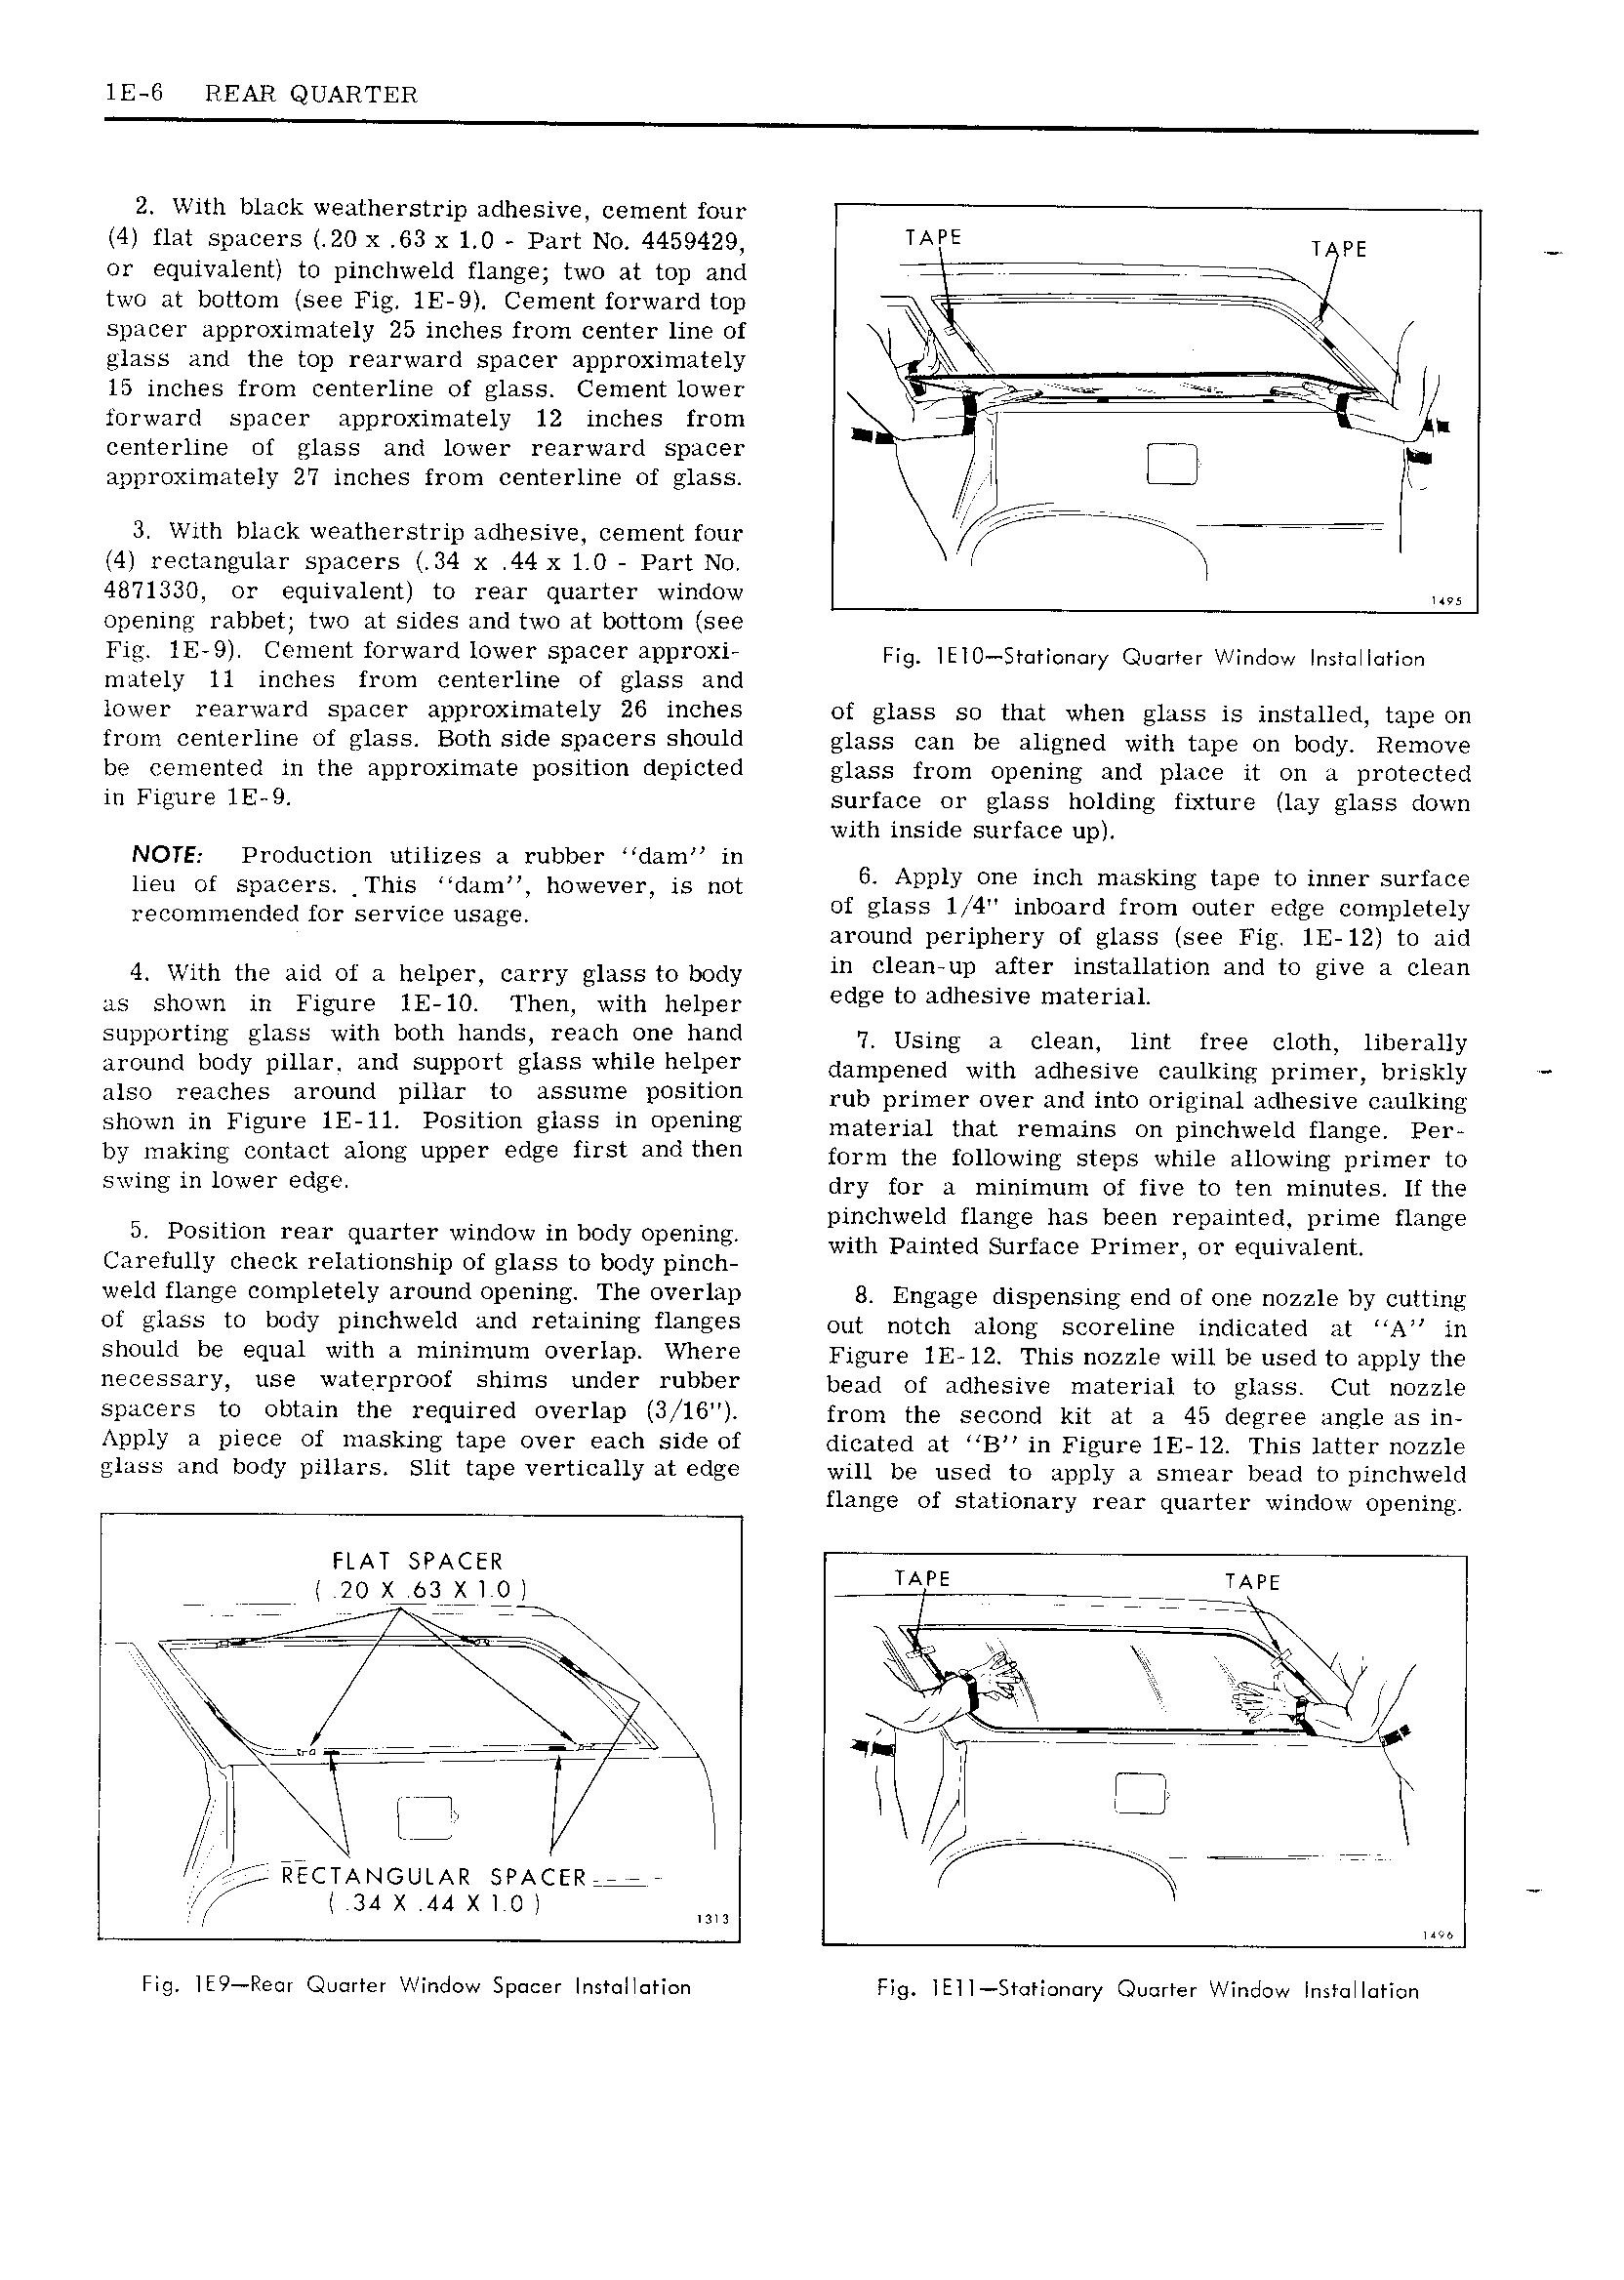
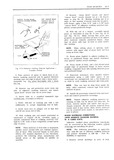
1E G REAR QUARTER 2 With black weatherstrip adhesive cement four 4 flat spacers 20 x 63 x 1 0 Part No 4459429 TAPE T pi or equivalent to pinchweld flange two at top and two at bottom see Fig lE 9 Cement forward top W V spacer approximately 25 inches from center line of v glass and the top rearward spacer approximately 15 inches from centerline of glass Cement lower ly forward spacer approximately 12 inches from no iq centerline of glass and lower rearward spacer F approximately 27 inches from centerline of glass l K 3 With black weatherstrip adhesive cement four if 7 4 rectangular spacers 34 x 44 x 1 0 Part No l i 4871330 or equivalent to rear quarter window im opening rabbet two at sides and two at bottom see Fig 1E 9 Cement forward lower spacer approxi Fig IEIO Sr H n ry Quarter Window Insrnilcricn mately 11 inches from centerline of glass and lower rearward spacer approximately 26 inches of glass so that when glass is installed tape on from centerline of glass Both side spacers should glass can be aligned with tape on body Remove be cemented in the approximate position d piCt d glass from opening and place it on a protected in Figure lE 9 surface or glass holding fixture lay glass down with inside surface up NOTE Production utilizes a rubber dam in lieu Of Spdcexx lrrms ndnmiiv however is not 6 Apply one inch masking tape to inner surface recommended for Service usage of glass 1 i44 inboard from outer edge completely around periphery of glass see Fig 1E 12 to aid 4 with the nid Of n ngiperv cnrry glass tn body in clean up after installation and to give a clean as shown in Figure 1E 10 Then with helper edge i 51 E i supporting glass with both hands reach one hand 7 Using n clean nn free Cloth hbgmuy around body pillar and support glass while helper dampened with adnesivg canlking pnhn ny briskly 8150 l i h il O d Pius to iissiims Position rub primer over and into original adhesive caulking Shown lll Fl lll 1E 11 POSMOH Eisss in Dpsniiig material that remains on pinchweld flange Per by making COllt3Ct 3101lE l P l Edge first and than form the following steps while allowing primer to Swing lll 1OW l Edge dry for a minimum of five to ten minutes If the V pinchweld flange has been repainted prime flange n a Position rear quarter window in body opening with Painted Surface Primgn Cn Equivalent Carefully check relationship of glass to body pinch weld flange completely around opening The overlap 8 Engage dispensing end of one nozzle by cutting of glass t body plnchweld and retaining flanges out notch along sccrciinc indicated at in should be equal with a minimum overlap Where Figure El12 This iiqzzie viii bg iisedtq Qipl 1yt 9 ll S l Y USE Wdl Y1lF00l Shlllls l Y l bb Y bead of adhesive material to glass Cut nozzle spacers to obtain the required overlap 3 16 from the second kit at a 45 degree angle as in Apply a piece of masking tape over each side of dicated at B in Figure 1E 12 This latter nozzle glues d body pillars Slit tape vertically at edge win be used to apply a smear bead to pincnwcid flange of stationary rear quarter window opening FLAT SPACER 20 XACSWKIQL TAPE iil an F ily ir Z A J ll t il 2 V iv EY A itk r Yr 7 i i J f i 7 i T T gi EEUANGULAR SPACER r i 3AX 4A lO Im Fig lE9 Re i Qodncr Window Spacer Insmlicricn Fig lEll St tSon ry Quarter Window Insicllcridn