Jeep Parts Wiki | Ford Parts Wiki
Home | Search | Browse | Marketplace | Messages | FAQ | Guest
|
Body Service Manual August 1964 |
|
Prev
 Next
Next
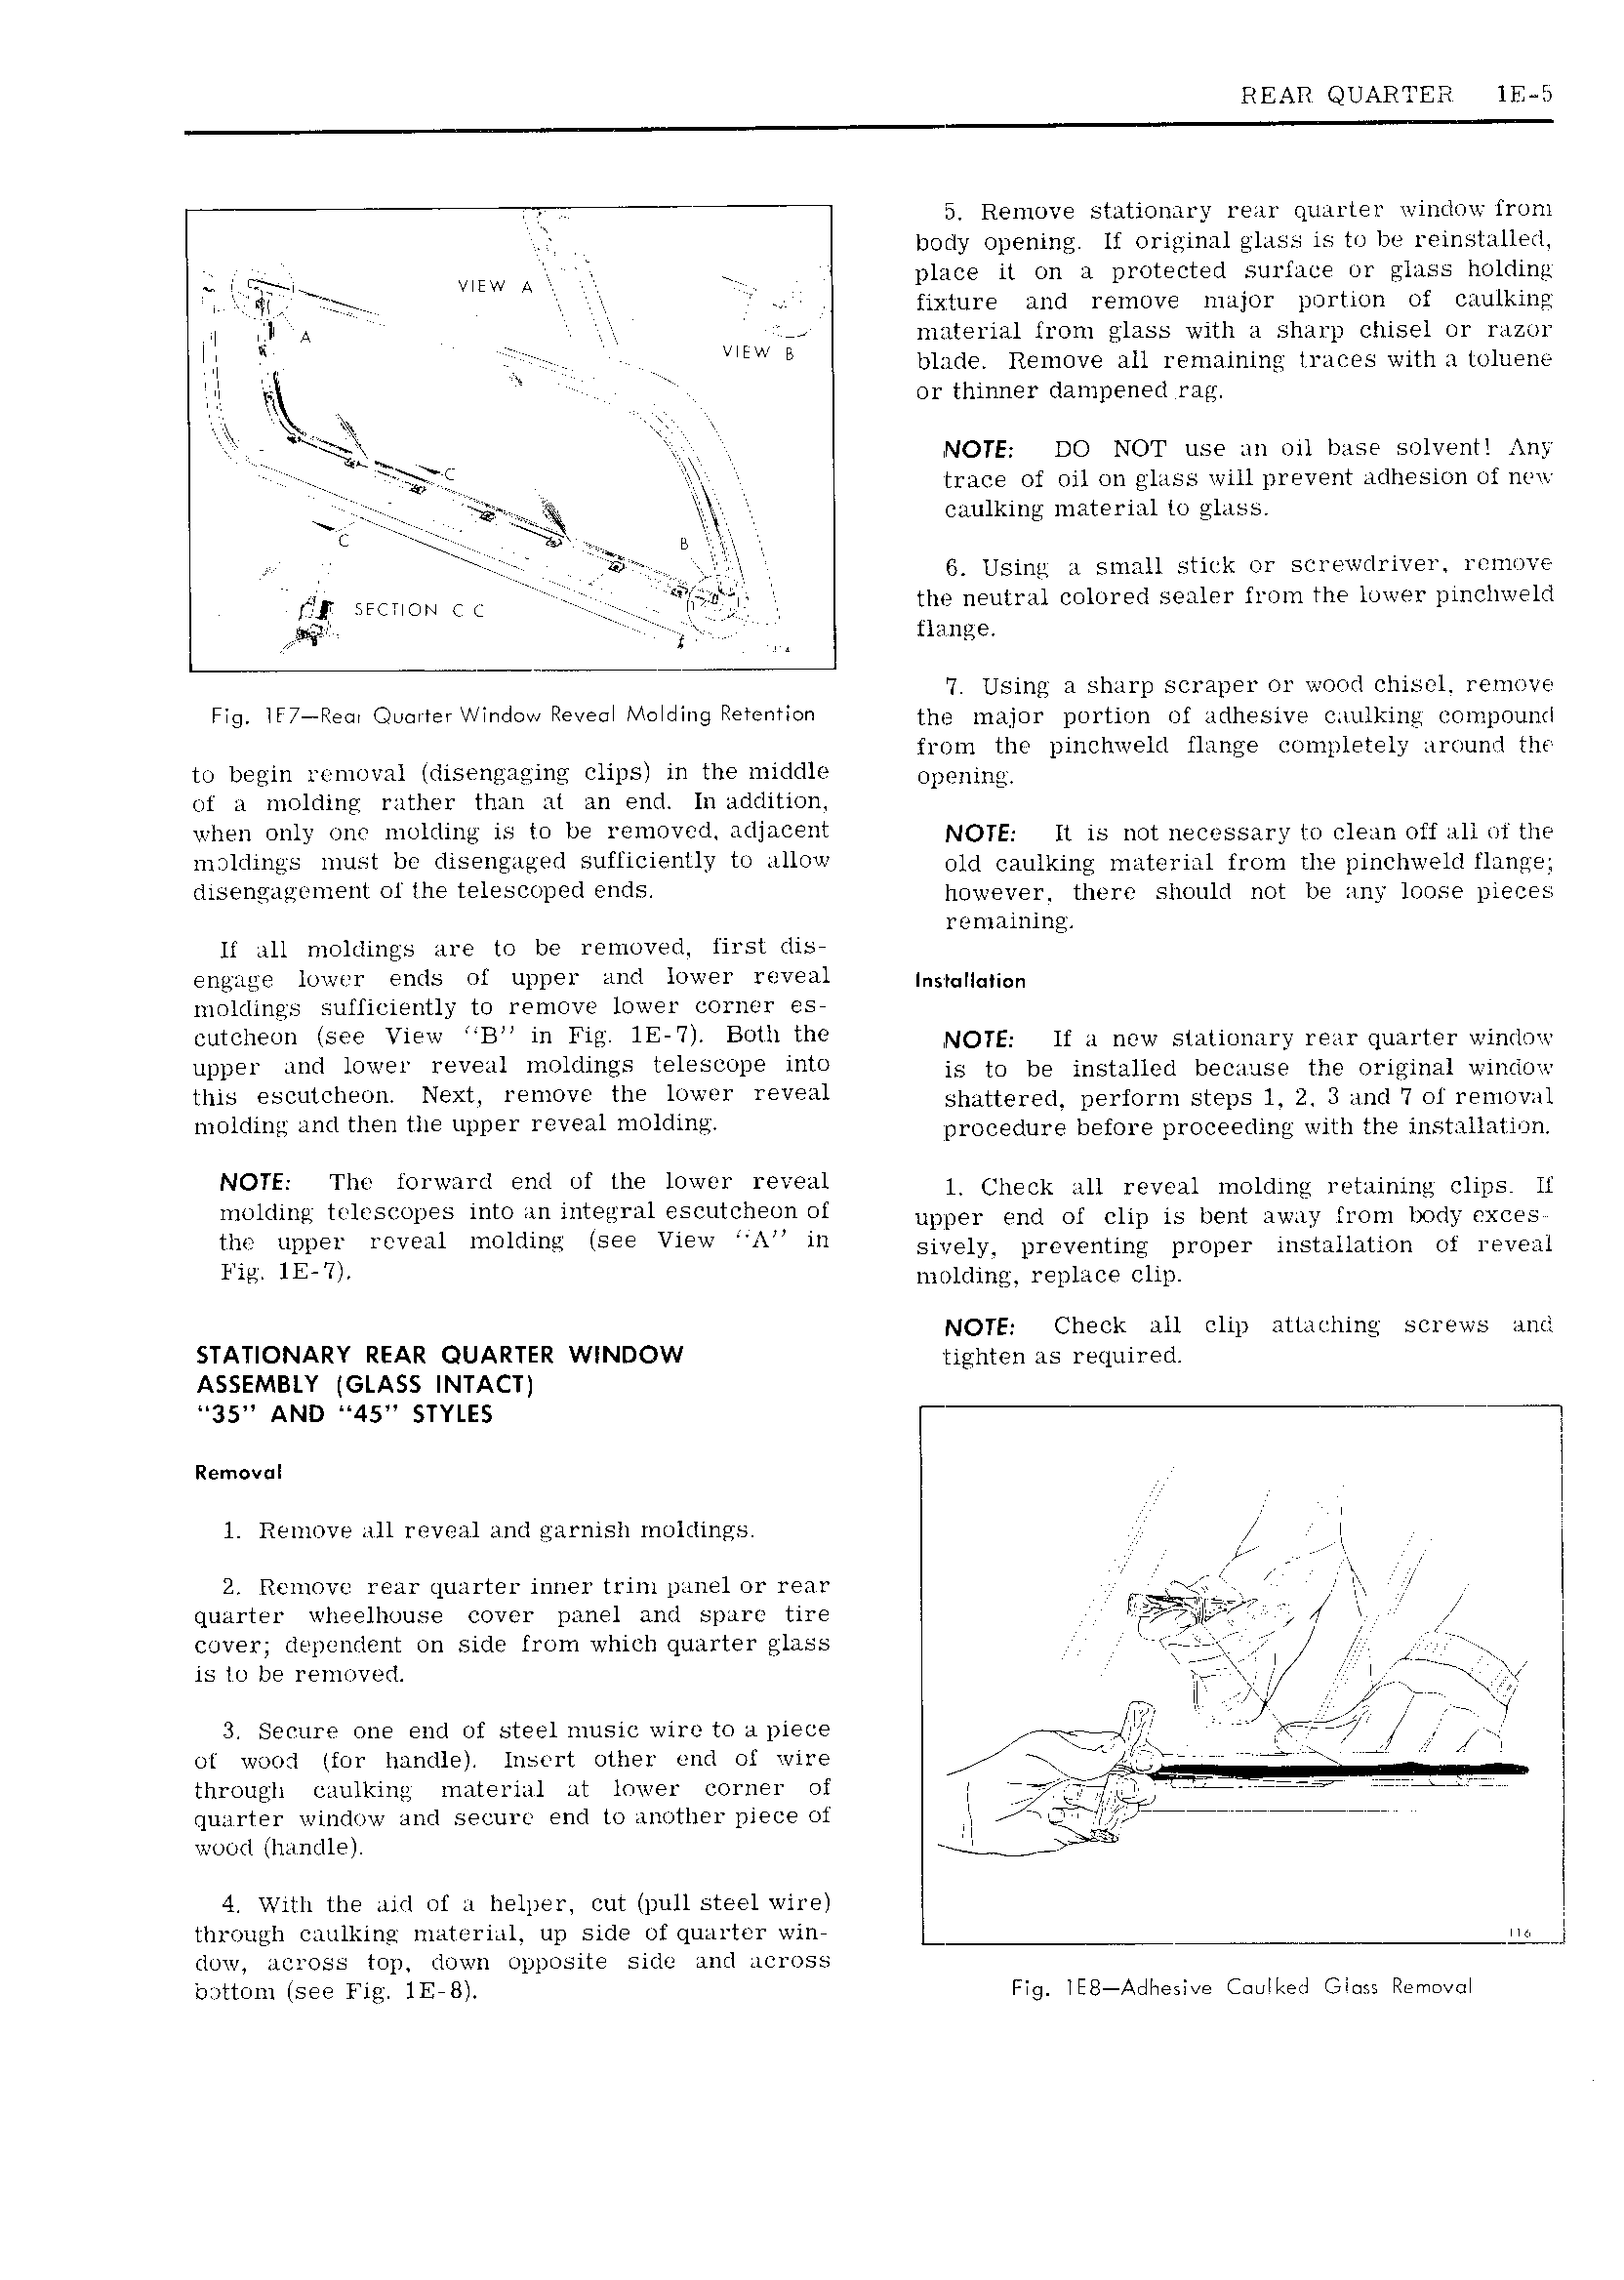
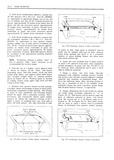
REAR QUARTER 1E 5 Remove stationary rear quarter windov from body opening lf Original glass is to be reinstalled L i G Ey AL V V place it on a protected surface or glass holding 1 L L LL fixture and remove major portion of caulking L QL ar material irom glass with a sharp chisel or razor LL LLL V L LLEL L E blade Remove all remaining trarzes with a toluene Lp or thinner dampened rag j j NOTE DO NOT use an oil base solvent An L trace of oil on glass will prevent adhesion of new V caulking material to glass L V 6 Using 1 small stirl or s1 rewdriver rr move Ijw y C L 1 i r LiLi the neutral colored sealer from the lower pm l1weld gat i W flange 7 Using a sharp scraper or o i d chisel remove Fig lF7 F e i Own teiowiridvw Rei i Meidiiie ileientien the major portion of adhesive eaulking compound from the pinchwe ld flange completely around the To begin removal disengaging clips in the middle ppm g of a molding rather than at an end In addition when only one molding is to be removed adjacent NQTE p 15 not u 0SS u L L L skim Off up My the mi 1 1ma must be iii e ie ew Sufficienilr ti 11 i rnd eauiknig material neu the pmeilweia rituige U5 i l f m UL 1Vihet l i G i d however there should not be any loose pieces remaining It all moldings are to be removed first dis engage lower ends of upper and lower reveal S H H n moldings sufficiently to remove lower corner es Cutchw SS View BLL in Fig 1E 7L B ih thc NOTE lf 1 new stationary rear quarter window upper and lower reveal moldings telescope into LO be msmucd because me magma mdU this SCuLCh NEXL 1 Emm 9 mg l ieve 1 shattered perform steps 1 2 3 and 7 ot removal molding and then the upper reveal molding procedure befmwe plwceedmg wml hg msmunmml NOTE Vm f m d End uf the 1 v V 1 1 Check all reveal molding retaining clips H molding t1 lz scopes into an integral eseutuheon of umm gud Of cup is hem H ly mm bwiy NCES mp UDVEIV NVEM mqldmq SEE View V LL in sively prc venting proper installation of reveal Fig 1E VLL molding replace clip NOTE Check all clip attaching screws and STATIONARY REAR QUARTER WINDOW tighten us pequj ed ASSEMBLY GLASS INTACT 35 AND 45 STYLES 74 L Removal L 1 Remove all reveal and garnish moldings L L 2 Remove rear quarter inner trim panel or rear v J L L quarter wheelhouse cover panel and sparc tire LLLEEQLLEQVV 4 L cover dependent on side from which quarter glass L 5 7 V LL L is to be removed xiii L L i V rl s L L Secure one end of steel music wire to a piece a 77 g L LL L jfi I L L ot wood for handle insert other end of rvire 4 AL J L througjli caulking material at lower corner of L f o l 7 i 4 L quarter v indo v and secure end to another piece of L Q T L f Y 77 7 7 wood handle l L L 4 With the 114 1 of 11 helper cut pull steel wire L through oaulking materiril up side of quarter win dow across top down opposite side and across bwttom lsee Fig 1E 8L Fig iEB AdL e i1 e Caolketl Siam Rememi