Jeep Parts Wiki | Ford Parts Wiki
Home | Search | Browse | Marketplace | Messages | FAQ | Guest
|
Body Service Manual August 1964 |
|
Prev
 Next
Next
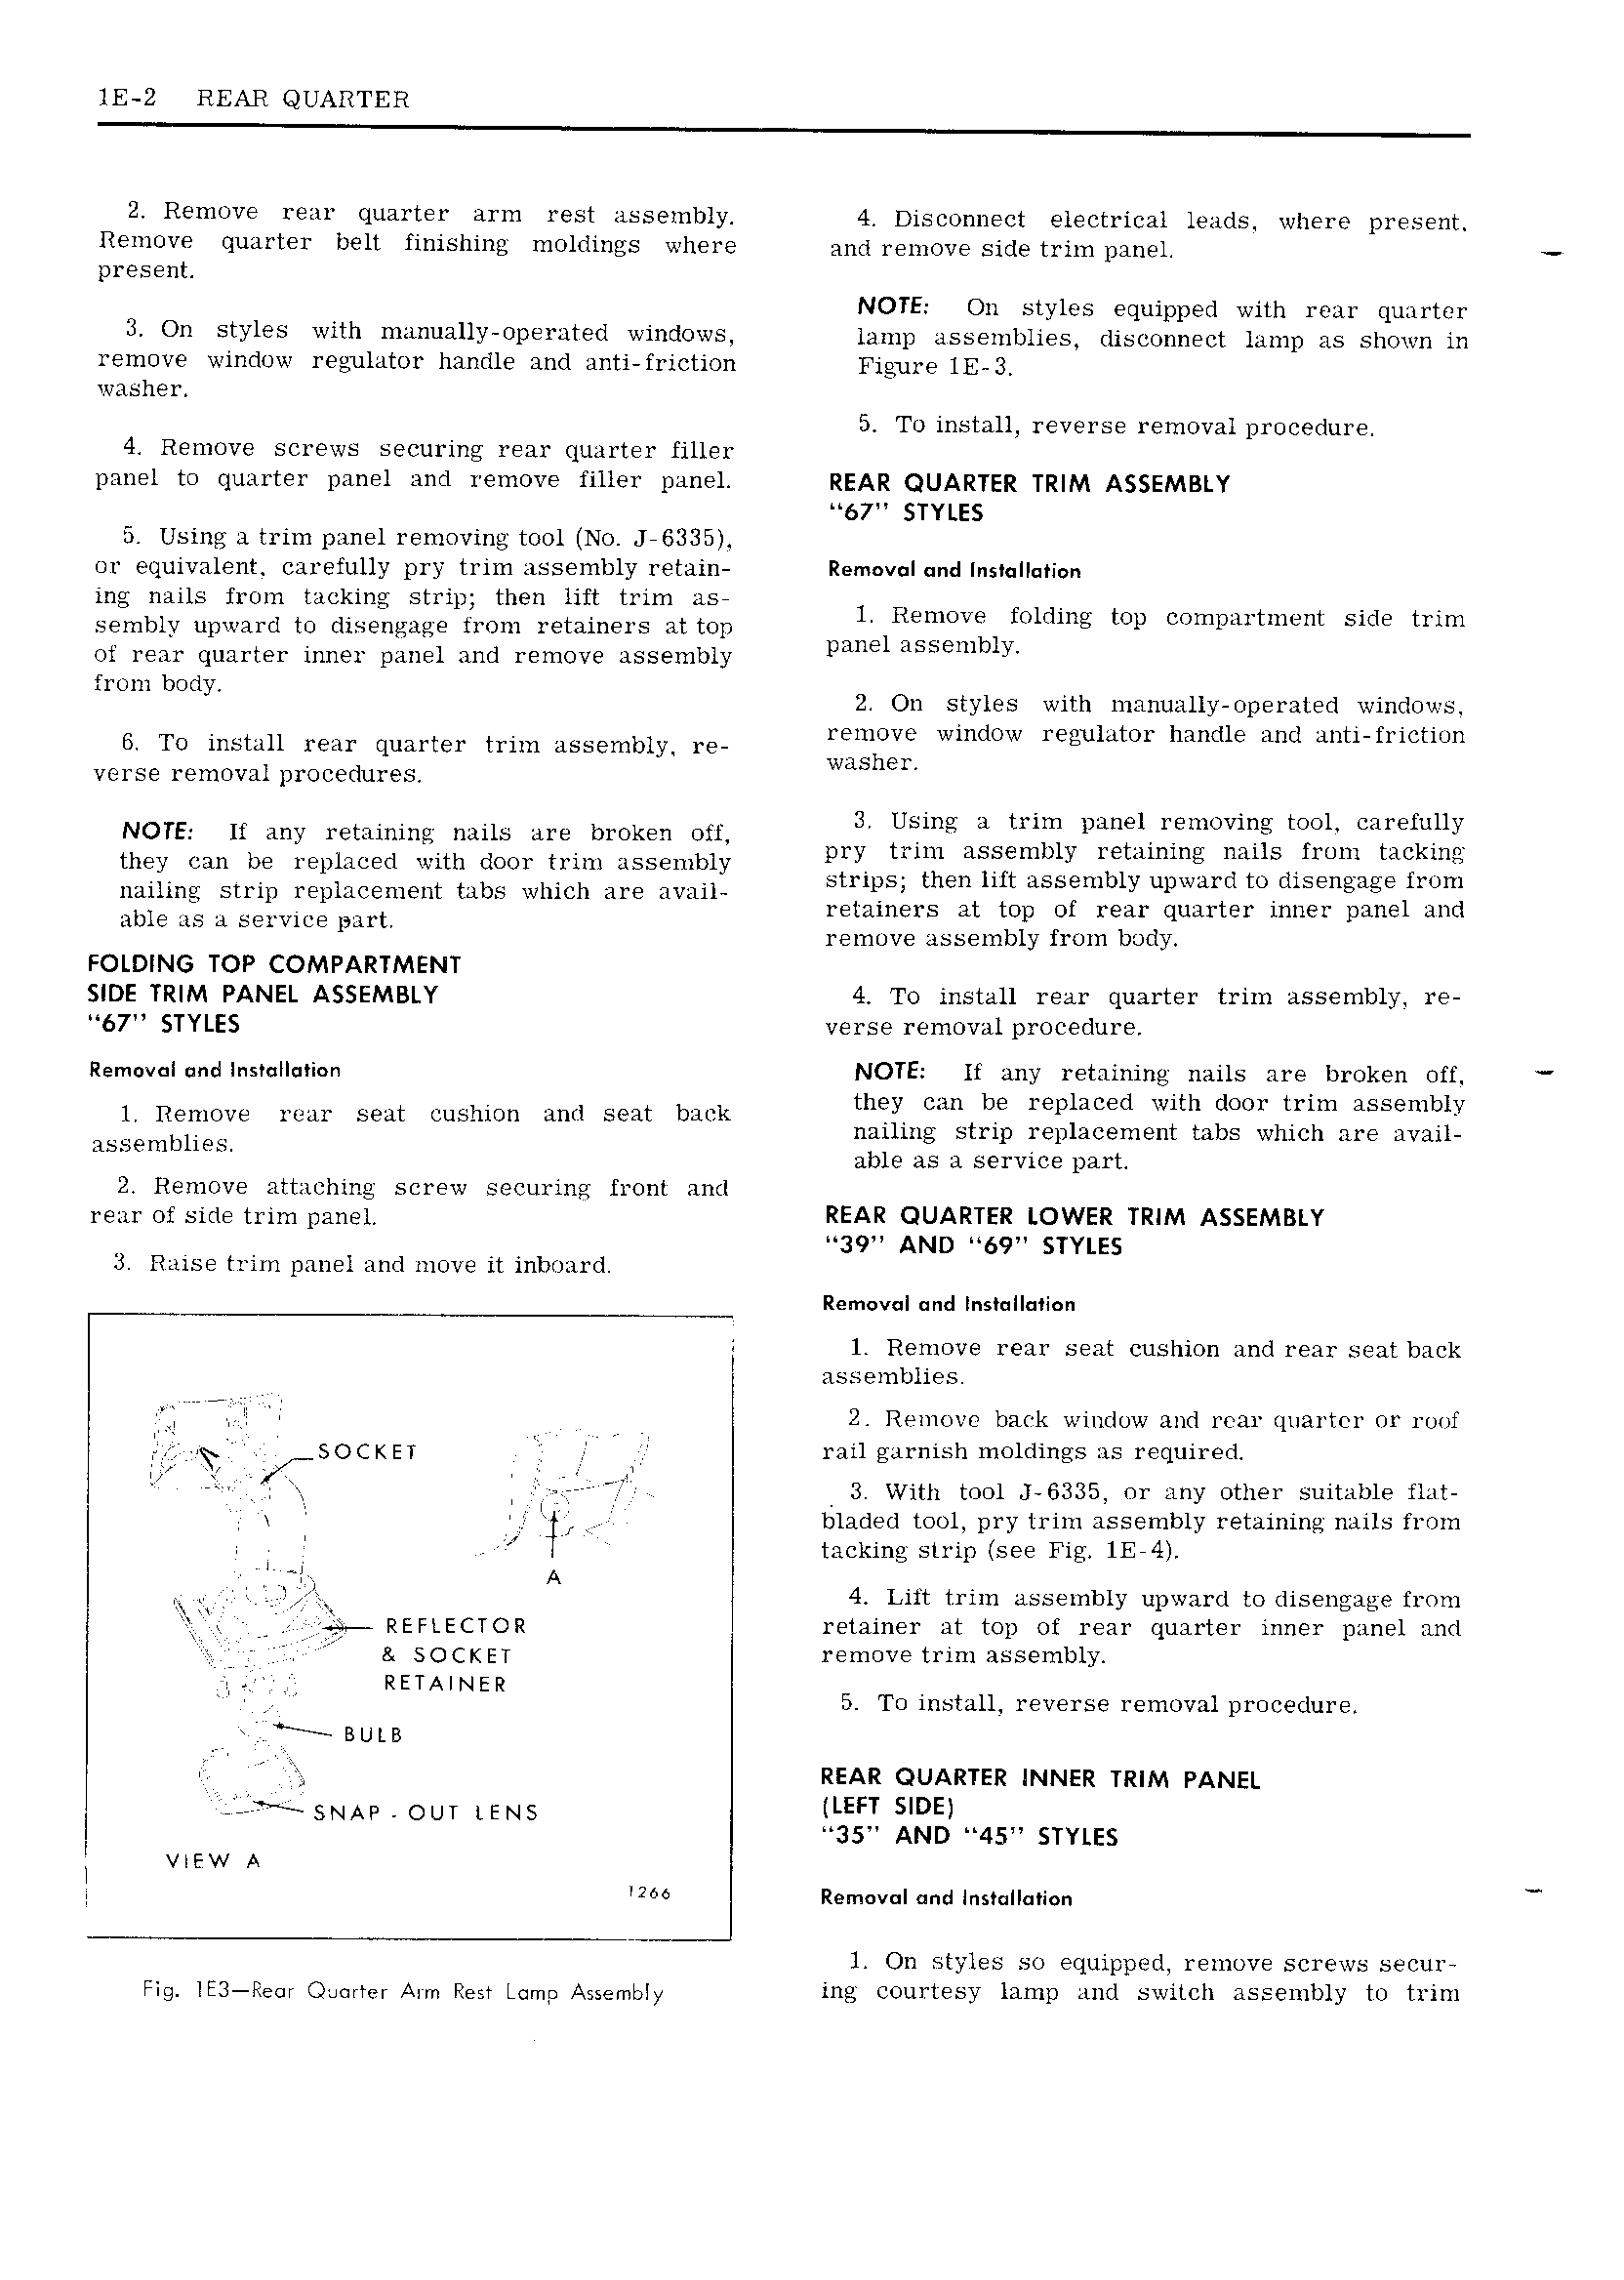
lE 2 REAR QUARTER 2 Remove rear quarter arm rest assembly 4 Disconnect electrical leads where present Remove quarter belt finishing moldings where and remove side trim panel present NOTE On styles equipped with rear quarter 3 On styles with manually operated windows lamp assemblies disconnect lamp as shown in remove window regulator handle and anti friction Figure IE 3 washer 5 To install reverse removal procedure 4 Remove screws securing rear quarter filler panel to quarter panel and remove filler panel REAR QUARTER TRIM ASSEMBLY 67 STYLES 5 Using a trim panel removing tool N0 J 6335 or equivalent carefully pry trim assembly retain Rem v I und Inslqllution ing nails from tacking strip then lift trim as 1 R V f U U 4 p A Sembly upward to disengage from yemineys at mp l 14f ll 1 T me wp cwmpaxtxntnt side nlm of rear quarter inner panel and remove assembly lmu lsbem y from body 2 On styles with manually operated windows 6 TO install 1 m qum t 1 trim assembly x E remove window regulator handle and anti friction washer verse removal procedures NOTE If any retaining nails are broken off iitxliilivlgllil 1 Ell OVl ti Catlleilglli they can be replaced with door trim assembly pil Um ASEEUUX le dmme um S 4 lum A9 m strips then lilt assembly upward to disengage iroin nailing strip replacement tabs which are avail N retzimers at top of rear quarter inner panel and able as a seivire part remove assembly from body FOLDING TOP COMPARTMENT SIDE TRIM PANEL ASSEMBLY 4 To install rear quarter trim assembly re 67 STYLES verse removal procedure Remuvalundlnsrulluoiun NOTE It any retaining nails are broken off lv R mOv X Um Seat Cushwn Cmd Seat bam they can ble replaced with door trim assembly r V nailing strip replacement tabs which are avail assemblies able as a service part 2 Remove attaching screw securing front and i of Side tum pallet REAR QUARTER LOWER TRIM ASSEMBLY I 39 AND 69 STYLES 5 Raise trim panel and move 1t inboard Removal und lns II i 1 Remove rear seat cushion and rear seat back assemblies Wi E 2 Remove back window and rear quarter or roof 5OCI ET I rail garnish moldings as required lv J 3 With tool J 6335 or any other suitable flat i l I 1 bladed tool pry trim assembly retaining nails from I tacking strip see Fig 1E 4 J A W l 4 Lift trim assembly upward to disengage from Q REFLECTOR retainer at top of rear quarter inner panel and i j Z SOCKET remove trim assembly ly RETAINER 5 To install reverse removal procedure V Bum REAR QUARTER INNER TRIM PANEL sr 1A our rms LEFT SIDE I 35 AND 45 STYLES VIEW A WM Removal and Installation rv l On styles so equipped remove screws secur Fig lE3 lle r Onslrrmr Am Regt Lamp Agsemlyly ing courtesy lamp and switch assembly to trim