Jeep Parts Wiki | Ford Parts Wiki
Home | Search | Browse
|
Body Service Manual August 1964 |
|
Prev

 Next
Next
4226000
4226000
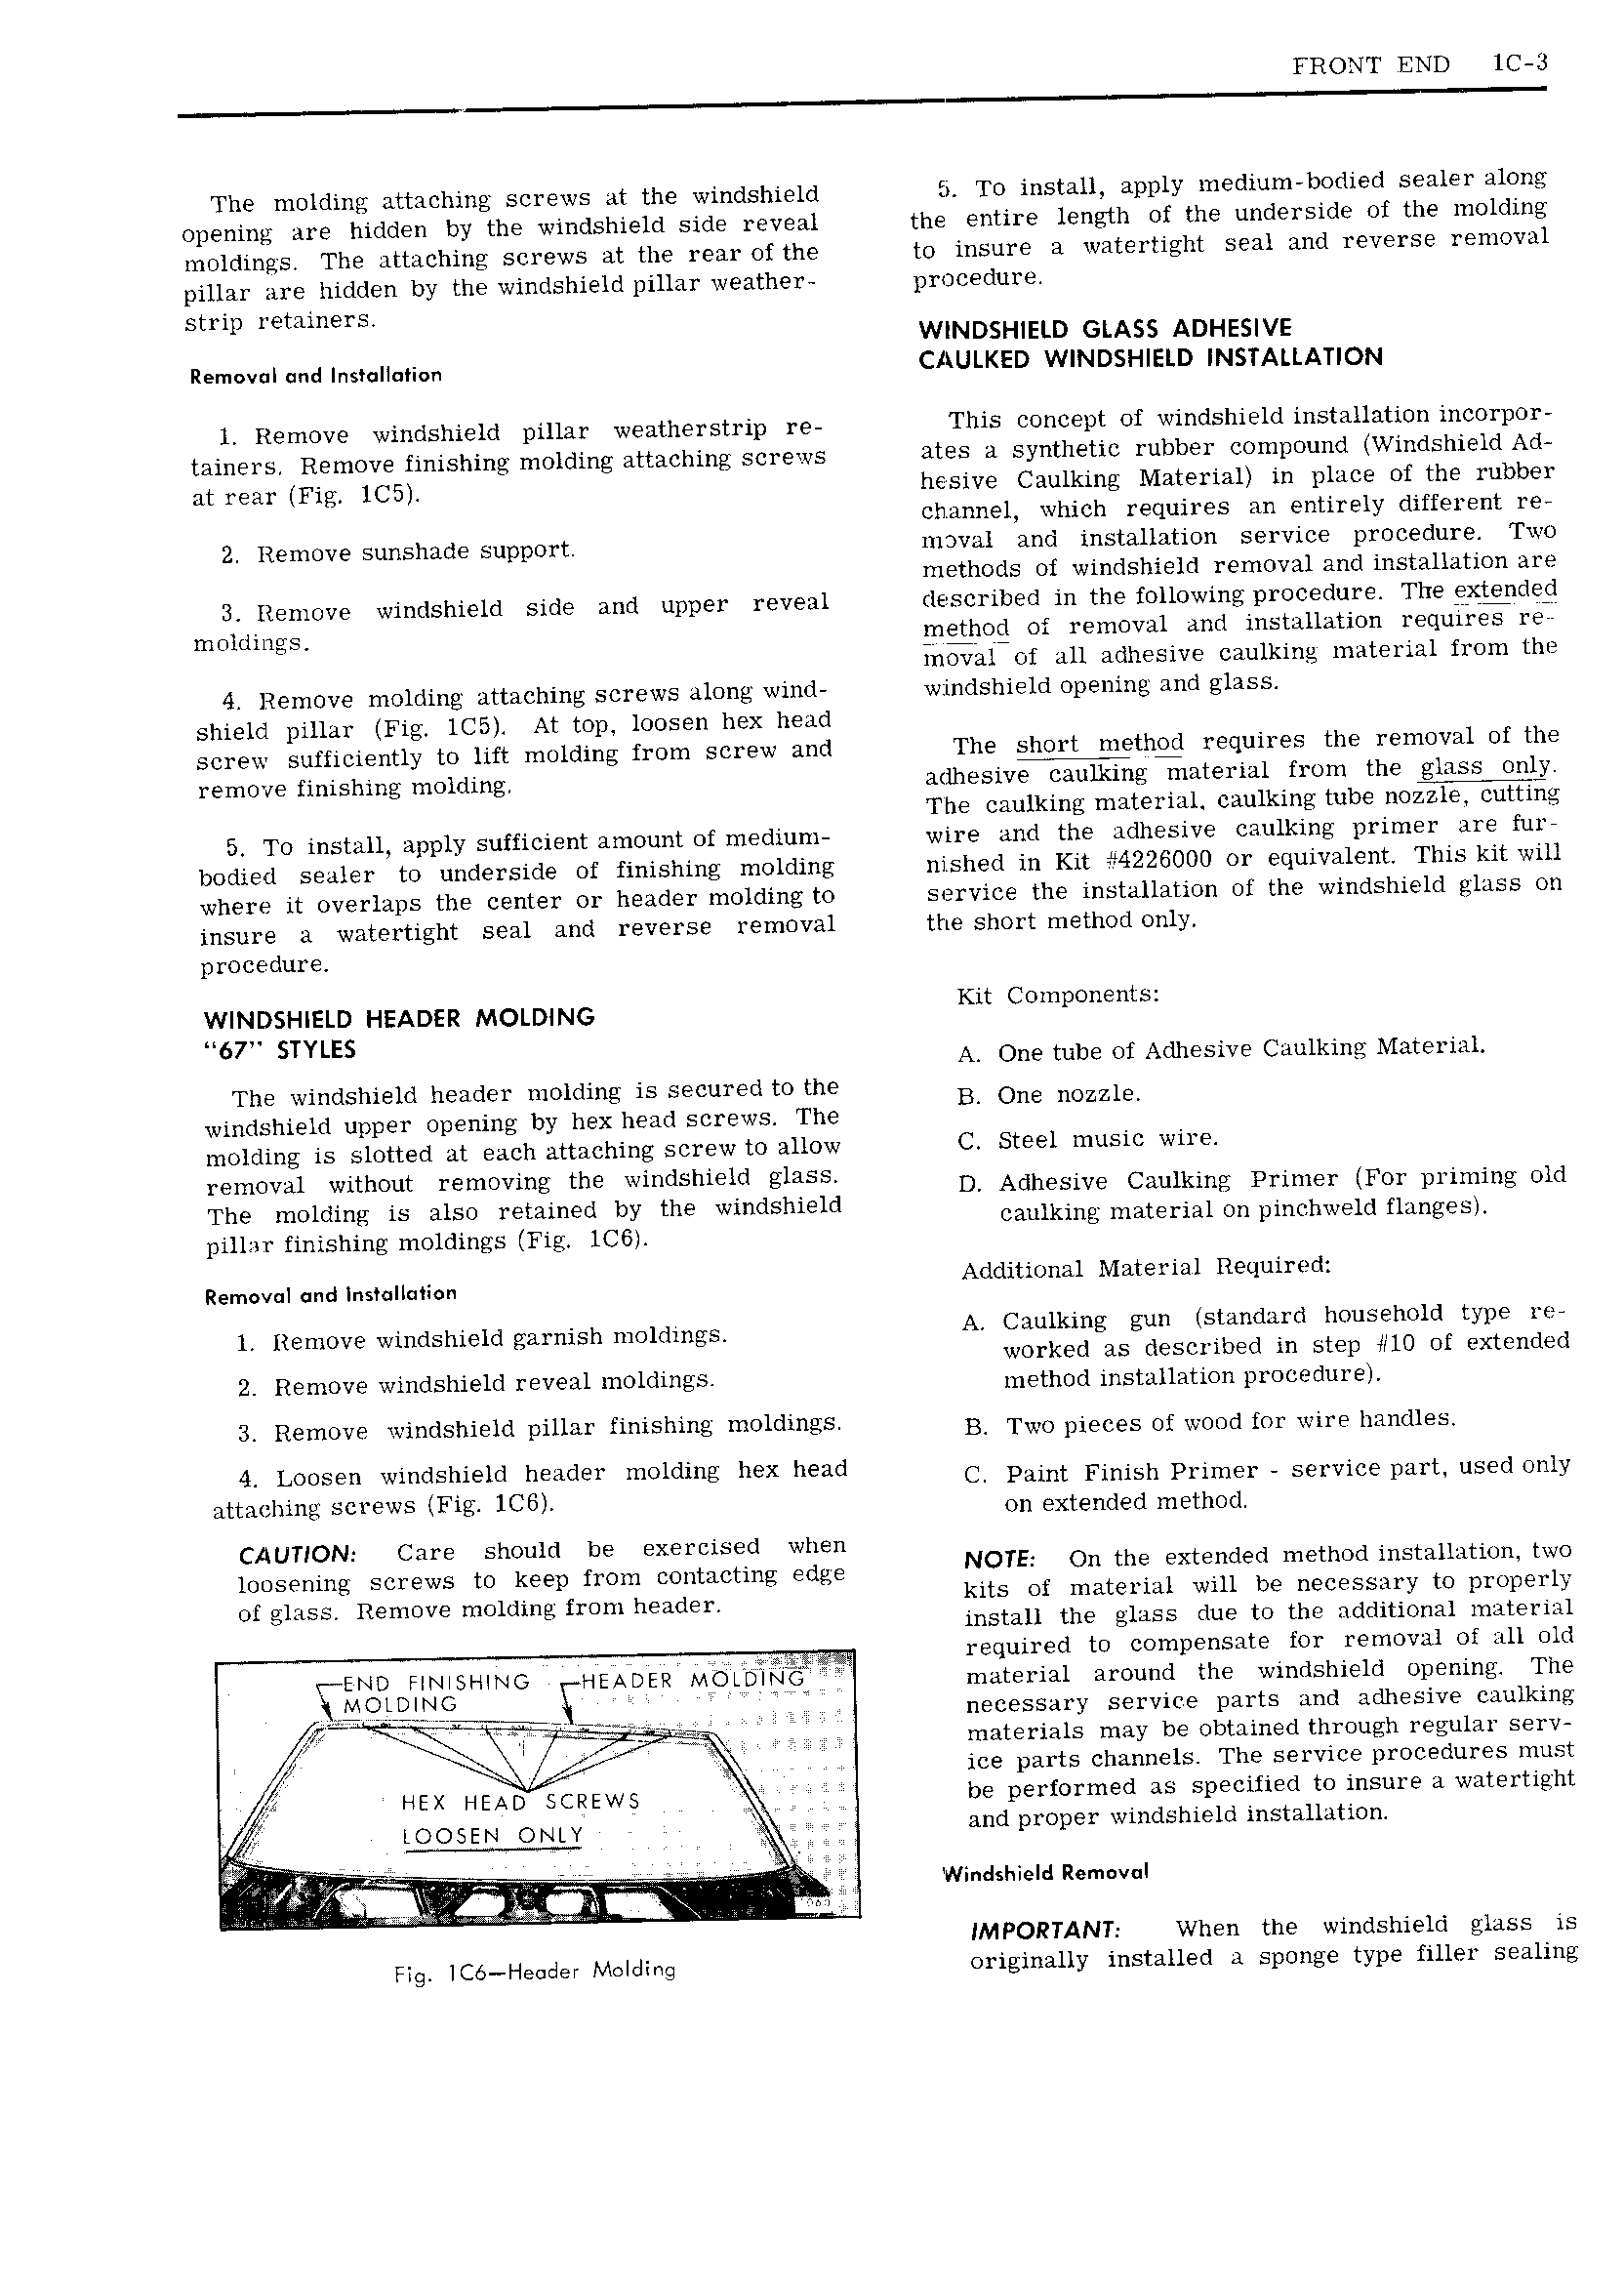
FRONT END lC 3 The molding attaching screws at the windshield Ei To install apply medium bodied sealer along opening are hidden by the windshield side reveal the entire length of the underside of the molding moldings The attaching screws at the rear of the to insure a watertight seal and reverse removal pillar are hidden by the windshield pillar weather procedure strip retainers WINDSHIELD GLASS ADHESIVE Remgvql and nsi 5 n CAULKED WINDSHIELD INSTALLATION l Remove windshield pillar weatherstrip re This Concept of windshield installation incorpor tainers Remove finishing molding attaching screws ates a synthetic rubber compound Windshield Ad at rear Fig lC5 hesive Caulking Material in place of the rubber channel which requires an entirely different re 2 Remove sunshade support moval and installation service procedure Two methods of windshield removal and installation are 3 Remove windshield side and upper reveal described in the following procedure The exgided moldings method of removal and installation requires re ingalrof all adhesive caulking material from the 4 Remove molding attaching screws along wind windshield opening and glass shield pillar Fig lC5 At top loosen hex head screw sufficiently to lift molding from screw and The short methg requires the removal of the remove finishing molding adhesive caulking material from the glass ong The caulking material caulking tube nozzle cutting 5 To install apply sufficient amount of medium wire and the adhesive caulking primer are fur bodied sealer to underside of finishing molding nished in Kit 4226000 or equivalent This kit will where it overlaps the center or header molding to service the installation of the windshield glass on insure a watertight seal and reverse removal the short method only procedure WINDSHIELD HEADER Motomc Kit C 5 67 STYLES A One tube of Adhesive Caulking Material The windshield header molding is secured to the Bi One Homie windshield upper opening by hex head screws The molding is slotted at each attaching screw to allow C Steel music wire YiHOV 11 Y1th PF 1i mOYuig the w T1Sh1 Fl D Adhesive Caulking Primer For priming old T e mo ring is a so ieta m d JY l Wm 5 19 cgmlking material on pinchweld flzmg sl pillar finishing moldings Fig lC6 Removal und insmlimion Additional Material Required ii Rmhhve Windshield garnish mOidmgS A Caulking gun standard household type re worked as described in step 10 of extended 2 Remove windshield reveal moldings method ihsmuhtioh hi Ohhdhi i 3 Remove windshield pillar finishing moldings B4 TWO pieces hi Whhd hm wh hmidies 4 Loosen windshield header molding hex head C Piiiiii Finish Piiiiihi service iiiii t usedmiiy attaching screws Fig 1Cb mi Extended method CAUTION Care should be exercised when imishiiiiig Screws io keep from hmimctiiig Edge NO TE On the extended method installation two Of gihsi Remove molding rem header ltits of material will be necessary to properly install the glass due to the additional material required to compensate for removal of all old i END FINISHING HEADER MOLDINVG material around the windshield opening The MQh 2 lN K ii necessary service parts and adhesive caulking ti materials may be obtained through regular serv 4 5 me parts channels The service procedures must HEX HEAD SCREWS be performed as specified to insure a watertight iOOSEN ONLY and proper windshield installation ww w gzly WW e i Q Windshield Removal IMPORTANT When the windshield glass is Fig lC6 Header Molding originally installed a sponge type filler sealing

 Next
Next