Jeep Parts Wiki | Ford Parts Wiki
Home | Search | Browse | Marketplace | Messages | FAQ | Guest
Prev
 Next
Next
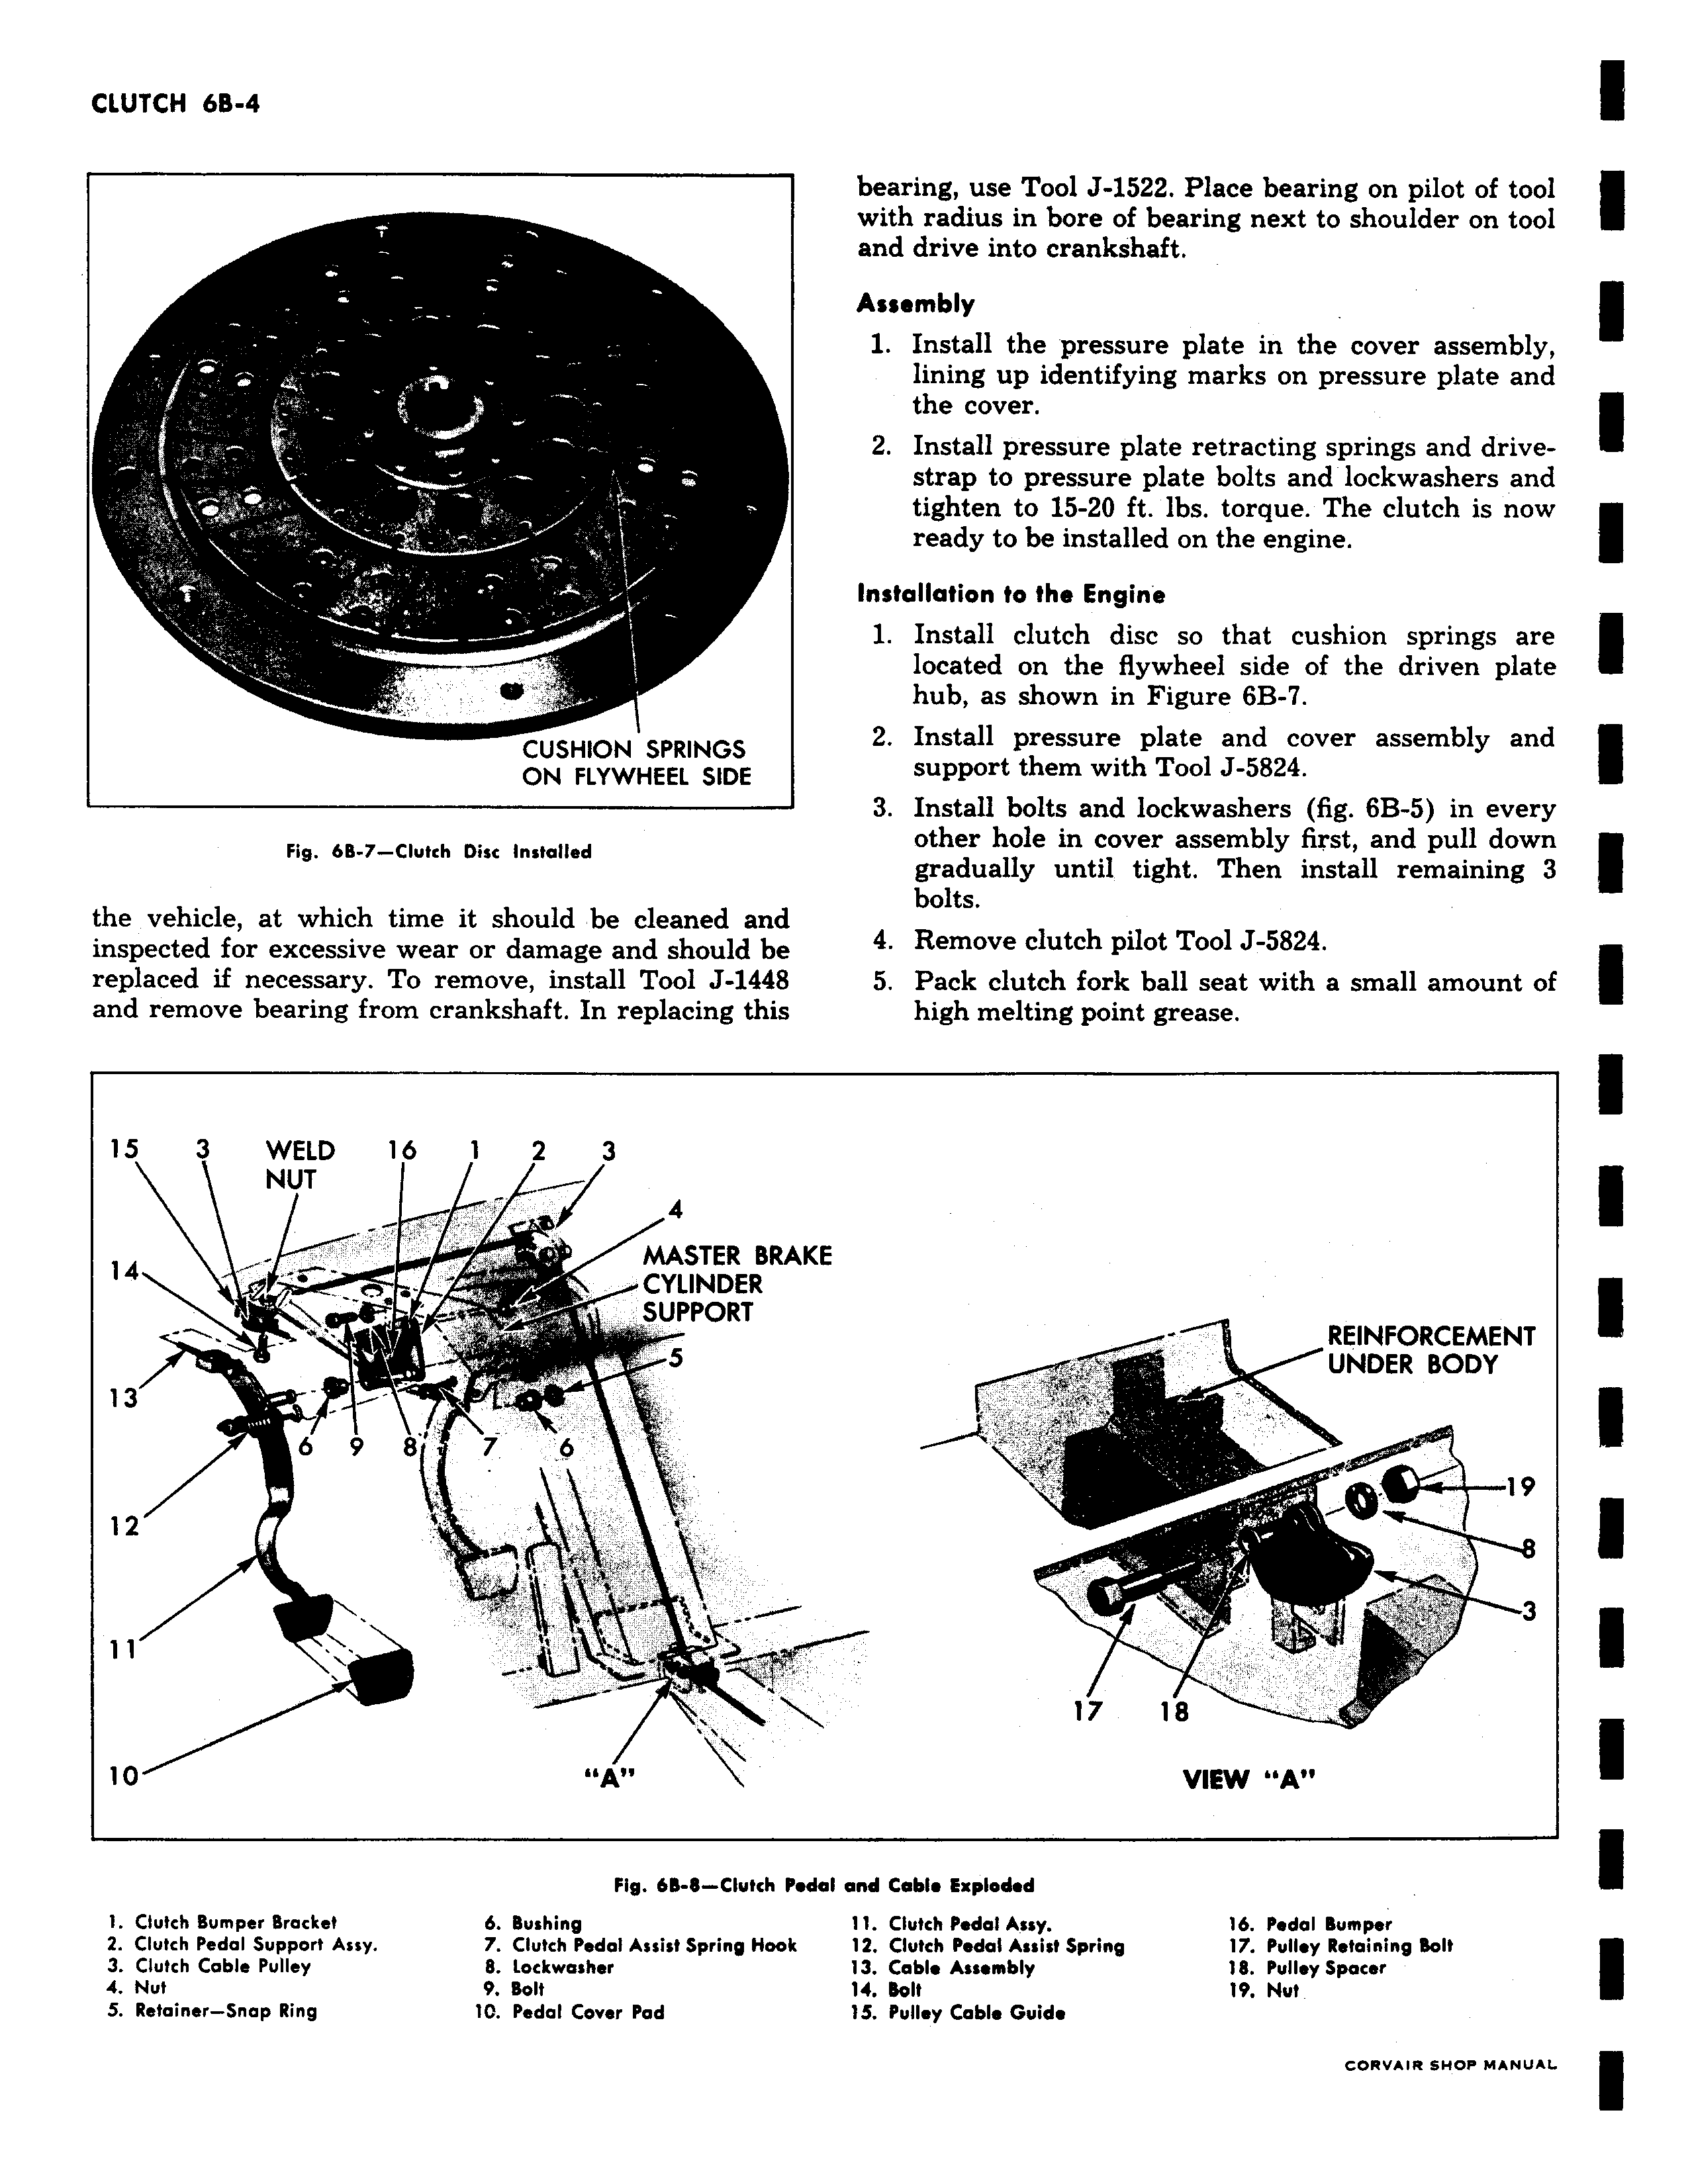
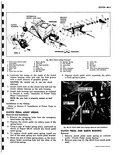
CUSHION SPRINGS ON FLYWHEEL SIDE Fig 6B 7 Clutch Disc Installed the vehicle at which time it should be cleaned and inspected for excessive wear or damage and should be replaced if necessary To remove install Tool J 1448 and remove bearing from crankshaft In replacing this 15 3 WELD 16 1 2 3 NUT 4 14 MASTER BRA CYLINDER a SUPPORT S 13 6 9 8 7 R6 12 10 A Fig 6B 8 Clutch Ps 1 Clutch Bumper Bracket 6 Bushing 2 Clutch Pedal Support Assy 7 Clutch Pedal Assist Spring Hook 3 Clutch Cable Pulley 8 Lockwasher 4 Nut 9 Bolt 5 Retainer Snap Ring 10 Pedal Cover Pad bearing use Tool J 1522 Place bearing on pilot of tool with radius in bore of bearing next to shoulder on tool and drive into crankshaft Assembly 1 Install the pressure plate in the cover assembly lining up identifying marks on pressure plate and the cover 2 Install pressure plate retracting springs and drivestrap to pressure plate bolts and lockwashers and tighten to 15 20 ft lbs torque The clutch is now ready to be installed on the engine Installation to the Engine 1 Install clutch disc so that cushion springs are located on the flywheel side of the driven plate hub as shown in Figure 6B 7 2 Install pressure plate and cover assembly and support them with Tool J 5824 3 Install bolts and lockwashers fig 6B 5 in every other hole in cover assembly first and pull down gradually until tight Then install remaining 3 bolts 4 Remove clutch pilot Tool J 5824 5 Pack clutch fork ball seat with a small amount of high melting point grease REINFORCEMENT UNDER BODY 19 w 3 ln le VIEW A dal and Cable Exploded 11 Clutch Pedal A sy 16 Pedal Bumper 12 Clutch Pedal Assist Spring 17 Pulley Retaining Bolt 13 Cable Assembly 18 Pulley Spacer 14 Bolt 19 Nut 15 Pulley Cable Guide