Jeep Parts Wiki | Ford Parts Wiki
Home | Search | Browse
Prev

 Next
Next
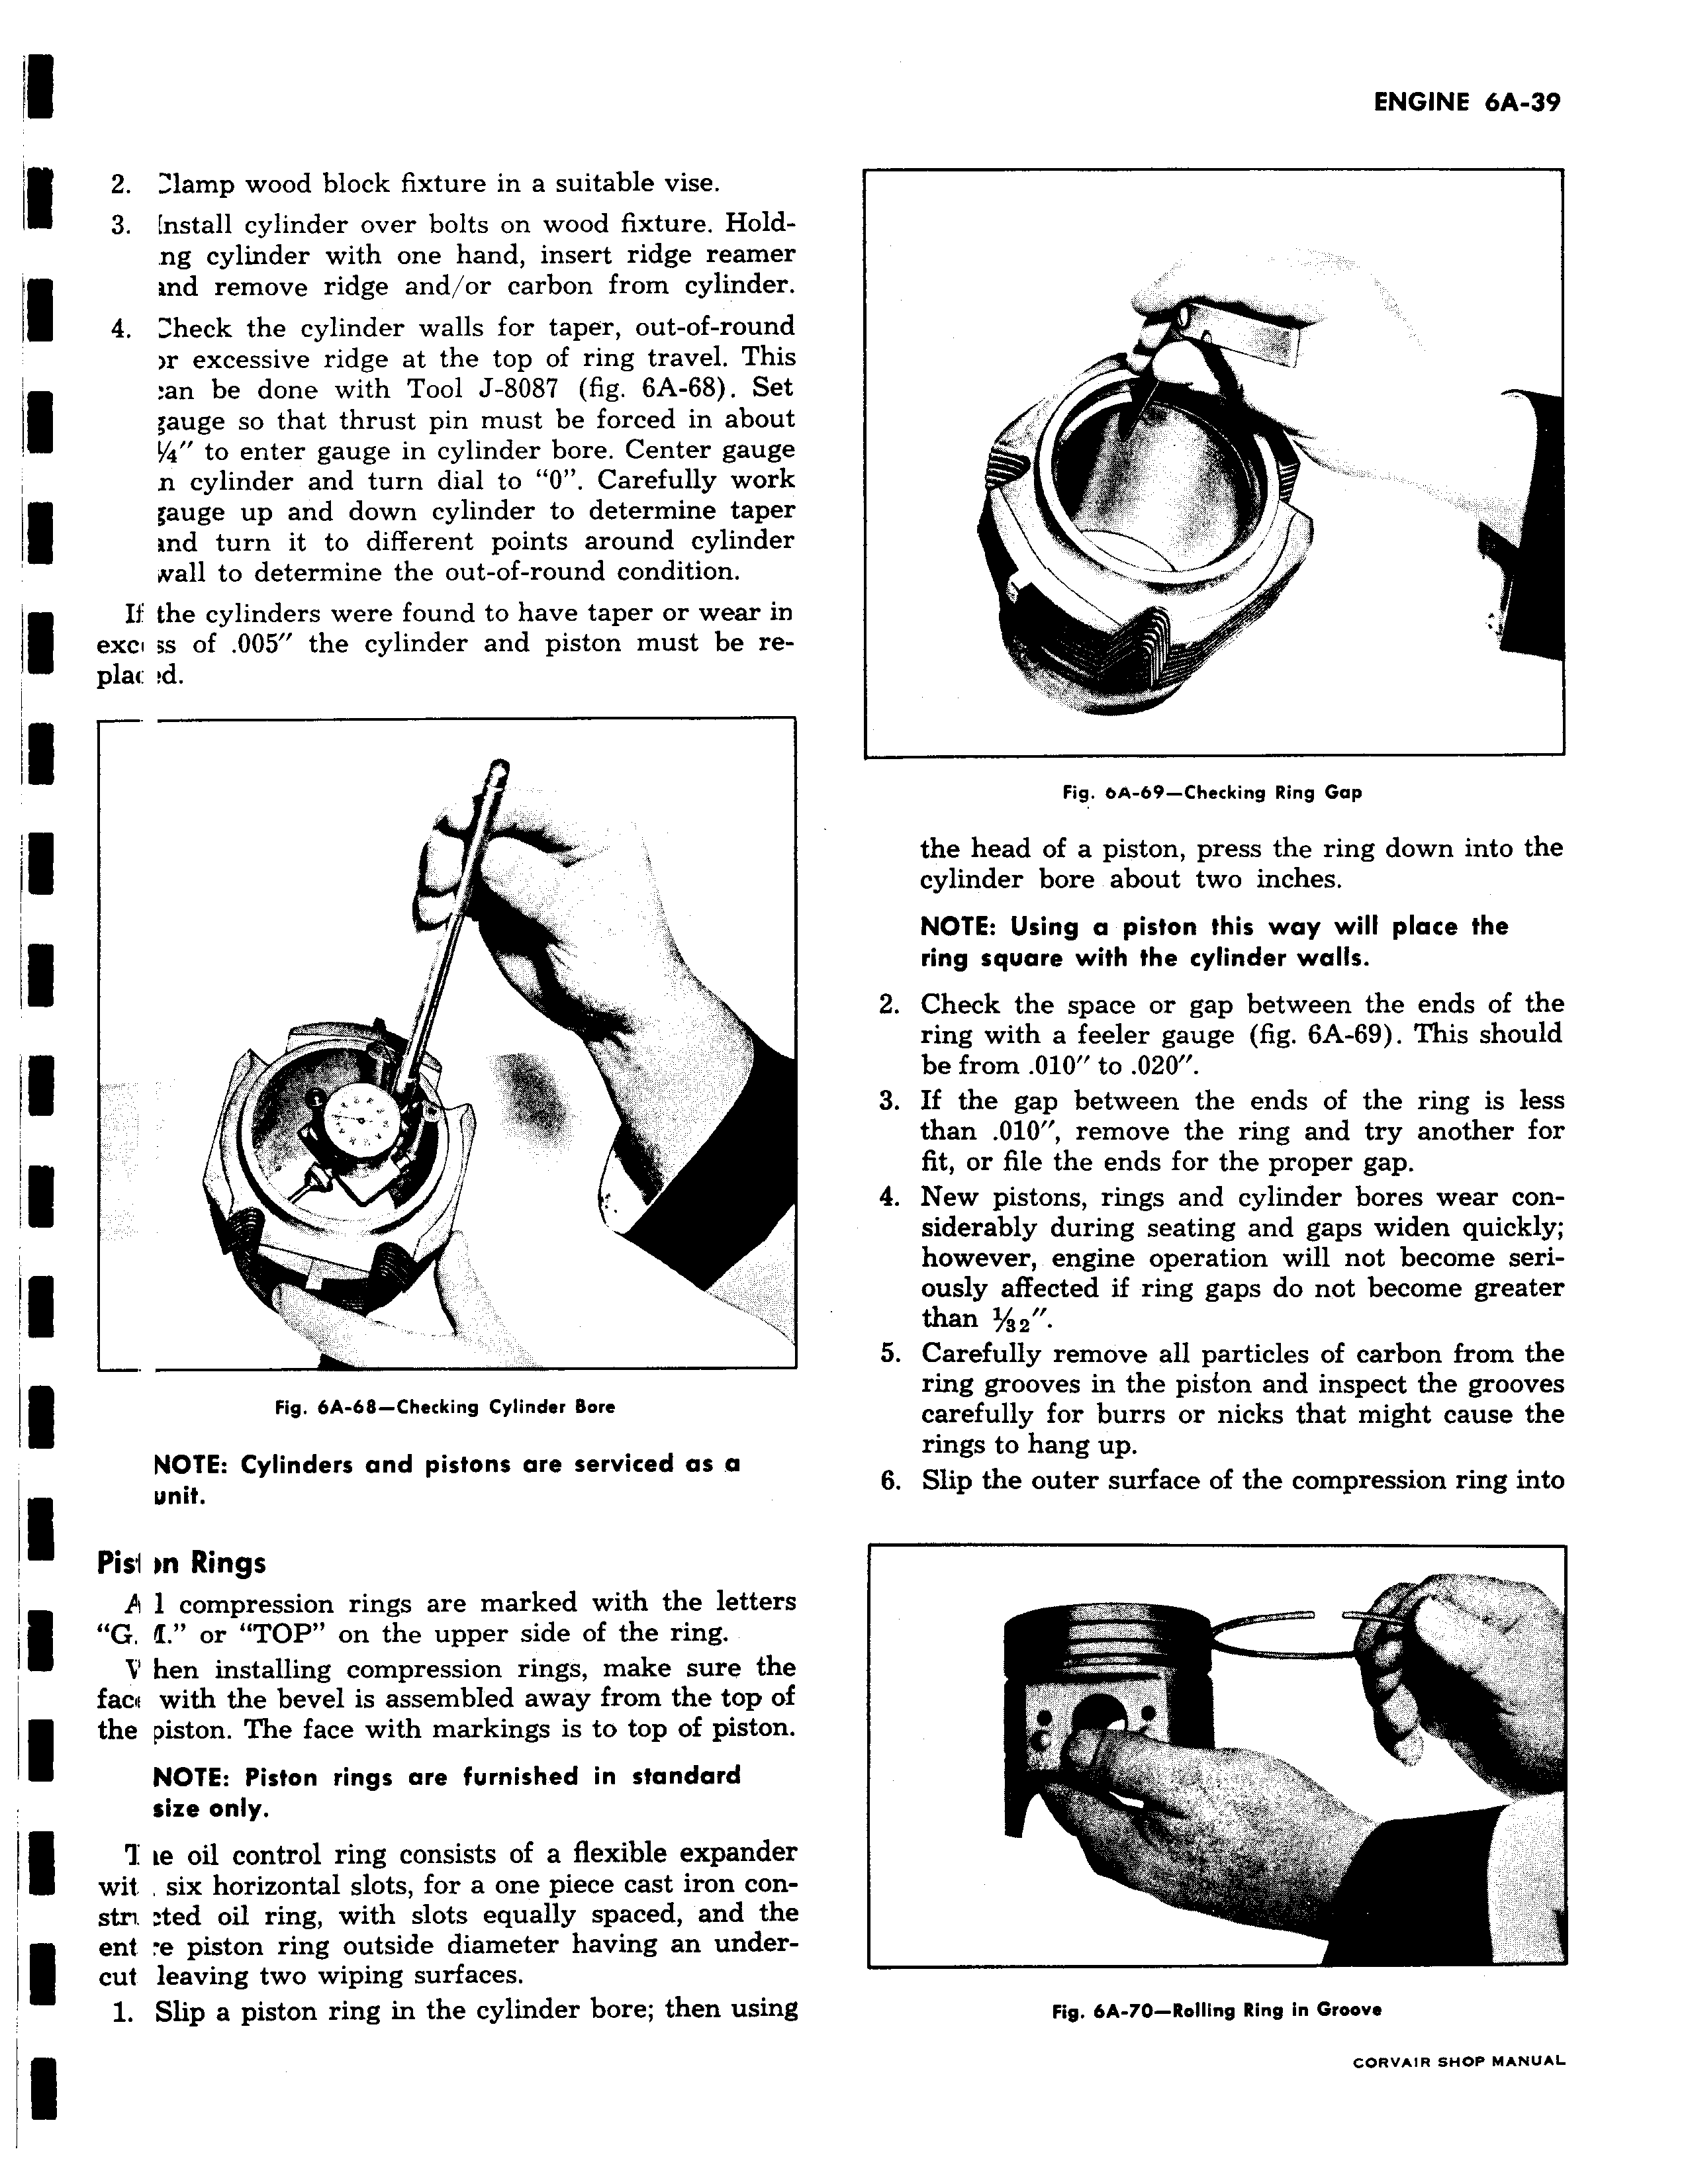
2 Mamp wood block fixture in a suitable vise 3 nstall cylinder over bolts on wood fixture Holdng cylinder with one hand insert ridge reamer I i nd remove ridge and or carbon from cylinder 4 heck the cylinder walls for taper out of round r excessive ridge at the top of ring travel This I an be done with Tool J 8087 fig 6A 68 Set gauge so that thrust pin must be forced in about y4 to enter gauge in cylinder bore Center gauge n cylinder and turn dial to 0 Carefully work gauge up and down cylinder to determine taper ind turn it to different points around cylinder wall to determine the out of round condition If the cylinders were found to have taper or wear in exci ss of 005 the cylinder and piston must be replac rd W f Fig 6A 68 Checking Cylinder Bore NOTE Cylinders and pistons are serviced as a unit Pisi m Rings A 1 compression rings are marked with the letters G 2 or TOP on the upper side of the ring hen installing compression rings make sure the faoE with the bevel is assembled away from the top of I the piston The face with markings is to top of piston NOTE Piston rings are furnished in standard size only 7 ie oil control ring consists of a flexible expander wit six horizontal slots for a one piece cast iron constn aed oil ring with slots equally spaced and the ent e piston ring outside diameter having an undercut leaving two wiping surfaces 1 Slip a piston ring in the cylinder bore then using w w Fig OA 69 Checking Ring Gap the head of a piston press the ring down into the cylinder bore about two inches NOTE Using a piston this way will place the ring square with the cylinder walls 2 Check the space or gap between the ends of the ring with a feeler gauge fig 6A 69 This should be from 010 to 020 3 If the gap between the ends of the ring is less than 010 remove the ring and try another for fit or file the ends for the proper gap 4 New pistons rings and cylinder bores wear considerably during seating and gaps widen quickly however engine operation will not become seriously affected if ring gaps do not become greater than 2 5 Carefully remove all particles of carbon from the ring grooves in the piston and inspect the grooves carefully for burrs or nicks that might cause the rings to hang up 6 Slip the outer surface of the compression ring into 61 Fig 6A 70 Rolling Ring in Groove

 Next
Next