Jeep Parts Wiki | Ford Parts Wiki
Home | Search | Browse
Prev
 Next
Next
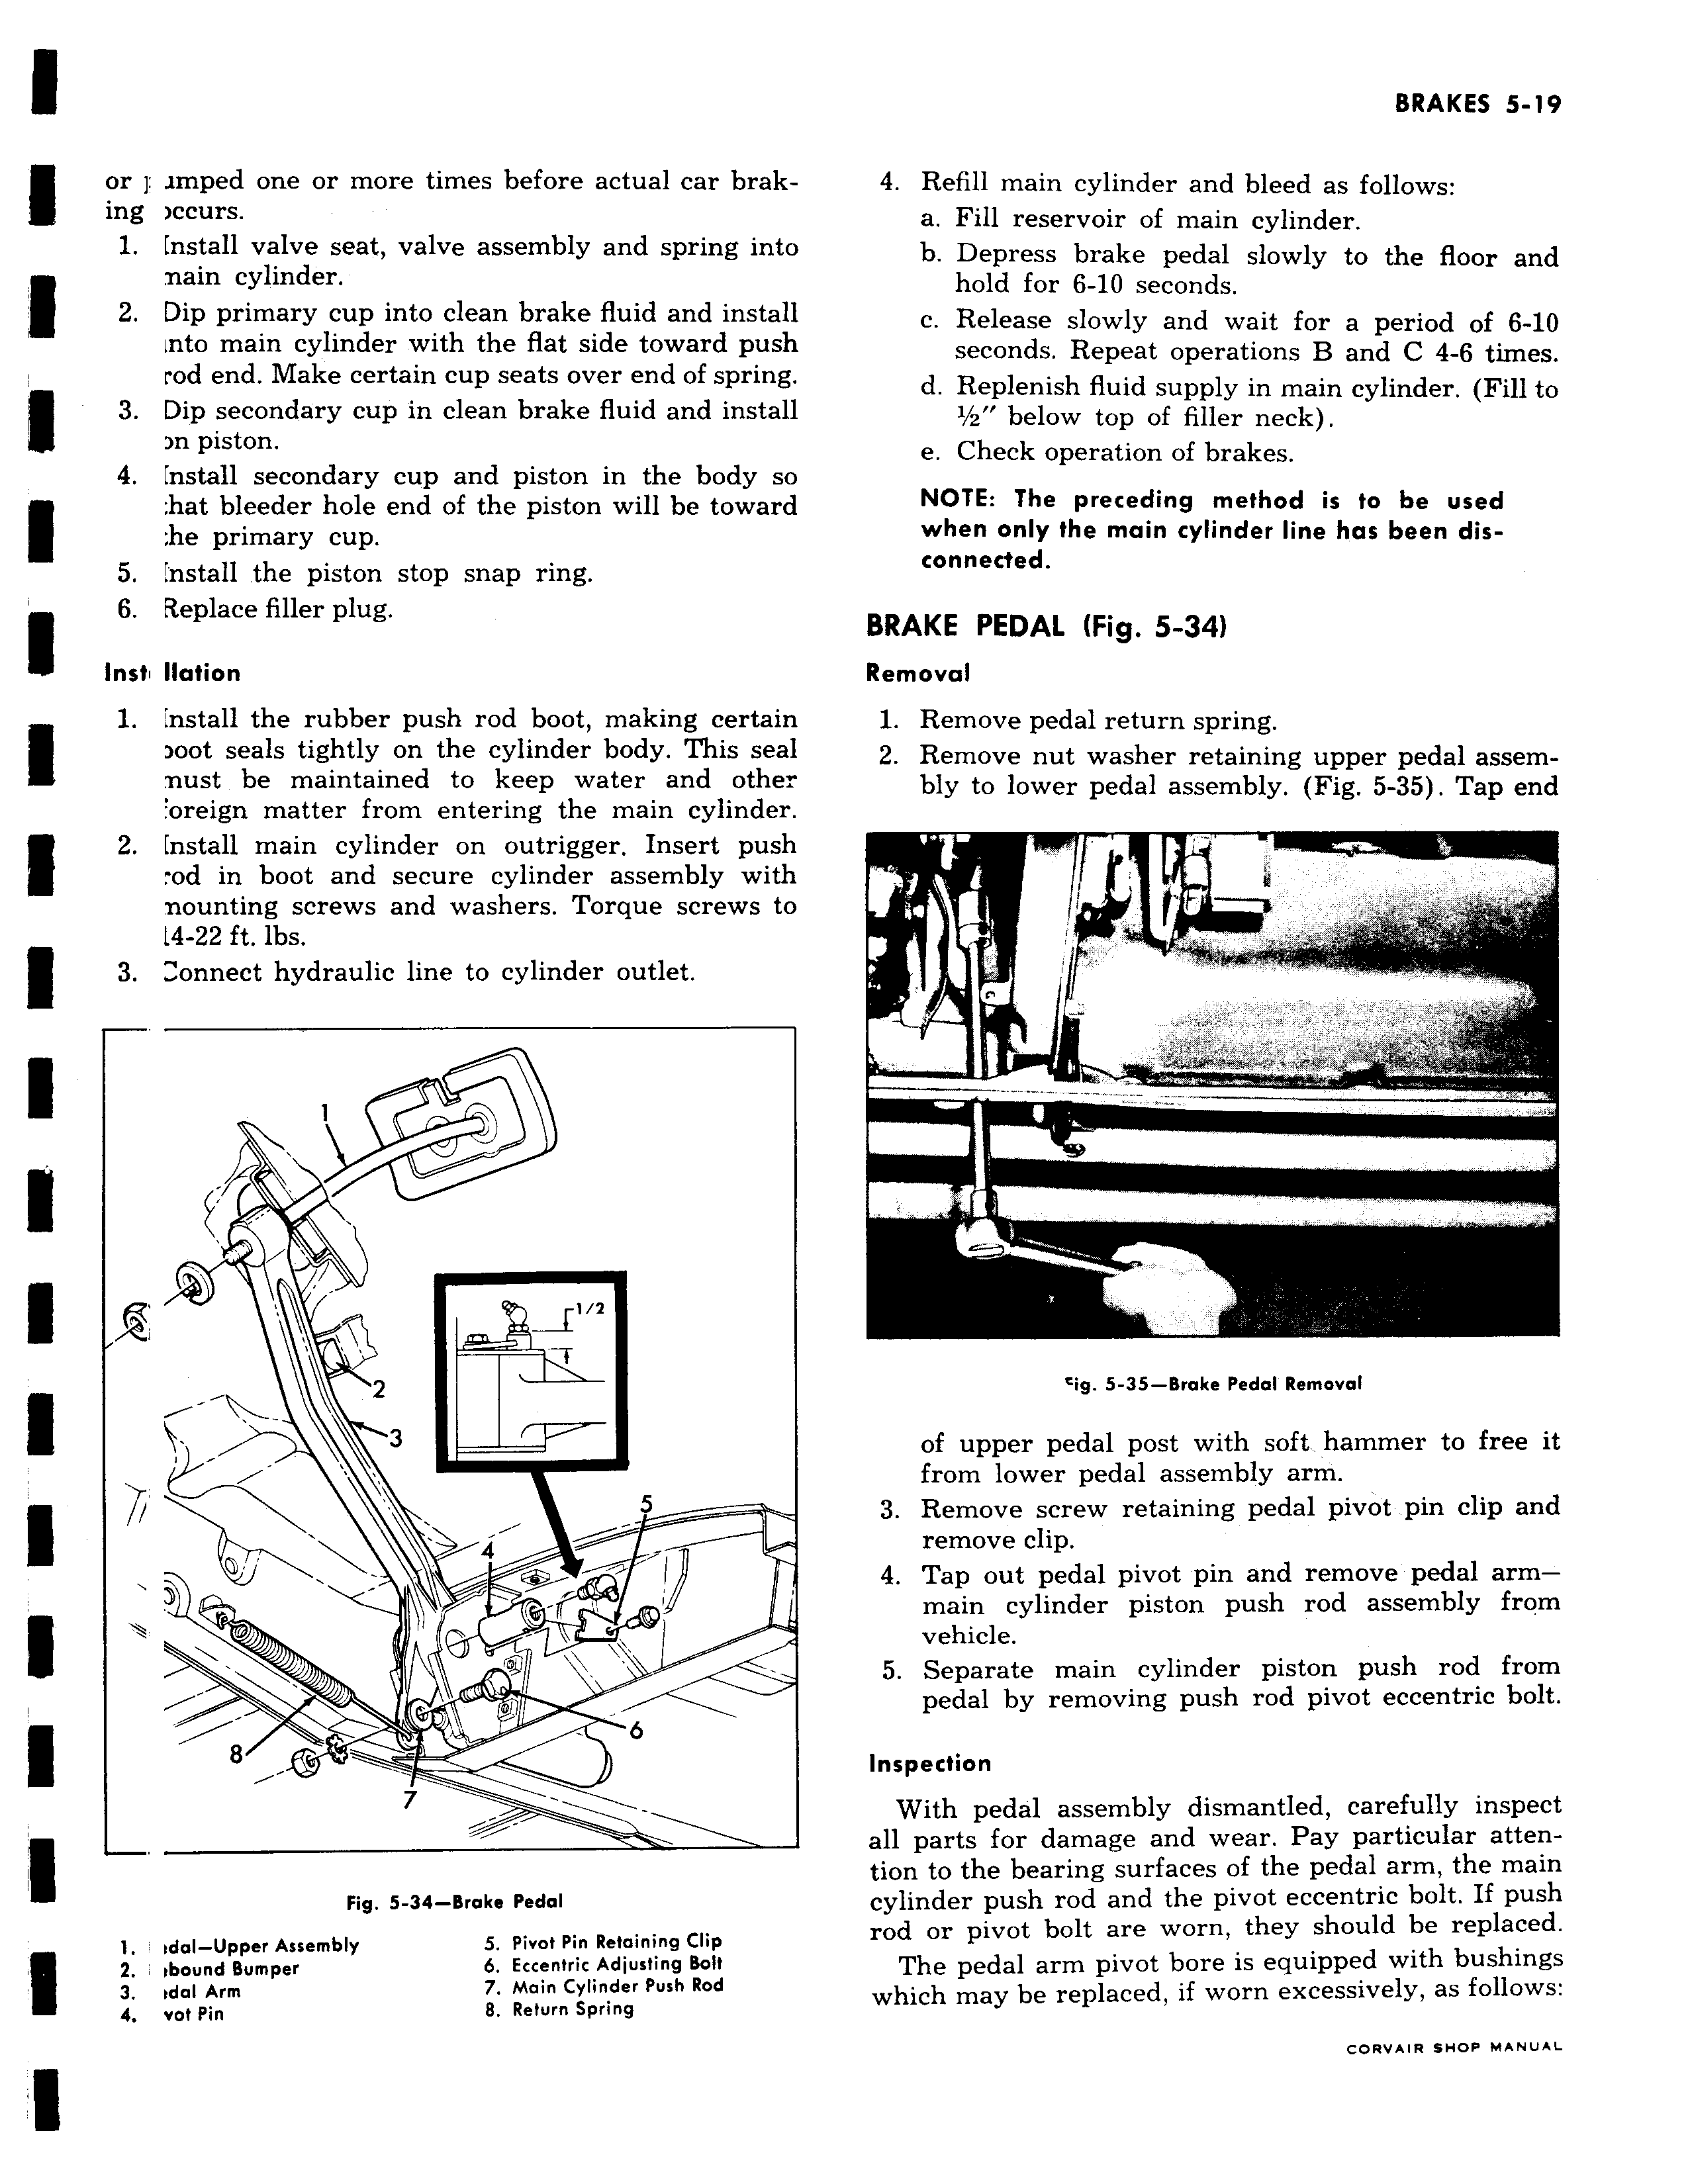
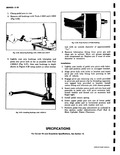
or 1 lmped one or more times before actual car braking ccurs 1 Install valve seat valve assembly and spring into nain cylinder 2 Dip primary cup into clean brake fluid and install mto main cylinder with the flat side toward push rod end Make certain cup seats over end of spring 3 Dip secondary cup in clean brake fluid and install n piston 4 Install secondary cup and piston in the body so hat bleeder hole end of the piston will be toward he primary cup 5 Install the piston stop snap ring 6 Replace filler plug Inst Ilation 1 Install the rubber push rod boot making certain oot seals tightly on the cylinder body This seal nust be maintained to keep water and other oreign matter from entering the main cylinder 2 Install main cylinder on outrigger Insert push od in boot and secure cylinder assembly with nounting screws and washers Torque screws to 14 22 ft lbs 3 onnect hydraulic line to cylinder outlet 1 4 3 i 5 r v w 6 8 7 Fig 5 34 Brake Pedal 1 td 1 Upper Assembly 5 Pivot Pin Retaining Clip 2 tbound Bumper 6 Eccentric Adjusting Bolt 3 tdal Arm 7 Main Cylinder Push Rod 4 vof Pin 8 Return Spring 4 Refill main cylinder and bleed as follows a Fill reservoir of main cylinder b Depress brake pedal slowly to the floor and hold for 6 10 seconds c Release slowly and wait for a period of 6 10 seconds Repeat operations B and C 4 6 times d Replenish fluid supply in main cylinder Fill to 1 z below top of filler neck e Check operation of brakes NOTE The preceding method is to be used when only the main cylinder line has been disconnected BRAKE PEDAL Fig 5 34 Removal 1 Remove pedal return spring 2 Remove nut washer retaining upper pedal assembly to lower pedal assembly Fig 5 35 Tap end i a r r ig 5 35 Brake Pedal Removal of upper pedal post with soft hammer to free it from lower pedal assembly arm 3 Remove screw retaining pedal pivot pin clip and remove clip 4 Tap out pedal pivot pin and remove pedal armmain cylinder piston push rod assembly from vehicle 5 Separate main cylinder piston push rod from pedal by removing push rod pivot eccentric bolt Inspection With pedal assembly dismantled carefully inspect all parts for damage and wear Pay particular attention to the bearing surfaces of the pedal arm the main cylinder push rod and the pivot eccentric bolt If push rod or pivot bolt are worn they should be replaced The pedal arm pivot bore is equipped with bushings which may be replaced if worn excessively as follows CORVAIR SHOP MANUAL