Jeep Parts Wiki | Ford Parts Wiki
Home | Search | Browse
Prev
 Next
Next
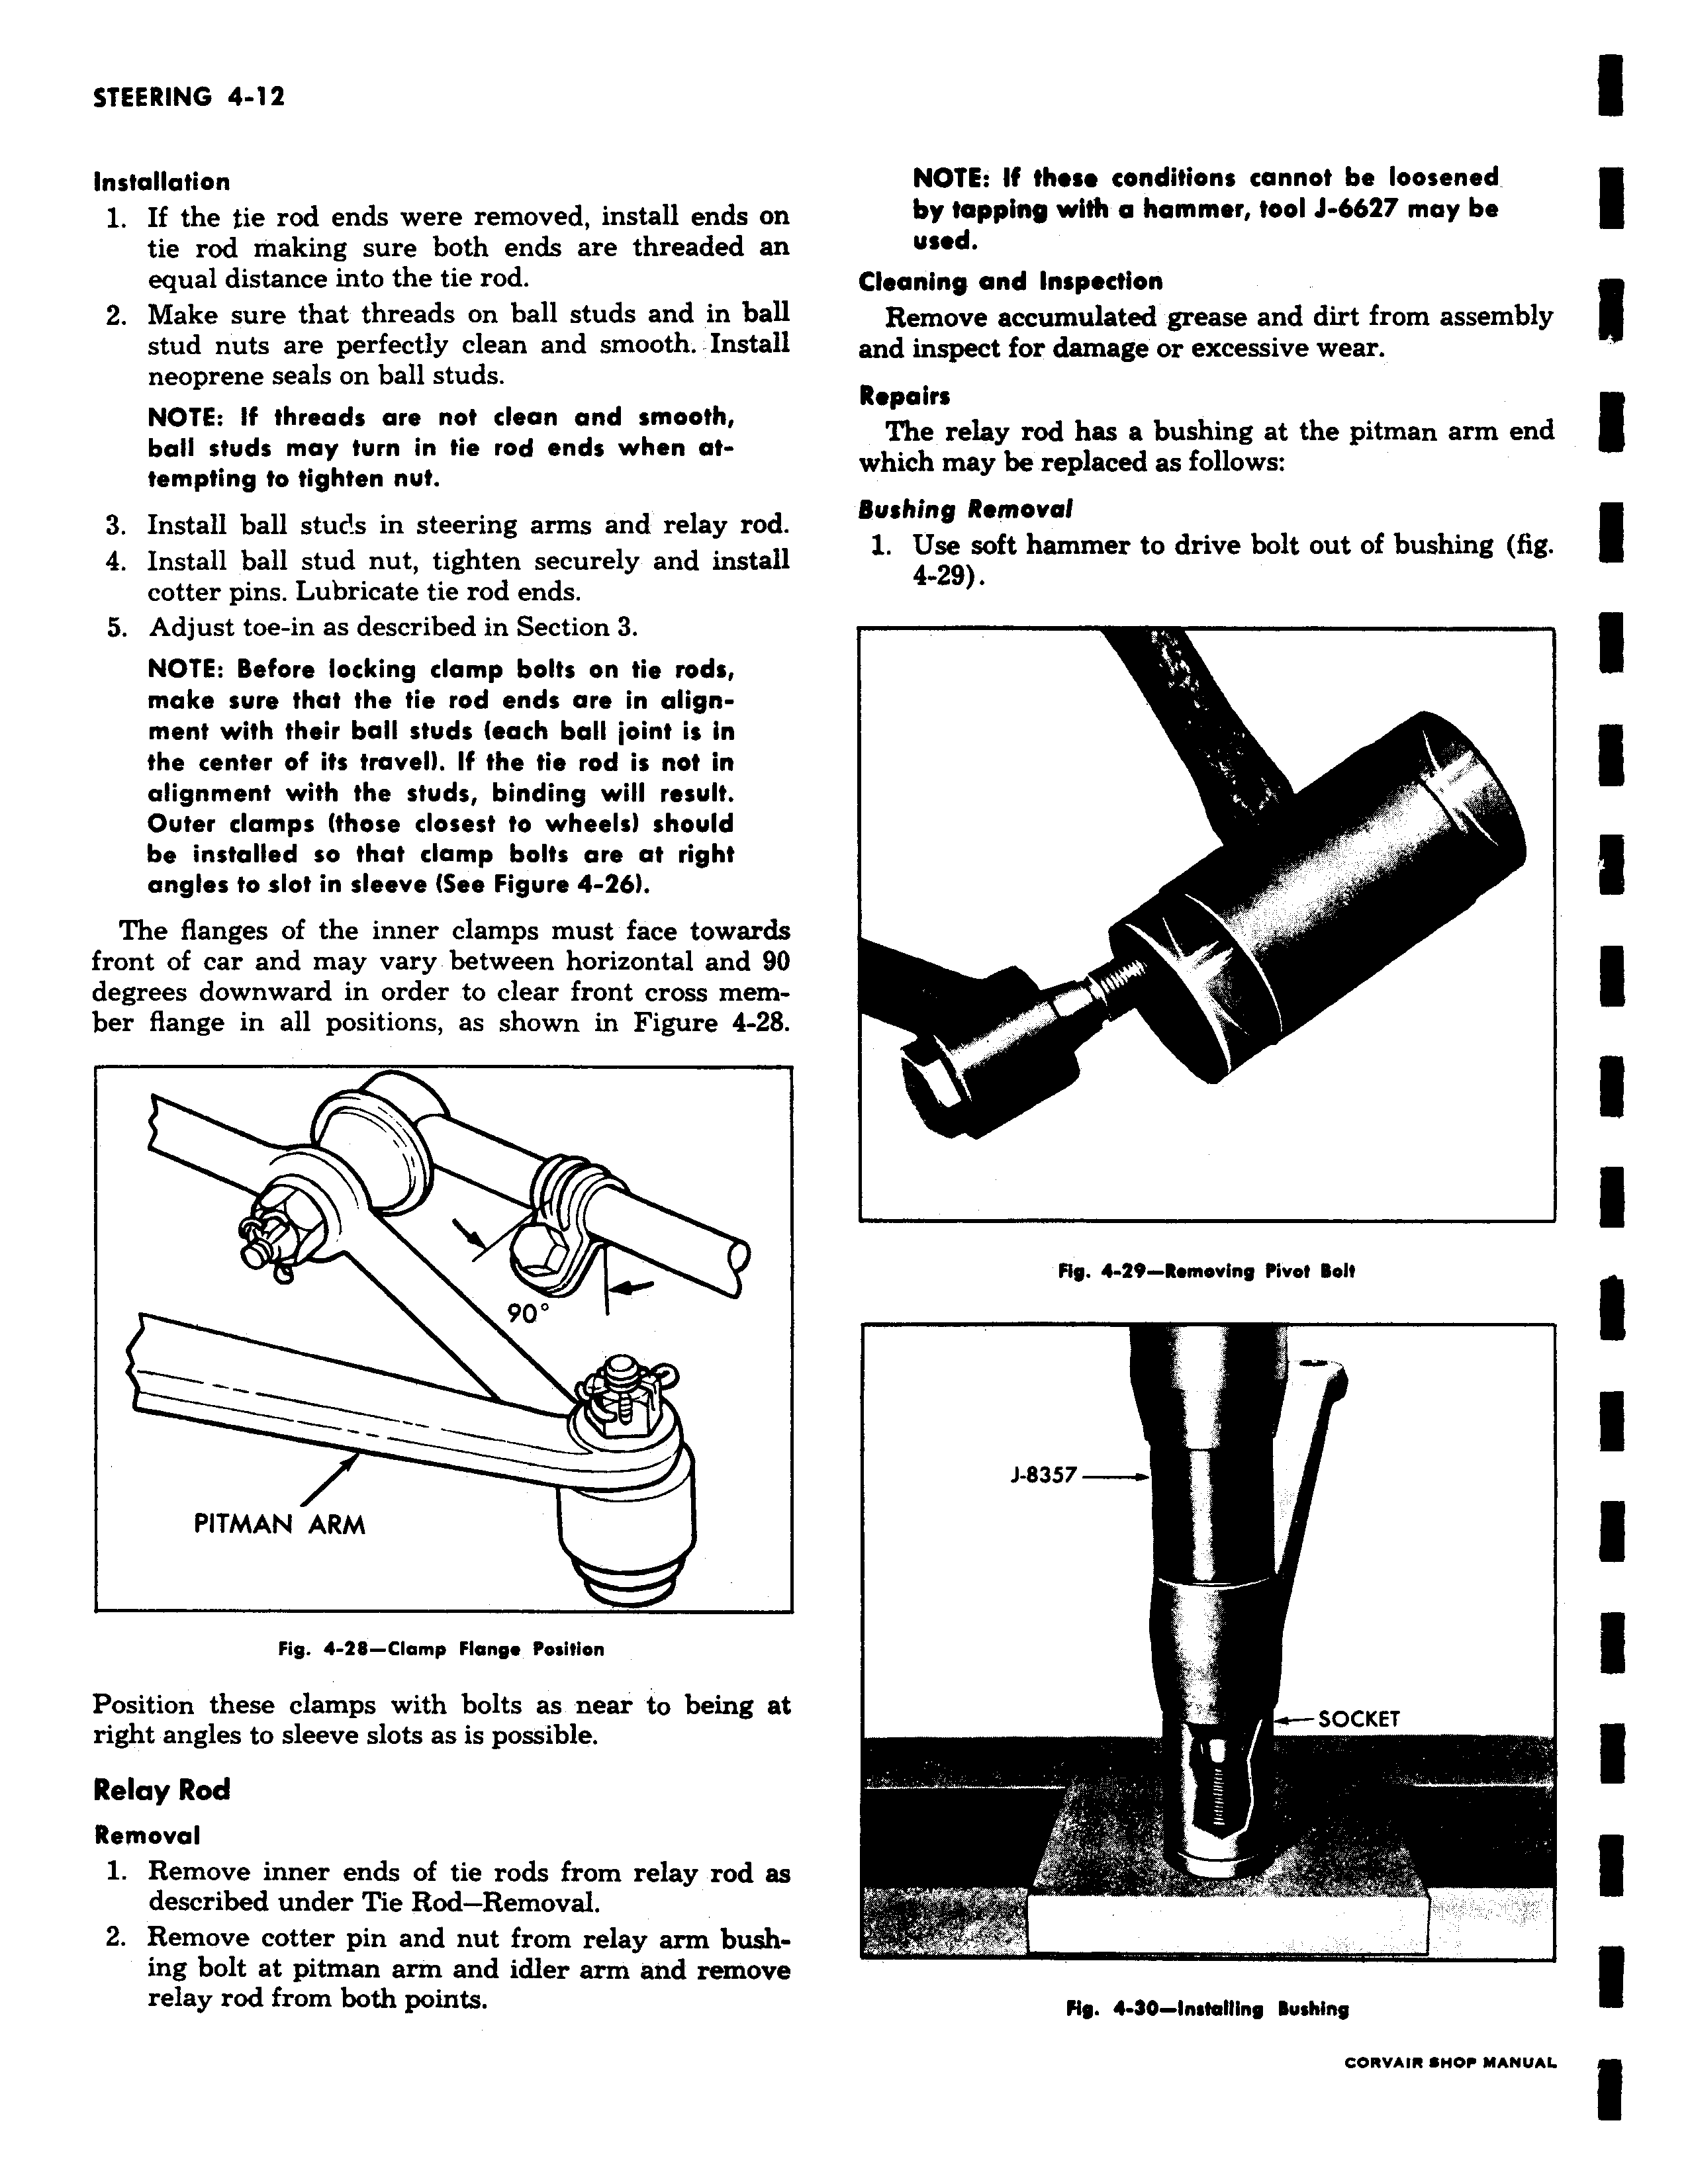
Installation 1 If the tie rod ends were removed install ends on tie rod making sure both ends are threaded an equal distance into the tie rod 2 Make sure that threads on ball studs and in ball stud nuts are perfectly clean and smooth Install neoprene seals on ball studs NOTE if threads are not dean and smooth ball studs may turn in tie rod ends when attempting to tighten nut 3 Install ball stuc s in steering arms and relay rod 4 Install ball stud nut tighten securely and install cotter pins Lubricate tie rod ends 5 Adjust toe in as described in Section 3 NOTE Before locking damp bolts on tie rods make sure that the tie rod ends are in alignment with their ball studs each ball joint is in the center of its travel If the tie rod is not in alignment with the studs binding will result Outer damps those closest to wheels should be installed so that damp bolts are at right angles to slot in sleeve See Figure 4 26 The flanges of the inner clamps must face towards front of car and may vary between horizontal and 90 degrees downward in order to clear front cross member flange in all positions as shown in Figure 4 28 9Q i PITMAN ARM Fig 4 28 Clamp Flange Position Position these clamps with bolts as near to being at right angles to sleeve slots as is possible Relay Rod Removal 1 Remove inner ends of tie rods from relay rod as described under Tie Rod Removal 2 Remove cotter pin and nut from relay arm bushing bolt at pitman arm and idler arm and remove relay rod from both points 4s 7 w 0