Jeep Parts Wiki | Ford Parts Wiki
Home | Search | Browse
Prev

 Next
Next
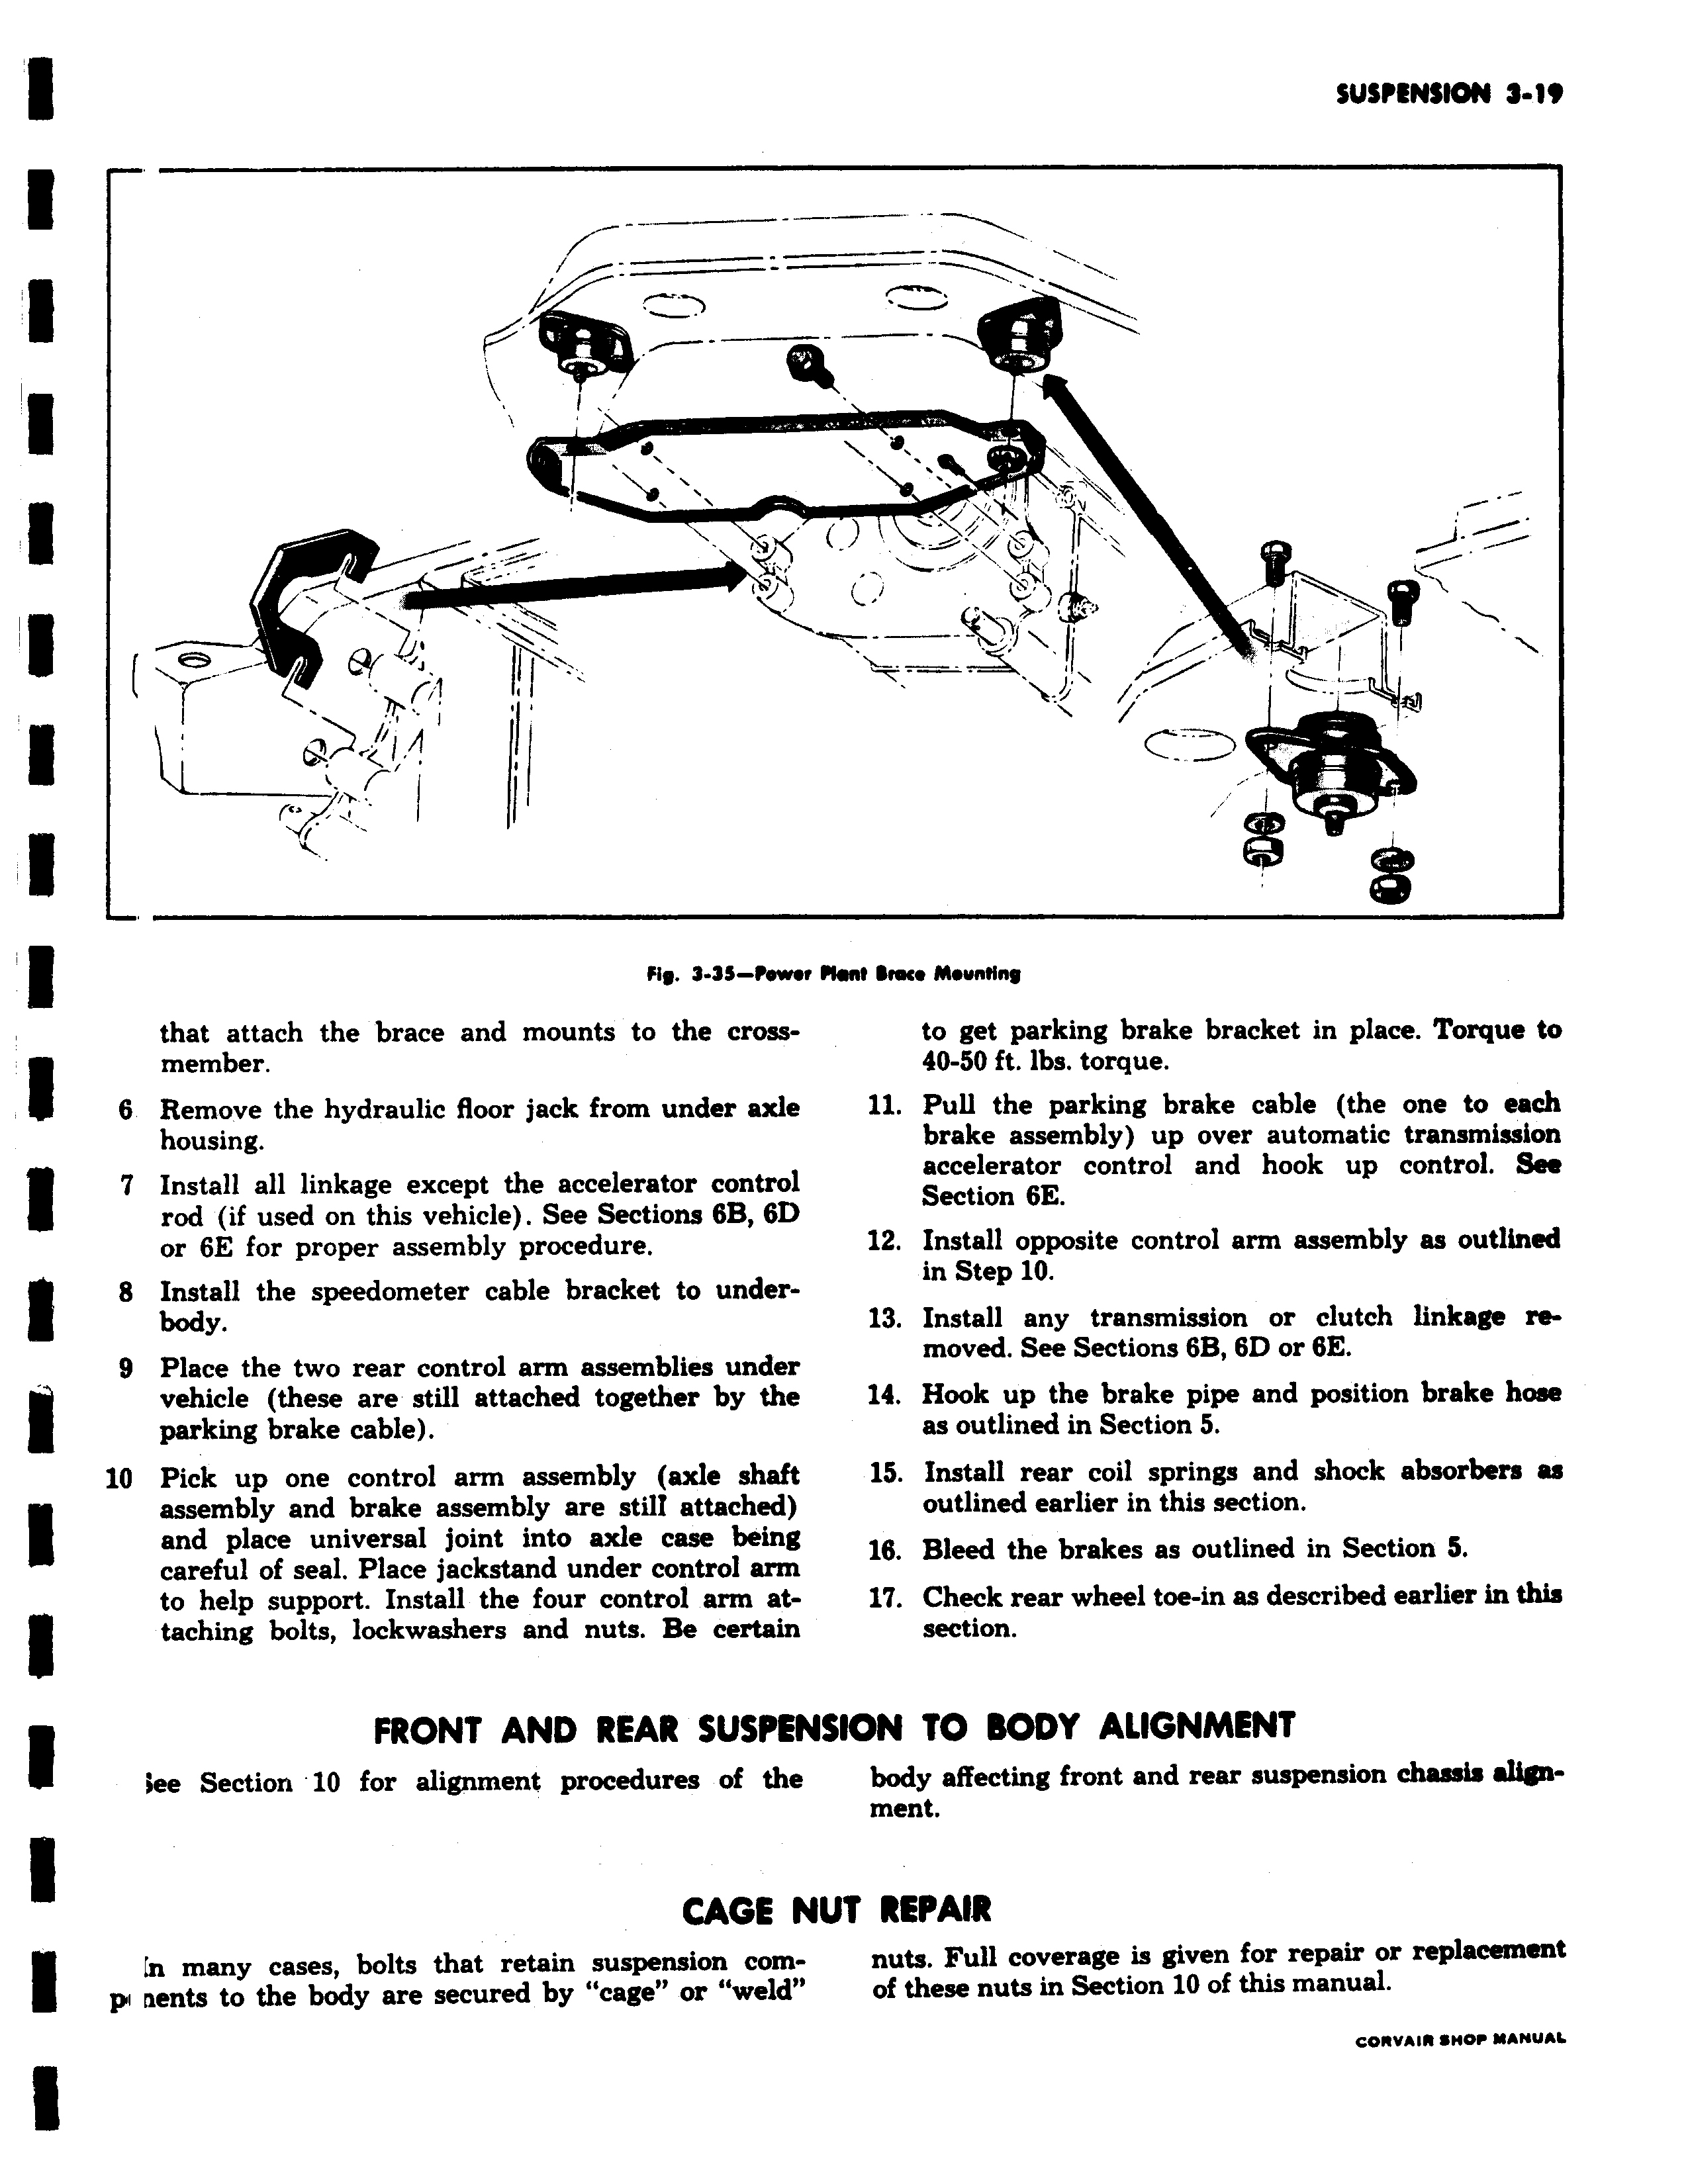
p i 0 Fly 9 7s Pew that attach the brace and mounts to the crossmember 6 Remove the hydraulic floor jack from under axle housing Install all linkage except the accelerator control rod if used on this vehicle See Sections 6B 6D or 6E for proper assembly procedure 8 Install the speedometer cable bracket to underbody 9 Place the two rear control arm assemblies under vehicle these are still attached together by the parking brake cable 10 Pick up one control arm assembly axle shaft assembly and brake assembly are still attached and place universal joint into axle case being careful of seal Place jackstand under control arm to help support Install the four control arm attaching bolts lockwashers and nuts Be certain FRONT AND REAR SUSPEI We Section 10 for alignment procedures of the CAGE fn many cases bolts that retain suspension compv nents to the body are secured by cage or weld 1 1 e r MMf Seem Mevnting to get parking brake bracket in place Torque to 40 50 ft lbs torque 11 Pull the parking brake cable the one to each brake assembly up over automatic transmission accelerator control and hook up control See Section 6E 12 Install opposite control arm assembly as outlined in Step 10 13 Install any transmission or clutch linkage removed See Sections 6B 6D or 6E 14 Hook up the brake pipe and position brake hose as outlined in Section 5 15 Install rear coil springs and shock absorbers as outlined earlier in this section 16 Bleed the brakes as outlined in Section 5 17 Check rear wheel toe in as described earlier in this section 4SION TO BODY ALIGNMENT body affecting front and rear suspension chassis alignment IUT REPAIR nuts Full coverage is given for repair or replacement of these nuts in Section 10 of this manual cowArs SHOP MANUAL

 Next
Next