Jeep Parts Wiki | Ford Parts Wiki
Home | Search | Browse
|
Corvair Chassis Shop Manual December 1964 |
|
Prev
 Next
Next
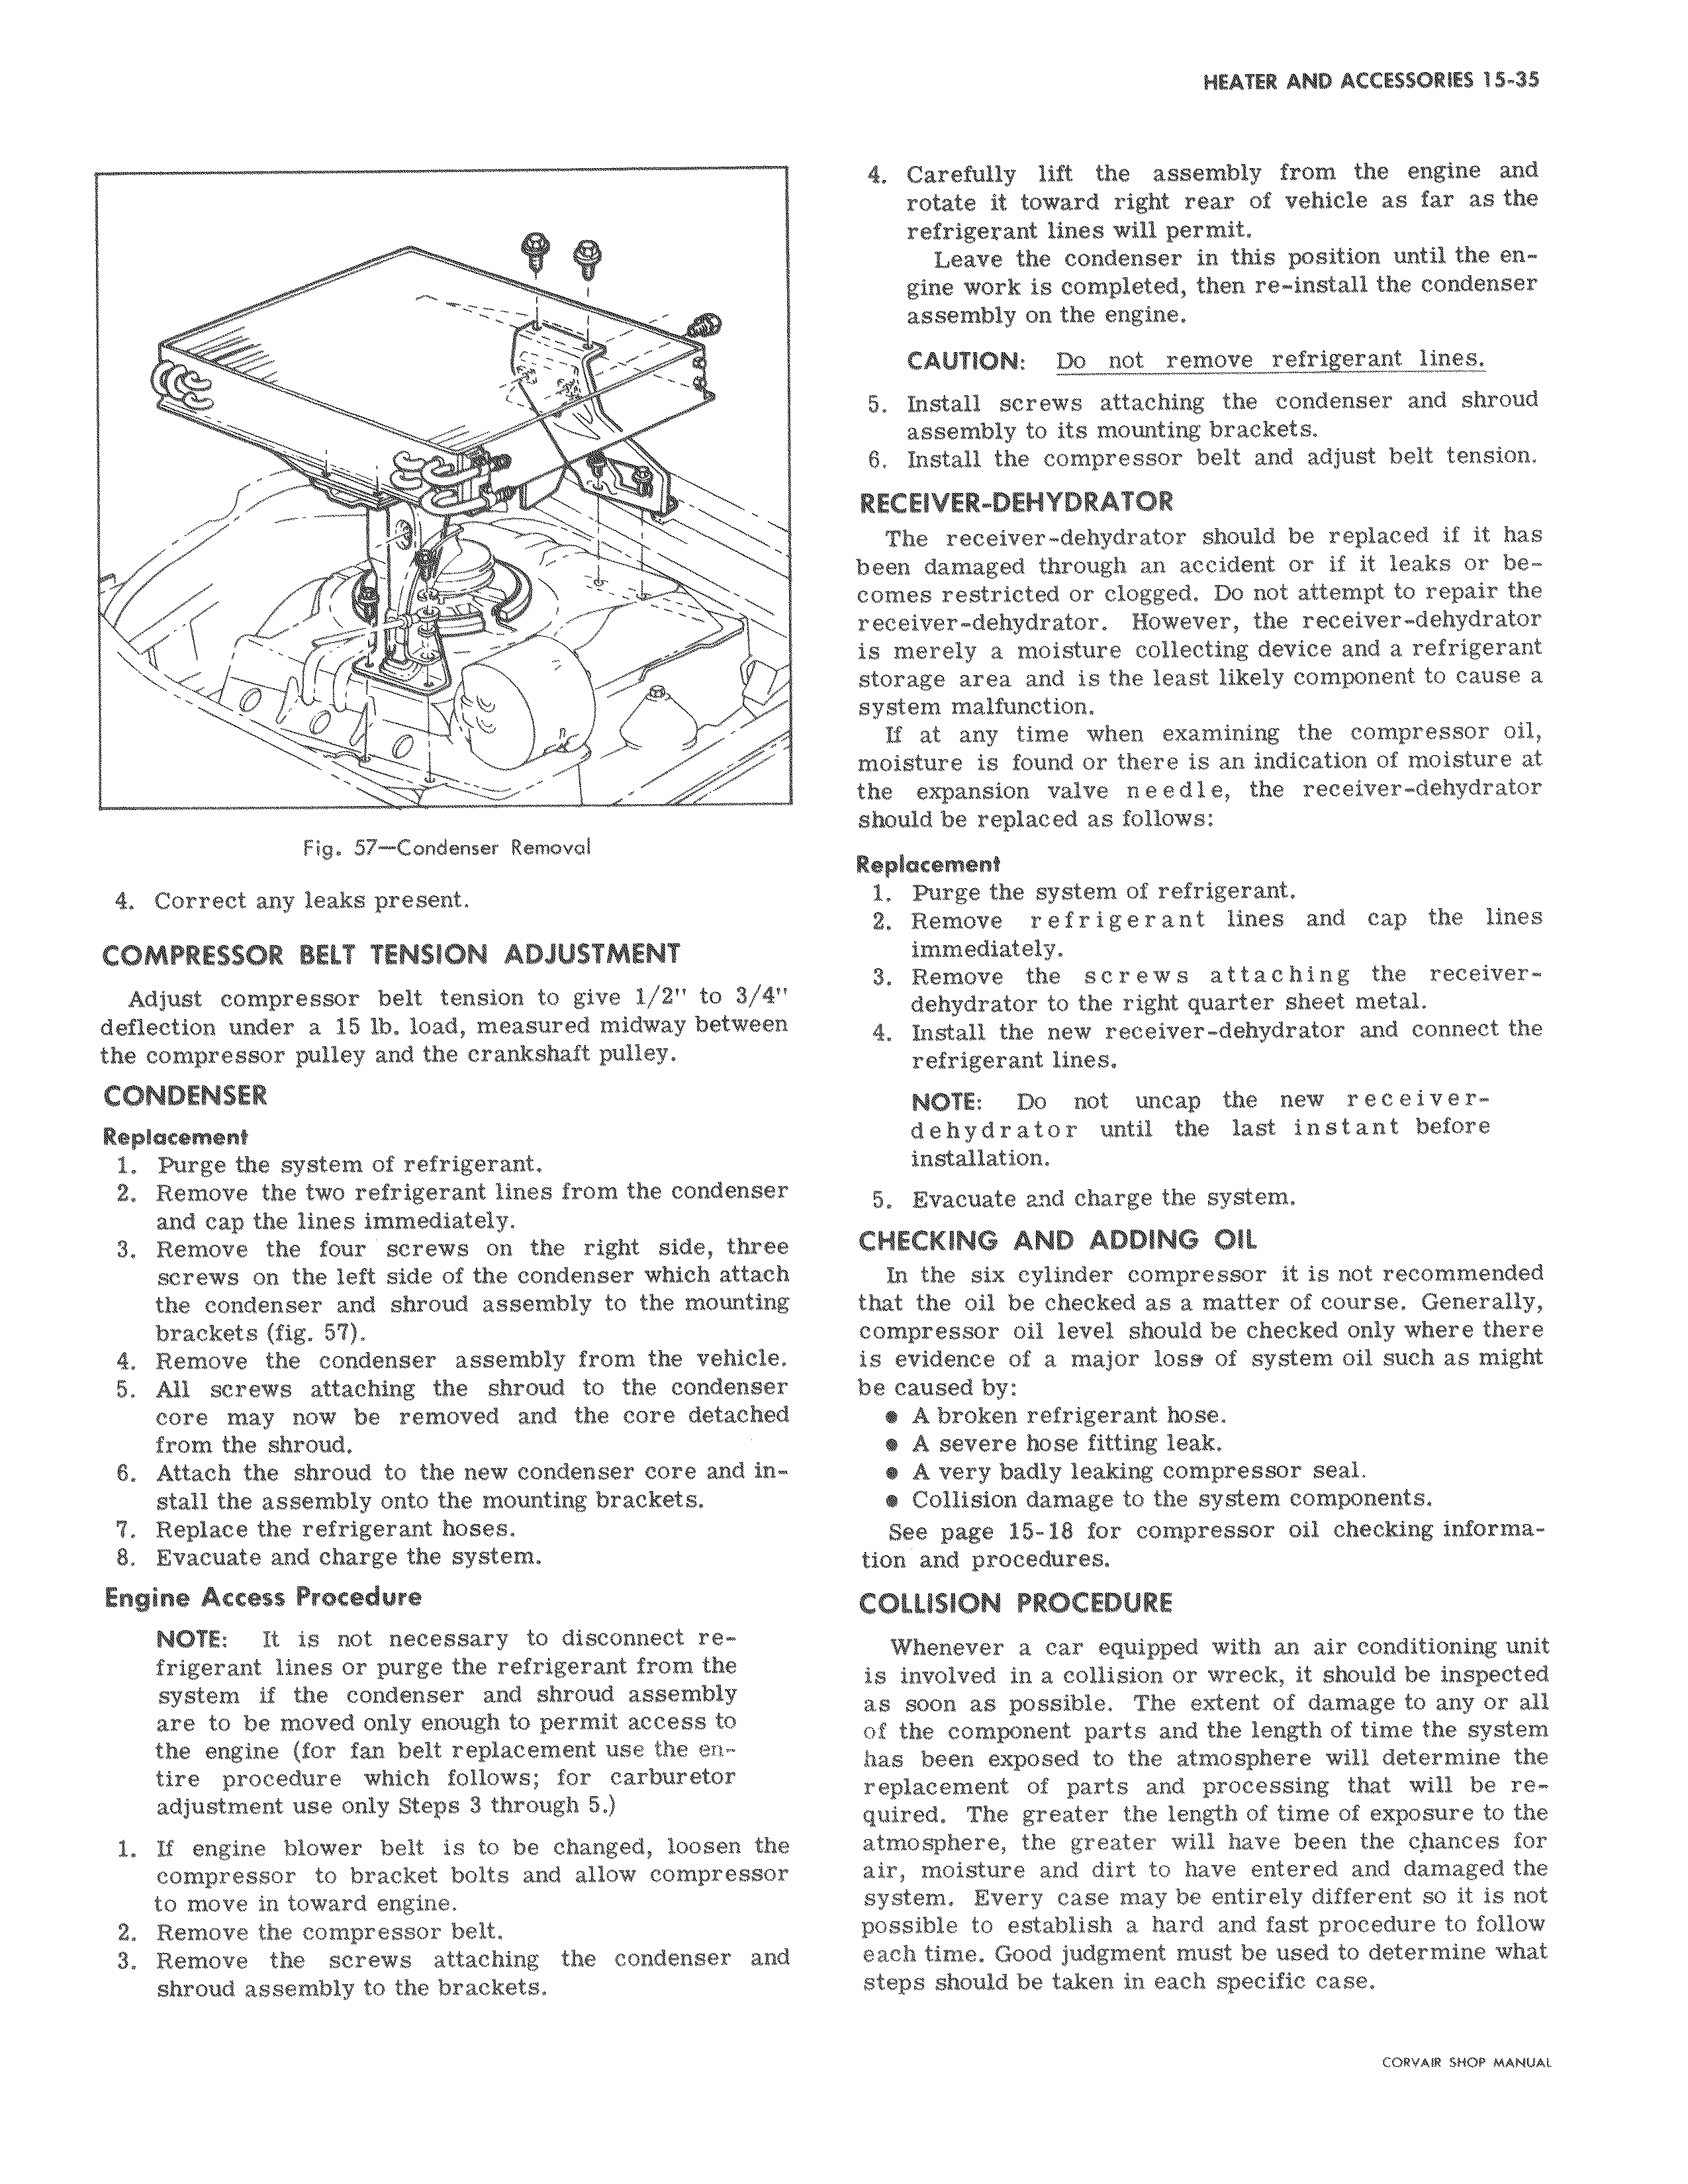
FW r C 0 1 I Fig 57 Condenser Removal 4 Correct any leaks present COMPRESSOR BELT TENSION ADJUSTMENT Adjust compressor belt tension to give 1 2 to 3 4 deflection under a 15 lb load measured midway between the compressor pulley and the crankshaft pulley CONDENSER Replacement i Purge the system of refrigerant 2 Remove the two refrigerant lines from the condenser and cap the lines immediately 3 Remove the four screws on the right side three screws on the left side of the condenser which attach the condenser and shroud assembly to the mounting brackets fig 5 4 Remove the condenser assembly from the vehicle 5 All screws attaching the shroud to the condenser core may now be removed and the core detached from the shroud 6 Attach the shroud to the new condenser core and install the assembly onto the mounting brackets 7 Replace the refrigerant hoses 8 Evacuate and charge the system Engine Access Procedure NOTE It is not necessary to disconnect refrigerant lines or purge the refrigerant from the system if the condenser and shroud assembly are to be moved only enough to permit access to the engine for fan belt replacement use the entire procedure which follows for carburetor adjustment use only Steps S through 5 1 If engine blower belt is to be changed loosen the compressor to bracket bolts and allow compressor to move in toward engine 2 Remove the compressor belt 3 Remove the screws attaching the condenser and shroud assembly to the brackets 4 Carefully lift the assembly from the engine and rotate it toward right rear of vehicle as far as the refrigerant lines will permit Leave the condenser in this position until the engine work is completed then re install the condenser assembly on the engine CAUTION Do not remove refrigerant lines 5 Install screws attaching the condenser and shroud assembly to its mounting brackets 6 Install the compressor belt and adjust belt tension RECEIVER DEHYDRATOR The receiver dehydrator should be replaced if it has been damaged through an accident or if it leaks or becomes restricted or clogged Do not attempt to repair the receiver dehydrator However the receiver dehydrator is merely a moisture collecting device and a refrigerant storage area and is the least likely component to cause a system malfunction If at any time when examining the compressor oil moisture is found or there is an indication of moisture at the expansion valve needle the receiver dehydrator should be replaced as follows Replacement 1 Purge the system of refrigerant 2 Remove refrigerant lines and cap the lines immediately 3 Remove the screws attaching the receiverdehydrator to the right quarter sheet metal 4 Install the new receiver dehydrator and connect the refrigerant lines NOTE Do not uncap the new receiverdehydrator until the last instant before installation 5 Evacuate and charge the system CHECKING AND ADDING OIL In the six cylinder compressor ft is not recommended that the oil be checked as a matter of course Generally compressor oil level should be checked only where there is evidence of a major loss of system oil such as might be caused by A broken refrigerant hose A severe hose fitting leak A very badly leaking compressor seal Collision damage to the system components See page 15 18 for compressor oil checking information and procedures COLLISION PROCEDURE Whenever a car equipped with an air conditioning unit is involved in a collision or wreck it should be inspected as soon as possible The extent of damage to any or all of the component parts and the length of time the system has been exposed to the atmosphere will determine the replacement of parts and processing that will be required The greater the length of time of exposure to the atmosphere the greater will have been the c hances for air moisture and dirt to have entered and damaged the system Every case may be entirely different so it is not possible to establish a hard and fast procedure to follow each time Good judgment must be used to determine what steps should be taken in each specific case