Jeep Parts Wiki | Ford Parts Wiki
Home | Search | Browse
|
Corvair Chassis Shop Manual December 1964 |
|
Prev
 Next
Next
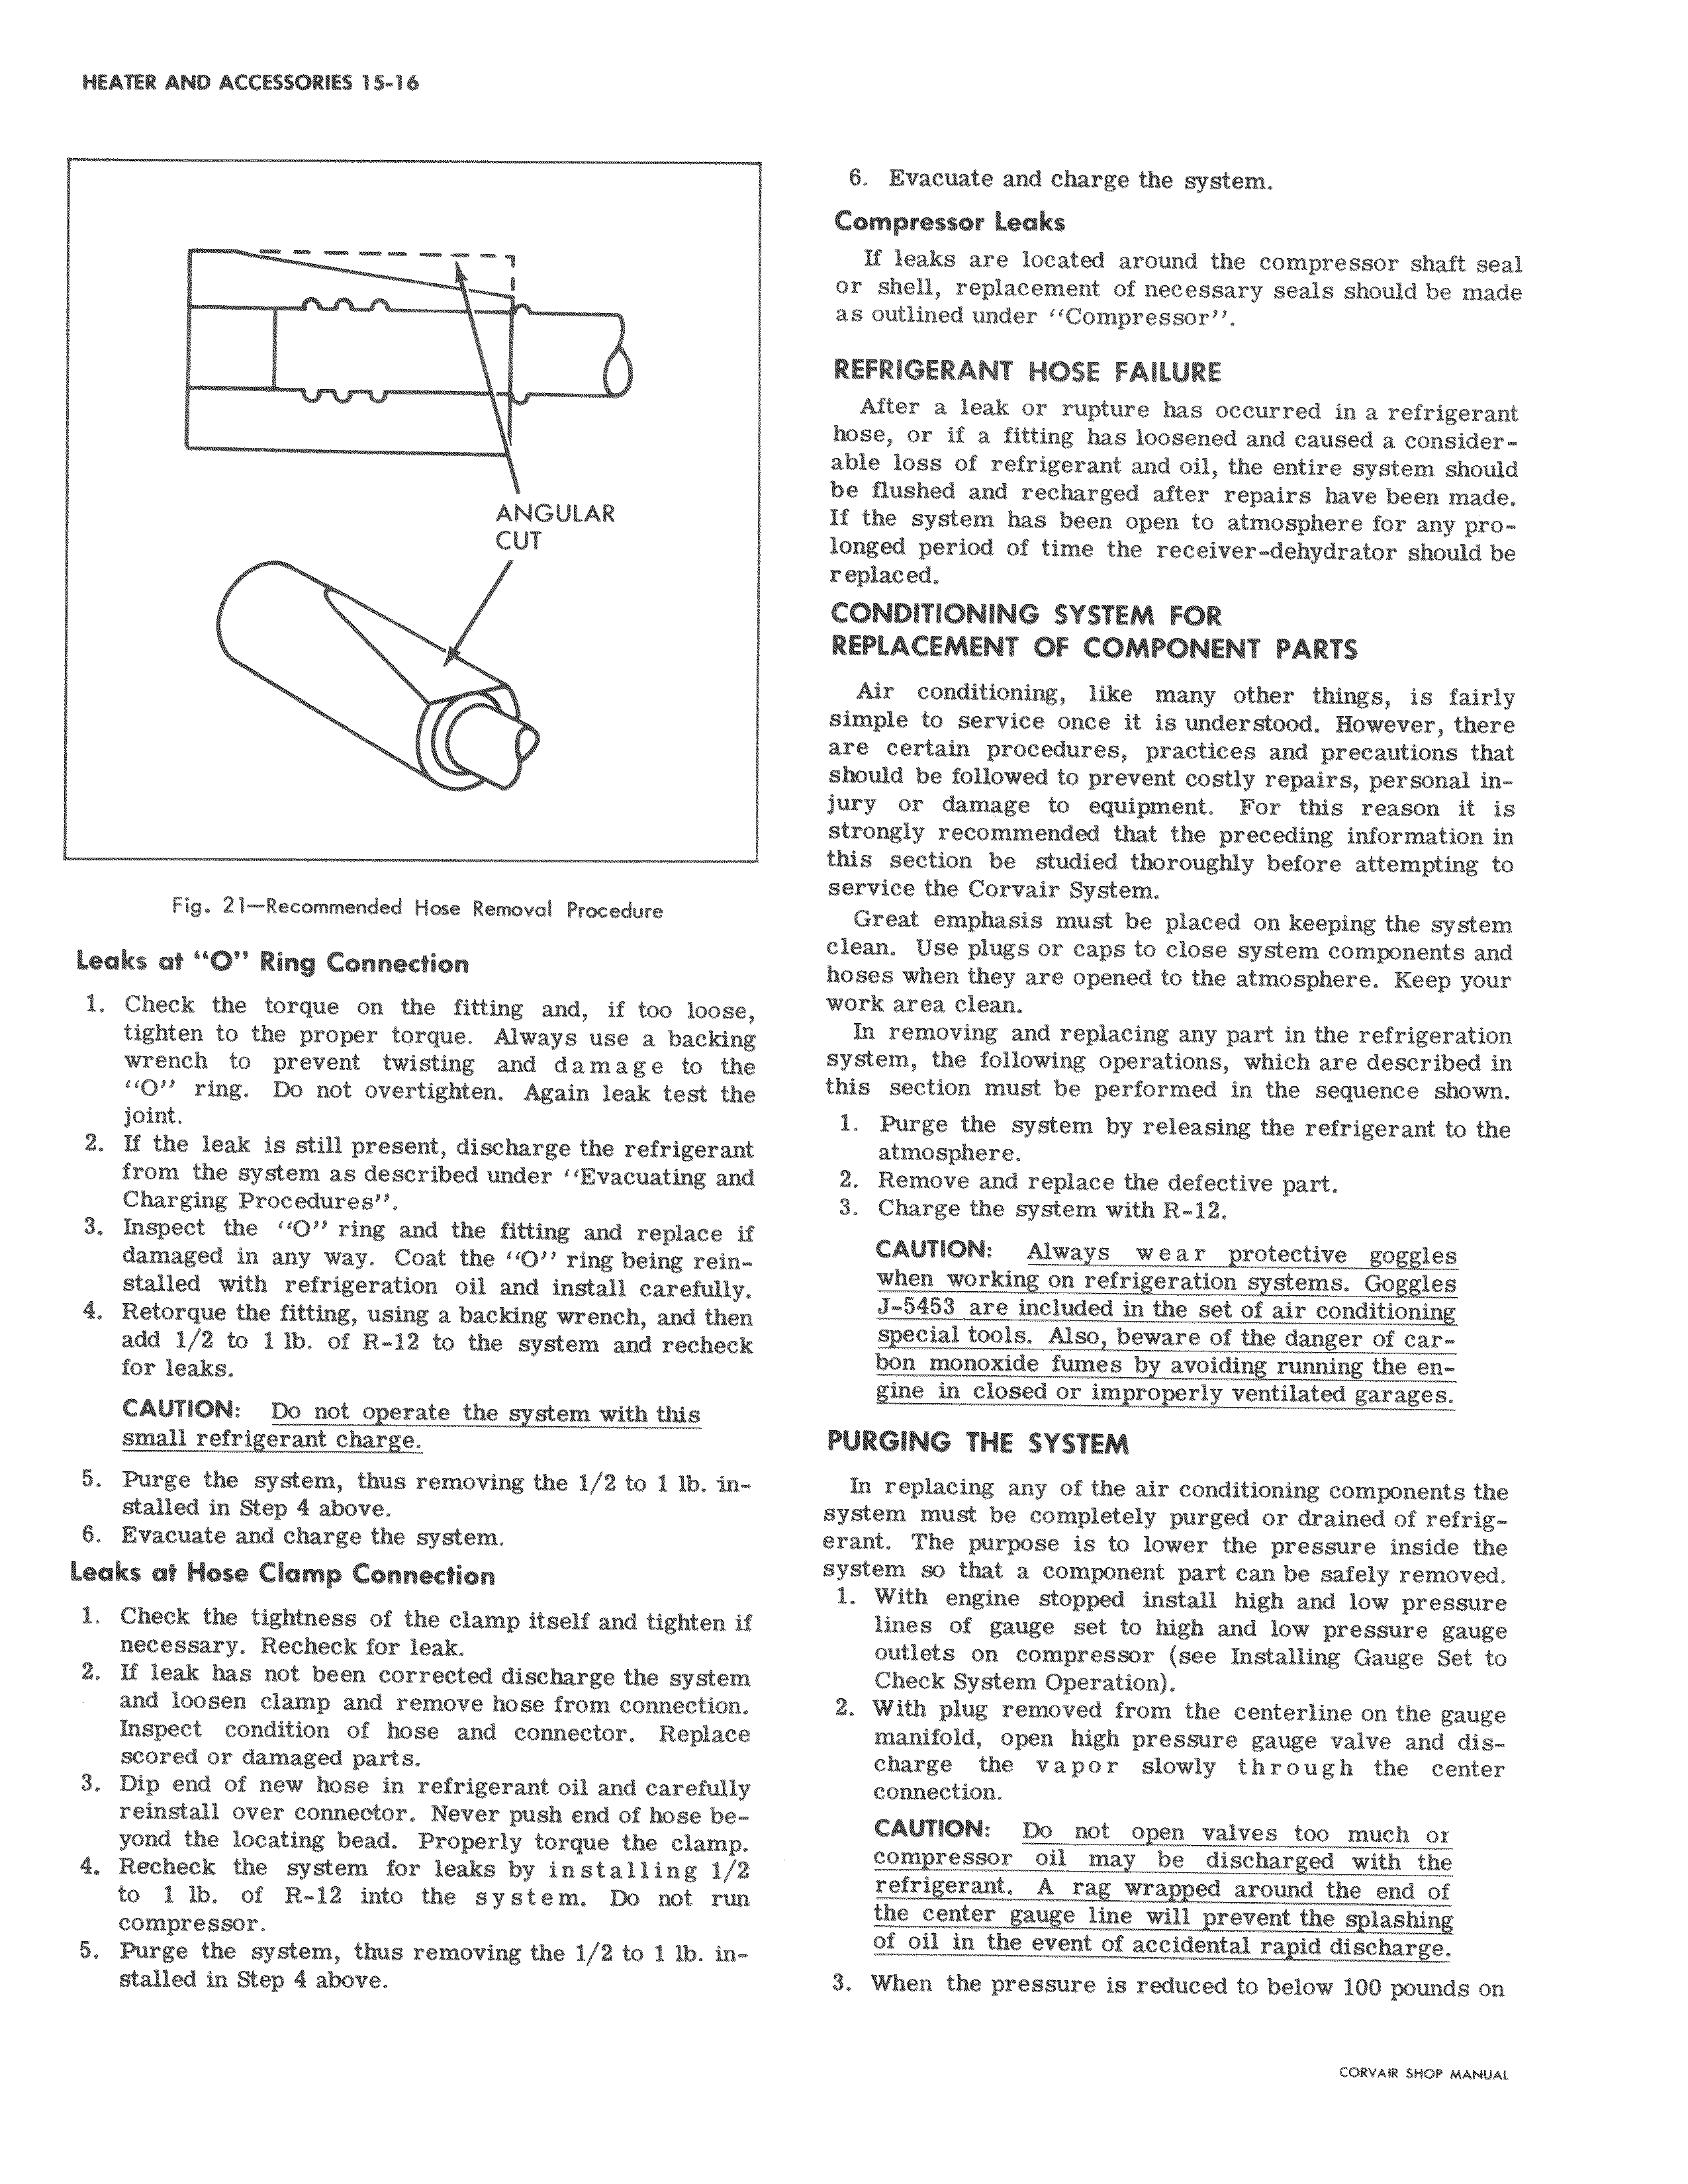
t ANGULAR CUT Fig 21 Recommended Hose Removal Procedure Leaks at O Ring Connection 1 Check the torque on the fitting and if too loose tighten to the proper torque Always use a backing wrench to prevent twisting and damage to the O ring Do not overtighten Again leak test th e joint 2 If the leak is still present discharge the refrigerant from the system as described under Evacuating and Charging Procedures 3 Inspect the O ring and the fitting and replace ilf damaged in any way Coat the O ring being rein stalled with refrigeration oil and install carefully 4 Retorque the fitting using a backing wrench and then add 1 2 to 1 lb of R 12 to the system and recheck for leaks CAUTION Do not operate the system with this small refrigerant charge 5 Purge the system thus removing the 1 2 to 1 lb in stalled in Step 4 above 6 Evacuate and charge the system Looks at Hose Clamp Connection 1 Check the tightness of the clamp itself and tighten if necessary Recheck for leak 2 If leak has not been corrected discharge the system and loosen clamp and remove hose from connection Inspect condition of hose and connector Replace scored or damaged parts 3 Dip end of new hose in refrigerant oil and carefully reinstall over connector Never push end of hose be yond the locating bead Properly torque the clamp 4 Recheck the system for leaks by installing 1 to 1 lb of R 12 into the system Do not run compressor 5 Purge the system thus removing the 1 2 to 1 lb int stalled in Step 4 above 6 EvSicuate and charge the system Compressor Looks If leaks are located around the compressor shaft seal or shell replacement of necessary seals should be made as outlined under Compressor REFRIdERANT HOSE FAILURE After a leak or rupture has occurred in a refrigerant hose or if a fitting has loosened and caused a considerable lops of refrigerant and oil the entire system should be flushed and recharged after repairs have been made If the system has been open to atmosphere for any prolonged period of time the receiver dehydrator should be replaced CONDITIONING SYSTEM FOR REPLACEMENT OF COMPONENT PARTS Air conditioning like many other things is fairly simple to service once it is understood However there are certain procedures practices and precautions that should be followed to prevent costly repairs personal injury or damage to equipment For this reason it is strongly recommended that the preceding information in this section be studied thoroughly before attempting to service the Corvair System Great emphasis must be placed on keeping the system clean Use plugs or caps to close system components and hoses When they are opened to the atmosphere Keep your work area clean In removing and replacing any part in the refrigeration system the following operations which are described in this section must be performed in the sequence shown 1 Pu ge the system by releasing the refrigerant to the atmosphere 2 Rezhove and replace the defective part 3 Charge the system with R 12 CAUTION Always w e a r protective goggles when working on refrigeration systems Goggles J 5i453 are included in the set of air conditioning spe cial tools Also beware of the danger of carbon monoxide fumes by avoiding running the engine in closed or improperly ventilated garages PURGING THE SYSTEM In replacing any of the air conditioning components the system must be completely purged or drained of refrigerant The purpose is to lower the pressure inside the system I so that a component part can be safely removed 1 WitT engine stopped install high and low pressure linos of gauge set to high and low pressure gauge outlets on compressor see Installing Gauge Set to Check System Operation 2 With plug removed from the centerline on the gauge manifold open high pressure gauge valve and discharge the vapor slowly through the center connection CAUTION Do not open valves too much oz conWessor oil may be discharged with the refirigerant A rag wrapped around the end of the center gauge line will prevent the splashing of til in the event of accidental rapid discharge 3 When the pressure is reduced to below 100 pounds on