Jeep Parts Wiki | Ford Parts Wiki
Home | Search | Browse
|
Corvair Chassis Shop Manual December 1964 |
|
Prev
 Next
Next
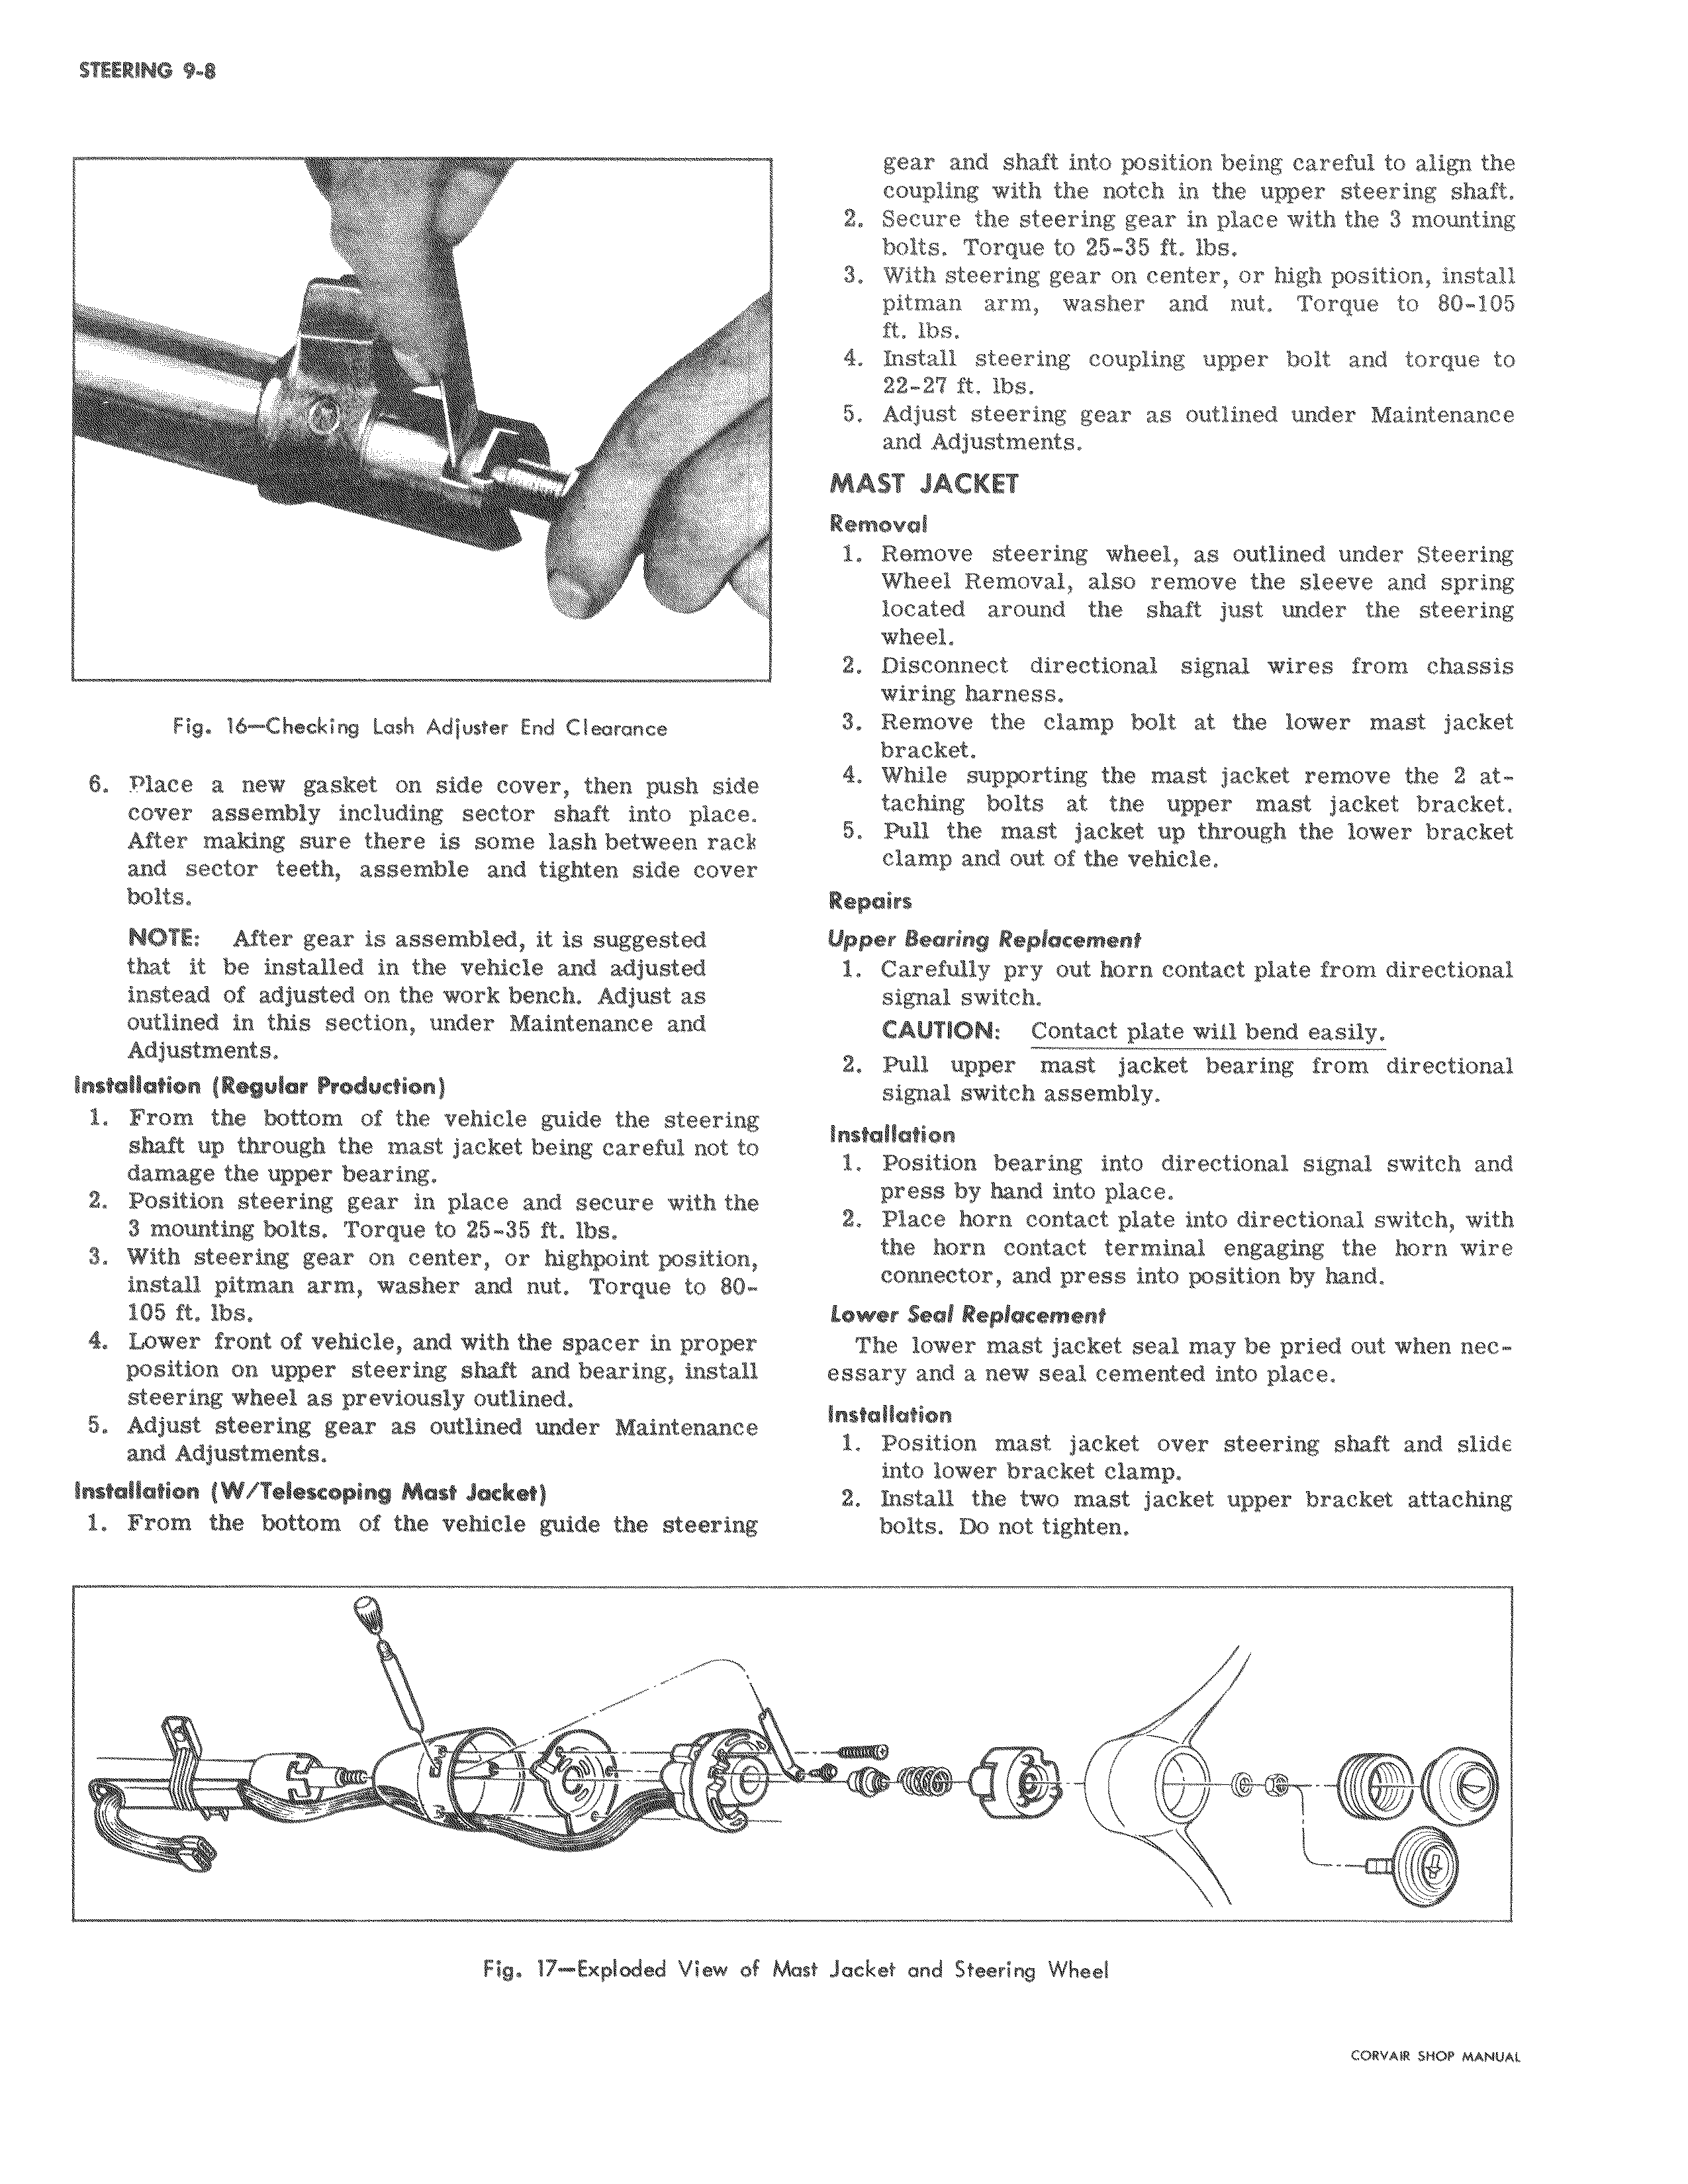
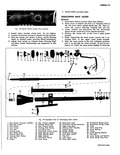
r r F i Aa Fig 16 Checking Lash Adjuster End Clearance 6 Place a new gasket on side cover then push si e cover assembly including sector shaft into plact After making sure there is some lash between rack and sector teeth assemble and tighten side cov r bolts NOTE After gear is assembled it is suggested that it be installed in the vehicle and adjusted instead of adjusted on the work bench Adjust as I outlined in this section under Maintenance and Adjustments Installation Regular production 1 From the bottom of the vehicle guide the steerl shaft up through the mast jacket being careful not to damage the upper bearing 2 Position steering gear in place and secure with the 3 mounting bolts Torque to 25 35 ft lbs 3 With steering gear on center or highpoint position install pitman arm washer and nut Torque to 81105 ft lbs 4 Lower front of vehicle and with the spacer in prop6 r position on upper steering shaft and bearing install steering wheel as previously outlined 5 Adjust steering gear as outlined under Maintenan e and Adjustments Installation W Telescoping Most Jacket 1 From the bottom of the vehicle guide the steeri i 11 u Fig 17 Exploded View of Ma gear and shaft into position being careful to align the coupling with the notch in the upper steering shaft 2 Secure the steering gear in place with the 3 mounting bolts Torque to 25 35 ft lbs 3 With steering gear on center or high position install pitman arm washer and nut Torque to 80 105 ft tbs 4 Install steering coupling upper bolt and torque to 22 27 ft lbs 5 Adjust steering gear as outlined under Maintenance and Adjustments MAST JACKET Removal 1 Remove steering wheel as outlined under Steering Wheel Removal also remove the sleeve and spring located around the shaft just under the steering wheel 2 Disconnect directional signal wires from chassis witing harness 3 Remove the clamp bolt at the lower mast jacket bracket 4 While supporting the mast jacket remove the 2 attadhing bolts at the upper mast jacket bracket 5 Pull the mast jacket up through the lower bracket clamp and out of the vehicle Repairs Upper Bearing Replacement 1 Carefully pry out horn contact plate from directional signal switch CAUTION Contact plate will bend easily 2 PuFI upper mast jacket bearing from directional signal switch assembly Installation 1 Position bearing into directional signal switch and press by hand into place 2 Place horn contact plate into directional switch with th horn contact terminal engaging the horn wire co nector and press into position by hand Lower lkwl Replacement The lower mast jacket seal may be pried out when necessary and a new seal cemented into place Installation 1 Polsition mast jacket over steering shaft and slide into lower bracket clamp 2 Install the two mast jacket upper bracket attaching bolts Do not tighten t Jacket and Steering Wheel CORVAIR SHOP MANUAL