Jeep Parts Wiki | Ford Parts Wiki
Home | Search | Browse
|
Corvair Chassis Shop Manual December 1964 |
|
Prev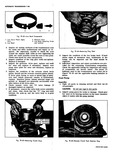
 Next
Next
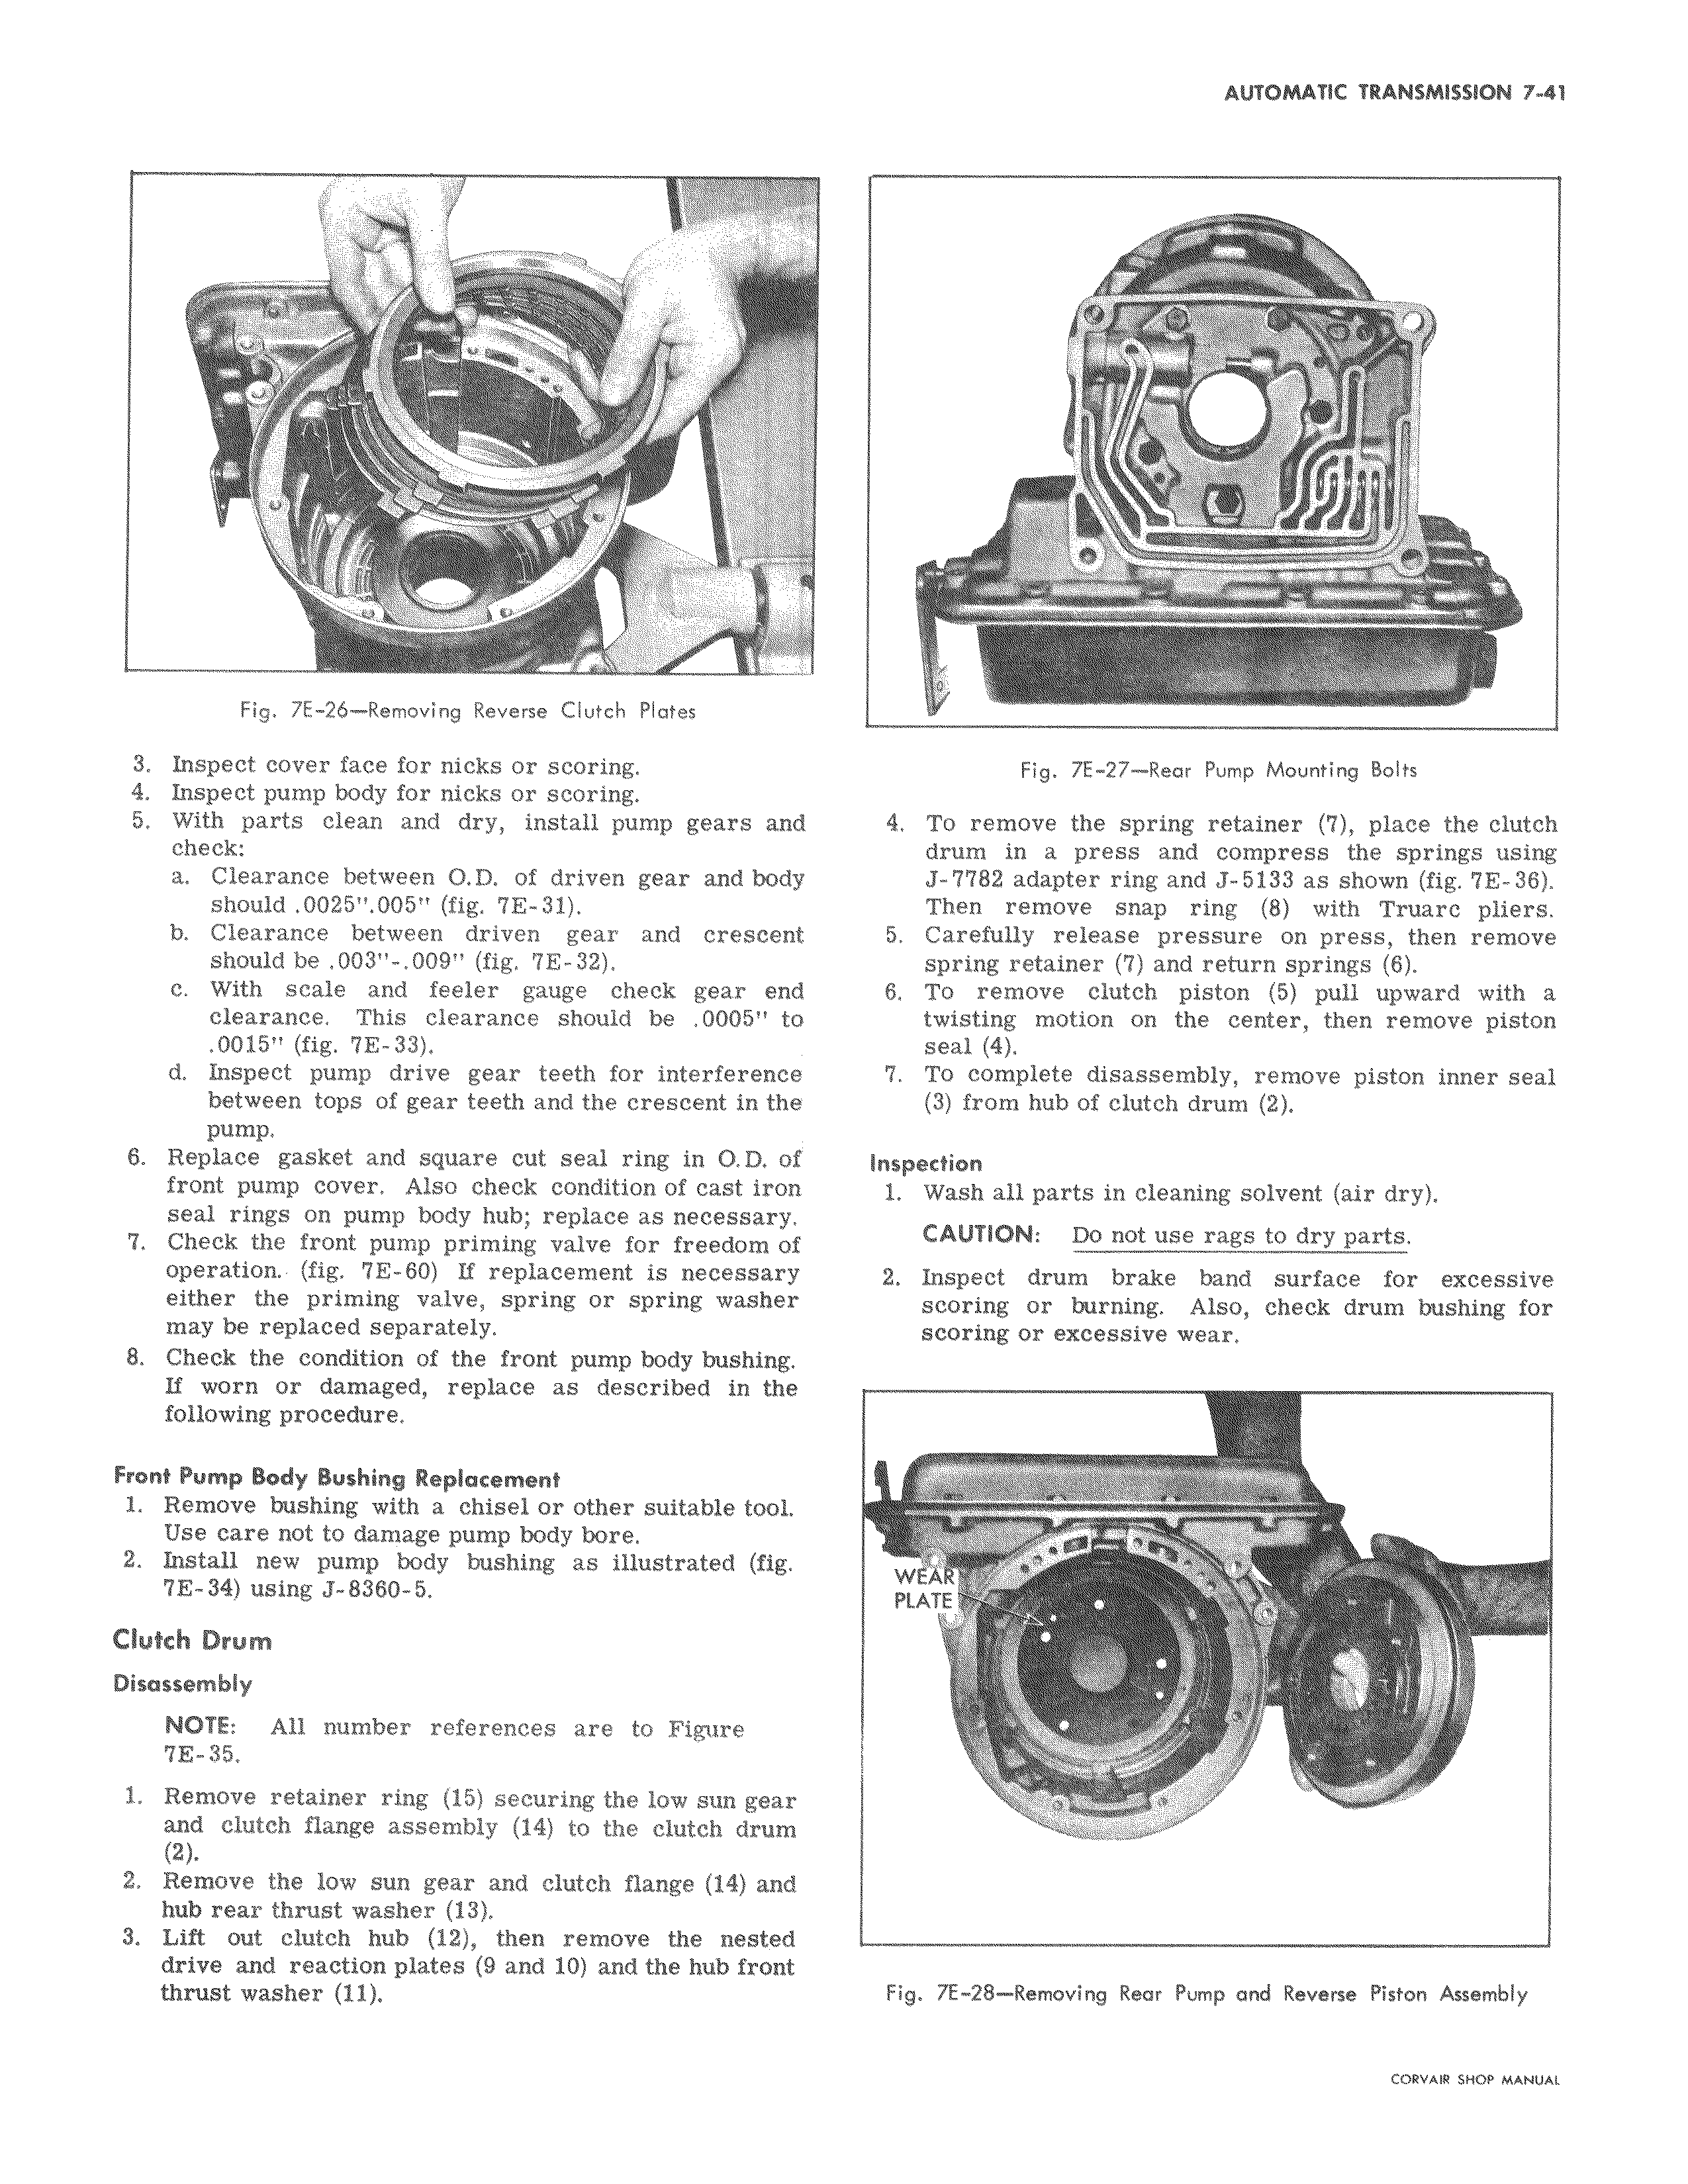
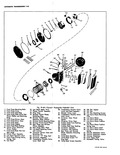
Fig 7E 26 Removing Reverse Clutch Plates 3 Inspect cover face for nicks or scoring 4 Inspect pump body for nicks or scoring 5 With parts clean and dry install pump gears and check a Clearance between 0 D of driven gear and body should 0025 005 fig 7E 31 b Clearance between driven gear and crescent should be 003 009 fig 7E 32 c With scale and feeler gauge check gear end clearance This clearance should be 0005 to 0015 fig 7E 33 d Inspect pump drive gear teeth for interference between tops of gear teeth and the crescent in the pump 6 Replace gasket and square cut seal ring in O D of front pump cover Also check condition of cast iron seal rings on pump body hub replace as necessary 7 Check the front pump priming valve for freedom of operation fig 7E 60 If replacement is necessary either the priming valve spring or spring washer may be replaced separately 8 Check the condition of the front pump body bushing If worn or damaged replace as described in the following procedure Front Pump Body Bushing Replacement 1 Remove bashing with a chisel or other suitable tool Use care not to damage pump body bore 2 Install new pump body bushing as illustrated fig 7E 34 using J 8360 5 Clutch Drum Disassembly NOTE All number references are to Figure 7E 35 1 Remove retainer ring 15 securing the low sun gear and clutch flange assembly 14 to the clutch drum 2 2 Remove the low sun gear and clutch flange 14 and hub rear thrust washer 13 3 Lift out clutch hub 12 then remove the nested drive and reaction plates 9 and 10 and the hub front thrust washer 11 t r v q i e 9