Jeep Parts Wiki | Ford Parts Wiki
Home | Search | Browse | Marketplace | Messages | FAQ | Guest
|
Corvair Chassis Shop Manual December 1964 |
|
Prev

 Next
Next
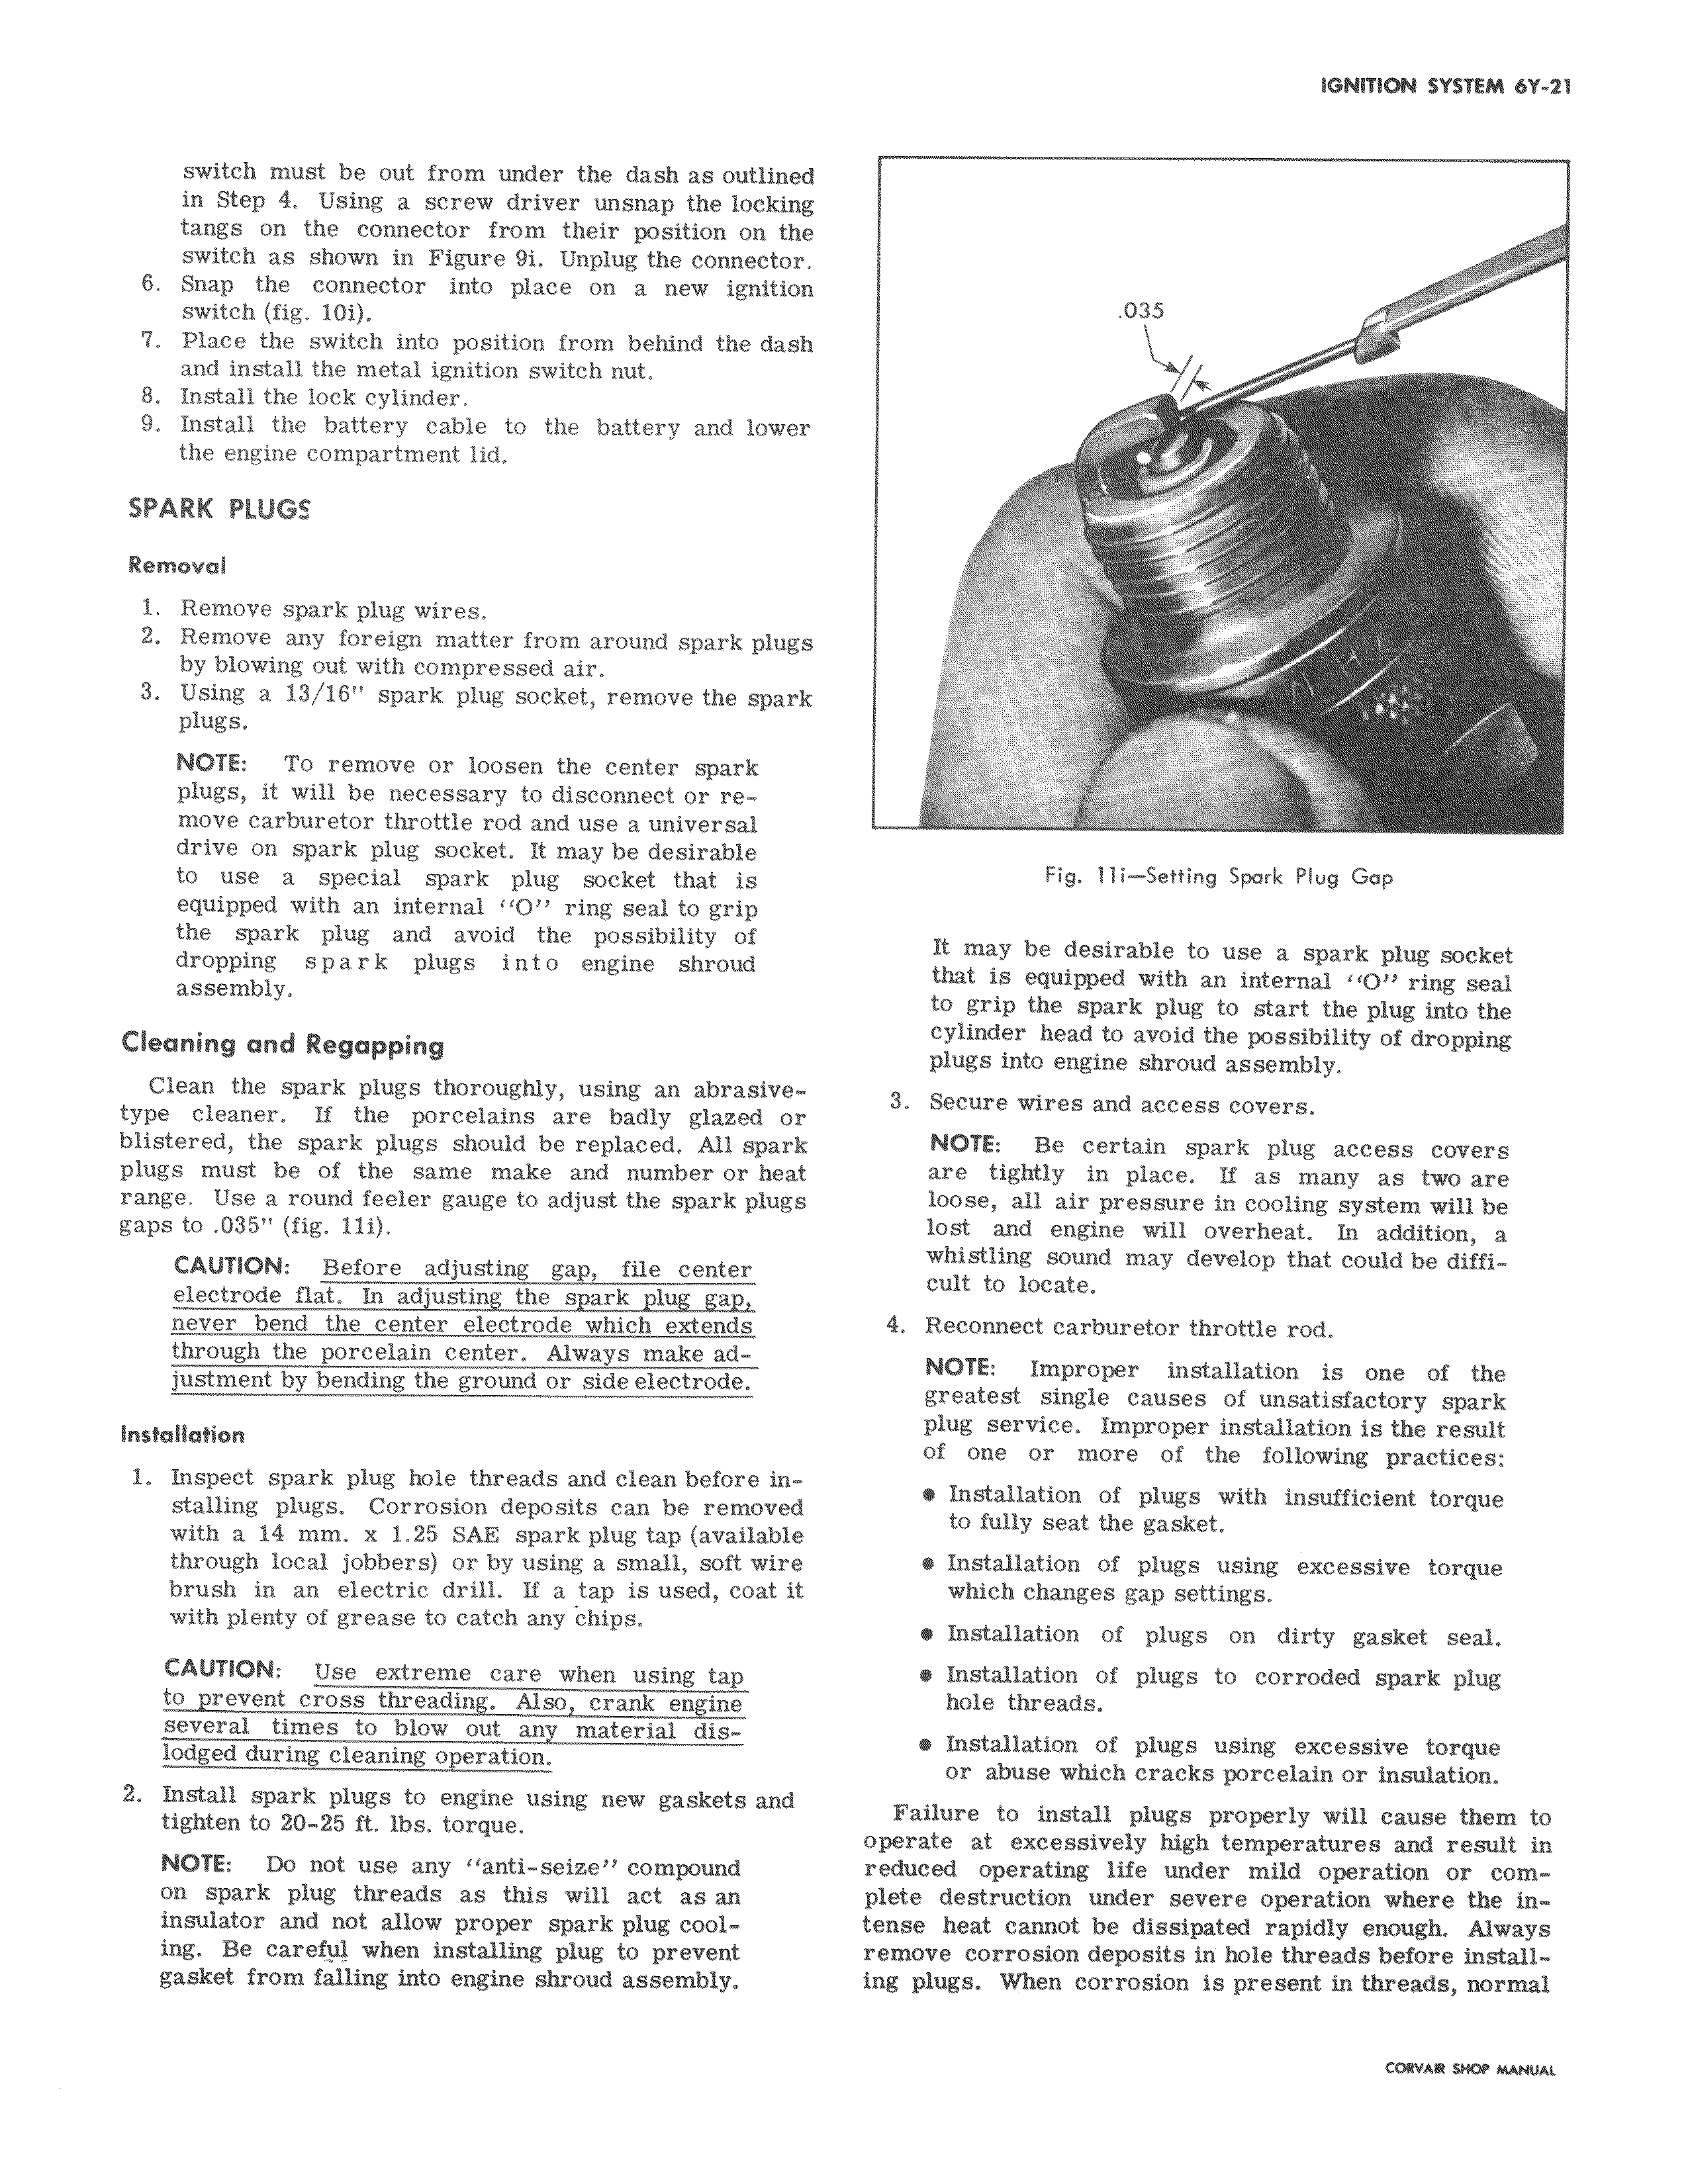
switch must be out from under the dash as outlined in Step 4 Using a screw driver unsnap the locking tangs on the connector from their position on the switch as shown in Figure 9i Unplug the connector 6 Snap the connector into place on a new ignition switch fig l0i 7 Place the switch into position from behind the dash and install the metal ignition switch nut 8 Install the lock cylinder 9 Install the battery cable to the battery and lower the engine compartment lid SPARK PLUGS Removal 1 Remove spark plug wires 2 Remove any foreign matter from around spark plugs by blowing out with compressed air 3 Using a 13 16 spark plug socket remove the spark plugs NOTE To remove or loosen the center spark plugs it will be necessary to disconnect or remove carburetor throttle rod and use a universal drive on spark plug socket It may be desirable to use a special spark plug socket that is equipped with an internal O ring seal to grip the spark plug and avoid the possibility of dropping spark plugs into engine shroud assembly Cleaning and Regapping Clean the spark plugs thoroughly using an abrasivetype cleaner If the porcelains are badly glazed or blistered the spark plugs should be replaced All spark plugs must be of the same make and number or heat range Use a round feeler gauge to adjust the spark plugs gaps to 035 fig lli CAUTION Before adjusting gap file center electrode flat In adjusting the spark plug gap never bend the center electrode which extends through the porcelain center Always make adjustment by bending the ground or side electrode Installation 1 Inspect spark plug hole threads and clean before installing plugs Corrosion deposits can be removed with a 14 mm x 1 25 SAE spark plug tap available through local jobbers or by using a small soft wire brush in an electric drill If a tap is used coat it with plenty of grease to catch any chips CAUTION Use extreme care when using tap to prevent cross threading Also crank engine several times to blow out any material dislodged during cleaning operation 2 Install spark plugs to engine using new gaskets and tighten to 20 25 ft lbs torque NOTE Do not use any anti seize compound on spark plug threads as this will act as an insulator and not allow proper spark plug cooling Be careful when installing plug to prevent gasket from falling into engine shroud assembly 035 Fig 11 i Setting Spark Plug Gap ft may be desirable to use a spark plug socket that is equipped with an internal p ring seal to grip the spark plug to start the plug into the cylinder head to avoid the possibility of dropping plugs into engine shroud assembly 3 Secure wires and access covers NOTE Be certain spark plug access covers are tightly in place If as many as two are loose all air pressure in cooling system will be lost and engine will overheat In addition a whistling sound may develop that could be difficult to locate 4 Reconnect carburetor throttle rod NOTE Improper installation is one of the greatest single causes of unsatisfactory spark plug service Improper installation is the result of one or more of the following practices Installation of plugs with insufficient torque to fully seat the gasket Installation of plugs using excessive torque which changes gap settings Installation of plugs on dirty gasket seal Installation of plugs to corroded spark plug hole threads Installation of plugs using excessive torque or abuse which cracks porcelain or insulation Failure to install plugs properly will cause them to operate at excessively high temperatures and result in reduced operating life under mild operation or complete destruction under severe operation where the intense heat cannot be dissipated rapidly enough Always remove corrosion deposits in hole threads before installing plugs When corrosion is present in threads normal n e

 Next
Next