Jeep Parts Wiki | Ford Parts Wiki
Home | Search | Browse
|
Corvair Chassis Shop Manual December 1964 |
|
Prev

 Next
Next
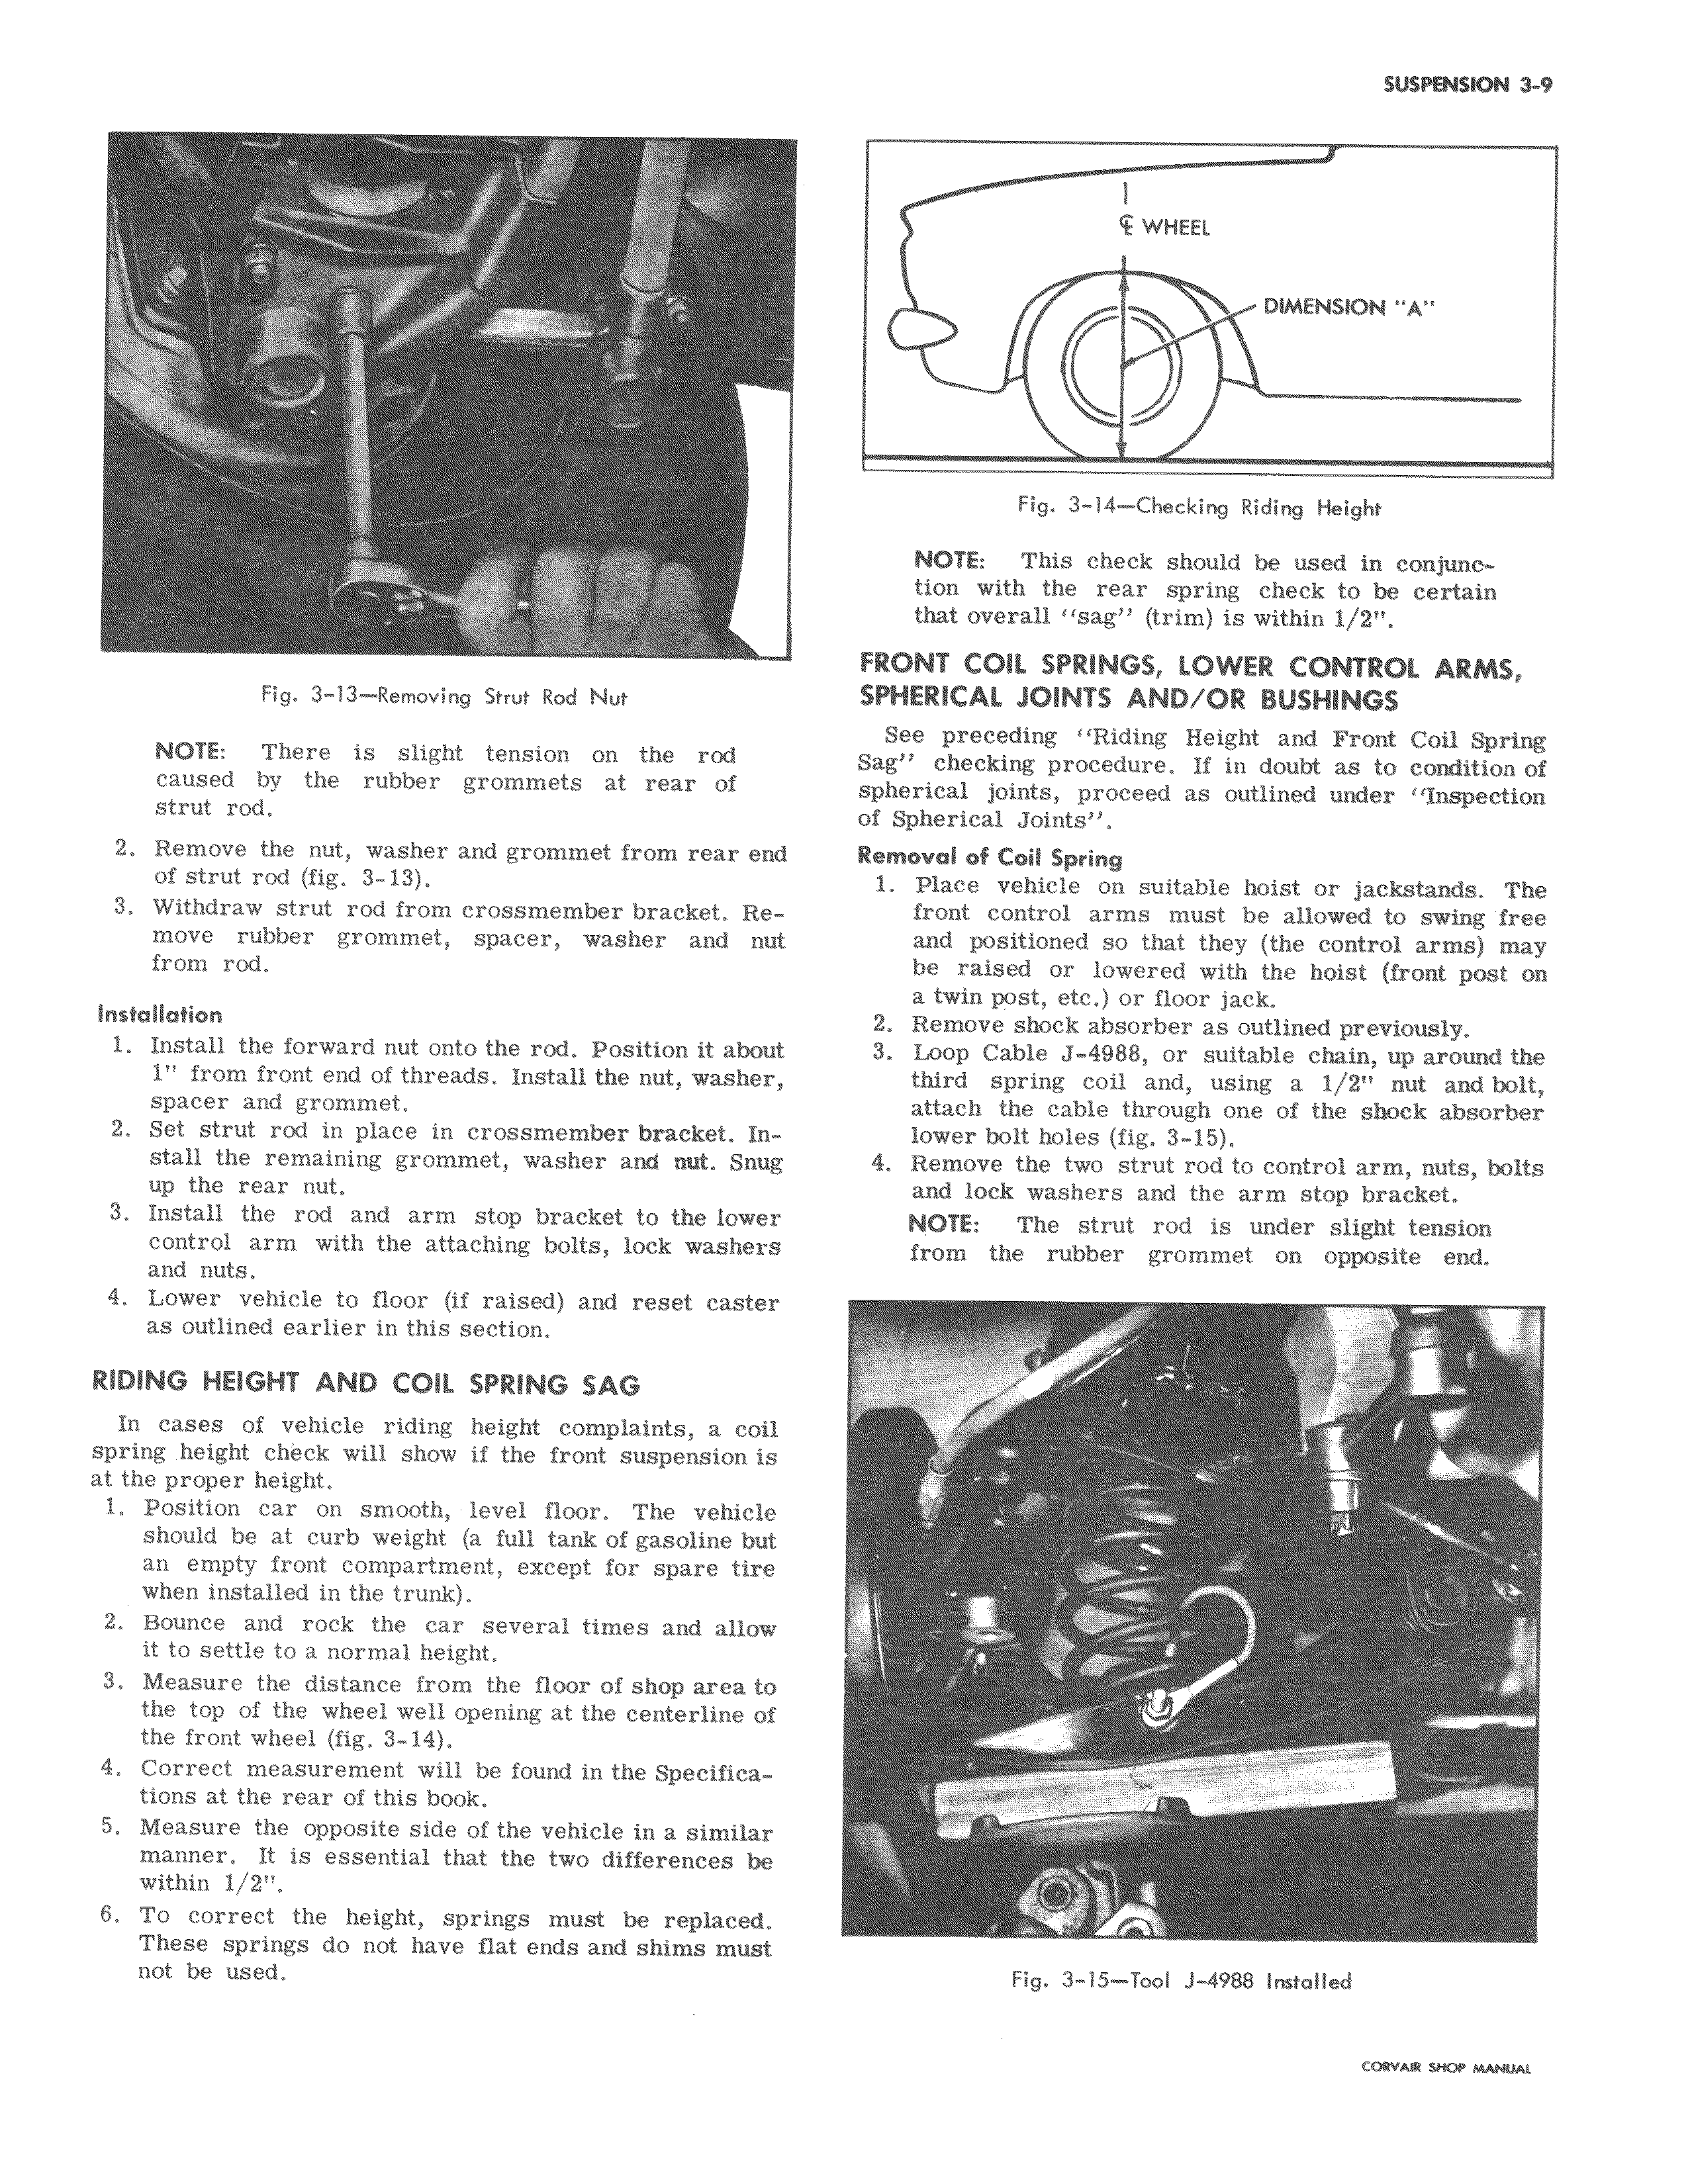
Fig 3 13 Removing Strut Rod Nut NOTE There is slight tension on the rod caused by the rubber grommets at rear of strut rod 2 Remove the nut washer and grommet from rear end of strut rod fig 3 13 3 Withdraw strut rod from crossmember bracket Remove rubber grommet spacer washer and nut from rod Installation 1 Install the forward nut onto the rod Position it about 1 from front end of threads Install the nut washer spacer and grommet 2 Set strut rod in place in crossmember bracket Install the remaining grommet washer and nut Snug up the rear nut 3 Install the rod and arm stop bracket to the tower control arm with the attaching bolts lock washers and nuts 4 Lower vehicle to floor if raised and reset caster as outlined earlier in this section RIDING HEIGHT AND COIL SPRING SAG In cases of vehicle riding height complaints a coil spring height check will show if the front suspension is at the proper height 1 Position car on smooth level floor The vehicle should be at curb weight a full tank of gasoline but an empty front compartment except for spare tire when installed in the trunk 2 Bounce and rock the car several times and allow it to settle to a normal height 3 Measure the distance from the floor of shop area to the top of the wheel well opening at the centerline of the front wheel fig 3 14 4 Correct measurement will be found in the Specifications at the rear of this book 5 Measure the opposite side of the vehicle in a similar manner It is essential that the two differences be within 1 2 6 To correct the height springs must be replaced These springs do not have flat ends and shims must not be used i WHEEL IMAAENSION A C Fig 3 14 Checking Riding Height NOTE This check should be used in conjunction with the rear spring check to be certain that overall sag trim is within 1 2 FRONT COIL SPRINGS LOWER CONTROL ARMS SPHERICAL JOINTS AND OR BUSHINGS See preceding Riding Height and Front Coil Spring Sag checking procedure If in doubt as to condition of spherical joints proceed as outlined under Inspection of Spherical Joints Removal of Coil Spring 1 Place vehicle on suitable hoist or jackstands The front control arms must be allowed to swing free and positioned so that they the control arms may be raised or lowered with the hoist front post on a twin post etc or floor jack 2 Remove shock absorber as outlined previously 3 Loop Cable J 4988 or suitable chain up around the third spring coil and using a 1 2 nut and bolt attach the cable through one of the shock absorber lower bolt holes fig 3 15 4 Remove the two strut rod to control arm nuts bolts and lock washers and the arm stop bracket NOTE The strut rod is under slight tension from the rubber grommet on opposite end Fig 3 15 Tool J 4988 Installed cowAe sHOr r wwu

 Next
Next