Jeep Parts Wiki | Ford Parts Wiki
Home | Search | Browse
|
Corvair Chassis Shop Manual December 1964 |
|
Prev

 Next
Next
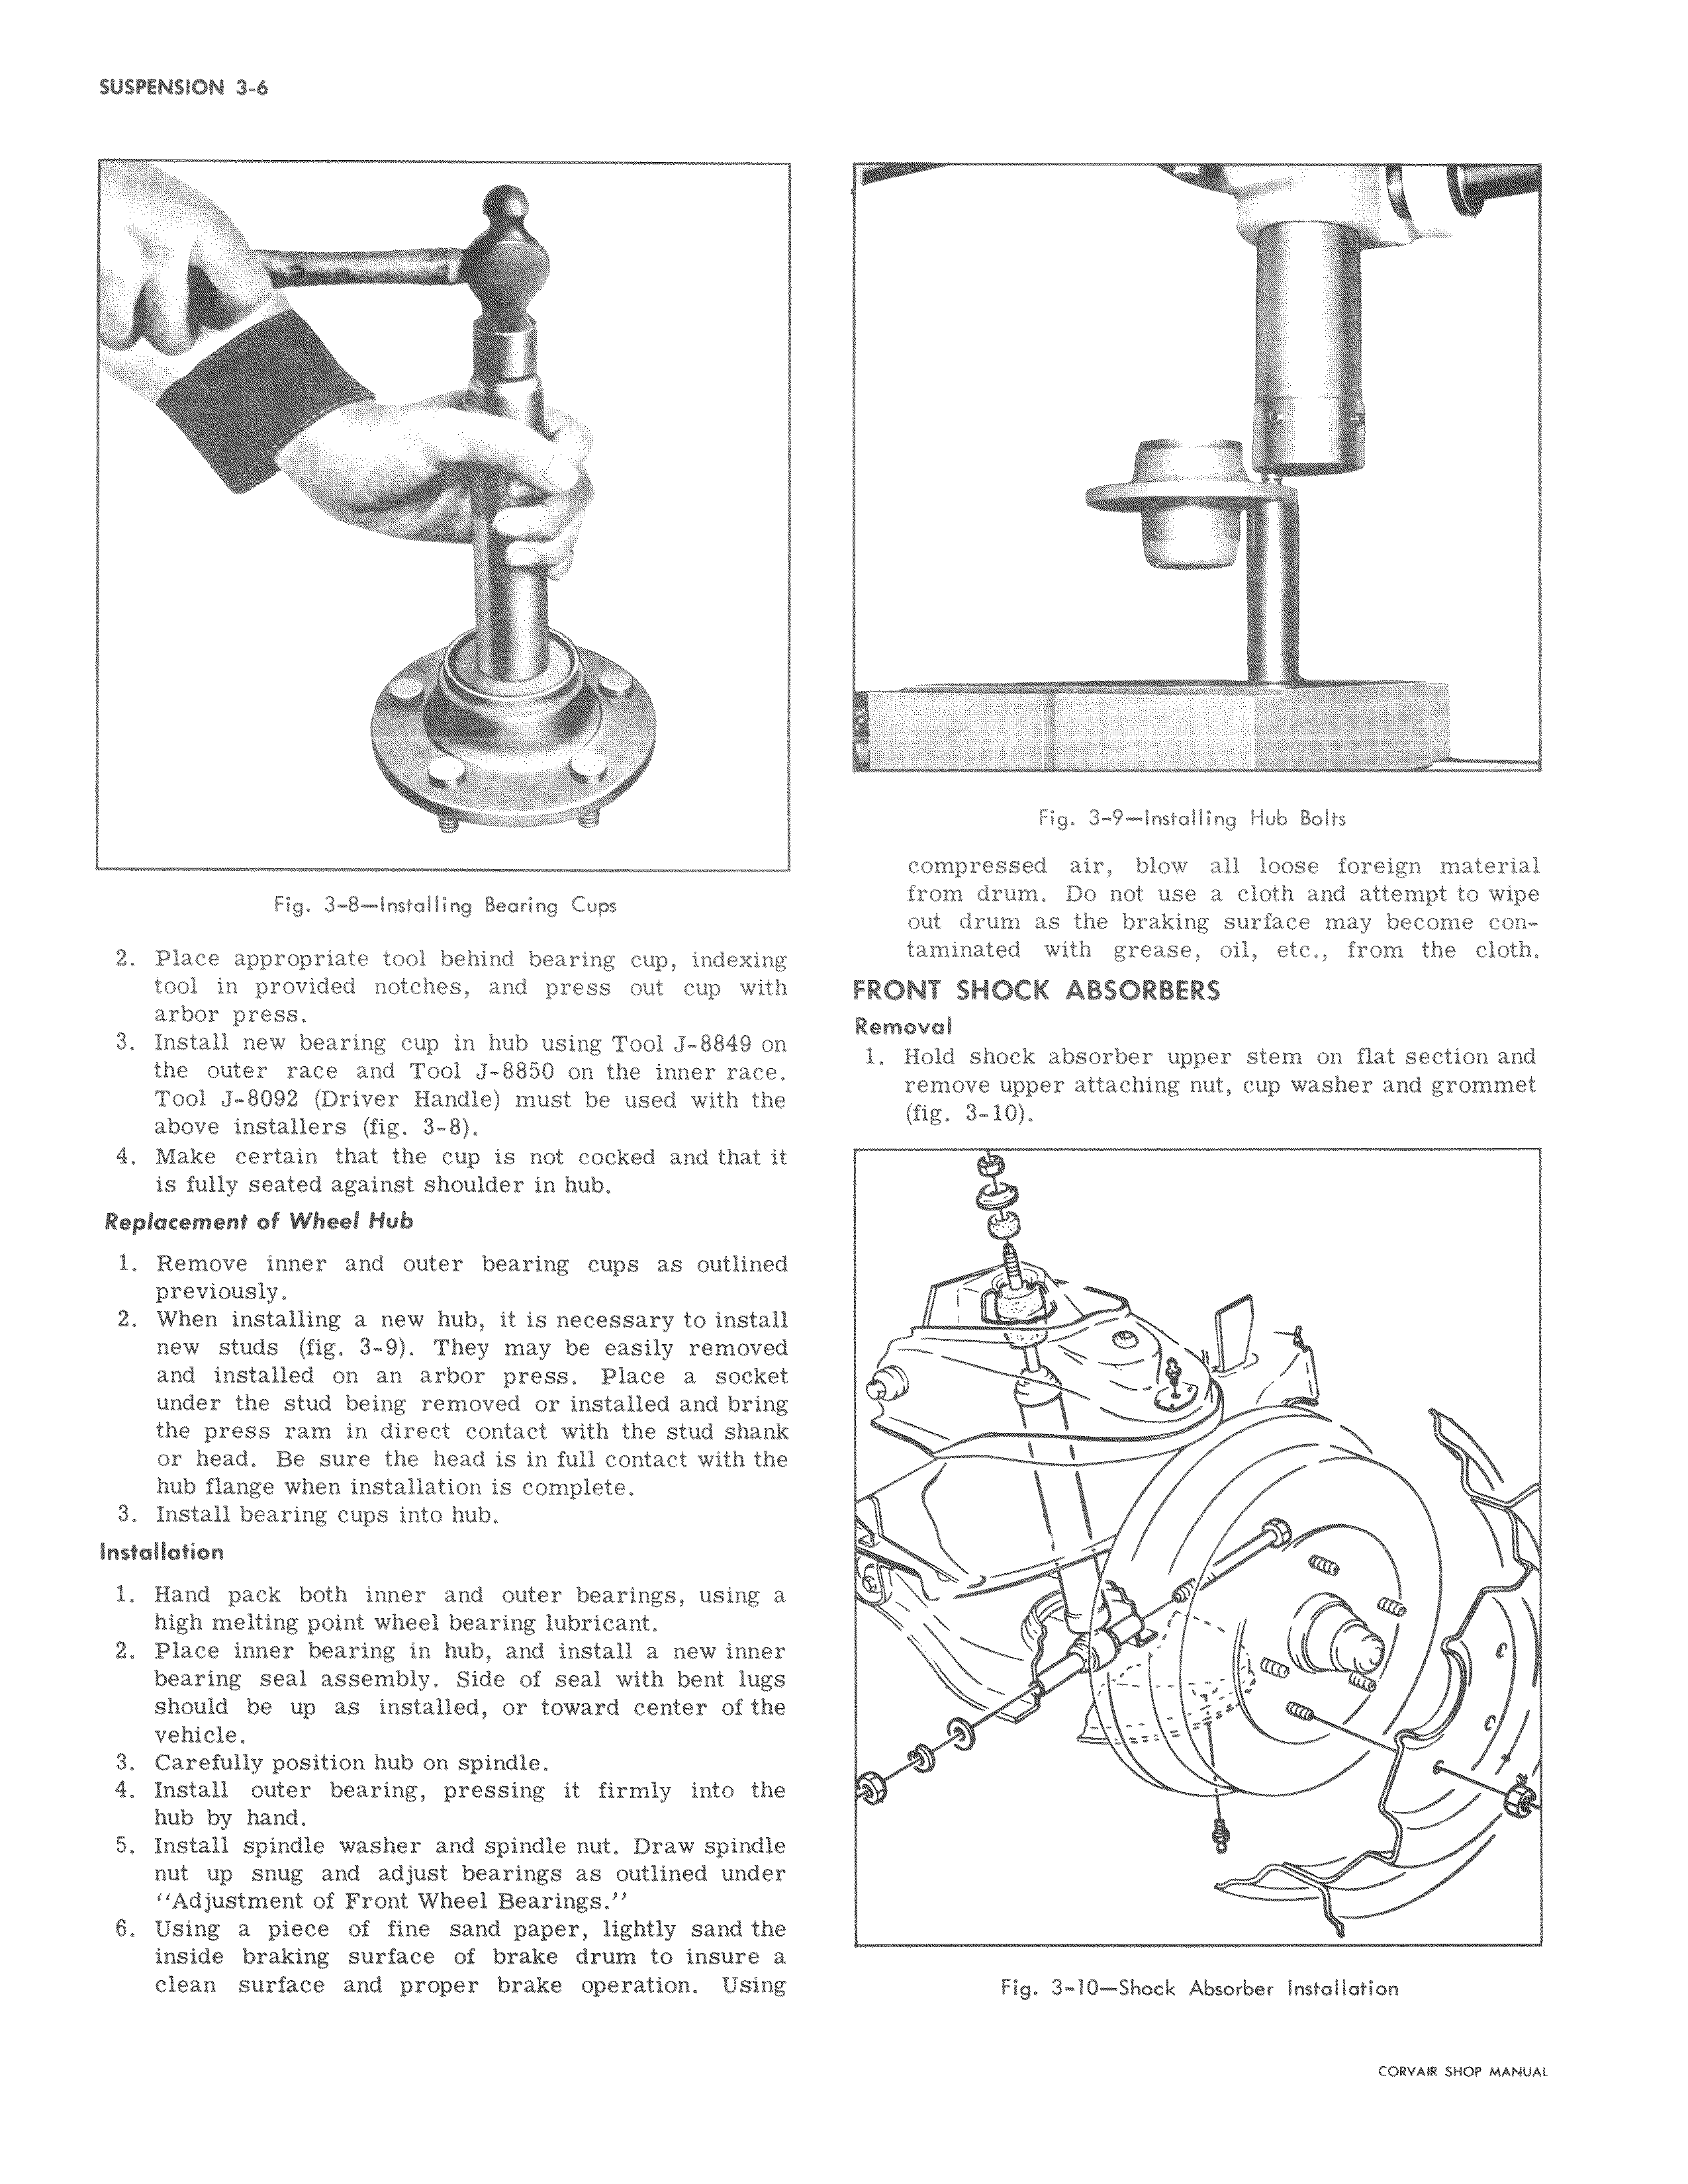
I k J I AWL Fig 3 8 Installing Bearing Cups 2 Place appropriate tool behind bearing cup inde ing tool in provided notches and press out cup with arbor press I 3 Install new bearing cup in hub using Tool J 8848 on the outer race and Tool J 8850 on the inner race Tool J 8092 Driver Handle must be used with the above installers fig 3 8 4 Make certain that the cup is not cocked and that it is fully seated against shoulder in hub I Replacement of Wheel Hub i Remove inner and outer bearing cups as outlined previously 2 When installing a new hub it is necessary to install new studs fig 3 9 They may be easily removed and installed on an arbor press Place a socket under the stud being removed or installed and bring the press ram in direct contact with the stud shank or head Be sure the head is in full contact with the hub flange when installation is complete 3 Install bearing cups into hub I Installation 1 Hand pack both inner and outer bearings using a high melting point wheel bearing lubricant I 2 Place inner bearing in hub and install a new inner bearing seal assembly Side of seal with bent lugs should be up as installed or toward center of the vehicle I 3 Carefully position hub on spindle 4 Install outer bearing pressing it firmly into the hub by hand 5 Install spindle washer and spindle nut Draw spindle nut up snug and adjust bearings as outlined under Adjustment of Front Wheel Bearings I 6 Using a piece of fine sand paper lightly san the inside braking surface of brake drum to insre a clean surface and proper brake operation sing II d WOO Q WPM Fig 3 9 Installing Hub Bolts compressed air blow all loose foreign material from drum Do not use a cloth and attempt to wipe out drum as the braking surface may become contaminated with grease oil etc from the cloth FRONT SHOCK ABSORBERS Remdwal 1 Hold shock absorber upper stem on flat section and z emove upper attaching nut cup washer and grommet 3 10 v o 1 1 e Fig 3 10 Shock Absorber Installation

 Next
Next