Jeep Parts Wiki | Ford Parts Wiki
Home | Search | Browse | Marketplace | Messages | FAQ | Guest
|
Corvair Chassis Shop Manual Supplement December 1966 |
|
Prev

 Next
Next
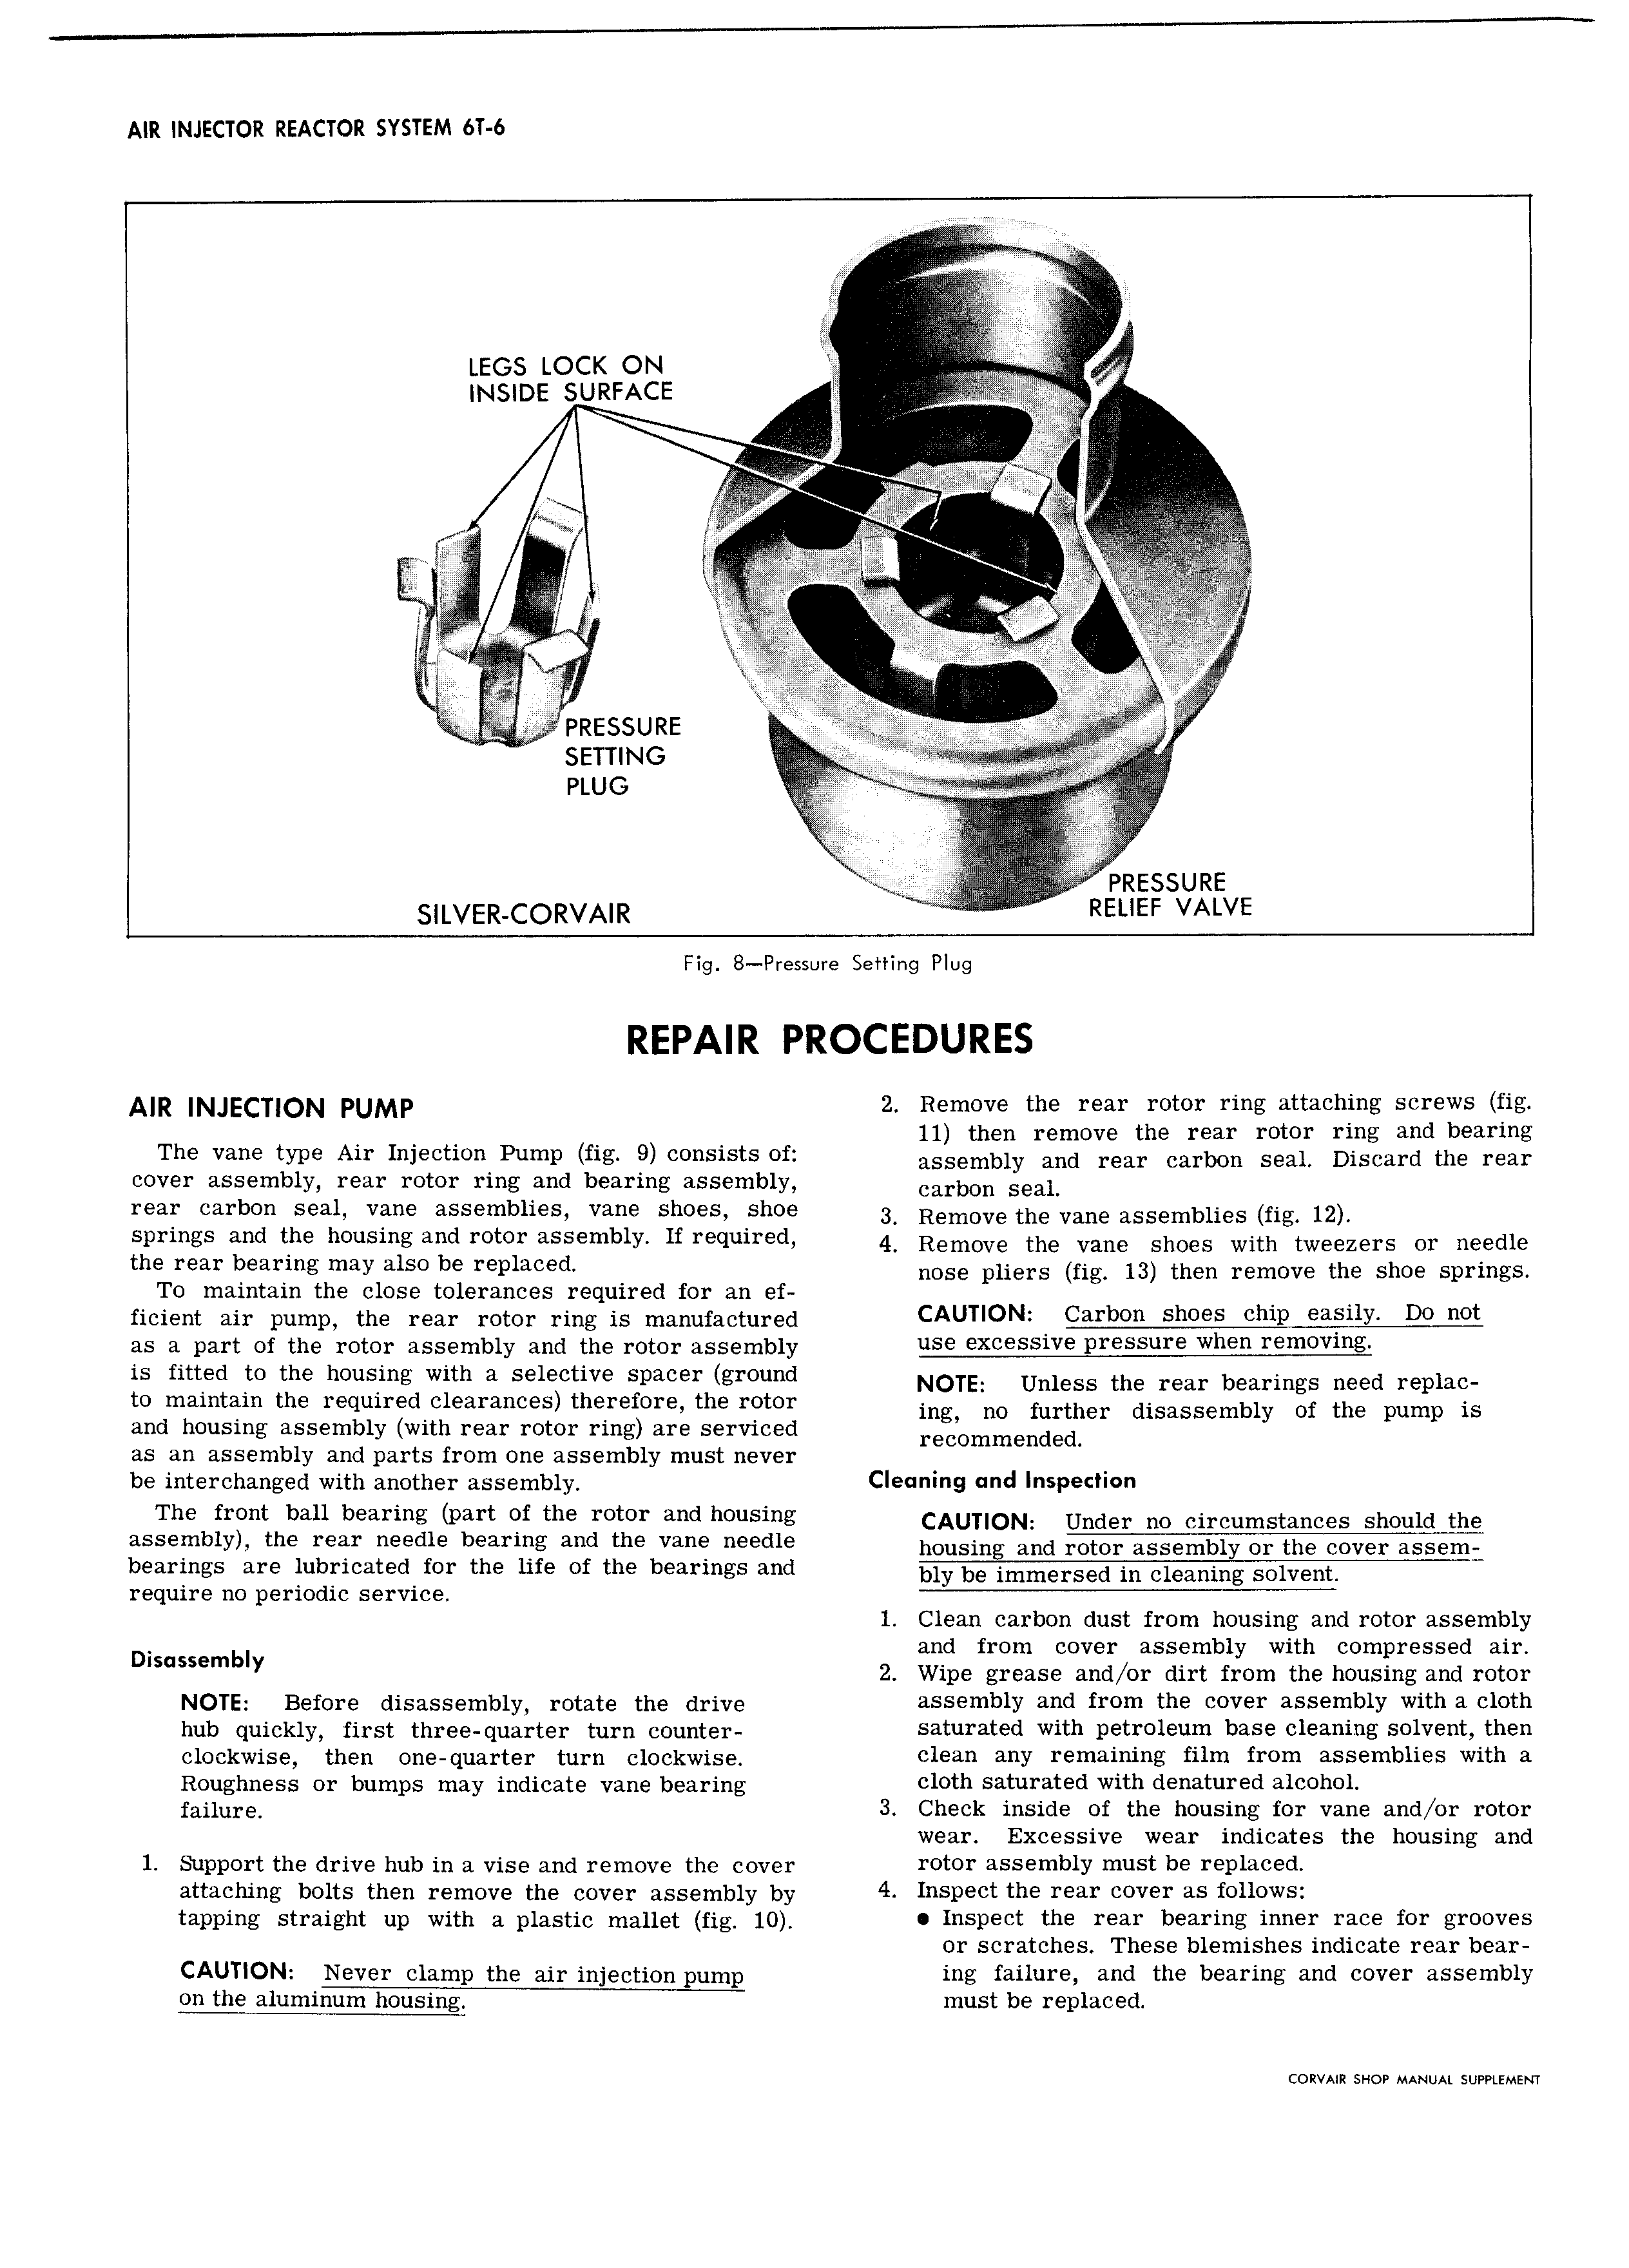
AIR INJECTOR REACTOR SYSTEM 6T 6 SS S S v LEGS LOCK QN V LLL INSIDE SURFACE I I i mliiggflitt T t 2 S S it S 1 SSL I IILSSS III I IIIS1 ILI SSS I ISS LS I I LIILIL LIIL I L i SSIL I III SI It S SLLL III ISIIS Tis ISSIISSI IIIIIII I IIS S I S IIL LL SS I ILISS no IILLLLLLILS SISS IiI1 x I I I LLI in LS LI IIII IIIS x ISIS SSSIQ 31 SS IIII S IIIIII I ISI LS It 2 PRESSURE SSSS II i i ISI SII IIISII t SETTING E T I PLUG I SS I I I I I IIII j IIII ITTT PRESSUEEVE SILVER CORVAIR REIIEE V Fig 8 Pressure Setting Plug A R N ECT gN pUMp 2 Remove the rear krotor ring ettaching scrlex vs fig 11 then remove t e rear ro or ring an earing Tne Vane type Air injection Pump iig 9 consists Oi assembly and rear carbon seal Discard the rear cover assembly rear rotor ring and bearing assembly Carbon seal rear carbon seal vane assemblies vane shoes shoe 3 Remove the vane aSS n b1i S fig lg springs and the housing and rotor assembly lf required 4 Remove the vane Shoes with tweezers or needle the mr be g may MSO be r pI I nose pliers ne iz then remove the shoe Springs To maintain the close tolerances required for an ef ficient air pump the rear rotor ring is manufactured CAUTIGNQ as a part of the rotor assembly and the rotor assembly is fitted to the housing with a selective spacer ground NOTE Unless the rear bearings need replae to maintain the requiredhclearances therefore the rotor mg no further disassembly of the pomp ls and housing assembly with rear rotor ring are serviced recommended as an assembly and parts from one assembly must never be interchanged with another assembly Cleuning und Inspection The front ball bearing part of the rotor and housing CAUTION Under no elronmstanees should the assembly the rear needle bearing and the vane needle housing and rotor assembly or the Cover assenr bearings are lubricated for the life of the bearings and bTv be 1Tm m ersed in eleanine solvent T require no periodic service 1 Clean carbon dust from housing and rotor assembly d i bl th d I S mI Iv 2 nliipe S I O SS Jomwihe SSJZKQZZZ TQ NOTE Bgfgyg disassembly rotate the drive assembly and from the cover assembly with a cloth hub quickly first three duarter turn counter saturated with petroleum base cleaning solvent then clockwise then one duarter turn clockwise clean any remaining film from assemblies with a Roughness or bumps may indicate vane bearing cloth saturated with denatured alcohol failure 3 Check inside of the housing for vane and or rotor wear Excessive wear indicates the housing and 1 Support the drive hub in a vise and remove the cover rotor assembly must be replaced attaching bolts then remove the cover assembly by 4 Inspect the rear cover as follows tapping straight up with a plastic mallet fig 10 Inspect the rear bearing inner race for grooves or scratches These blemishes indicate rear bear CAUTION Never clamp the air injection pump ing failure and the bearing and cover assembly must be PI CORVAIR SHOP MANUAL SUPPLEMENT

 Next
Next