Jeep Parts Wiki | Ford Parts Wiki
Home | Search | Browse
Prev
 Next
Next
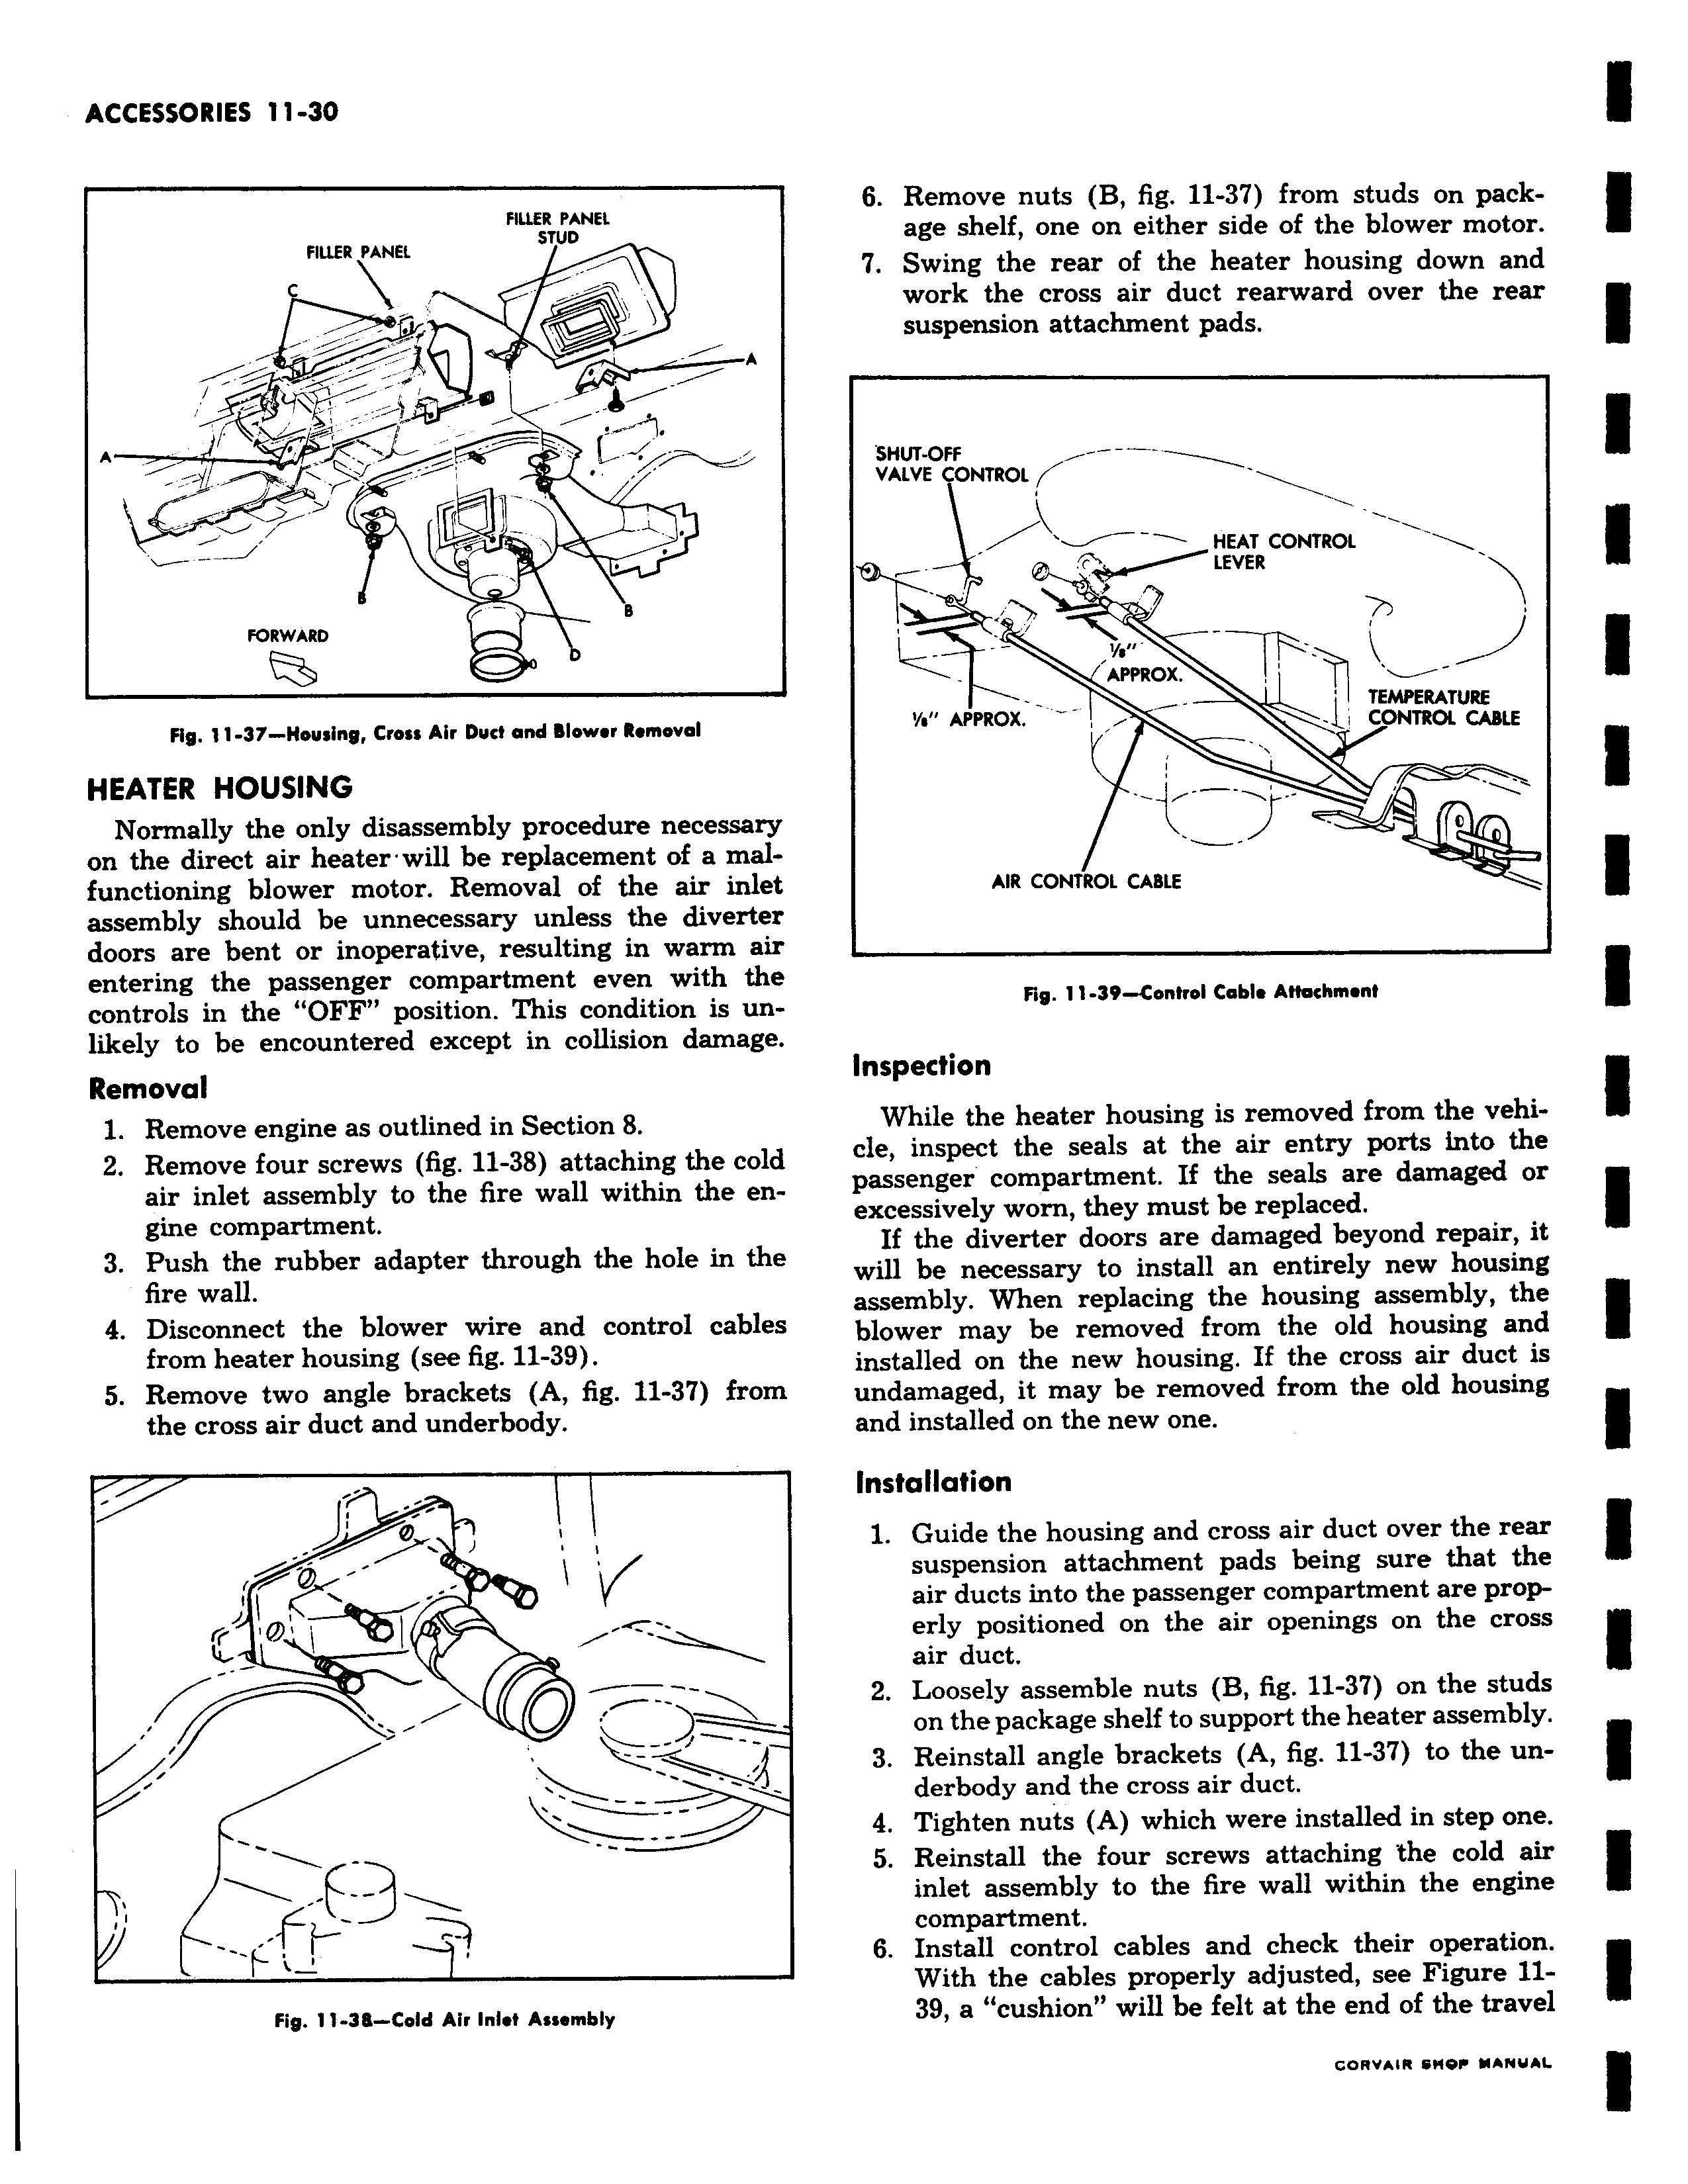
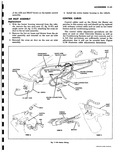
FILLER PANEL FILLER PANEL STUD c y FORWARD Fig 11 37 Housing Cross Air Duct and Blower Removal HEATER HOUSING Normally the only disassembly procedure necessary on the direct air heater will be replacement of a malfunctioning blower motor Removal of the air inlet assembly should be unnecessary unless the diverter doors are bent or inoperative resulting in warm air entering the passenger compartment even with the controls in the OFF position This condition is unlikely to be encountered except in collision damage Removal 1 Remove engine as outlined in Section 8 2 Remove four screws fig 11 38 attaching the cold air inlet assembly to the fire wall within the engine compartment 3 Push the rubber adapter through the hole in the fire wall 4 Disconnect the blower wire and control cables from heater housing see fig 11 39 5 Remove two angle brackets A fig 11 37 from the cross air duct and underbody v 1 l Fig 11 38 Cold Air Inlet Assembly 6 Remove nuts B fig 11 3 from studs on package shelf one on either side of the blower motor 7 Swing the rear of the heater housing down and work the cross air duct rearward over the rear suspension attachment pads SHUT OFF VALVE CONTROL HEAT CONTROL LEVER APPROX TEMPERATURE s APPROX CONTROL CABLE AIR CONTROL CABLE Fig 11 39 Control Cable Attachment Inspection While the heater housing is removed from the vehicle inspect the seals at the air entry ports into the passenger compartment If the seals are damaged or excessively worn they must be replaced If the diverter doors are damaged beyond repair it will be necessary to install an entirely new housing assembly When replacing the housing assembly the blower may be removed from the old housing and installed on the new housing If the cross air duct is undamaged it may be removed from the old housing and installed on the new one Installation 1 Guide the housing and cross air duct over the rear suspension attachment pads being sure that the air ducts into the passenger compartment are properly positioned on the air openings on the cross air duct 2 Loosely assemble nuts B fig 11 3 on the studs on the package shelf to support the heater assembly 3 Reinstall angle brackets A fig 11 37 to the underbody and the cross air duct 4 Tighten nuts A which were installed in step one 5 Reinstall the four screws attaching the cold air inlet assembly to the fire wall within the engine compartment 6 Install control cables and check their operation With the cables properly adjusted see Figure 1139 a cushion will be felt at the end of the travel