Jeep Parts Wiki | Ford Parts Wiki
Home | Search | Browse
Prev
 Next
Next
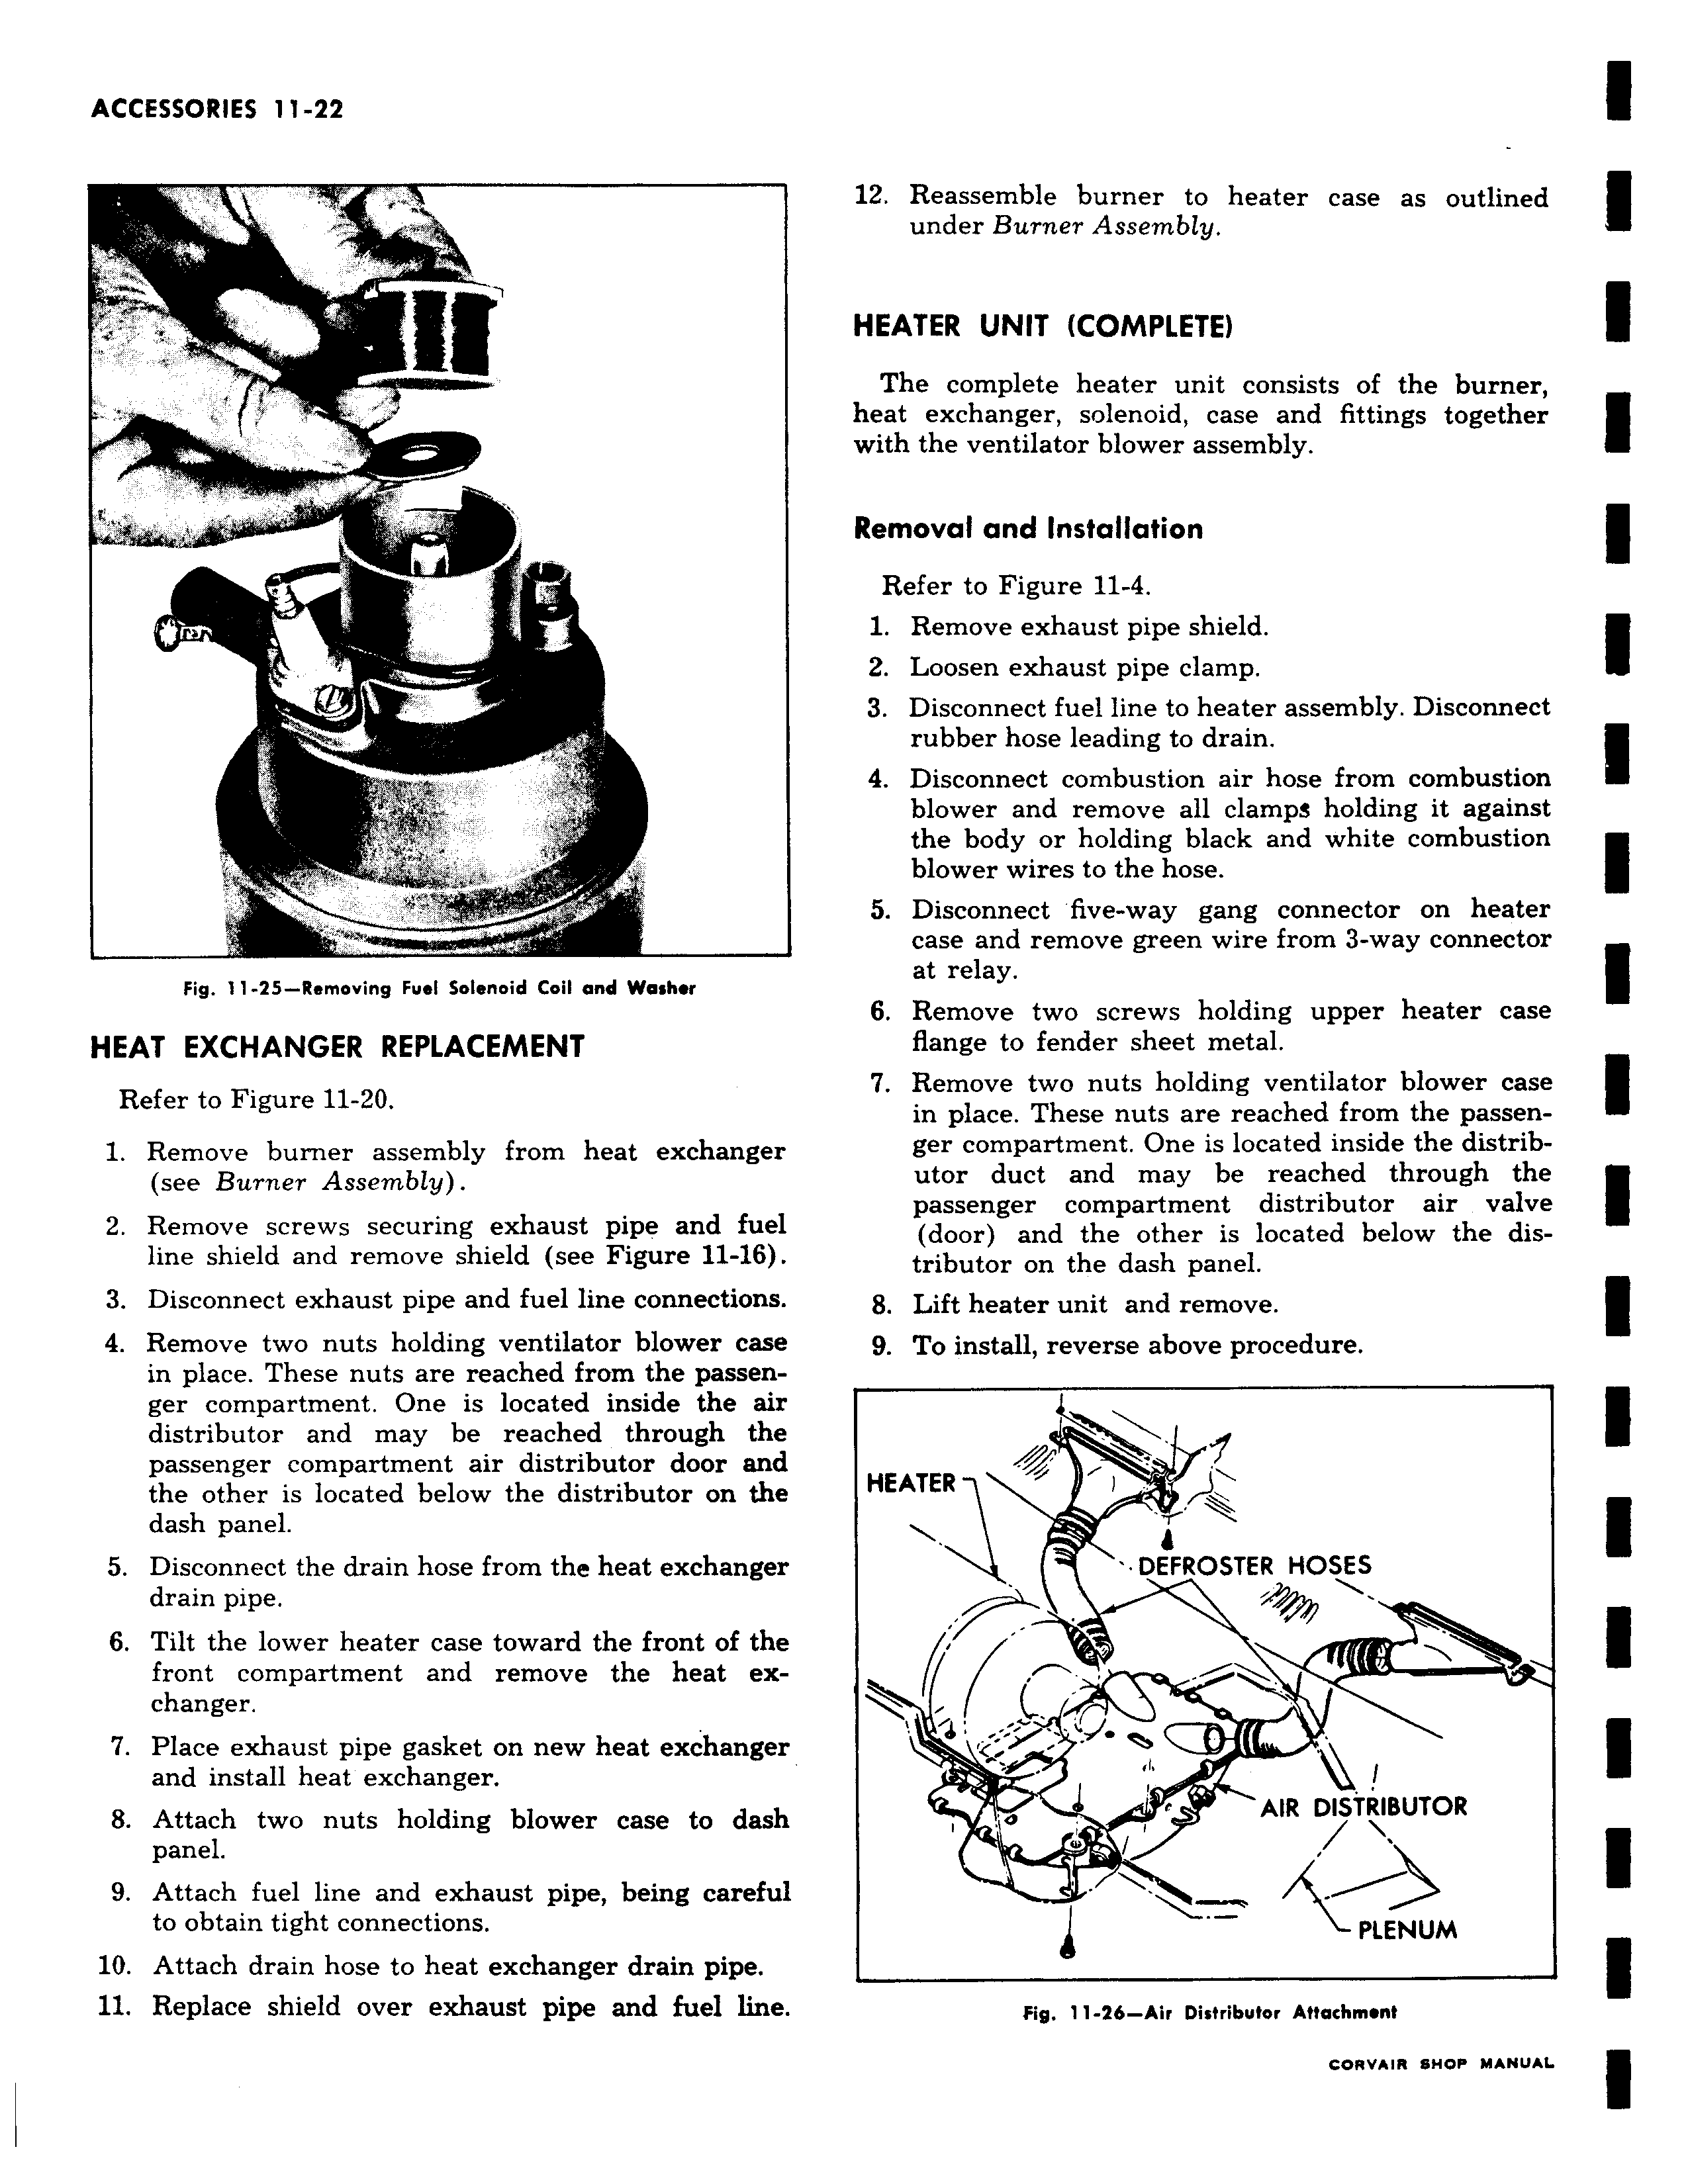
ro a ra c e aYfw 1 r t Fig 11 25 Removing Fuel Solenoid Coil and Washer HEAT EXCHANGER REPLACEMENT Refer to Figure 11 20 1 Remove burner assembly from heat exchanger see Burner Assembly 2 Remove screws securing exhaust pipe and fuel line shield and remove shield see Figure 11 16 3 Disconnect exhaust pipe and fuel line connections 4 Remove two nuts holding ventilator blower case in place These nuts are reached from the passenger compartment One is located inside the air distributor and may be reached through the passenger compartment air distributor door and the other is located below the distributor on the dash panel 5 Disconnect the drain hose from the heat exchanger drain pipe 6 Tilt the lower heater case toward the front of the front compartment and remove the heat exchanger 7 Place exhaust pipe gasket on new heat exchanger and install heat exchanger 8 Attach two nuts holding blower case to dash panel 9 Attach fuel line and exhaust pipe being careful to obtain tight connections 10 Attach drain hose to heat exchanger drain pipe 11 Replace shield over exhaust pipe and fuel line 12 Reassemble burner to heater case as outlined under Burner Assembly HEATER UNIT COMPLETE The complete heater unit consists of the burner heat exchanger solenoid case and fittings together with the ventilator blower assembly Removal and Installation Refer to Figure 11 4 1 Remove exhaust pipe shield 2 Loosen exhaust pipe clamp 3 Disconnect fuel line to heater assembly Disconnect rubber hose leading to drain 4 Disconnect combustion air hose from combustion blower and remove all clamps holding it against the body or holding black and white combustion blower wires to the hose 5 Disconnect five way gang connector on heater case and remove green wire from 3 way connector at relay 6 Remove two screws holding upper heater case flange to fender sheet metal 7 Remove two nuts holding ventilator blower case in place These nuts are reached from the passenger compartment One is located inside the distrib utor duct and may be reached through the passenger compartment distributor air valve door and the other is located below the distributor on the dash panel 8 Lift heater unit and remove 9 To install reverse above procedure HEATER DEFROSTER HOSES v r AIR DISTRIBUTOR i PLENUM 1 Fig 11 26 Air Distributor Attachment