Jeep Parts Wiki | Ford Parts Wiki
Home | Search | Browse
Prev
 Next
Next
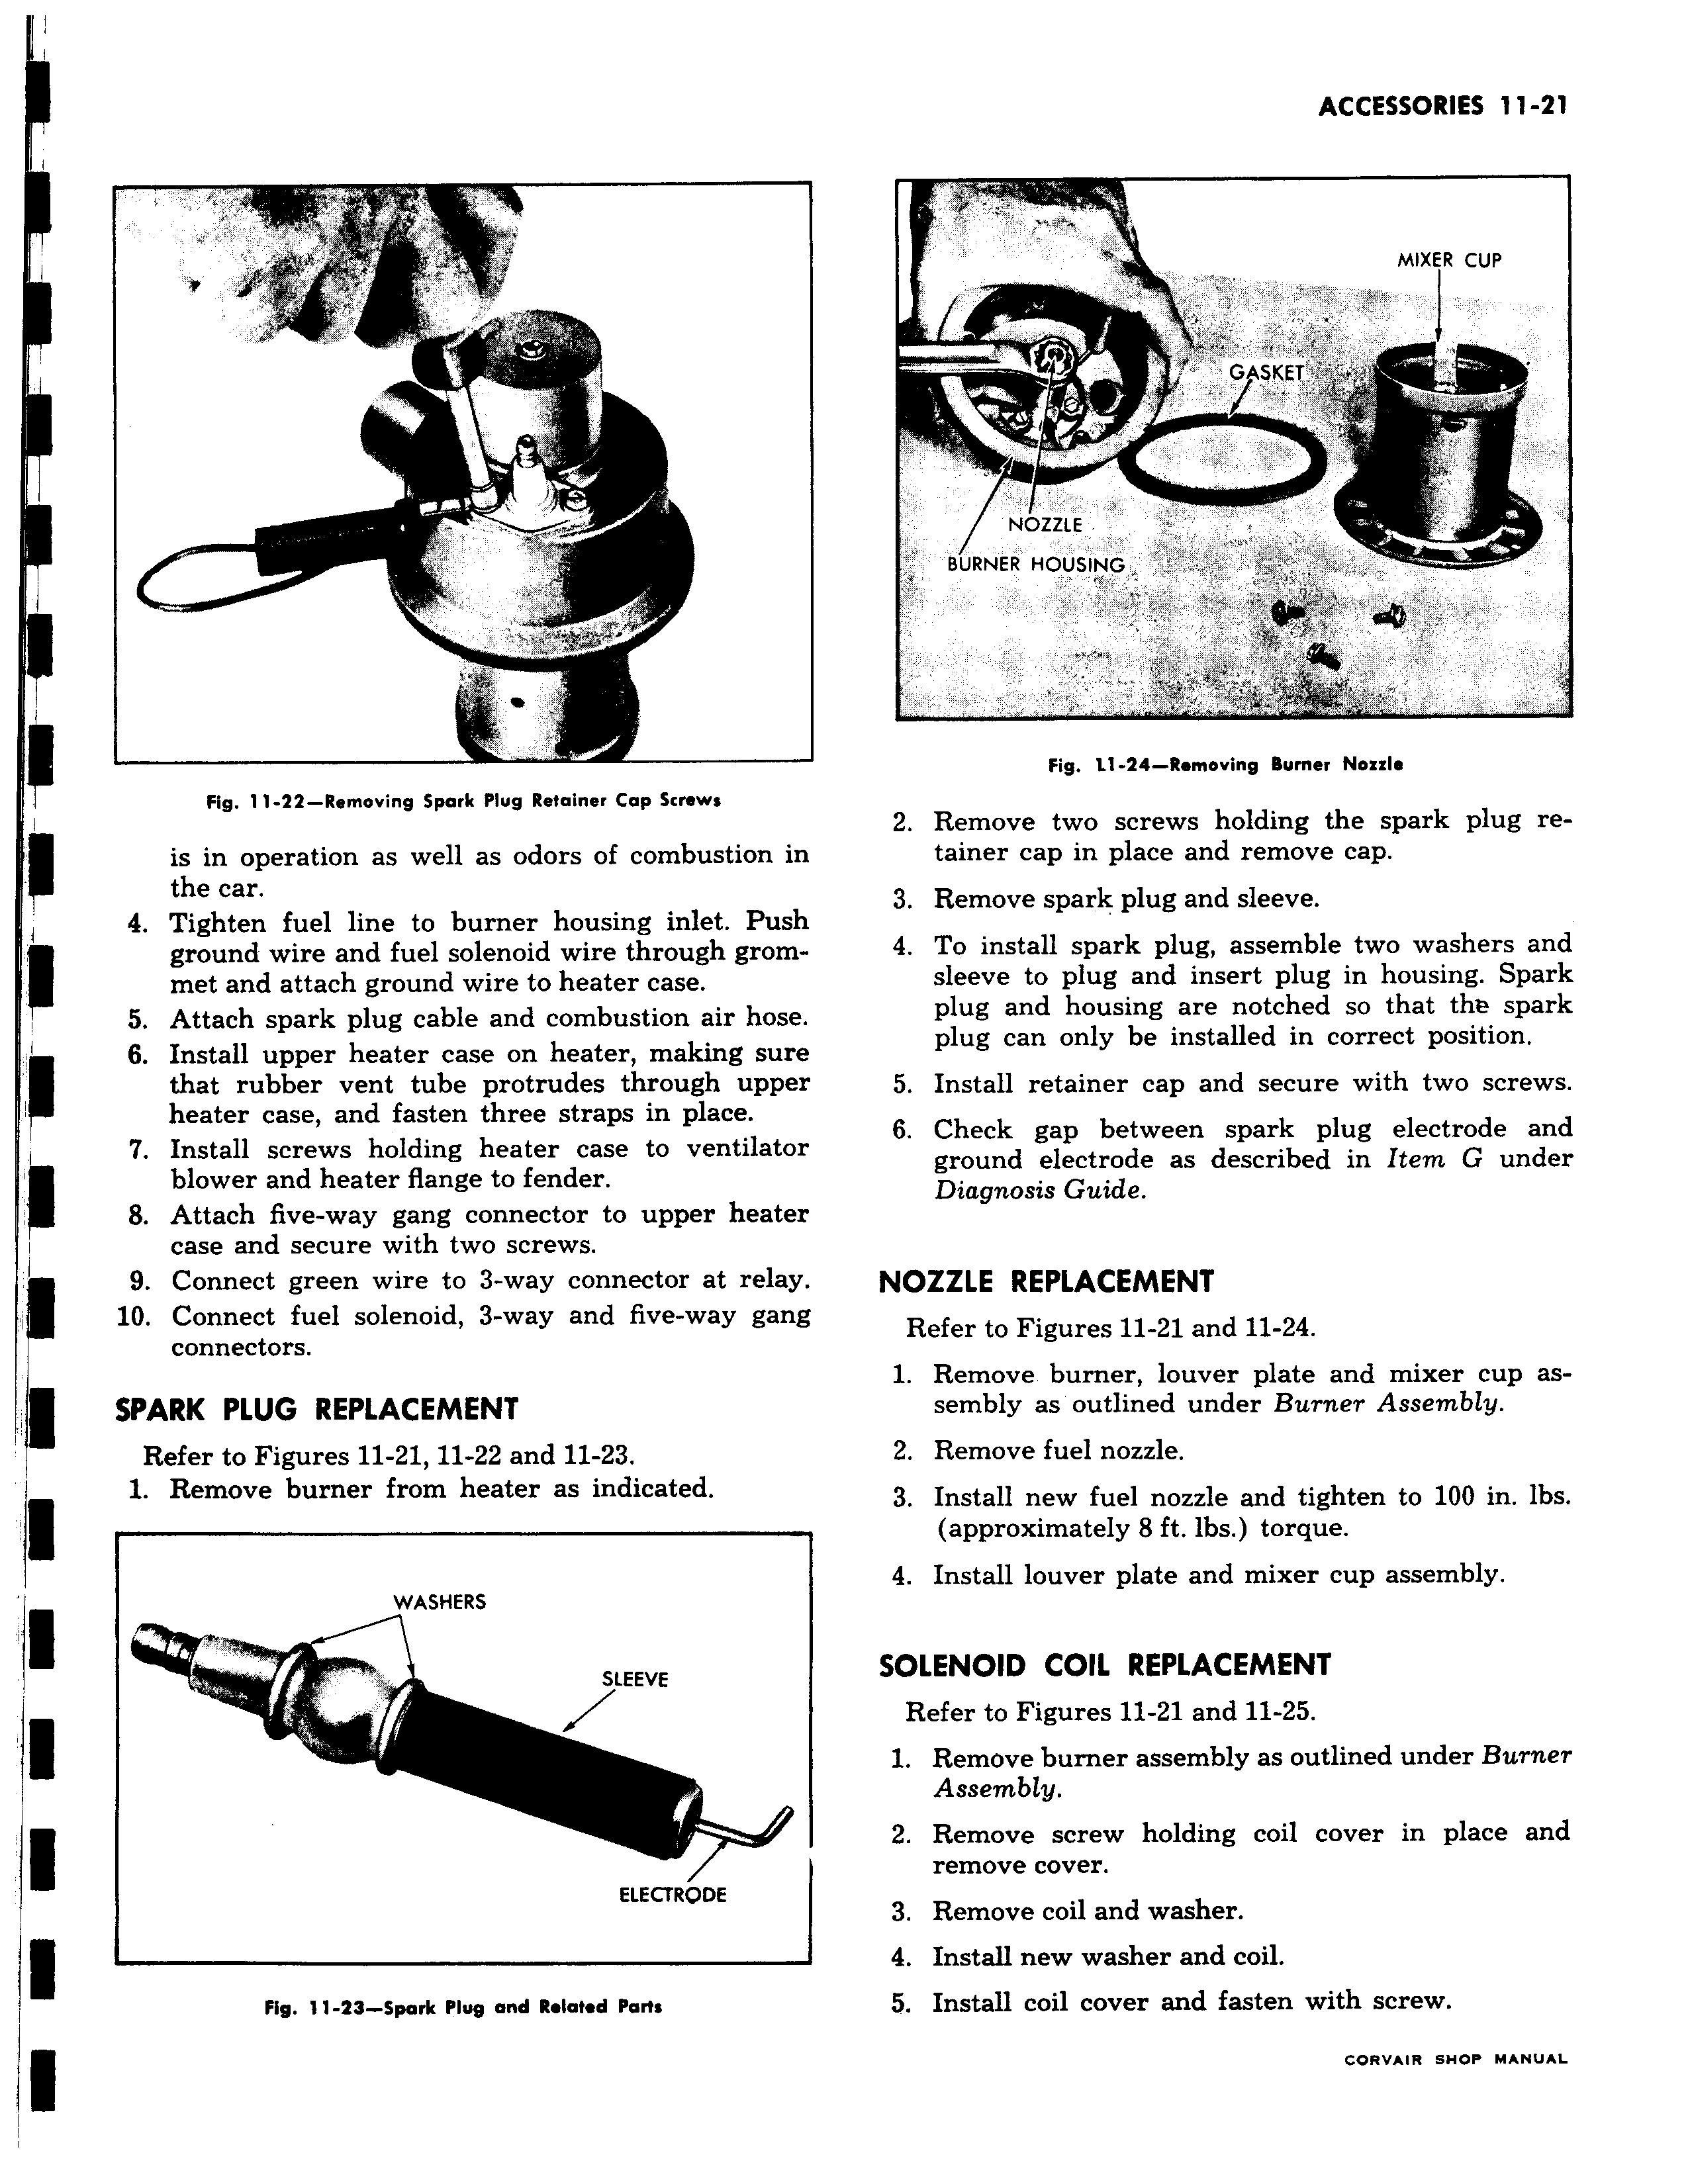
1 f f i Fig 11 22 Removing Spark Plug Retainer Cap Screws is in operation as well as odors of combustion ir the car 4 Tighten fuel line to burner housing inlet Pusl ground wire and fuel solenoid wire through grom met and attach ground wire to heater case 5 Attach spark plug cable and combustion air hose 6 Install upper heater case on heater making sure that rubber vent tube protrudes through uppei heater case and fasten three straps in place Install screws holding heater case to ventilatoi blower and heater flange to fender 8 Attach five way gang connector to upper heatei case and secure with two screws 9 Connect green wire to 3 way connector at relay 10 Connect fuel solenoid 3 way and five way gant connectors I SPARK PLUG REPLACEMENT Refer to Figures 11 21 11 22 and 11 23 1 Remove burner from heater as indicated WASHERS SLEEVE ELECTRODE Fig 11 23 Spork Plug and Related Pares CTl MIXER CUP G H G ASKET l NOZZLE BURNER HOUSING Fig 11 24 Ramoving burner Nozzle 2 Remove two screws holding the spark plug retainer cap in place and remove cap 3 Remove spark plug and sleeve 4 To install spark plug assemble two washers and sleeve to plug and insert plug in housing Spark plug and housing are notched so that thL spark plug can only be installed in correct position 5 Install retainer cap and secure with two screws 6 Check gap between spark plug electrode and ground electrode as described in Item G under Diagnosis Guide NOZZLE REPLACEMENT Refer to Figures 11 21 and 11 24 1 Remove burner louver plate and mixer cup assembly as outlined under Burner Assembly 2 Remove fuel nozzle 3 Install new fuel nozzle and tighten to 100 in lbs approximately 8 ft lbs torque 4 Install louver plate and mixer cup assembly SOLENOID COIL REPLACEMENT Refer to Figures 11 21 and 11 25 1 Remove burner assembly as outlined under Burner Assembly 2 Remove screw holding coil cover in place and remove cover 3 Remove coil and washer 4 Install new washer and coil 5 Install coil cover and fasten with screw