Jeep Parts Wiki | Ford Parts Wiki
Home | Search | Browse
Prev
 Next
Next
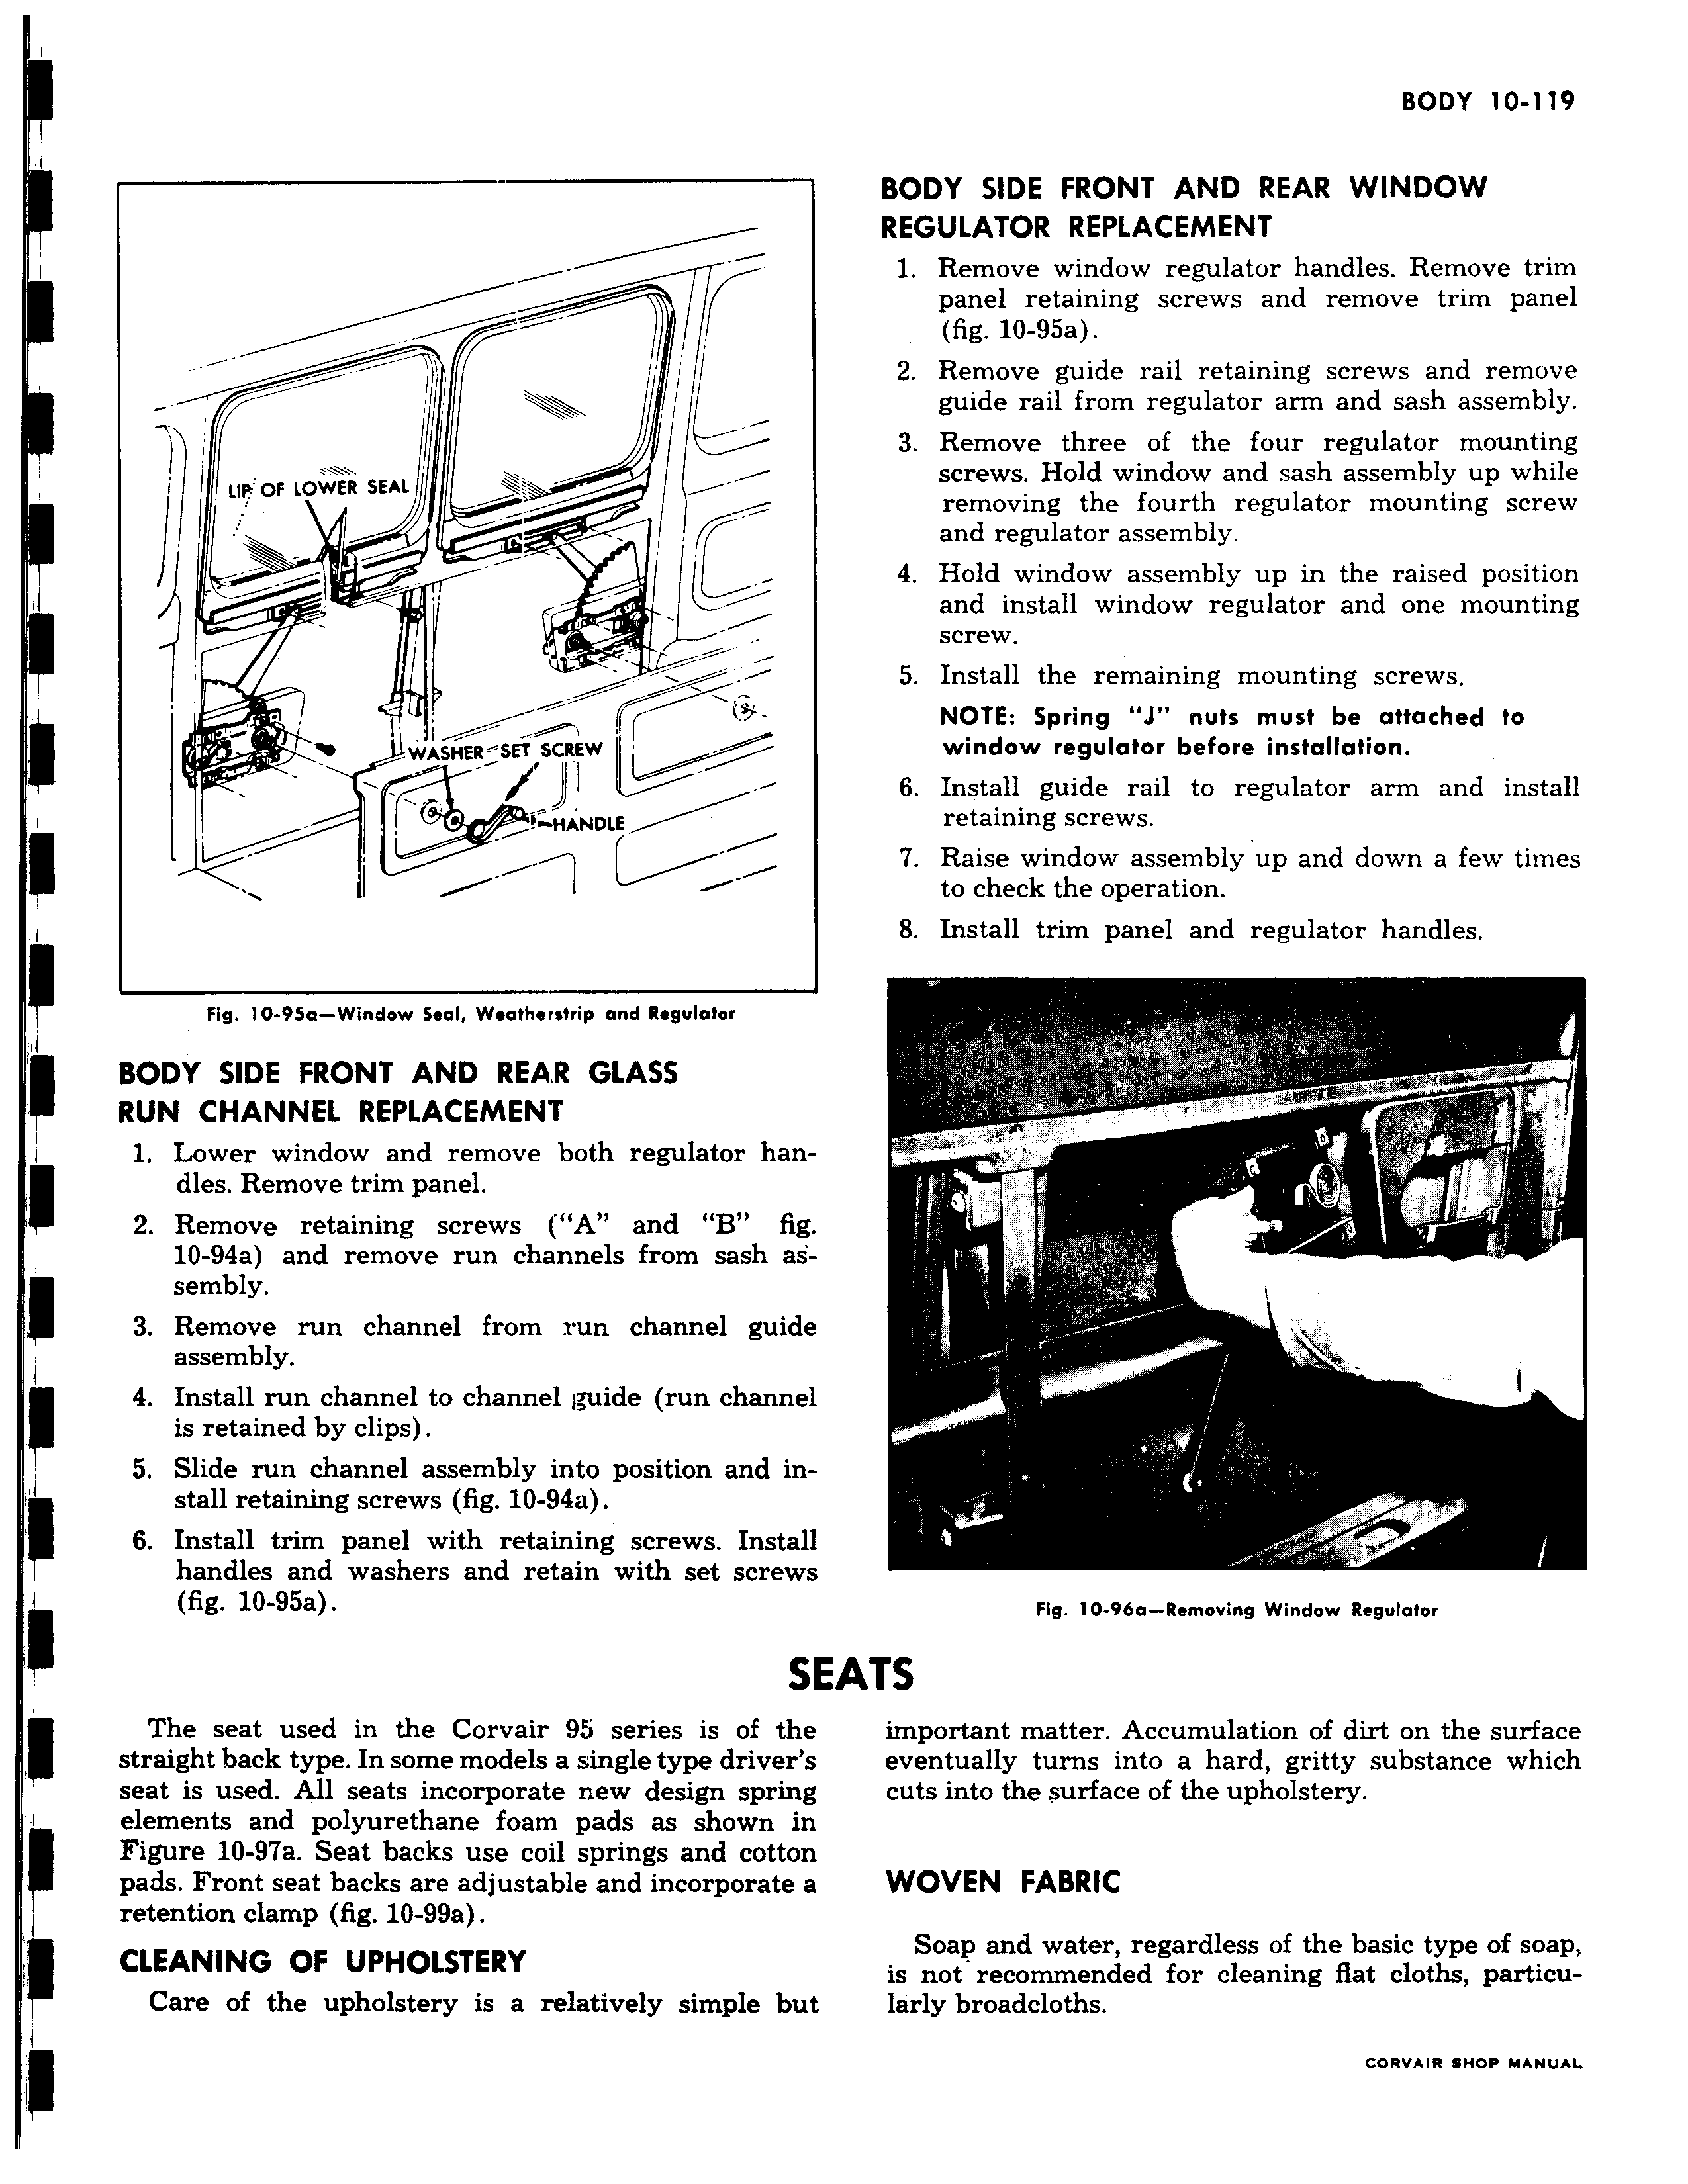
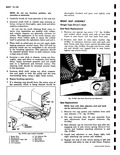
i I LIP OF LOWER SEAL 4 I r WASHER SET SCREW y HANDLE Fig 0 95a Window Seal Weafherslrip and Regulator BODY SIDE FRONT AND REAR GLASS RUN CHANNEL REPLACEMENT 1 Lower window and remove both regulator han dles Remove trim panel 2 Remove retaining screws A and B fi 10 94a and remove run channels from sash a i sembly 3 Remove run channel from run channel guid assembly 4 Install run channel to channel gruide run channe is retained by clips 5 Slide run channel assembly into position and in i stall retaining screws fig 10 94a 6 Install trim panel with retaining screws Insta handles and washers and retain with set screw i fig 10 95a i The seat used in the Corvair 95 series is of th straight back type In some models a single type driver seat is used All seats incorporate new design sprin elements and polyurethane foam pads as shown ii i Figure 10 97a Seat backs use coil springs and cottoi pads Front seat backs are adjustable and incorporate retention clamp fig 10 99a i CLEANING OF UPHOLSTERY Care of the upholstery is a relatively simple bu BODY SIDE FRONT AND REAR WINDOW REGULATOR REPLACEMENT 1 Remove window regulator handles Remove trim panel retaining screws and remove trim panel fig 10 95a 2 Remove guide rail retaining screws and remove guide rail from regulator arm and sash assembly 3 Remove three of the four regulator mounting screws Hold window and sash assembly up while removing the fourth regulator mounting screw and regulator assembly 4 Hold window assembly up in the raised position and install window regulator and one mounting screw 5 Install the remaining mounting screws NOTE Spring J nuts must be attached to window regulator before installation 6 Install guide rail to regulator arm and install retaining screws 7 Raise window assembly up and down a few times to check the operation 8 Install trim panel and regulator handles s 1 S r Y J o a t 1 w I 1 9 t s Fig 10 96a Removing Window Regulator 1EATS important matter Accumulation of dirt on the surface s eventually turns into a hard gritty substance which cuts into the surface of the upholstery i a WOVEN FABRIC Soap and water regardless of the basic type of soap is not recommended for cleaning flat cloths particut larly broadcloths