Jeep Parts Wiki | Ford Parts Wiki
Home | Search | Browse | Marketplace | Messages | FAQ | Guest
Prev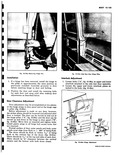
 Next
Next
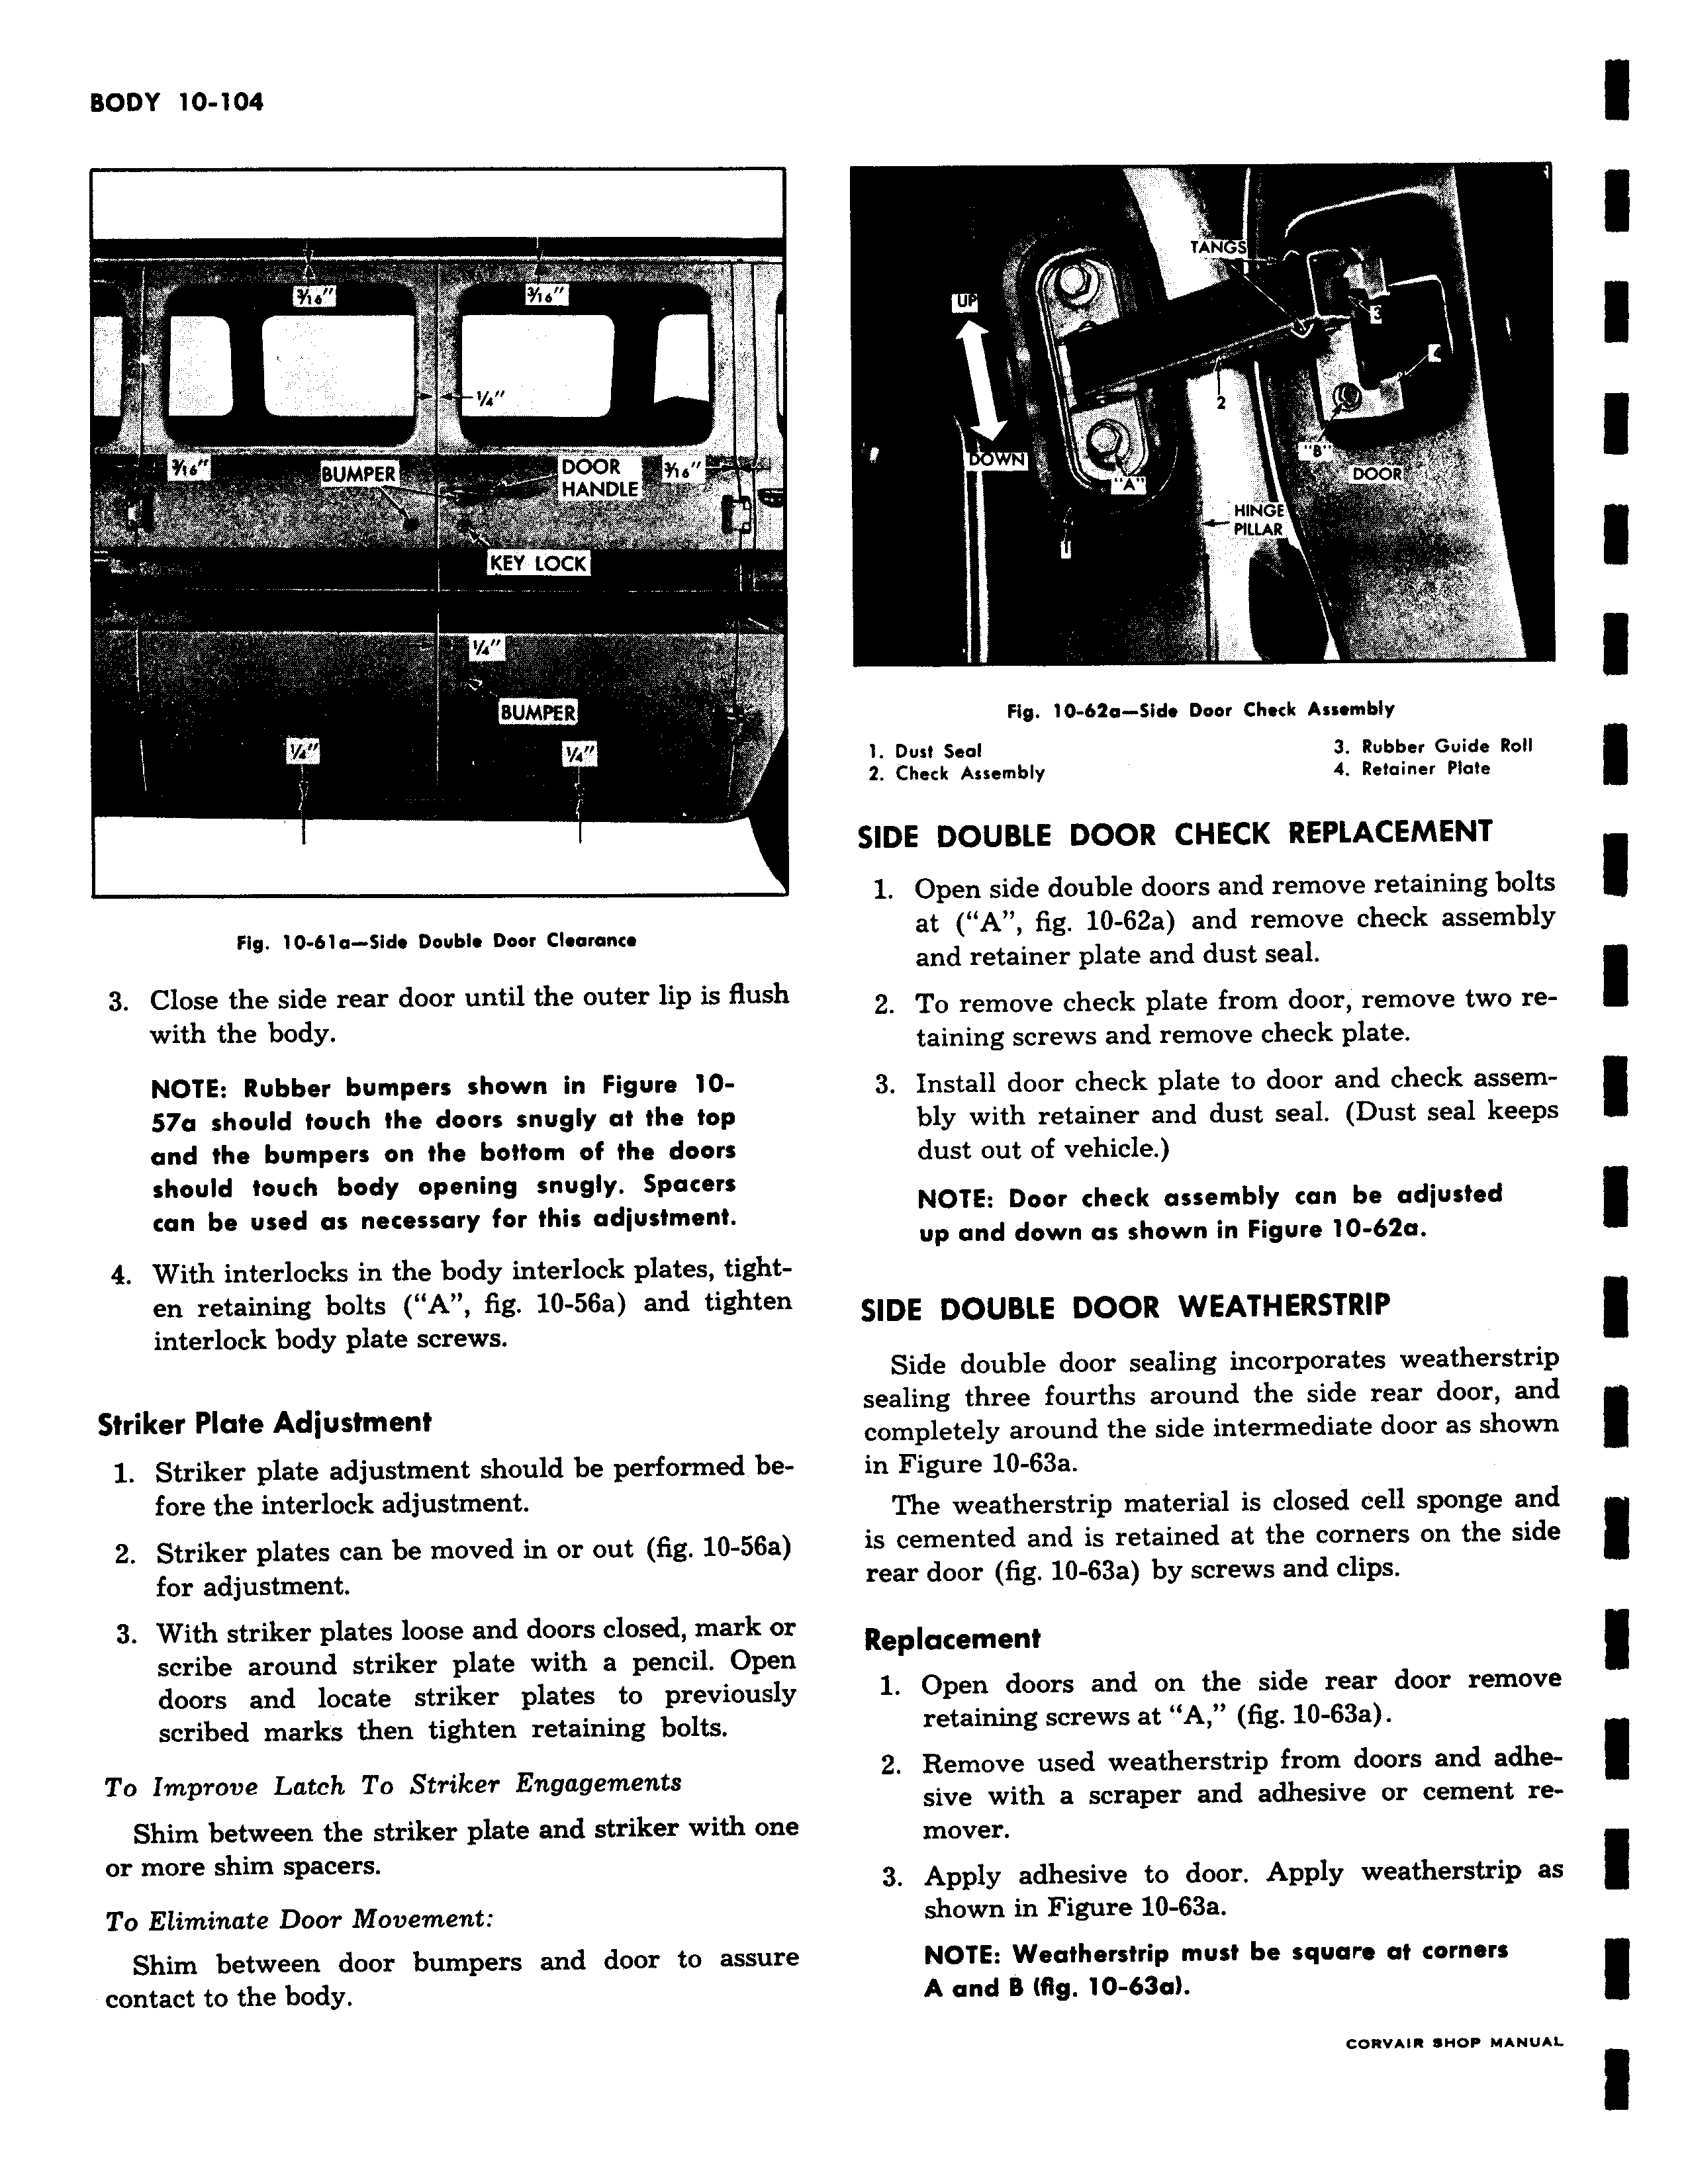
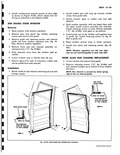
Y 1 4 BUMPER DOOR 3y r HANDLE KEY LOCK BUMPER j Fig 10 61 Side Double Door Clearance 3 Close the side rear door until the outer lip is flush with the body NOTE Rubber bumpers shown in Figure 1057a should touch the doors snugly at the top and the bumpers on the bottom of the doors should touch body opening snugly Spacers can be used as necessary for this adjustment 4 With interlocks in the body interlock plates tighten retaining bolts A fig 10 56a and tighten interlock body plate screws Striker Plate Adjustment 1 Striker plate adjustment should be performed before the interlock adjustment 2 Striker plates can be moved in or out fig 10 56a for adjustment 3 With striker plates loose and doors closed mark or scribe around striker plate with a pencil Open doors and locate striker plates to previously scribed marks then tighten retaining bolts To Improve Latch To Striker Engagements Shim between the striker plate and striker with one or more shim spacers To Eliminate Door Movement Shim between door bumpers and door to assure contact to the body TAN 4 p HINGE PILLAR 3 4 Fig 10 62a Sid Door Check Assembly 1 Dust Seal 3 Rubber Guide Roll 2 Check Assembly 4 Retainer Plate SIDE DOUBLE DOOR CHECK REPLACEMENT 1 Open side double doors and remove retaining bolts at A fig 10 62a and remove check assembly and retainer plate and dust seal 2 To remove check plate from door remove two retaining screws and remove check plate 3 Install door check plate to door and check assembly with retainer and dust seal Dust seal keeps dust out of vehicle NOTE Door check assembly can be adjusted up and down as shown in Figure 10 62a SIDE DOUBLE DOOR WEATHERSTRIP Side double door sealing incorporates weatherstrip sealing three fourths around the side rear door and completely around the side intermediate door as shown in Figure 10 63a The weatherstrip material is closed cell sponge and is cemented and is retained at the corners on the side rear door fig 10 63a by screws and clips Replacement 1 Open doors and on the side rear door remove retaining screws at A fig 10 63a 2 Remove used weatherstrip from doors and adhesive with a scraper and adhesive or cement remover 3 Apply adhesive to door Apply weatherstrip as shown in Figure 10 63a NOTE Weatherstrip must be square at corners A and B fig 10 630 CORVAIR SHOP MANUAL