Jeep Parts Wiki | Ford Parts Wiki
Home | Search | Browse
Prev
 Next
Next
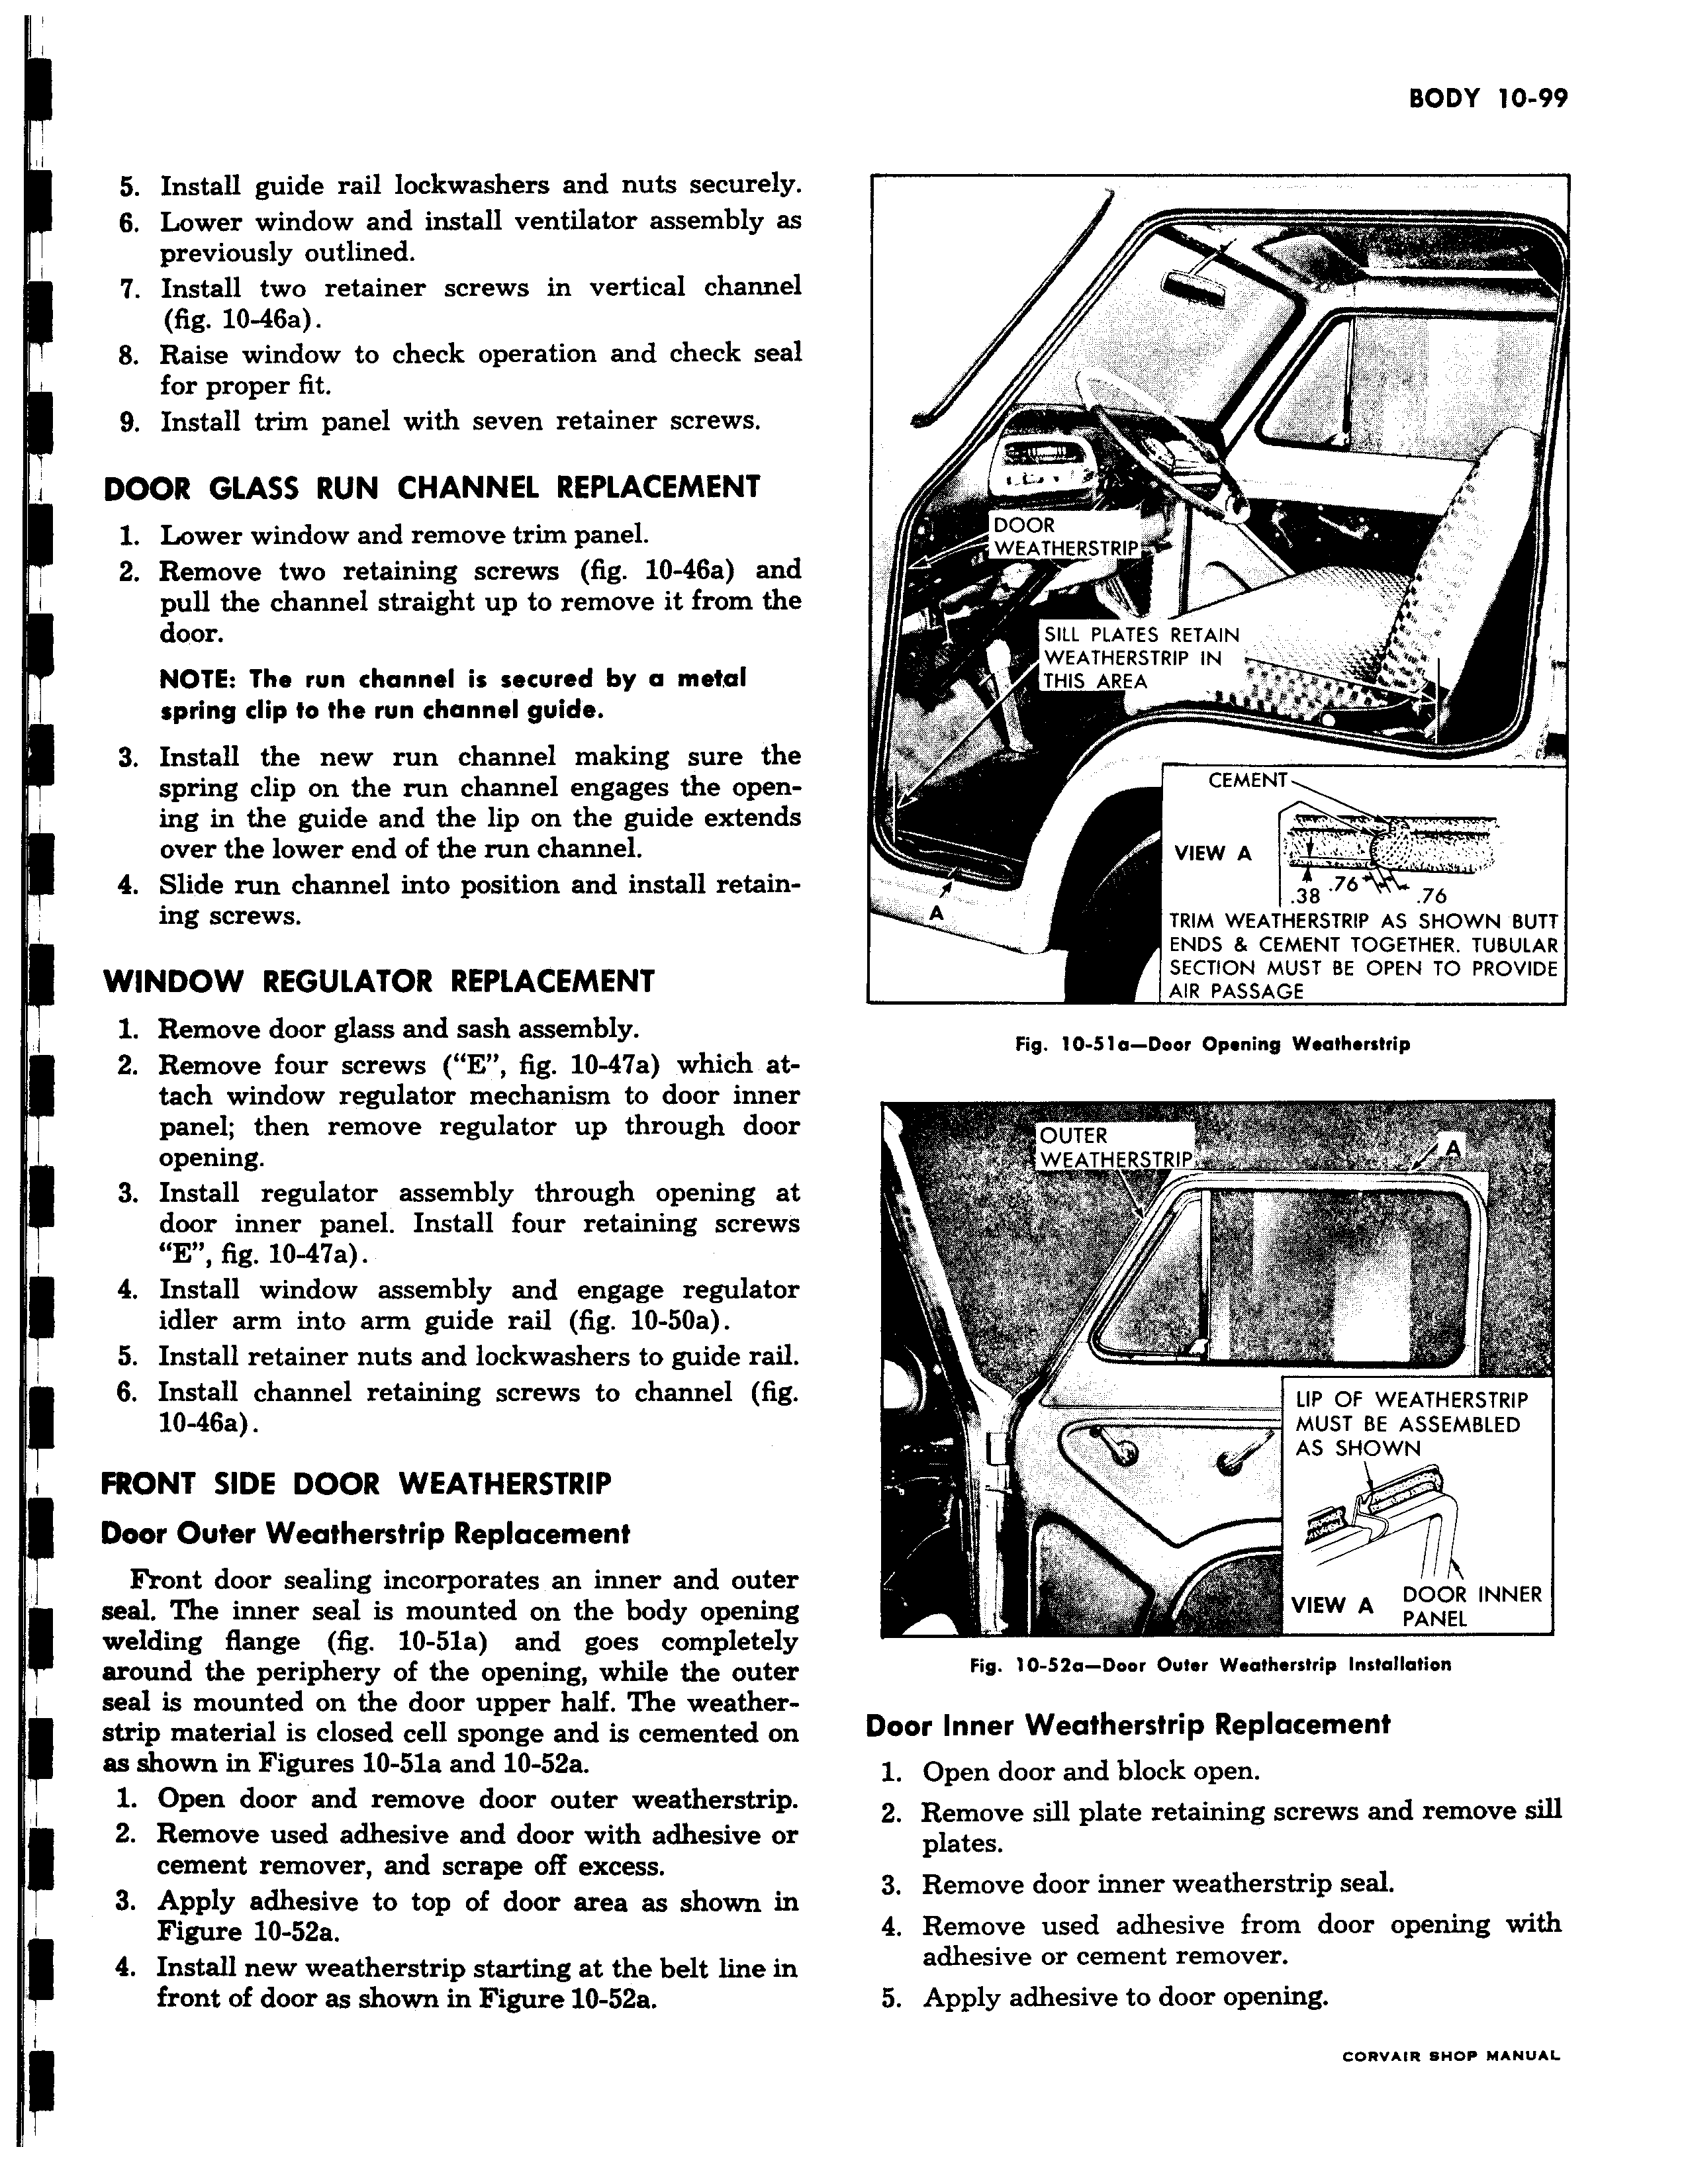
II 5 Install guide rail lockwashers and nuts securely 6 Lower window and install ventilator assembly as previously outlined 7 Install two retainer screws in vertical channel fig 10 46a 8 Raise window to check operation and check seal for proper fit 9 Install trim panel with seven retainer screws DOOR GLASS RUN CHANNEL REPLACEMENT 1 Lower window and remove trim panel 2 Remove two retaining screws fig 10 46a and pull the channel straight up to remove it from the I door NOTE The run channel is secured by a metal spring dip to the run channel guide 3 Install the new run channel making sure the spring clip on the run channel engages the opening in the guide and the lip on the guide extends over the lower end of the run channel 4 Slide run channel into position and install retaining screws WINDOW REGULATOR REPLACEMENT 1 Remove door glass and sash assembly 2 Remove four screws E fig 10 47a which attach window regulator mechanism to door inner panel then remove regulator up through door opening 3 Install regulator assembly through opening at door inner panel Install four retaining screws E fig 10 47a 4 Install window assembly and engage regulator idler arm into arm guide rail fig 10 50a 5 Install retainer nuts and lockwashers to guide rail 6 Install channel retaining screws to channel fig 10 46a FRONT SIDE DOOR WEATHERSTRIP Door Outer Weatherstrip Replacement Front door sealing incorporates an inner and outer seal The inner seal is mounted on the body opening welding flange fig 10 51a and goes completely around the periphery of the opening while the outer seal is mounted on the door upper half The weatherstrip material is closed cell sponge and is cemented on as shown in Figures 10 51a and 10 52a 1 Open door and remove door outer weatherstrip 2 Remove used adhesive and door with adhesive or cement remover and scrape off excess 3 Apply adhesive to top of door area as shown in Figure 10 52a 4 Install new weatherstrip starting at the belt line in front of door as shown in Figure 10 52a i x 3 I y f sy s l y CEMENT 76 TRIM WEATHERSTRIP AS SHOWN BUTT ENDS CEMENT TOGETHER TUBULAR SECTION MUST BE OPEN TO PROVIDE 1 k s 1 J AIR PASSAGE LIP MUST BE ASSEMBLED AS SHOWN ab DOOR INNER I c VIEW A PANEL