Jeep Parts Wiki | Ford Parts Wiki
Home | Search | Browse
Prev
 Next
Next
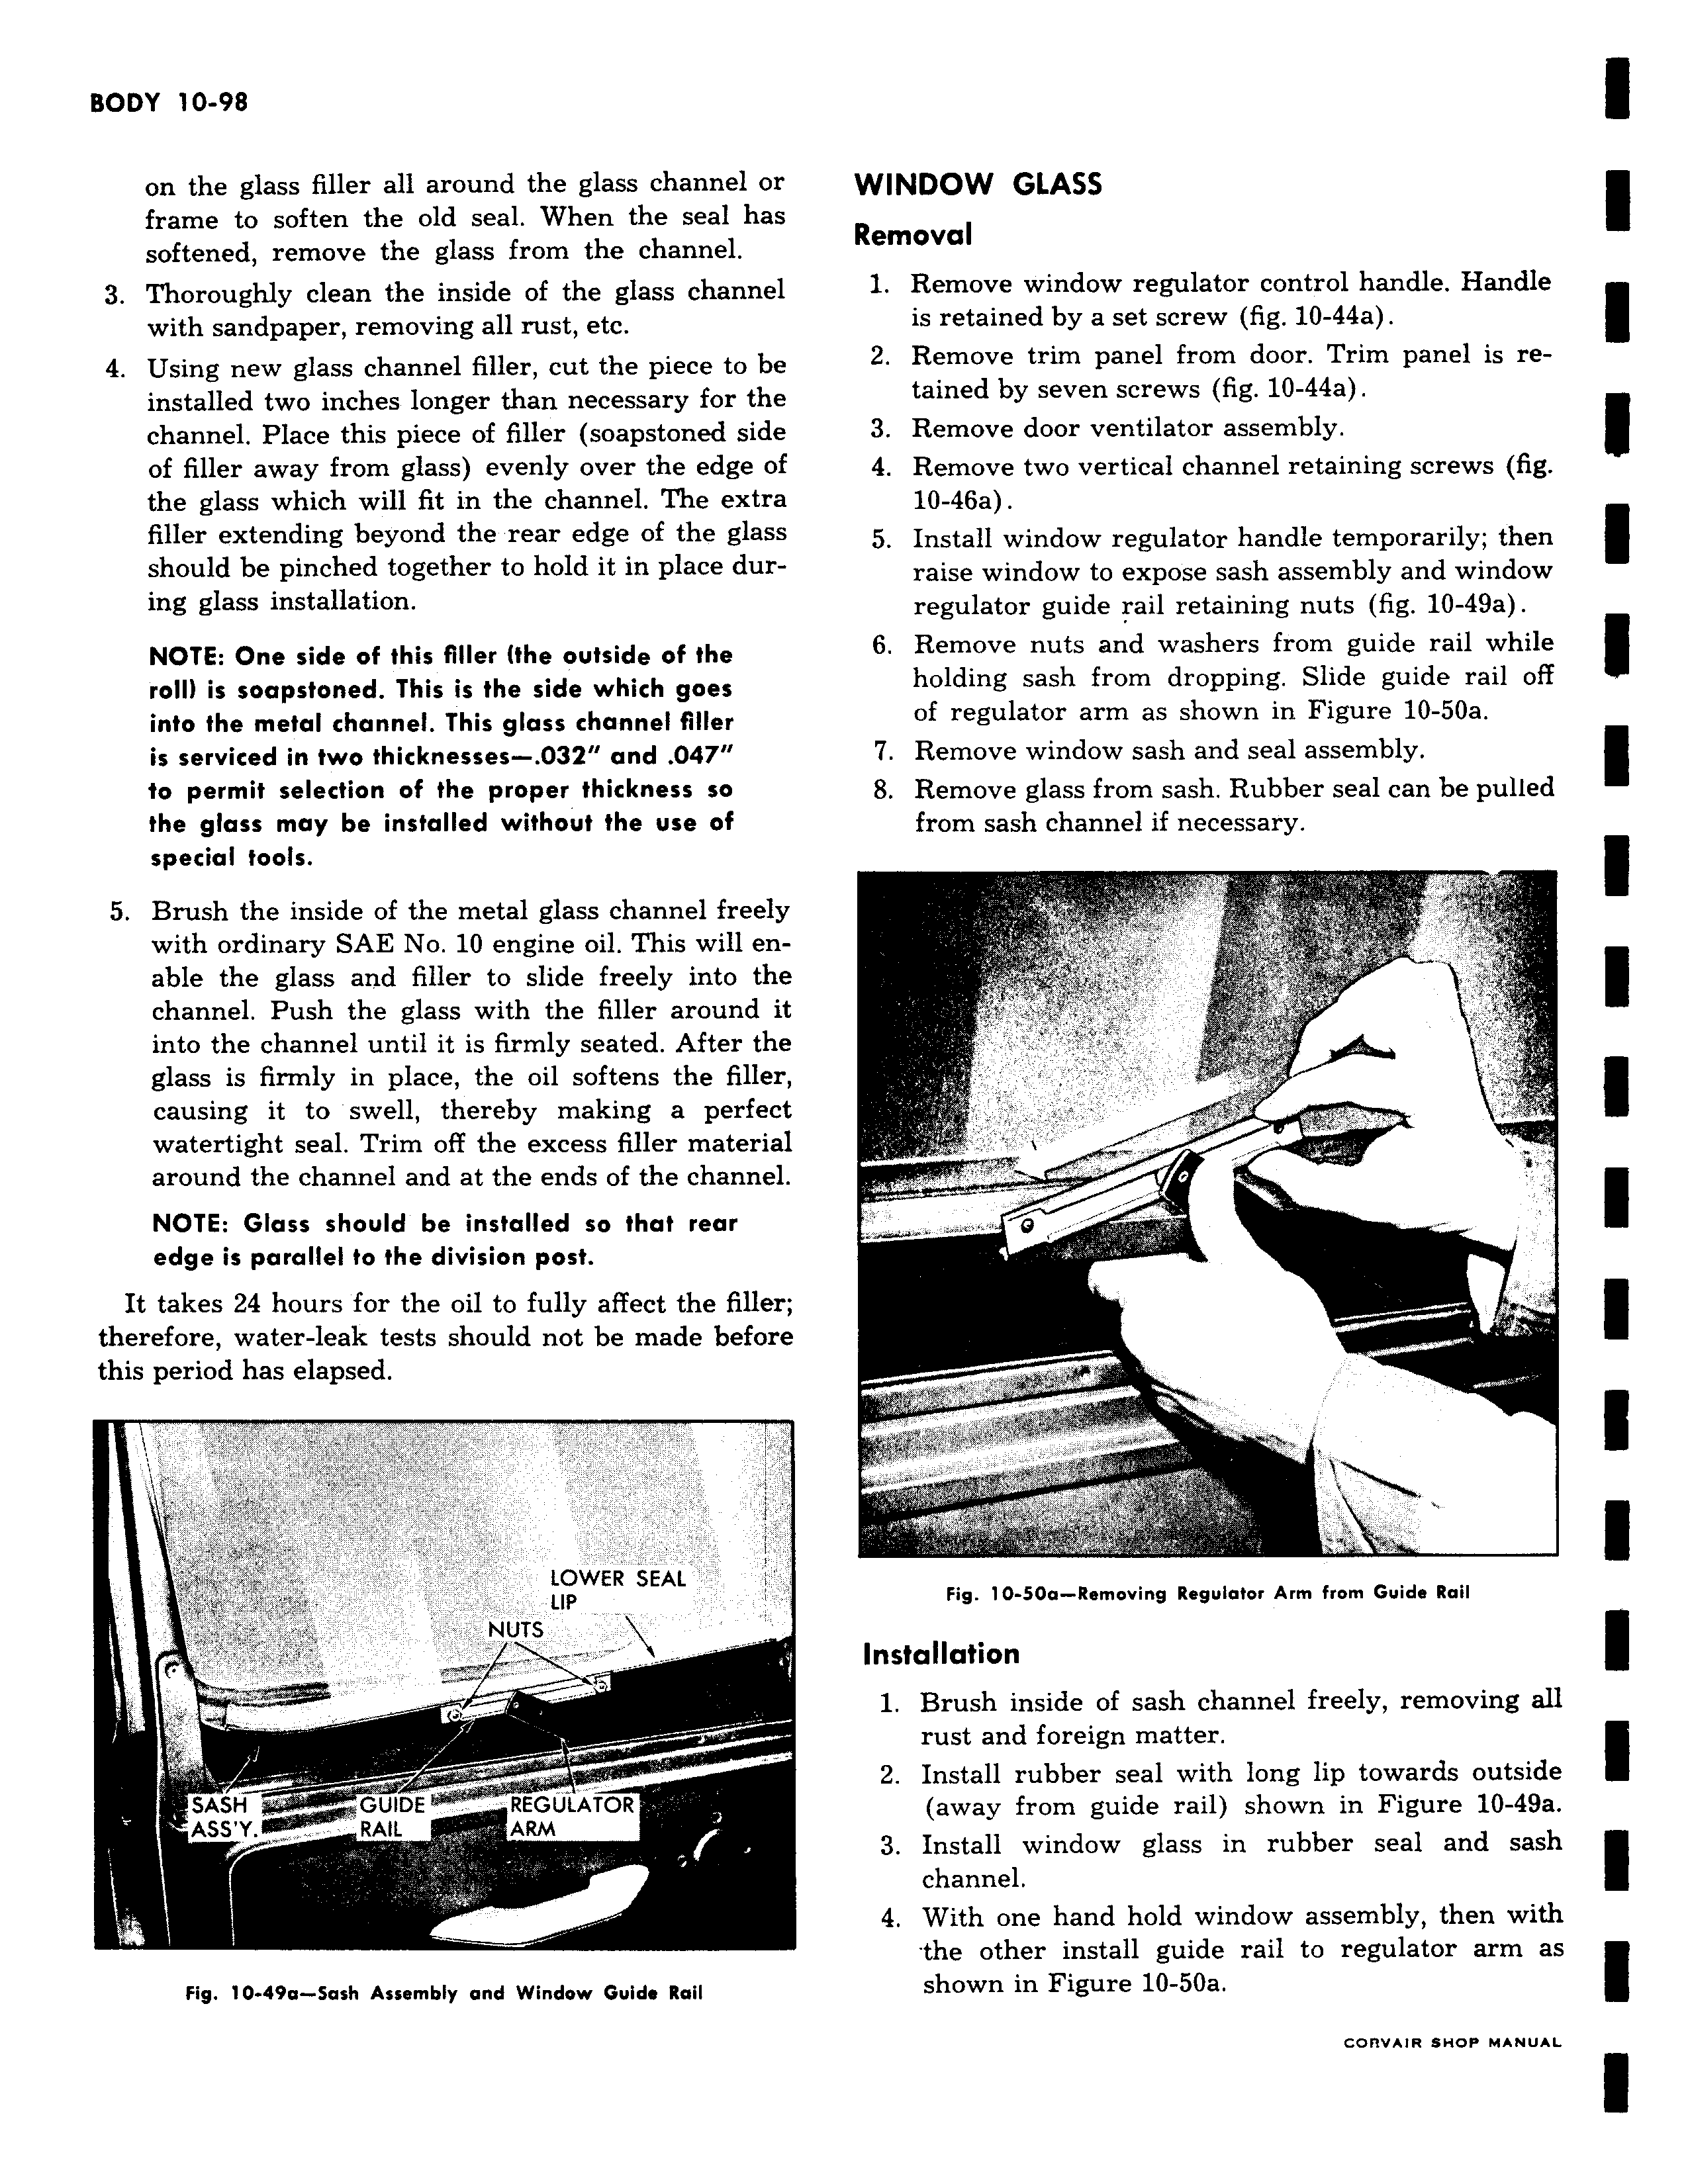
on the glass filler all around the glass channel or frame to soften the old seal When the seal has softened remove the glass from the channel 3 Thoroughly clean the inside of the glass channel with sandpaper removing all rust etc 4 Using new glass channel filler cut the piece to be installed two inches longer than necessary for the channel Place this piece of filler soapstoned side of filler away from glass evenly over the edge of the glass which will fit in the channel The extra filler extending beyond the rear edge of the glass should be pinched together to hold it in place during glass installation NOTE One side of this filler the outside of the roll is soapstoned This is the side which goes into the metal channel This glass channel filler is serviced in two thicknesses 032 and 047 to permit selection of the proper thickness so the glass may be installed without the use of special tools 5 Brush the inside of the metal glass channel freely with ordinary SAE No 10 engine oil This will enable the glass and filler to slide freely into the channel Push the glass with the filler around it into the channel until it is firmly seated After the glass is firmly in place the oil softens the filler causing it to swell thereby making a perfect watertight seal Trim off the excess filler material around the channel and at the ends of the channel NOTE Glass should be installed so that rear edge is parallel to the division post It takes 24 hours for the oil to fully affect the filler therefore water leak tests should not be made before this period has elapsed LOWER SEAL LIP NUTS Y SASH GUIDE REGULATOR ASS Y RAIL ARM Fig 10 49o Sash Assembly and Window Guide Rail WINDOW GLASS Removal 1 Remove window regulator control handle Handle is retained by a set screw fig 10 44a 2 Remove trim panel from door Trim panel is retained by seven screws fig 10 44a 3 Remove door ventilator assembly 4 Remove two vertical channel retaining screws fig 10 46a 5 Install window regulator handle temporarily then raise window to expose sash assembly and window regulator guide rail retaining nuts fig 10 49a 6 Remove nuts and washers from guide rail while holding sash from dropping Slide guide rail off of regulator arm as shown in Figure 10 50a 7 Remove window sash and seal assembly S Remove glass from sash Rubber seal can be pulled from sash channel if necessary l p Fig 10 50a Removing Regulator Arm from Guide Rail Installation 1 Brush inside of sash channel freely removing all rust and foreign matter 2 Install rubber seal with long lip towards outside away from guide rail shown in Figure 10 49a 3 Install window glass in rubber seal and sash channel 4 With one hand hold window assembly then with the other install guide rail to regulator arm as shown in Figure 10 50a CORVAIR SHOP MANUAL