Jeep Parts Wiki | Ford Parts Wiki
Home | Search | Browse
Prev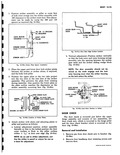
 Next
Next
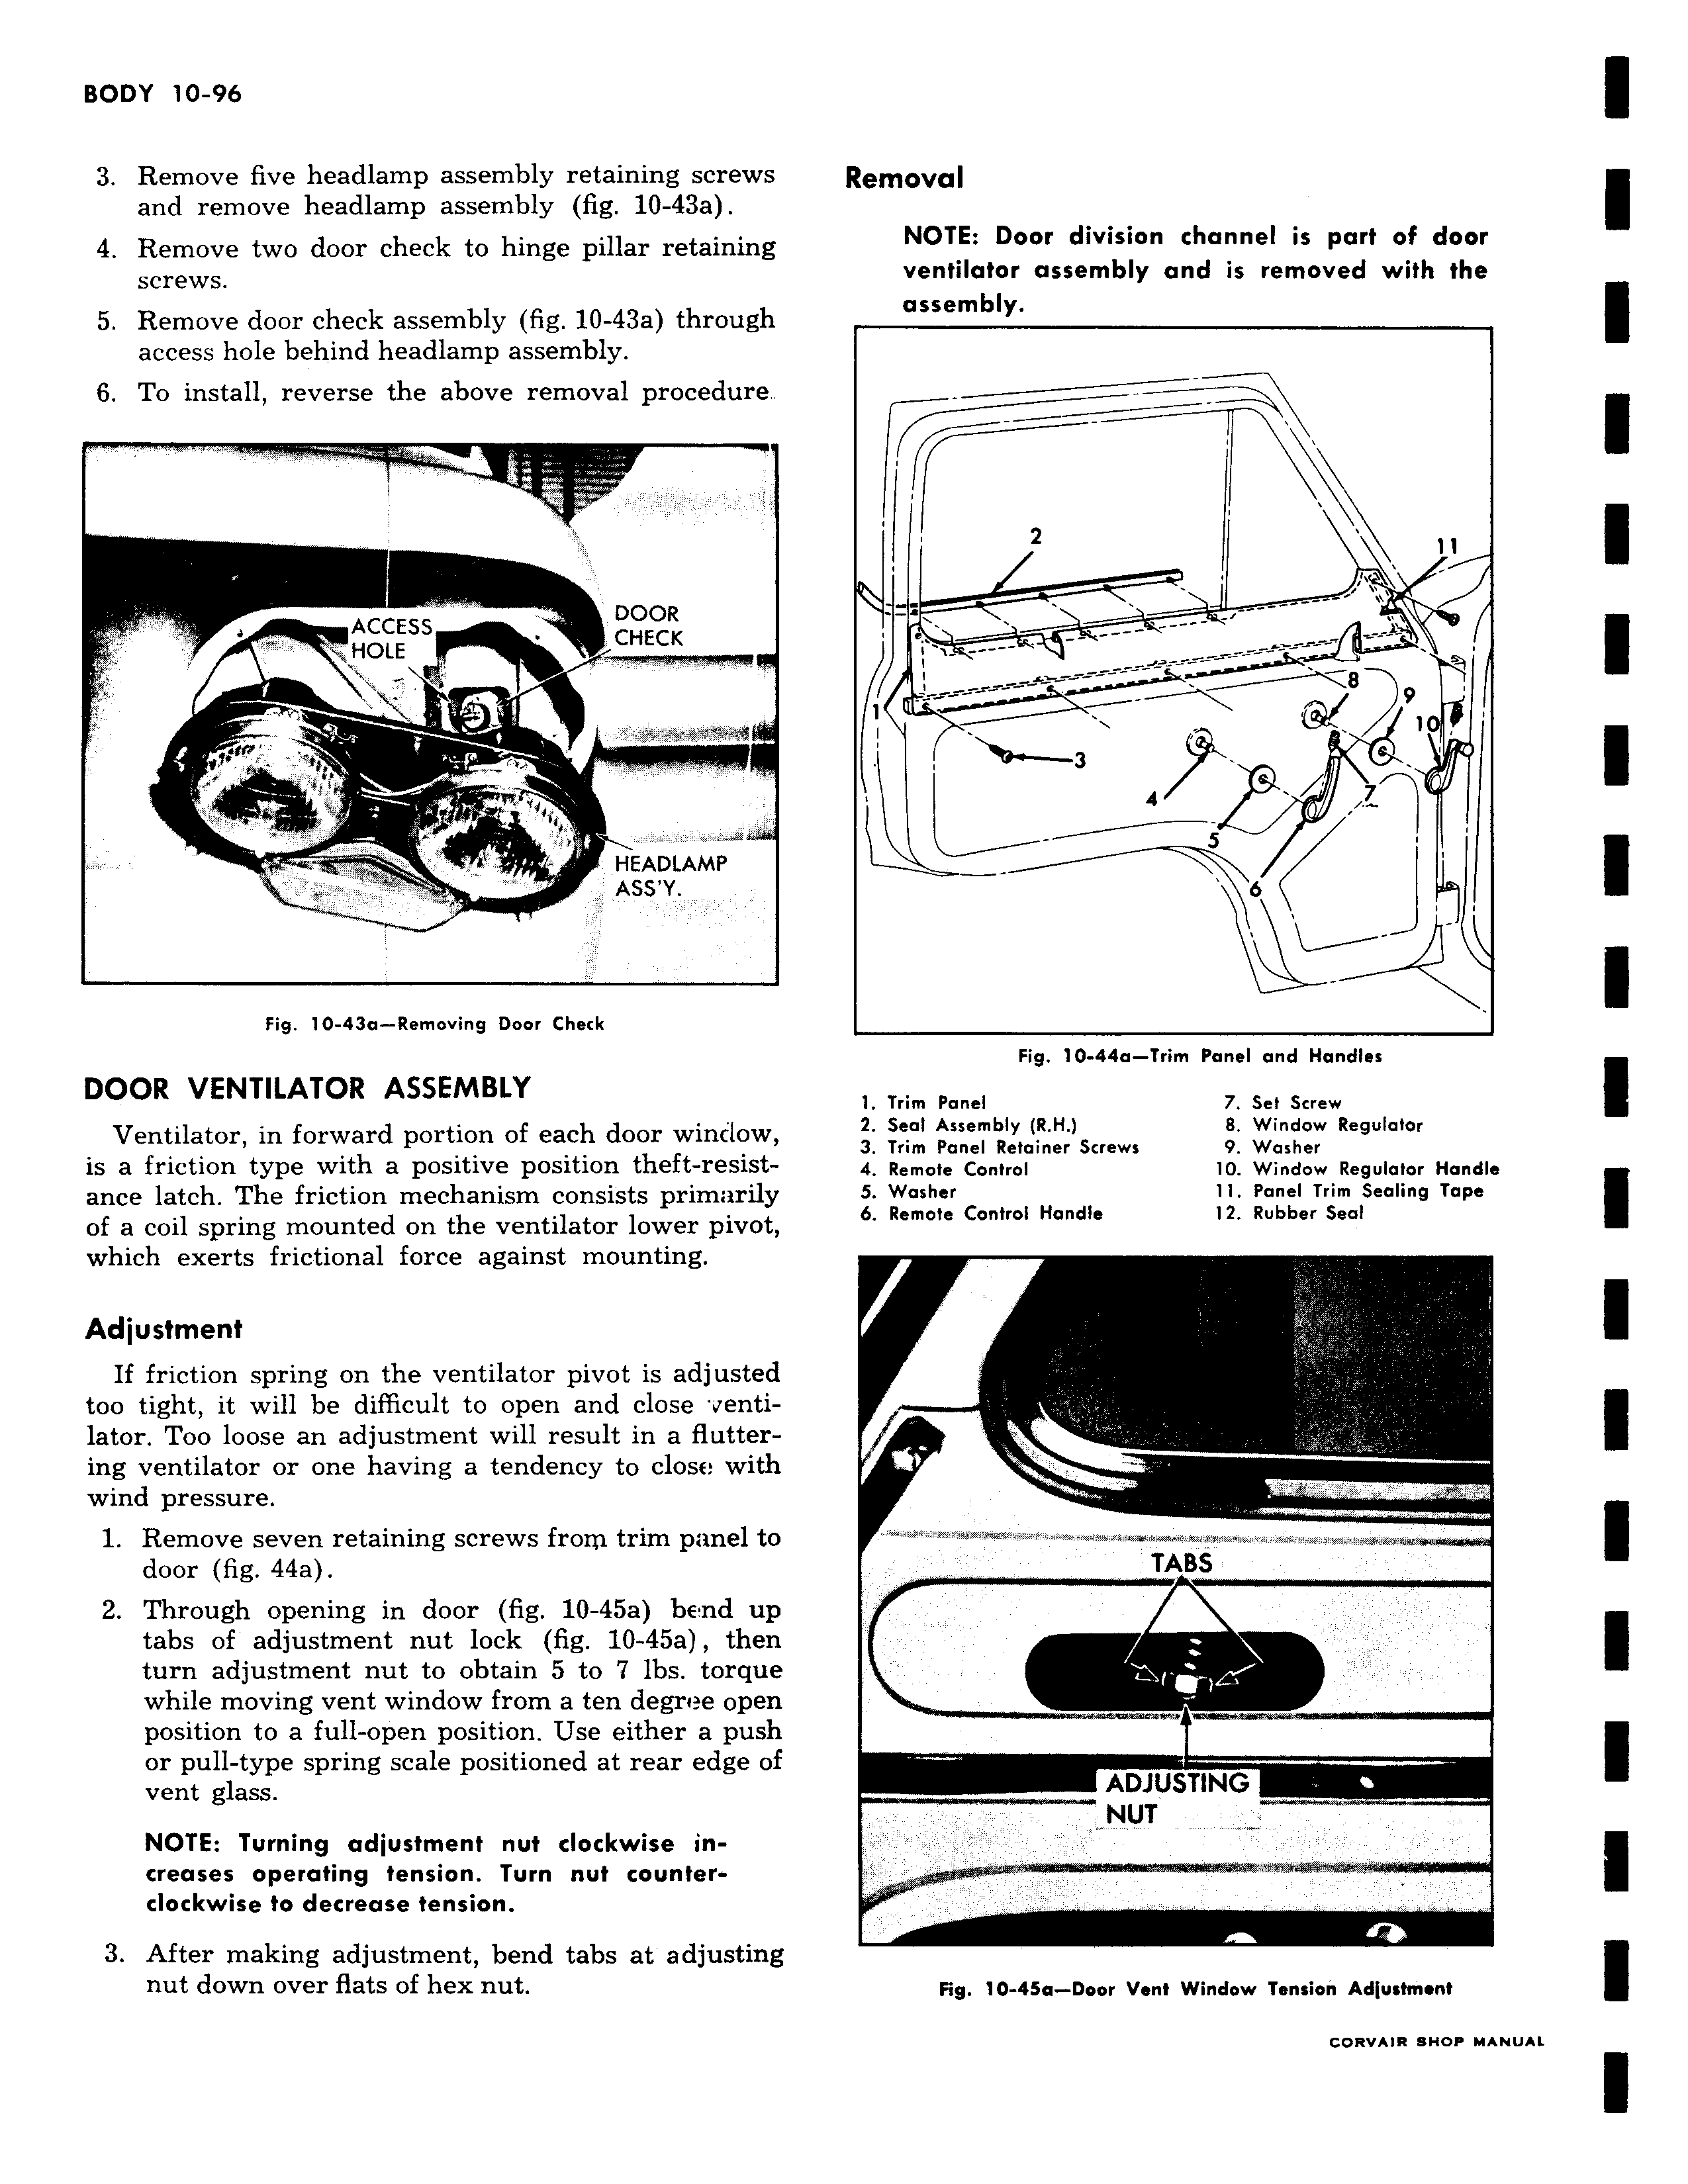
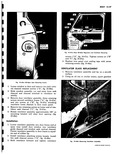
3 Remove five headlamp assembly retaining screws and remove headlamp assembly fig 10 43a 4 Remove two door check to hinge pillar retaining screws 5 Remove door check assembly fig 10 43a through access hole behind headlamp assembly 6 To install reverse the above removal procedure ACCESS DOOR HOLE CHECK Yt r rr y HEADLAMP w ASS Y Fig 10 43a Removing Door Check DOOR VENTILATOR ASSEMBLY Ventilator in forward portion of each door window is a friction type with a positive position theft resistance latch The friction mechanism consists primarily of a coil spring mounted on the ventilator lower pivot which exerts frictional force against mounting Adjustment If friction spring on the ventilator pivot is adjusted too tight it will be difficult to open and close ventilator Too loose an adjustment will result in a fluttering ventilator or one having a tendency to close with wind pressure 1 Remove seven retaining screws from trim panel to door fig 44a 2 Through opening in door fig 10 45a bend up tabs of adjustment nut lock fig 10 45a then turn adjustment nut to obtain 5 to 7 lbs torque while moving vent window from a ten degree open position to a full open position Use either a push or pull type spring scale positioned at rear edge of vent glass NOTE Turning adjustment nut clockwise increases operating tension Turn nut counterclockwise to decrease tension 3 After making adjustment bend tabs at adjusting nut down over flats of hex nut Removal NOTE Door division channel is part of door ventilator assembly and is removed with the assembly i 1 1 8 910 3 4 7 5 I 6 Fig 10 44a Trim Panel and Handles 1 Trim Panel 7 Set Screw 2 Seal Assembly R H 8 Window Regulator 3 Trim Panel Retainer Screws 9 Washer 4 Remote Control 10 Window Regulator Handle 5 Washer 11 Panel Trim Sealing Tape 6 Remote Control Handle 12 Rubber Seal TABS ADJUSTING NUT J Fig 10 45a Door Vent Window Tension Adjustment CORVAIR SHOP MANUAL