Jeep Parts Wiki | Ford Parts Wiki
Home | Search | Browse | Marketplace | Messages | FAQ | Guest
Prev
 Next
Next
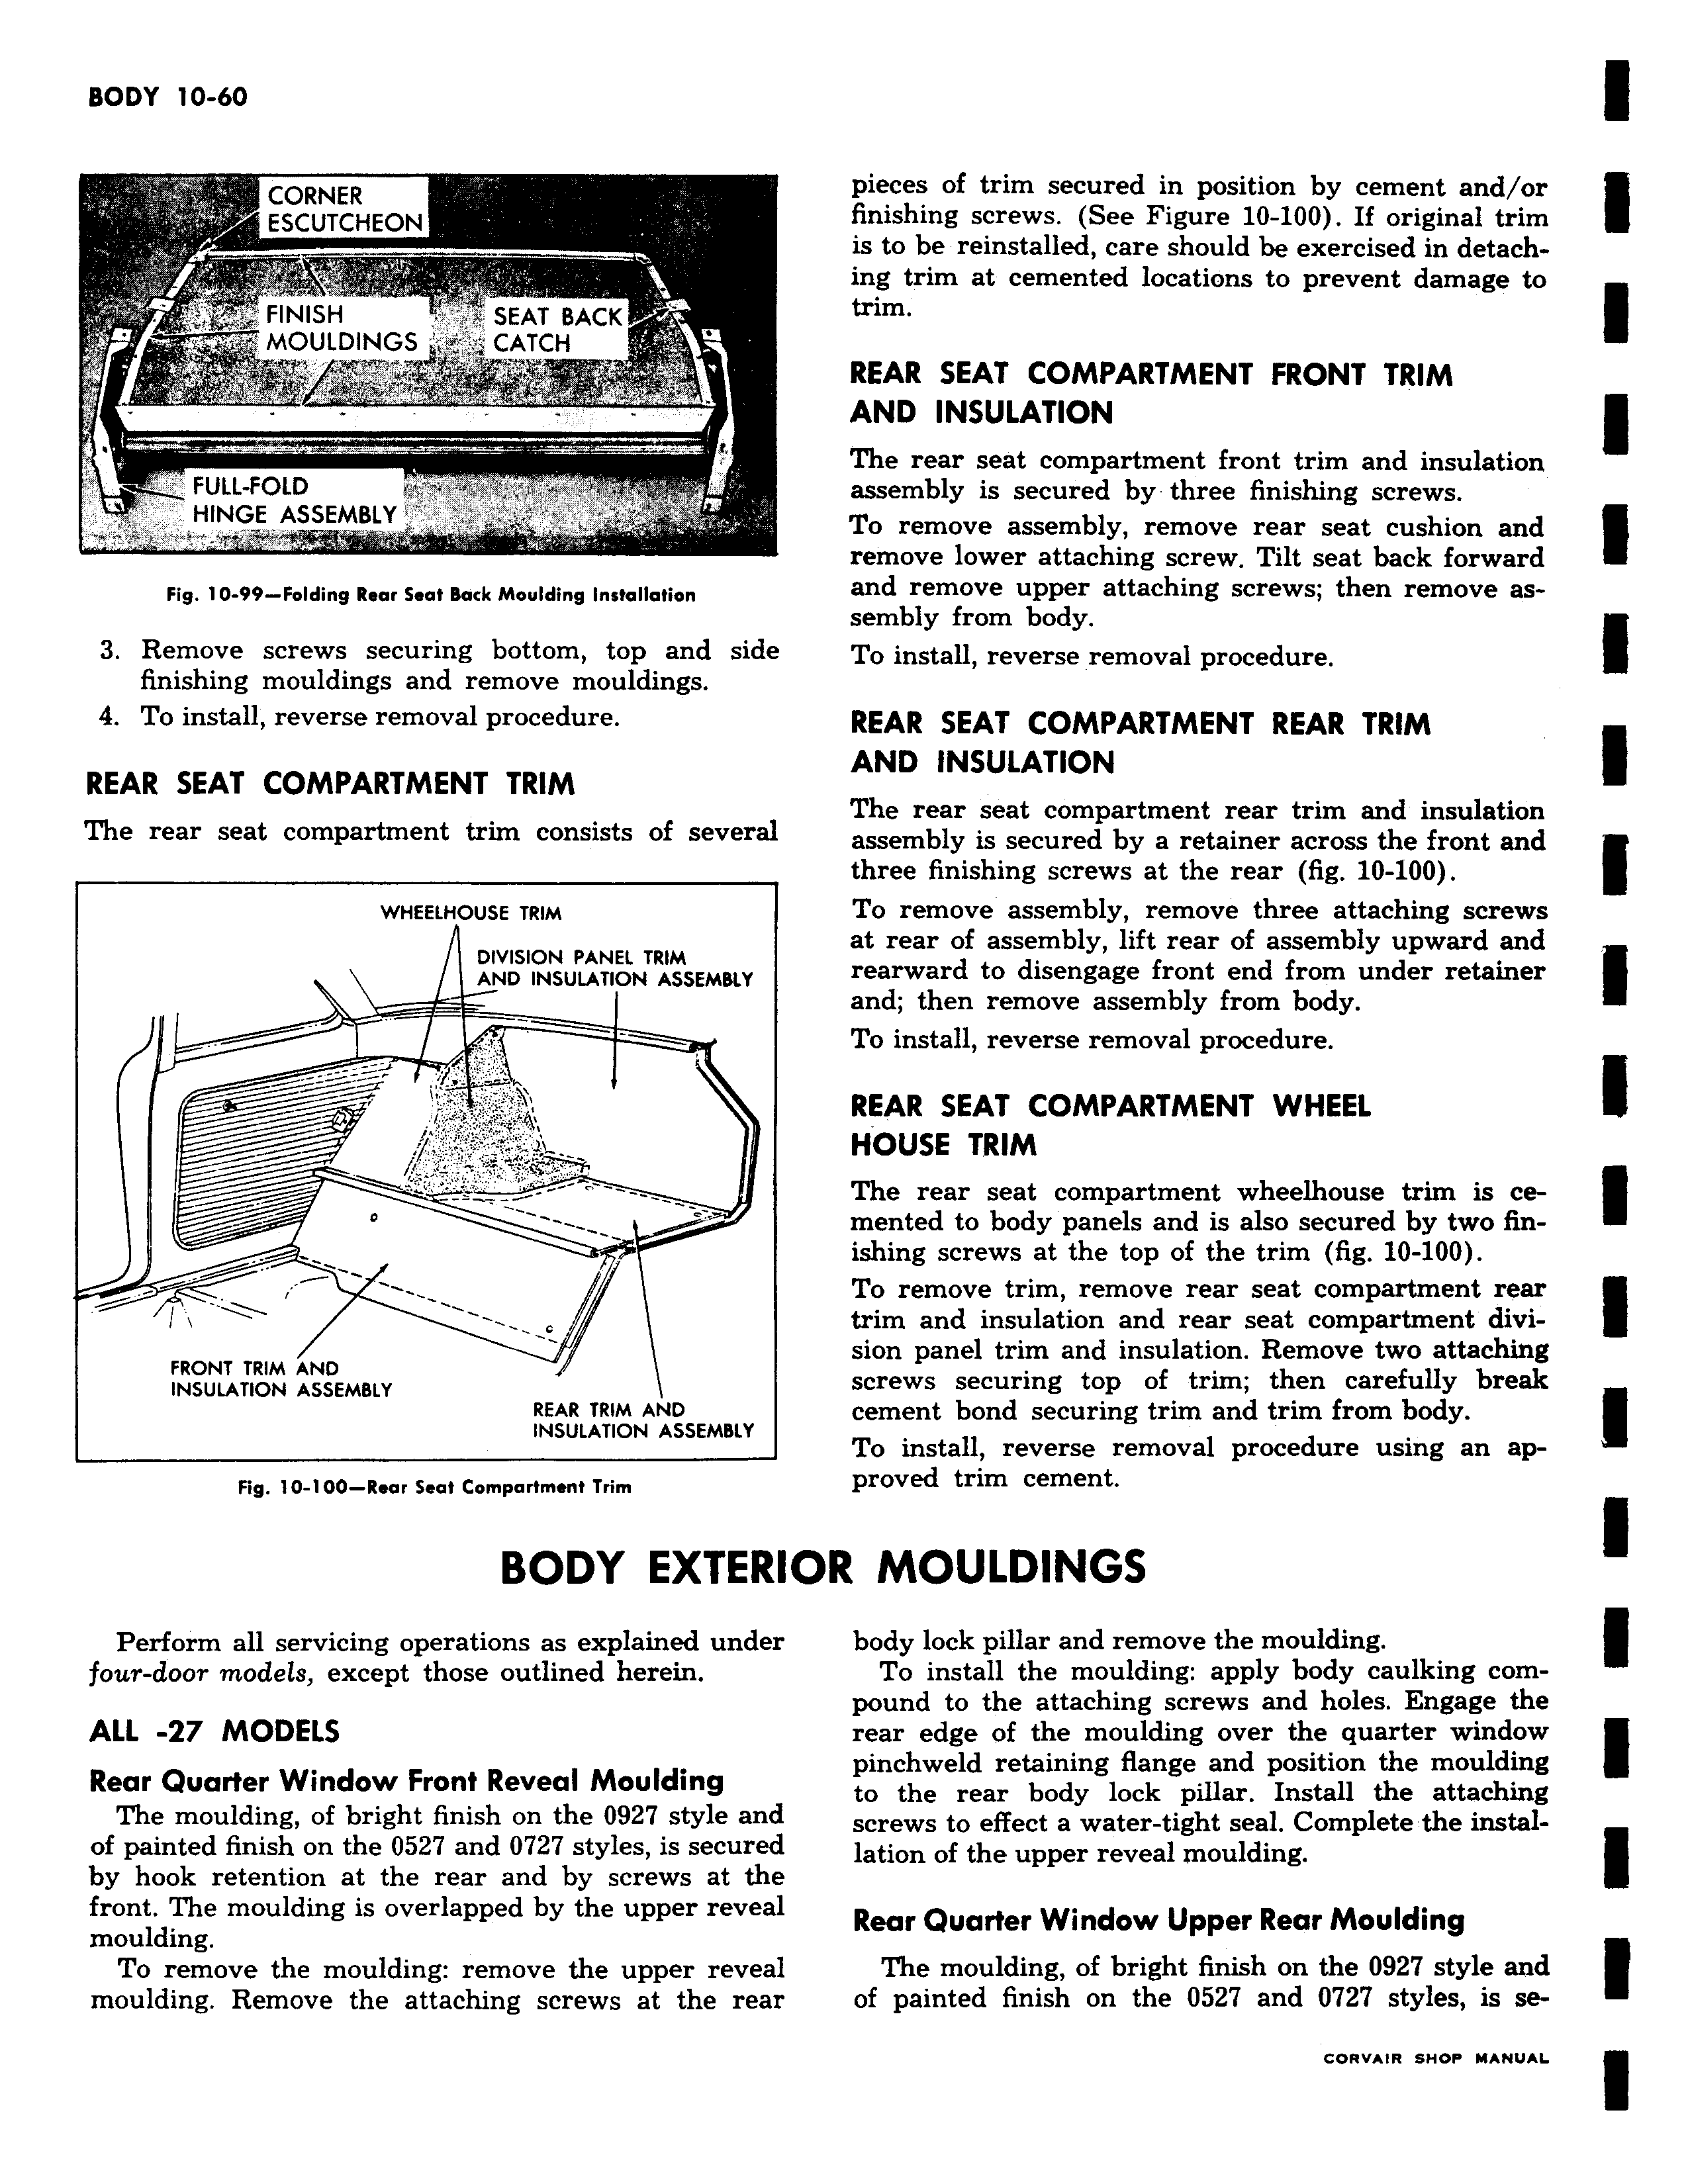
CORNER i ESCUTCHEON FINISH Yw SE A T BACC MOULDINGS CATCH T FULL FOLD HINGE ASSEMBLY ti Fig 10 99 Folding Rear Seat Back Moulding Installation 3 Remove screws securing bottom top and side finishing mouldings and remove mouldings 4 To install reverse removal procedure REAR SEAT COMPARTMENT TRIM The rear seat compartment trim consists of several WHEELHOUSE TRIM DIVISION PANEL TRIM AND INSULATION ASSEMBLY 1 i FRONT TRIM AND INSULATION ASSEMBLY REAR TRIM AND INSULATION ASSEMBLY Fig 10 100 Rear Seat Compartment Trim BODY EXTERK Perform all servicing operations as explained under four door models except those outlined herein ALL 27 MODELS Rear Quarter Window Front Reveal Moulding The moulding of bright finish on the 0927 style and of painted finish on the 0527 and 0727 styles is secured by hook retention at the rear and by screws at the front The moulding is overlapped by the upper reveal moulding To remove the moulding remove the upper reveal moulding Remove the attaching screws at the rear pieces of trim secured in position by cement and or finishing screws See Figure 10 100 If original trim is to be reinstalled care should be exercised in detaching trim at cemented locations to prevent damage to trim REAR SEAT COMPARTMENT FRONT TRIM AND INSULATION The rear seat compartment front trim and insulation assembly is secured by three finishing screws To remove assembly remove rear seat cushion and remove lower attaching screw Tilt seat back forward and remove upper attaching screws then remove assembly from body To install reverse removal procedure REAR SEAT COMPARTMENT REAR TRIM AND INSULATION The rear seat compartment rear trim and insulation assembly is secured by a retainer across the front and three finishing screws at the rear fig 10 100 To remove assembly remove three attaching screws at rear of assembly lift rear of assembly upward and rearward to disengage front end from under retainer and then remove assembly from body To install reverse removal procedure REAR SEAT COMPARTMENT WHEEL HOUSE TRIM The rear seat compartment wheelhouse trim is cemented to body panels and is also secured by two finishing screws at the top of the trim fig 10 100 To remove trim remove rear seat compartment rear trim and insulation and rear seat compartment division panel trim and insulation Remove two attaching screws securing top of trim then carefully break cement bond securing trim and trim from body To install reverse removal procedure using an approved trim cement R MOULDINGS body lock pillar and remove the moulding To install the moulding apply body caulking compound to the attaching screws and holes Engage the rear edge of the moulding over the quarter window pinchweld retaining flange and position the moulding to the rear body lock pillar Install the attaching screws to effect a water tight seal Complete the installation of the upper reveal moulding Rear Quarter Window Upper Rear Moulding The moulding of bright finish on the 0927 style and of painted finish on the 0527 and 0727 styles is se