Jeep Parts Wiki | Ford Parts Wiki
Home | Search | Browse | Marketplace | Messages | FAQ | Guest
Prev
 Next
Next
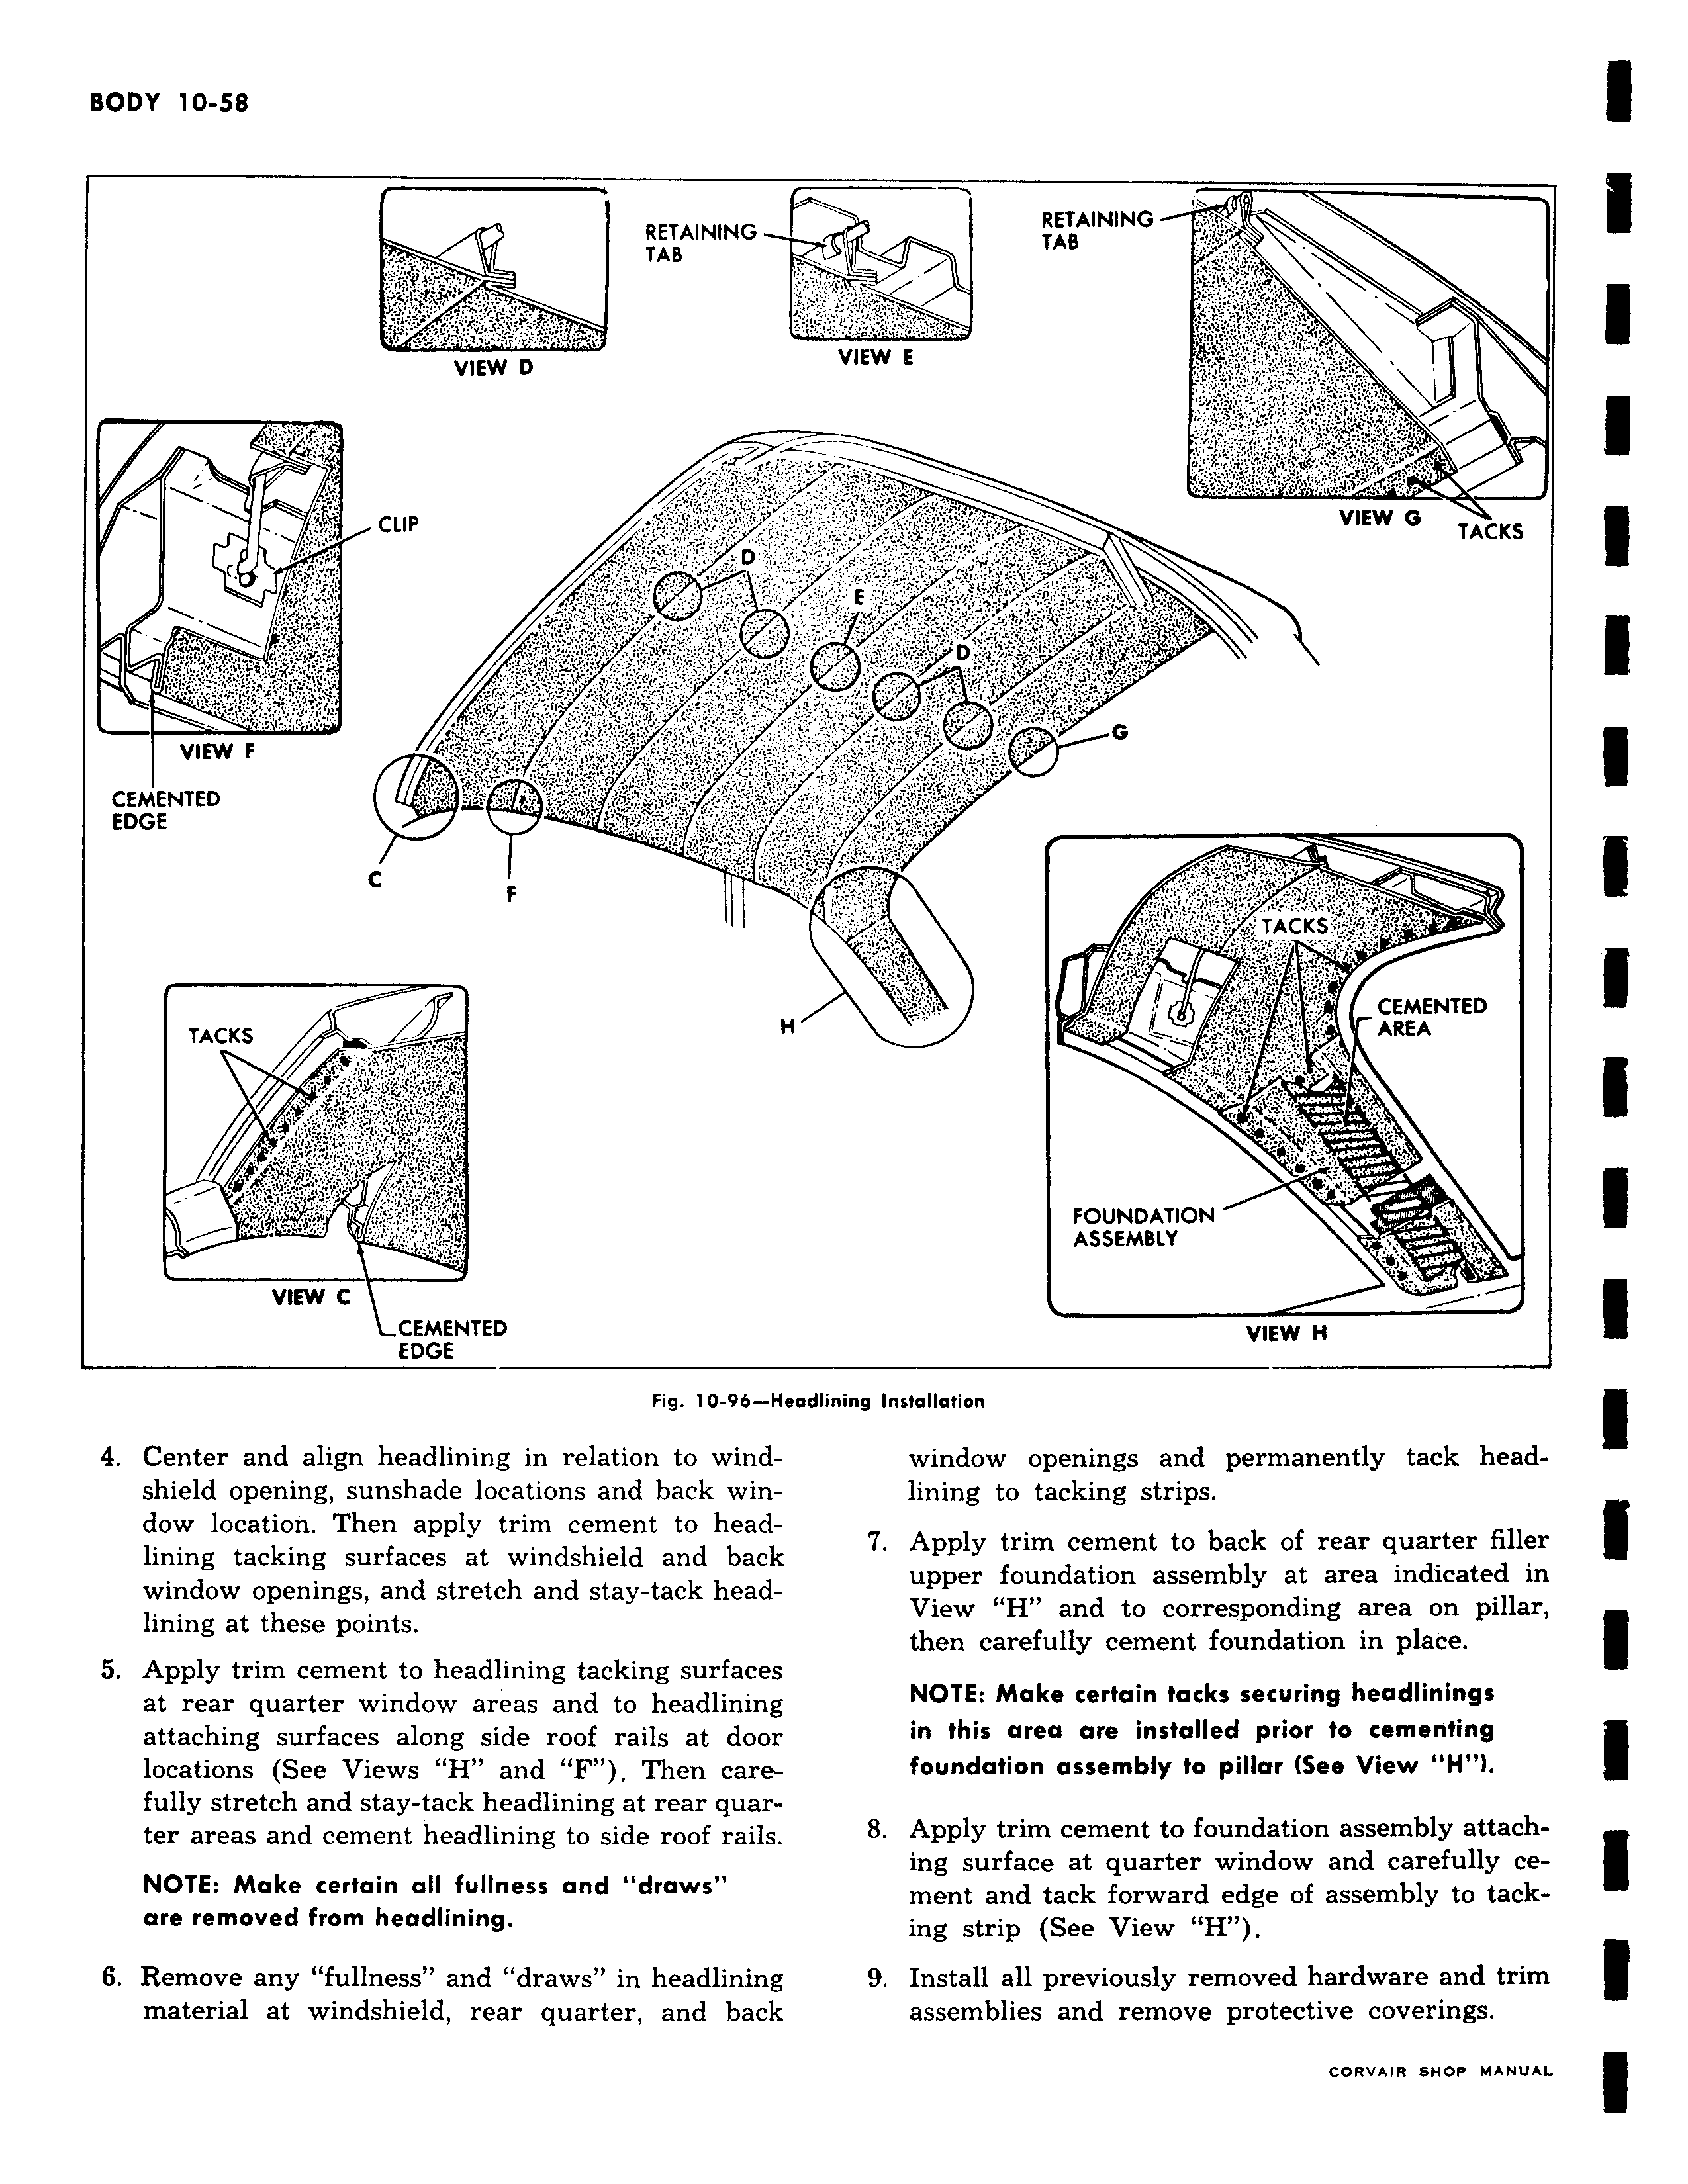
RETAINING F TAB N c7 x h t y 1 r 4 S rY m y u VIEW D t Irl l u5 CLIP D C yJ s r T r l l p rs e a i 1 1I r 9lUrF r VIEW F 3t ryy r t ti i CEMENTED y x a r r i t EDGE s r Sr y rll I y x r r F r i TACKS r s Z 1 L f l 2 t3f J 1 VIEW C CEMENTED EDGE Fig 10 9b Hea 4 Center and align headlining in relation to windshield opening sunshade locations and back window location Then apply trim cement to headlining tacking surfaces at windshield and back window openings and stretch and stay tack headlining at these points 5 Apply trim cement to headlining tacking surfaces at rear quarter window areas and to headlining attaching surfaces along side roof rails at door locations See Views H and F Then carefully stretch and stay tack headlining at rear quarter areas and cement headlining to side roof rails NOTE Make certain all fullness and draws are removed from headlining 6 Remove any fullness and draws in headlining material at windshield rear quarter and back RETAINING TAB t r r t VIEW E t S S y F If u ry t a f U 1 VIEW G TACKS r t E zlit v 2 N y y J t t r v G t s r t A r t t e u r s k r TACKS d CEMENTED tr s r AREA a ra w t K FOUNDATION ASSEMBLY VIEW H dlining Installation window openings and permanently tack headlining to tacking strips 7 Apply trim cement to back of rear quarter filler upper foundation assembly at area indicated in View H and to corresponding area on pillar then carefully cement foundation in place NOTE Make certain tacks securing headlinings in this area are installed prior to cementing foundation assembly to pillar See View H 8 Apply trim cement to foundation assembly attaching surface at quarter window and carefully cement and tack forward edge of assembly to tacking strip See View H 9 Install all previously removed hardware and trim assemblies and remove protective coverings