Jeep Parts Wiki | Ford Parts Wiki
Home | Search | Browse
Prev
 Next
Next
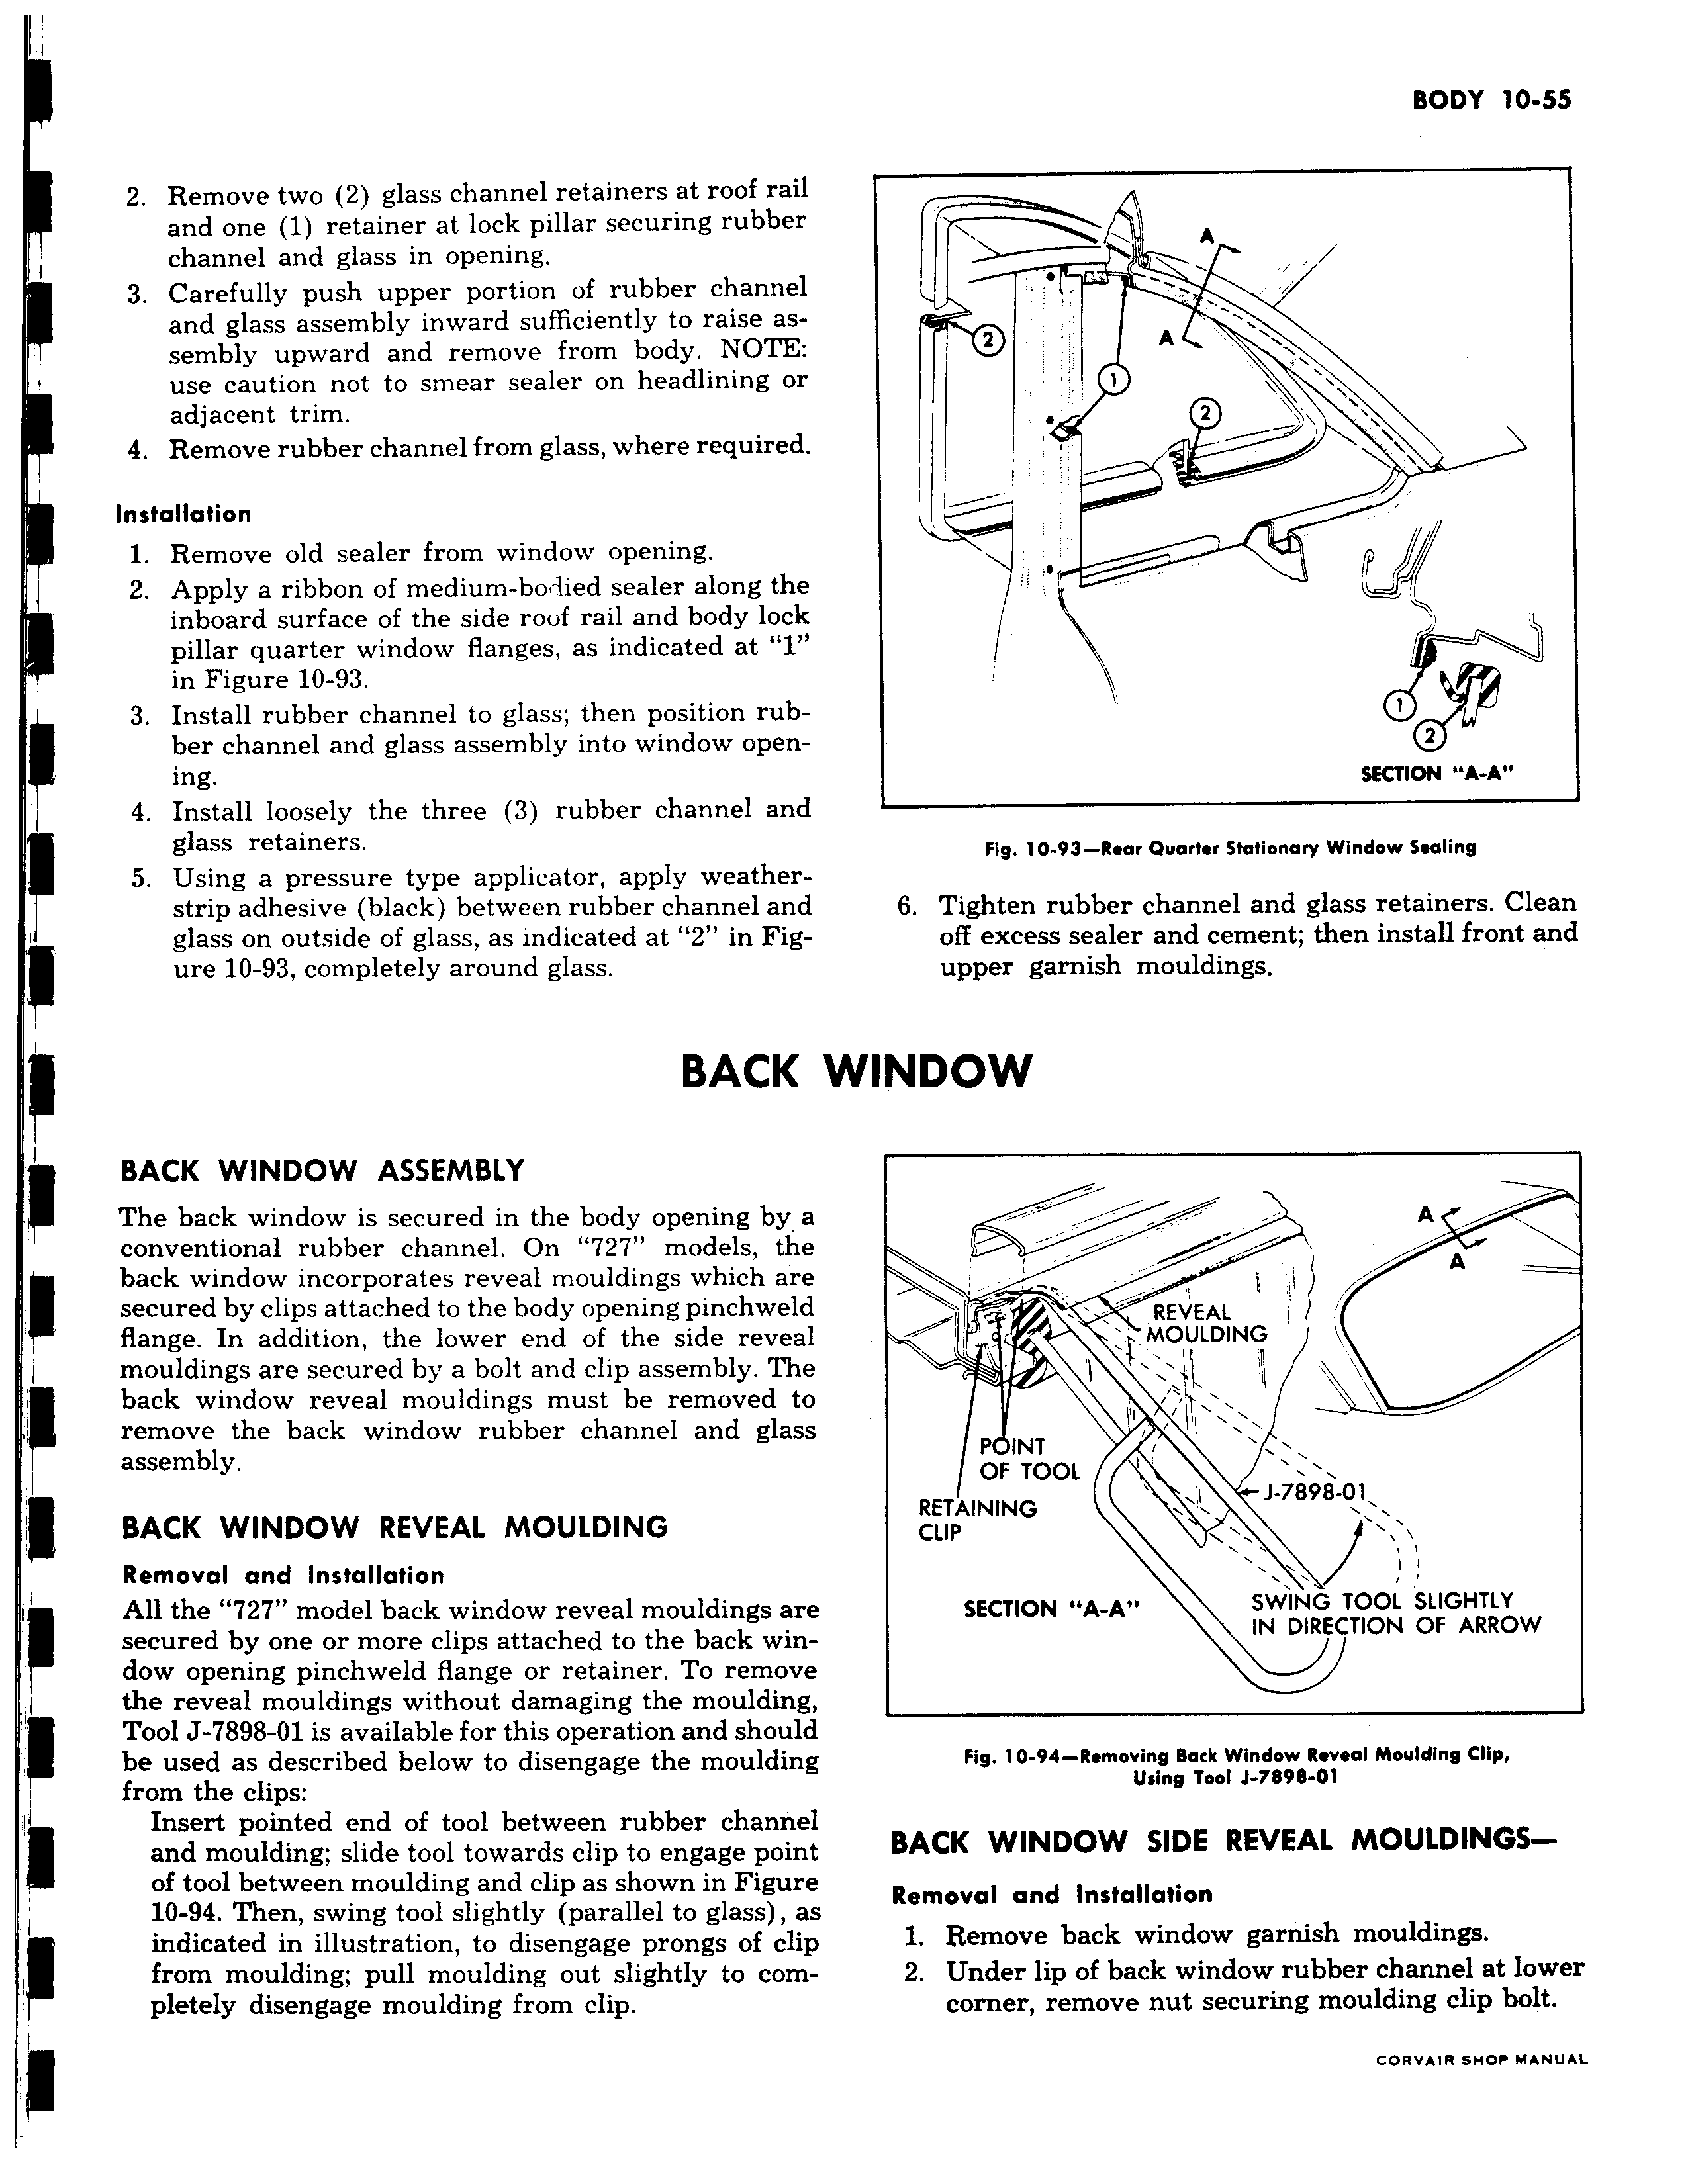
2 Remove two 2 glass channel retainers at roof rail and one 1 retainer at lock pillar securing rubber channel and glass in opening 3 Carefully push upper portion of rubber channel and glass assembly inward sufficiently to raise assembly upward and remove from body NOTE use caution not to smear sealer on headlining or adjacent trim 4 Remove rubber channel from glass where required Installation 1 Remove old sealer from window opening 2 Apply a ribbon of medium bodied sealer along the inboard surface of the side roof rail and body locl pillar quarter window flanges as indicated at 1 in Figure 10 93 3 Install rubber channel to glass then position rub ber channel and glass assembly into window open ing 4 Install loosely the three 3 rubber channel an glass retainers 5 Using a pressure type applicator apply weather strip adhesive black between rubber channel an glass on outside of glass as indicated at 2 in Fig ure 10 93 completely around glass BACK BACK WINDOW ASSEMBLY The back window is secured in the body opening by conventional rubber channel On 727 models th back window incorporates reveal mouldings which ar secured by clips attached to the body opening pinchweli flange In addition the lower end of the side revea mouldings are secured by a bolt and clip assembly Th back window reveal mouldings must be removed t remove the back window rubber channel and glas assembly BACK WINDOW REVEAL MOULDING Removal and Installation All the 727 model back window reveal mouldings ar fff secured by one or more clips attached to the back win dow opening pinchweld flange or retainer To remov the reveal mouldings without damaging the mouldinl Tool J 7898 O1 is available for this operation and shoul be used as described below to disengage the mouldin from the clips Insert pointed end of tool between rubber channE and moulding slide tool towards clip to engage poir of tool between moulding and clip as shown in Figur 10 94 Then swing tool slightly parallel to glass z indicated in illustration to disengage prongs of cli from moulding pull moulding out slightly to corr pletely disengage moulding from clip A V 1 z v w 2 SECTION A A L Fig 10 93 Rear Quarter Stationary Window Sealing 6 Tighten rubber channel and glass retainers Clean off excess sealer and cement then install front and upper garnish mouldings WINDOW i A A REVEAL w MOULDING w a q i P INT OF TOOL RETAINING J 7898 01 CLIP 1 e SECTION A A SWING TOOL SLIGHTLY IN DIRECTION OF ARROW e f Fig 10 94 Removing Back Window Reveal Moulding Clip Using Tool J 7898 01 t BACK WINDOW SIDE REVEAL MOULDINGSRemoval and Installation s 1 Remove back window garnish mouldings 2 Under lip of back window rubber channel at lower corner remove nut securing moulding clip bolt