Jeep Parts Wiki | Ford Parts Wiki
Home | Search | Browse
Prev
 Next
Next
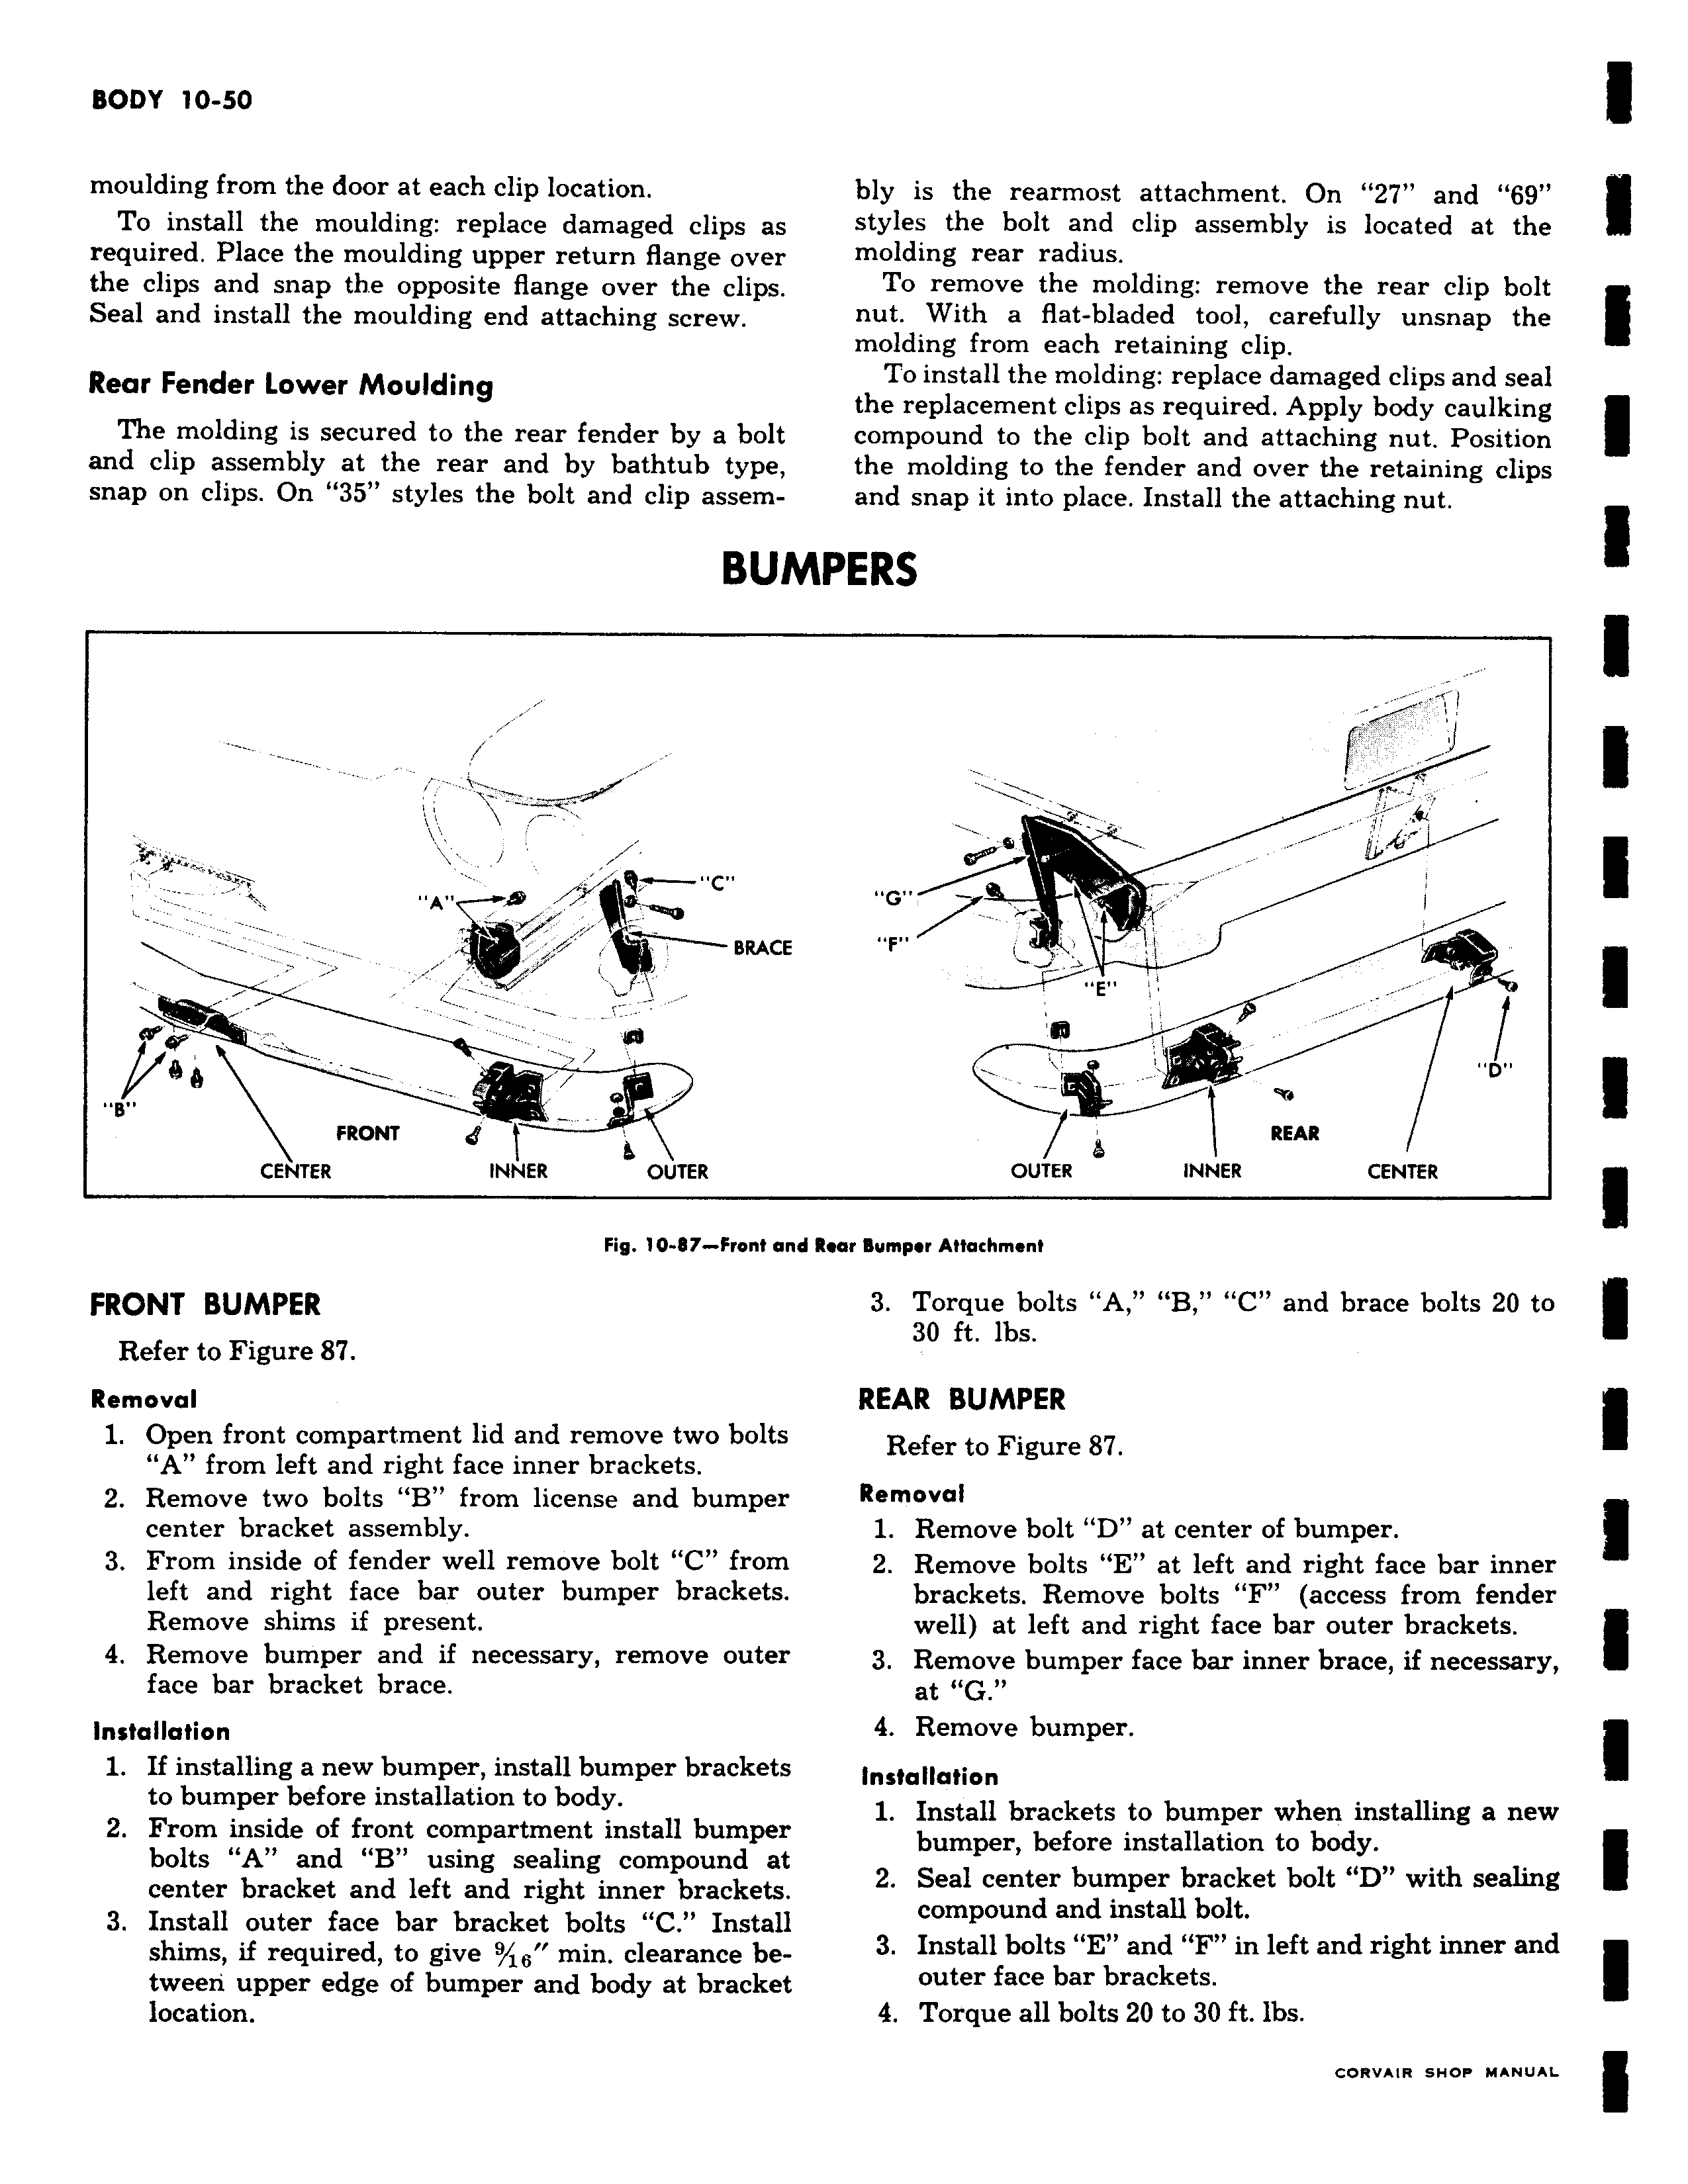
moulding from the door at each clip location To install the moulding replace damaged clips as required Place the moulding upper return flange over the clips and snap the opposite flange over the clips Seal and install the moulding end attaching screw Rear Fender Lower Moulding The molding is secured to the rear fender by a bolt and clip assembly at the rear and by bathtub type snap on clips On 35 styles the bolt and clip assemBUA V i y BRACE a l FRONT 1 CENTER INNER OUTER Fig 10 87 Front ane FRONT BUMPER Refer to Figure 87 Removal 1 Open front compartment lid and remove two bolts A from left and right face inner brackets 2 Remove two bolts B from license and bumper center bracket assembly 3 From inside of fender well remove bolt C from left and right face bar outer bumper brackets Remove shims if present 4 Remove bumper and if necessary remove outer face bar bracket brace Installation 1 If installing a new bumper install bumper brackets to bumper before installation to body 2 From inside of front compartment install bumper bolts A and B using sealing compound at center bracket and left and right inner brackets 3 Install outer face bar bracket bolts C Install shims if required to give 9 1 min clearance betweeri upper edge of bumper and body at bracket location bly is the rearmost attachment On 27 and 69 styles the bolt and clip assembly is located at the molding rear radius To remove the molding remove the rear clip bolt nut With a flat bladed tool carefully unsnap the molding from each retaining clip To install the molding replace damaged clips and seal the replacement clips as required Apply body caulking compound to the clip bolt and attaching nut Position the molding to the fender and over the retaining clips and snap it into place Install the attaching nut IPERS h G F E l REAR OUTER INNER CENTER Rear Bumper Attachment 3 Torque bolts A B C and brace bolts 20 to 30 ft lbs REAR BUMPER Refer to Figure 87 Removal 1 Remove bolt D at center of bumper 2 Remove bolts E at left and right face bar inner brackets Remove bolts F access from fender well at left and right face bar outer brackets 3 Remove bumper face bar inner brace if necessary at G 4 Remove bumper Installation 1 Install brackets to bumper when installing a new bumper before installation to body 2 Seal center bumper bracket bolt D with sealing compound and install bolt 3 Install bolts E and F in left and right inner and outer face bar brackets 4 Torque all bolts 20 to 30 ft lbs