Jeep Parts Wiki | Ford Parts Wiki
Home | Search | Browse | Marketplace | Messages | FAQ | Guest
Prev
 Next
Next
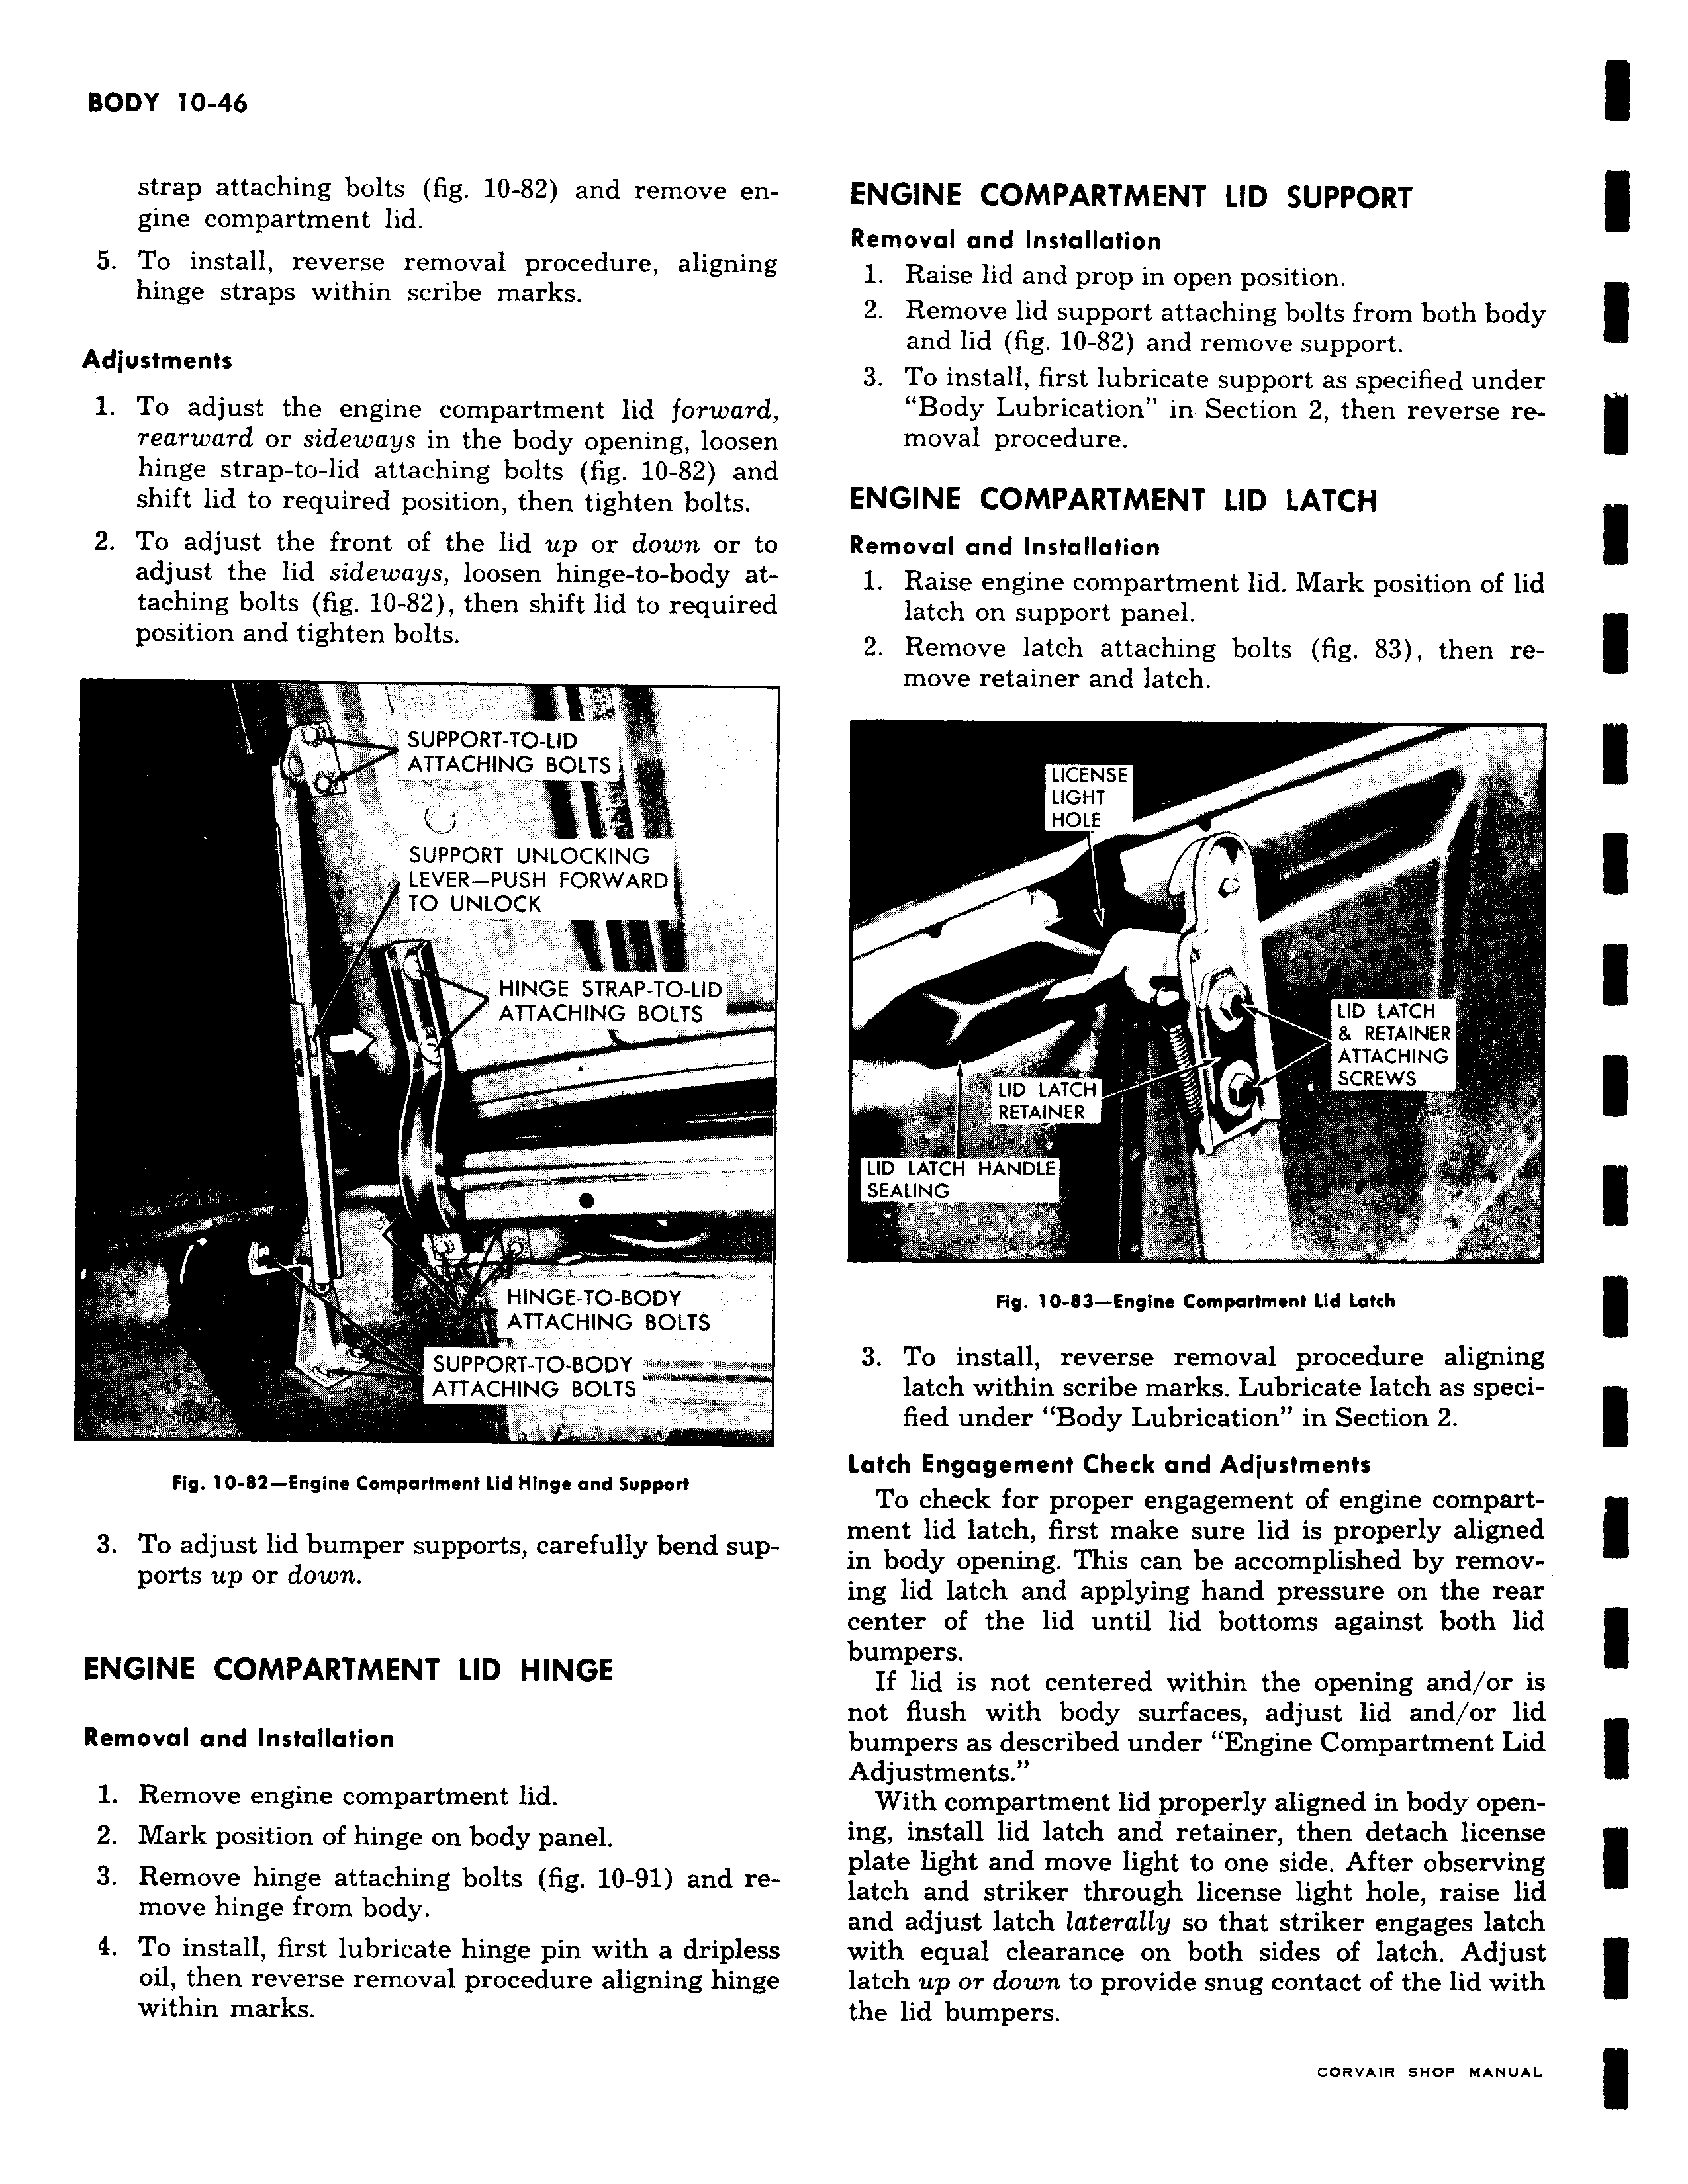
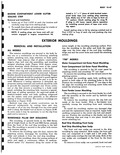
strap attaching bolts fig 10 82 and remove engine compartment lid 5 To install reverse removal procedure aligning hinge straps within scribe marks Adjustments 1 To adjust the engine compartment lid forward rearward or sideways in the body opening loosen hinge strap to lid attaching bolts fig 10 82 and shift lid to required position then tighten bolts 2 To adjust the front of the lid up or down or to adjust the lid sideways loosen hinge to body attaching bolts fig 10 82 then shift lid to required position and tighten bolts SUPPORT TO LID ATTACHING BOLTS SUPPORT UNLOCKING LEVER PUSH PORWARj TO UNLOCK HINGE STRAP TO LID ATTACHING BOLTS i HINGE TO BODY ATTACHING BOLTS SUPPORT TO BODY rr y ATTACHING BOLTS Fig 10 82 Engine Compartment Lid Hinge and Support 3 To adjust lid bumper supports carefully bend supports up or down ENGINE COMPARTMENT LID HINGE Removal and Installation 1 Remove engine compartment lid 2 Mark position of hinge on body panel 3 Remove hinge attaching bolts fig 10 91 and remove hinge from body 4 To install first lubricate hinge pin with a dripless oil then reverse removal procedure aligning hinge within marks ENGINE COMPARTMENT LID SUPPORT Removal and Installation 1 Raise lid and prop in open position 2 Remove lid support attaching bolts from both body and lid fig 10 82 and remove support 3 To install first lubricate support as specified under Body Lubrication in Section 2 then reverse removal procedure ENGINE COMPARTMENT LID LATCH Removal and Installation 1 Raise engine compartment lid Mark position of lid latch on support panel 2 Remove latch attaching bolts fig 83 then remove retainer and latch LICENSE LIGHT HOLE r LID LATCH RETAINER ATTACHING LID LATCH SCREWS RETAINER i LID LATCH HA LE SEALING Fig 10 83 Engine Compartment Lid Latch 3 To install reverse removal procedure aligning latch within scribe marks Lubricate latch as specified under Body Lubrication in Section 2 Latch Engagement Check and Adjustments To check for proper engagement of engine compartment lid latch first make sure lid is properly aligned in body opening This can be accomplished by removing lid latch and applying hand pressure on the rear center of the lid until lid bottoms against both lid bumpers If lid is not centered within the opening and or is not flush with body surfaces adjust lid and or lid bumpers as described under Engine Compartment Lid Adjustments With compartment lid properly aligned in body opening install lid latch and retainer then detach license plate light and move light to one side After observing latch and striker through license light hole raise lid and adjust latch laterally so that striker engages latch with equal clearance on both sides of latch Adjust latch up or down to provide snug contact of the lid with the lid bumpers