Jeep Parts Wiki | Ford Parts Wiki
Home | Search | Browse
Prev

 Next
Next
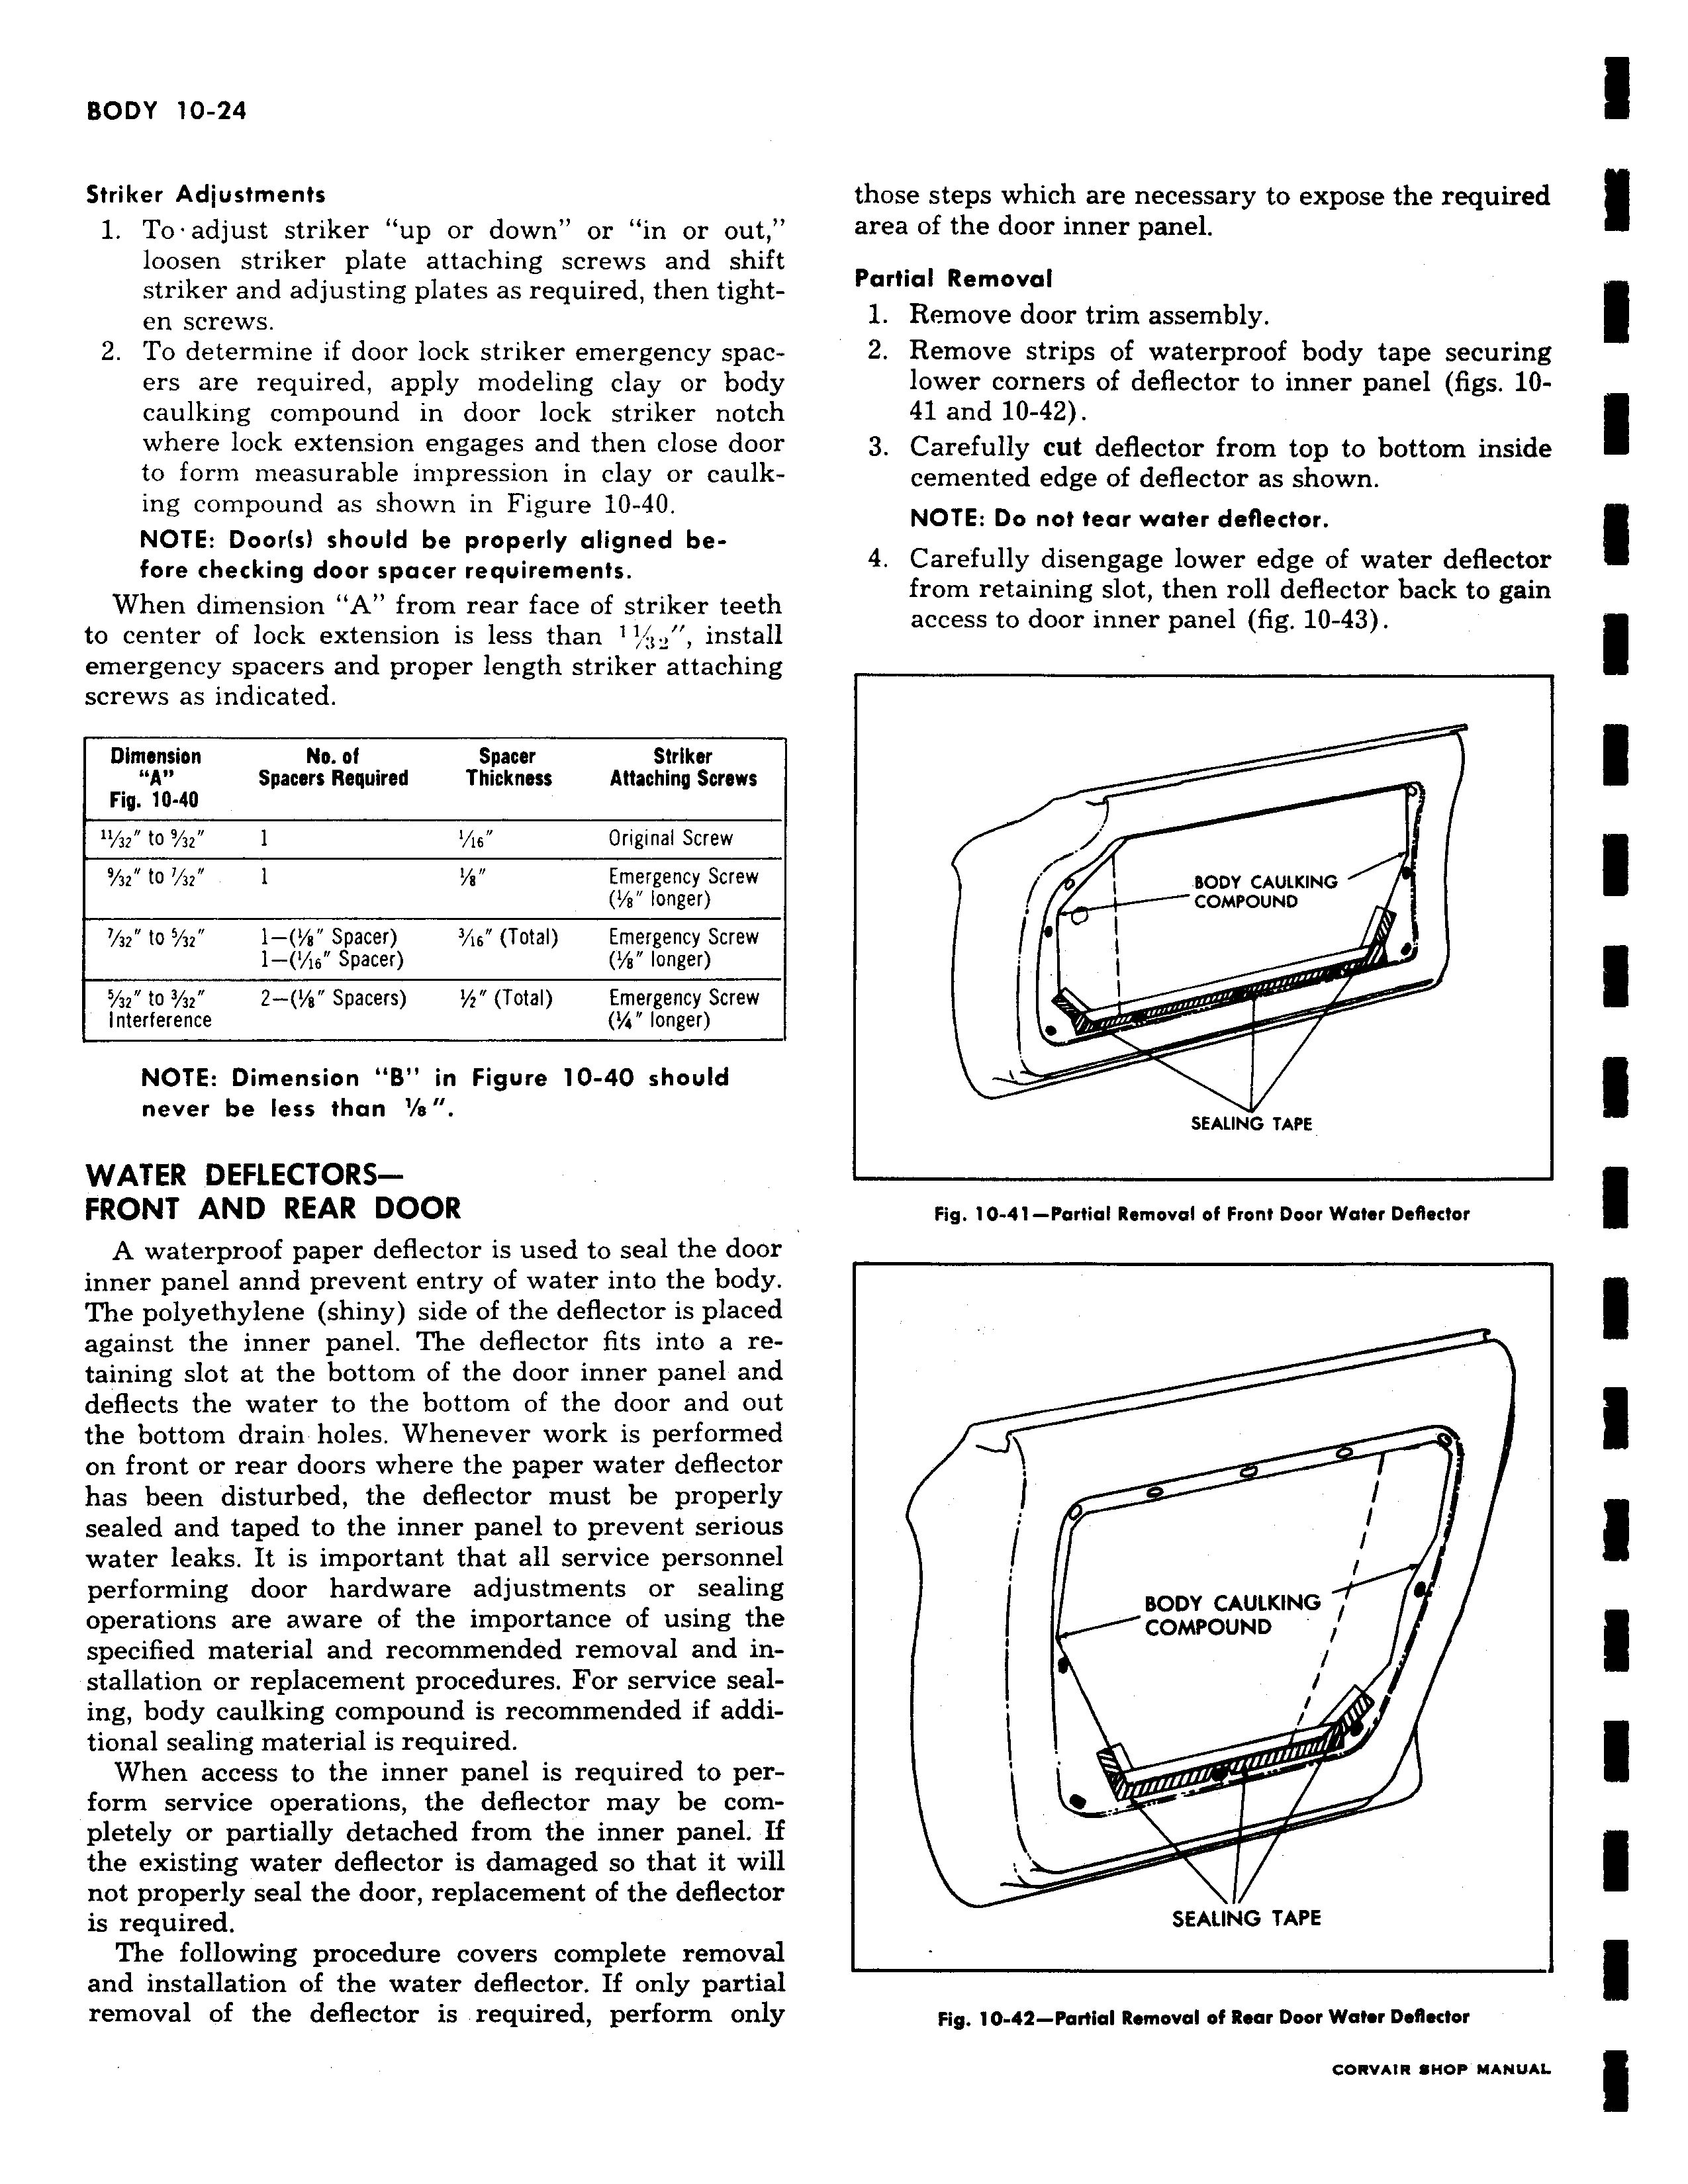
Striker Adjustments 1 To adjust striker up or down or in or out loosen striker plate attaching screws and shift striker and adjusting plates as required then tighten screws 2 To determine if door lock striker emergency spacers are required apply modeling clay or body caulking compound in door lock striker notch where lock extension engages and then close door to form measurable impression in clay or caulking compound as shown in Figure 10 40 NOTE Door s should be properly aligned before checking door spacer requirements When dimension A from rear face of striker teeth to center of lock extension is less than 1 S2 install emergency spacers and proper length striker attaching screws as indicated Dimension No of Spacer Striker A Spacers Required Thickness Attaching Screws Fig 10 40 132 to 1 32 1 is Original Screw 9 3z to 32 1 r Emergency Screw s longer az to 5 3z 1 Spacer 1s Total Emergency Screw 1 hs Spacer e longer 5 32 t0 3 32 2 Spacers z Total Emergency Screw Interference y longer NOTE Dimension B in Figure 10 40 should never be less than e WATER DEFLECTORSFRONT AND REAR DOOR A waterproof paper deflector is used to seal the door inner panel annd prevent entry of water into the body The polyethylene shiny side of the deflector is placed against the inner panel The deflector fits into a retaining slot at the bottom of the door inner panel and deflects the water to the bottom of the door and out the bottom drain holes Whenever work is performed on front or rear doors where the paper water deflector has been disturbed the deflector must be properly sealed and taped to the inner panel to prevent serious water leaks It is important that all service personnel performing door hardware adjustments or sealing operations are aware of the importance of using the specified material and recommended removal and installation or replacement procedures For service sealing body caulking compound is recommended if additional sealing material is required When access to the inner panel is required to perform service operations the deflector may be completely or partially detached from the inner panel If the existing water deflector is damaged so that it will not properly seal the door replacement of the deflector is required The following procedure covers complete removal and installation of the water deflector If only partial removal of the deflector is required perform only those steps which are necessary to expose the required area of the door inner panel Partial Removal 1 Remove door trim assembly 2 Remove strips of waterproof body tape securing lower corners of deflector to inner panel figs 1041 and 10 42 3 Carefully cut deflector from top to bottom inside cemented edge of deflector as shown NOTE Do not tear water deflector 4 Carefully disengage lower edge of water deflector from retaining slot then roll deflector back to gain access to door inner panel fig 10 43 I BODY CAULKING I COMPOUND I v I I I SEALING TAPE Fig 10 41 Partial Removal of Front Door Water Deflector I I BODY CAULKING COMPOUND i SEALING TAPE Fig 10 42 Partial Removal of Rear Door Wafer Deflector

 Next
Next