Jeep Parts Wiki | Ford Parts Wiki
Home | Search | Browse | Marketplace | Messages | FAQ | Guest
Prev
 Next
Next
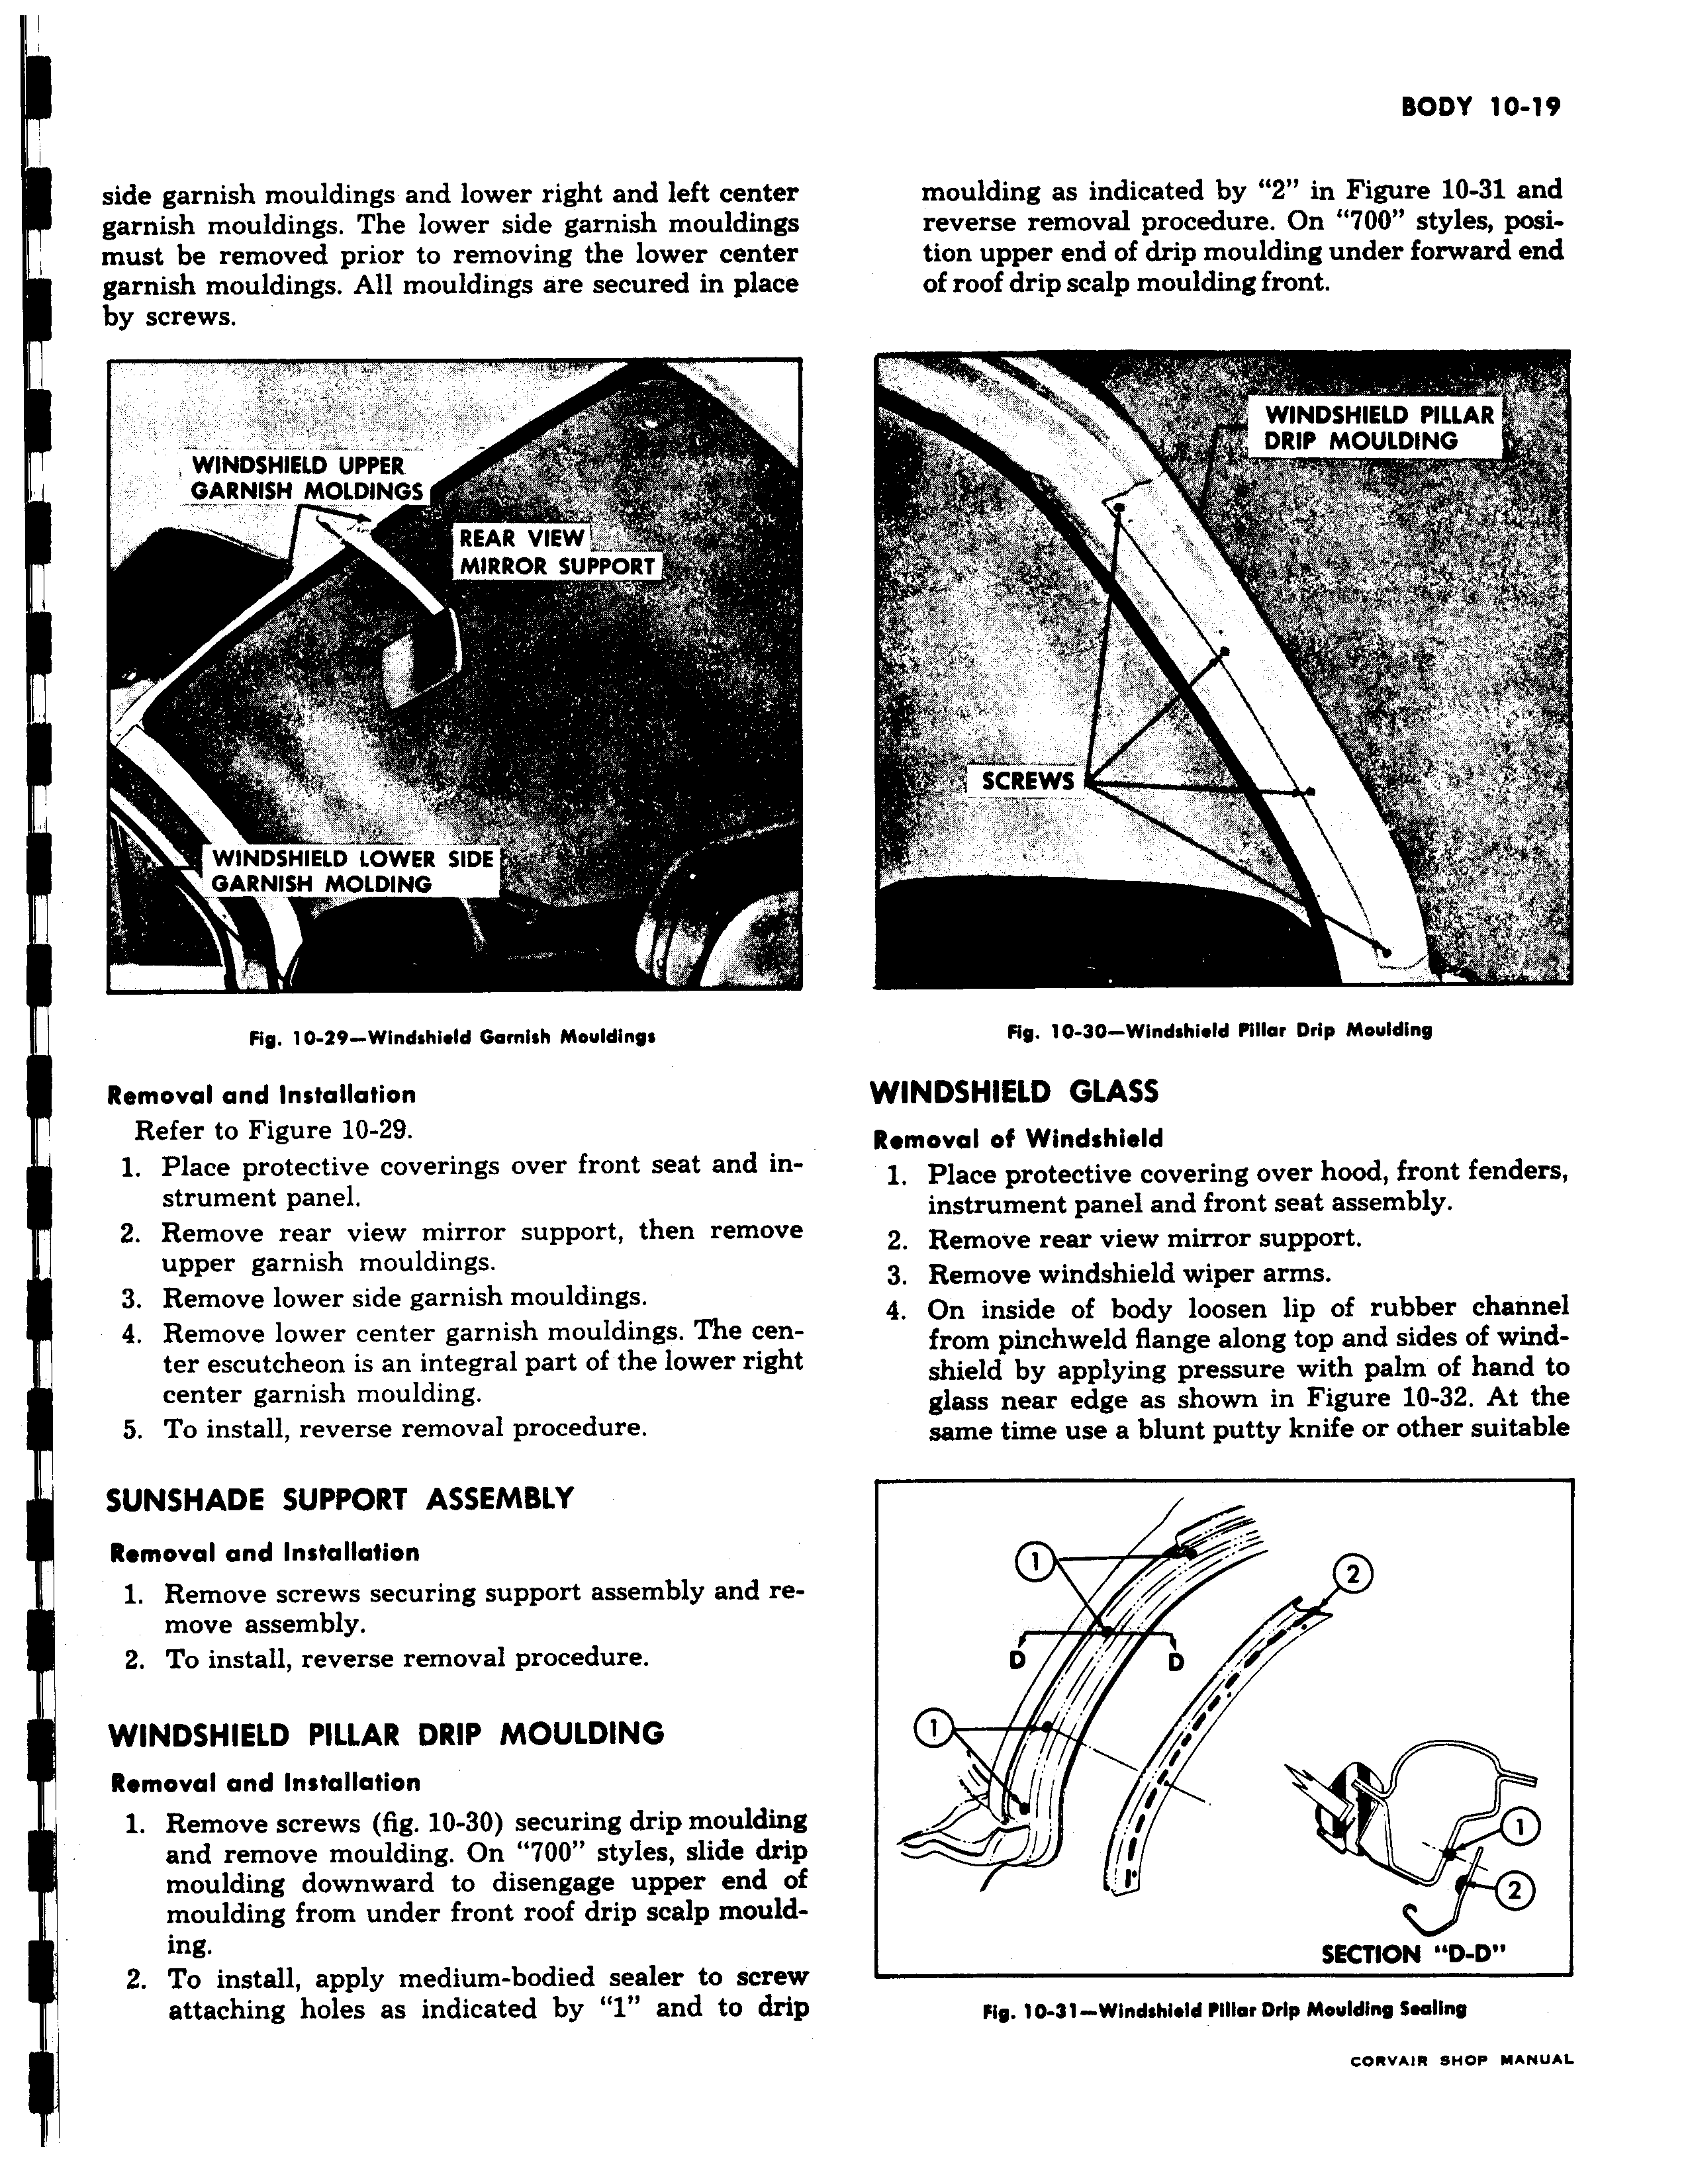
side garnish mouldings and lower right and left center garnish mouldings The lower side garnish mouldings must be removed prior to removing the lower center I garnish mouldings All mouldings are secured in place by screws WINDSHIELD UPPER GARNISH MOLDINGS REAR VIEW MIRROR SUPPORT a n a4 WINDSHIELD LOWER SIDE I GARNISH MOLDING Fig 10 49 Windshield Garnish Mouldings Removal and Installation Refer to Figure 10 29 1 Place protective coverings over front seat and instrument panel 2 Remove rear view mirror support then remove upper garnish mouldings 3 Remove lower side garnish mouldings 4 Remove lower center garnish mouldings The center escutcheon is an integral part of the lower right center garnish moulding 5 To install reverse removal procedure SUNSHADE SUPPORT ASSEMBLY Removal and Installation 1 Remove screws securing support assembly and remove assembly 2 To install reverse removal procedure WINDSHIELD PILLAR DRIP MOULDING Removal and Installation 1 Remove screws fig 10 30 securing drip moulding and remove moulding On 700 styles slide drip moulding downward to disengage upper end o1 moulding from under front roof drip scalp moulding 2 To install apply medium bodied sealer to screw attaching holes as indicated by 1 and to driF moulding as indicated by 2 in Figure 10 31 and reverse removal procedure On 00 styles position upper end of drip moulding under forward end of roof drip scalp moulding front i WINDSHIELD PILLAR DRIP MOULDING f Ff G Y SCREWS v i 717 Fig 10 30 Windshield Pillar Drip Moulding WINDSHIELD GLASS Removal of Windshield 1 Place protective covering over hood front fenders instrument panel and front seat assembly 2 Remove rear view mirror support 3 Remove windshield wiper arms 4 On inside of body loosen lip of rubber channel from pinchweld flange along top and sides of windshield by applying pressure with palm of hand to glass near edge as shown in Figure 10 32 At the same time use a blunt putty knife or other suitable 2 D D I 1 t 2 SECTION D D Fig 10 31 Windshield pillar Drip Moulding Sealing